1. Introduction
This instruction manual provides detailed guidance for the installation, operation, and maintenance of your Deal4GO CPU Cooling Fan. This fan is designed as a direct replacement for specific Dell Latitude and Precision laptop models. Please read this manual thoroughly before attempting any installation or maintenance to ensure proper function and safety.
2. Product Overview
Key Features
- Direct replacement for Dell Latitude 5450 and Precision 3490 laptops with integrated Intel Graphics.
- Part Numbers: WY6RC, 0WY6RC, ND85C52-23F13, DC2800186DL.
- Operating Voltage: DC 5V / 0.60A.
- Air Flow Capacity: 7.46 CFM.
- Power Connection: 4-Pin, 4-Wire (wire-to-board).
- Designed to attach to your existing heatsink.
- Includes thermal grease for installation.
Specifications
| Specification | Value |
|---|---|
| Model Number | WY6RC, ND85C52-23F13 |
| Brand | Deal4GO |
| Product Dimensions (L x W x H) | 9.7 x 8.1 x 1 cm |
| Voltage | 5 Volts (DC) |
| Wattage | 2.5 watts |
| Power Connector Type | 4-Pin |
| Cooling Method | Air |
| Air Flow Capacity | 7.46 Cubic Feet Per Minute (CFM) |
| Maximum Rotational Speed | 3500 RPM |
| Noise Level | 32 Decibels |
| Material | Stainless Steel |
| Item Weight | 0.06 Kilograms |
3. Compatibility
This CPU cooling fan is specifically designed for the following Dell laptop models with integrated Intel Graphics:
- Dell Latitude 14 (5450)
- Dell Precision 14 (3490)
Please verify your laptop model and existing fan part number (WY6RC, 0WY6RC, ND85C52-23F13, or DC2800186DL) to ensure compatibility before installation.
4. Package Contents
Each package includes:
- 1x Deal4GO CPU Cooling Fan (Model: WY6RC)
- 1x Thermal Grease
5. Safety Information
Please observe the following safety precautions:
- Disconnect Power: Always ensure your laptop is powered off and disconnected from the AC adapter and battery before beginning any internal component replacement.
- Anti-Static Precautions: Use an anti-static wrist strap or frequently touch a grounded metal object to discharge static electricity, which can damage sensitive electronic components.
- Handle with Care: Electronic components are delicate. Handle the fan and other internal parts carefully to avoid damage.
- Professional Installation: If you are not comfortable performing this installation, it is recommended to seek assistance from a qualified technician.
- Keep Away from Children: Small parts can be a choking hazard.
6. Installation Instructions
This section outlines the steps to replace the CPU cooling fan in your compatible Dell laptop. Refer to your laptop's service manual for specific disassembly instructions if needed.
Tools Required
- Small Phillips head screwdriver
- Plastic pry tool (optional, for opening laptop casing)
- Anti-static wrist strap (recommended)
Preparation
- Power off your laptop completely.
- Disconnect the AC adapter and remove the battery (if removable).
- Place the laptop on a clean, flat, and static-free surface.
- Wear an anti-static wrist strap to prevent electrostatic discharge (ESD) damage.
Step-by-Step Installation
- Access the Motherboard: Carefully open your laptop's bottom cover to access the internal components, including the CPU cooling fan. Refer to your laptop's specific service manual for precise instructions on removing the back panel.
- Locate the Old Fan: Identify the existing CPU cooling fan. It will typically be connected to the heatsink and motherboard.

Image: Top view of the Deal4GO CPU Cooling Fan, showing its design and 4-pin connector.
- Disconnect the Fan Cable: Gently disconnect the 4-pin power cable of the old fan from its connector on the motherboard. Use a plastic pry tool if necessary to avoid damaging the connector.
- Remove Mounting Screws: Unscrew the two M2x5 screws (or similar) that secure the fan to the laptop chassis or heatsink. Keep these screws safe as they will be reused.

Image: Diagram illustrating the fan's position on the motherboard, highlighting the two M2x5 mounting screws and the 4-pin power connector.
- Remove the Old Fan: Carefully lift and remove the old CPU cooling fan from its position.
- Clean CPU/GPU (Optional but Recommended): If you are also replacing the heatsink or reapplying thermal paste to the CPU/GPU, gently clean off any old thermal paste from the CPU/GPU die and the heatsink contact area using isopropyl alcohol and a lint-free cloth.
- Apply Thermal Grease: Apply a small amount of the included thermal grease to the center of the CPU die. This helps ensure efficient heat transfer between the CPU and the heatsink.
- Position the New Fan: Place the new Deal4GO CPU cooling fan into the designated slot, ensuring it aligns correctly with the screw holes and the heatsink.
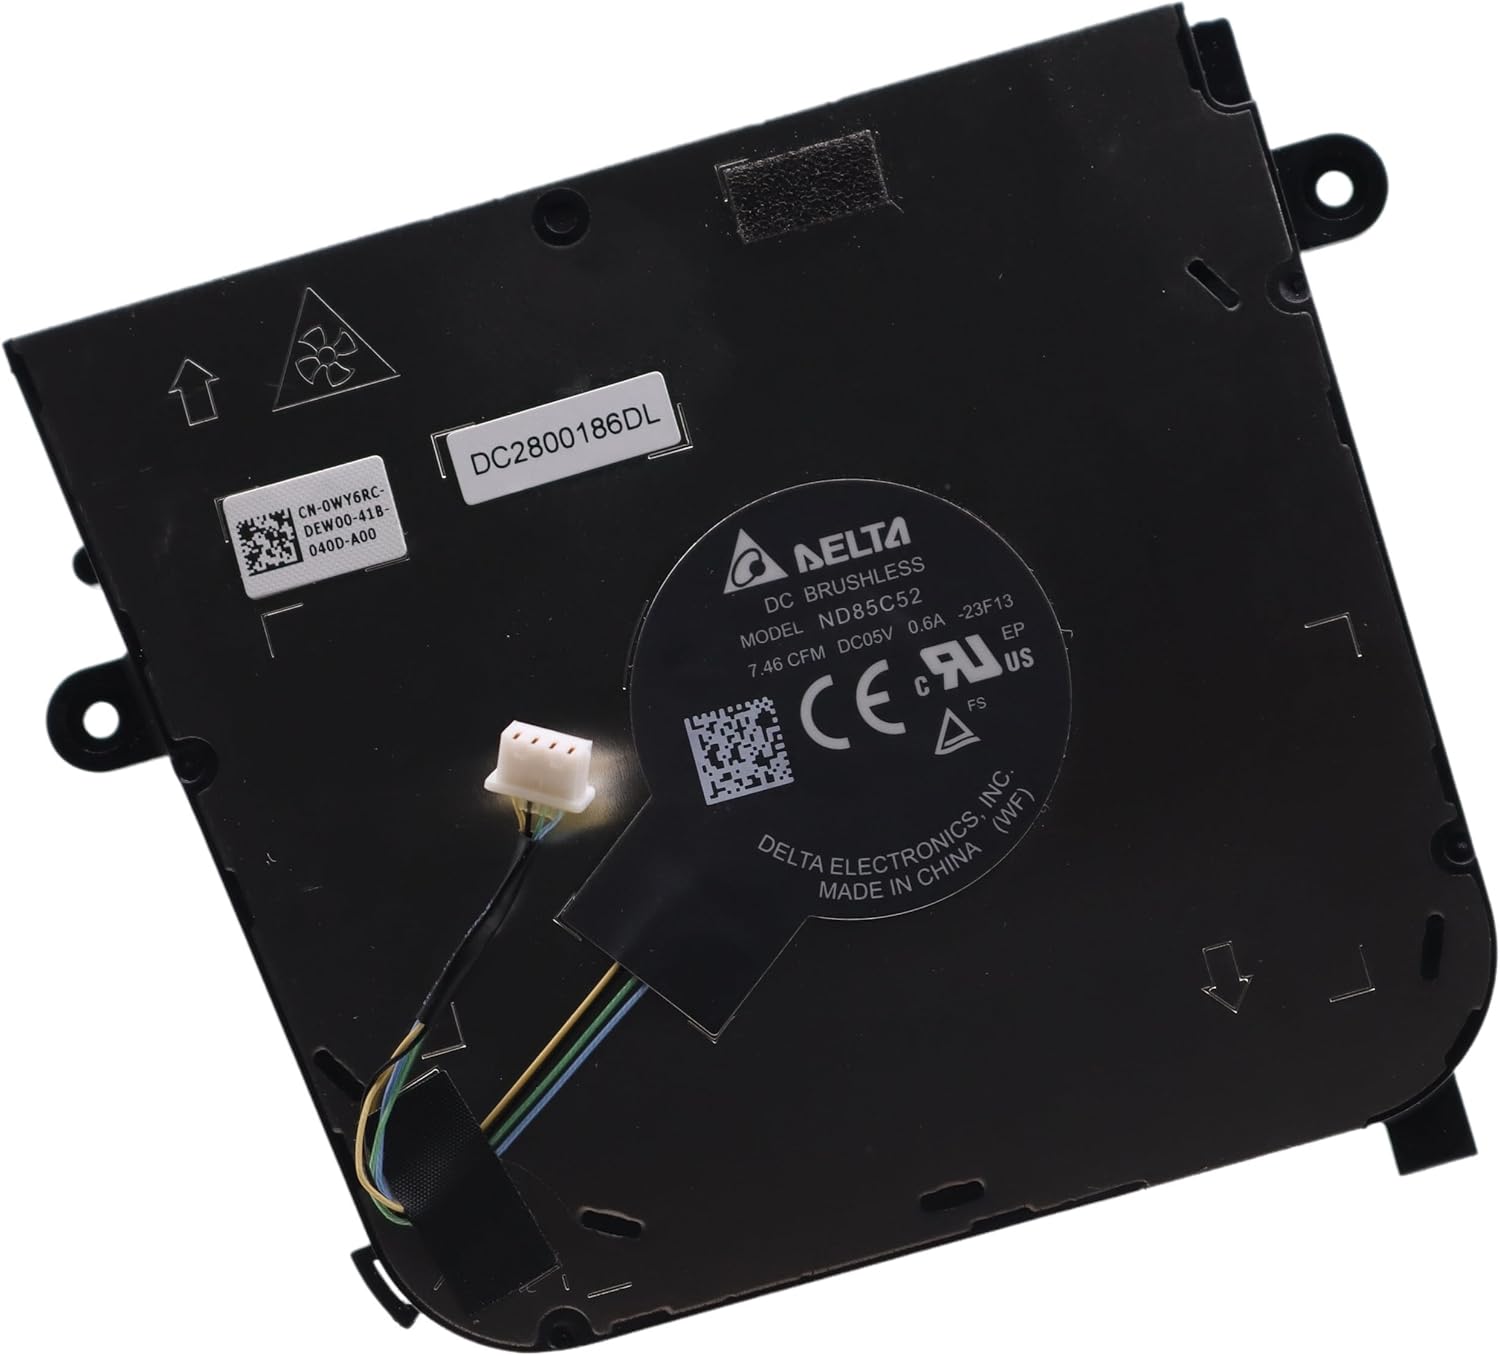
Image: Back view of the Deal4GO CPU Cooling Fan, displaying part numbers (DC2800186DL, ND85C52) and manufacturing details.
- Secure the New Fan: Reinsert and tighten the two M2x5 screws to secure the new fan in place. Do not overtighten.
- Connect the Fan Cable: Carefully connect the 4-pin power cable of the new fan to the corresponding connector on the motherboard. Ensure it is seated firmly.
- Reassemble Laptop: Reattach the laptop's bottom cover, ensuring all clips and screws are properly secured. Reconnect the battery and AC adapter.
- Test Functionality: Power on your laptop and verify that the fan spins correctly and the system boots without errors. Monitor CPU temperatures to ensure proper cooling.
7. Operating the CPU Cooling Fan
The Deal4GO CPU Cooling Fan operates automatically. It is controlled by your laptop's system BIOS/UEFI and operating system, which regulate its speed based on the CPU temperature and system load. No manual intervention is typically required for its operation.
8. Maintenance
To ensure optimal performance and longevity of your CPU cooling fan:
- Regular Cleaning: Periodically (e.g., every 6-12 months, depending on usage environment) clean dust from the fan blades and heatsink fins. Use compressed air or a soft brush. Ensure the laptop is powered off and disconnected from power before cleaning.
- Avoid Obstructions: Ensure the laptop's air vents are not blocked by objects or surfaces (e.g., blankets, soft furniture) during operation.
- Monitor Temperatures: Use system monitoring software to occasionally check CPU temperatures. Consistently high temperatures may indicate a need for more thorough cleaning or reapplication of thermal paste.
9. Troubleshooting
If you encounter issues with your CPU cooling fan, refer to the following table:
| Problem | Possible Cause | Solution |
|---|---|---|
| Fan not spinning | Loose or disconnected cable; Fan failure; BIOS/OS issue. | Check fan cable connection; Restart laptop; Update BIOS/drivers; Replace fan if faulty. |
| Fan making unusual noise | Dust accumulation; Bearing wear; Obstruction. | Clean fan blades and heatsink; Ensure no cables are touching fan; Replace fan if noise persists. |
| Laptop overheating | Fan not working efficiently; Insufficient thermal grease; Blocked vents. | Clean fan and heatsink; Reapply thermal grease; Ensure proper airflow; Verify fan operation. |
| Fan constantly running at high speed | High CPU load; Dust accumulation; BIOS settings. | Close unnecessary applications; Clean fan and heatsink; Check BIOS power management settings. |
10. Warranty and Support
This Deal4GO product is covered by a standard manufacturer's warranty. For specific warranty terms, return policies, or technical support, please refer to the product listing on the retailer's website or contact Deal4GO customer service directly. Keep your proof of purchase for warranty claims.