1. Introduction
The Masoll M23 RV Tire Pressure Monitoring System (TPMS) is designed to enhance driving safety by providing real-time tire pressure and temperature data. This system features a solar-powered monitor and four external sensors, offering intelligent alarm modes and easy installation for various vehicles, including RVs, campers, trailers, sedans, SUVs, MPVs, and pickup trucks.

Figure 1.1: Masoll M23 TPMS system and compatible vehicle types.
2. Package Contents
Verify that all items are present in the package:
- TPMS Monitor (1 unit)
- Tire Pressure Sensors (4 units)
- USB Charging Cable
- Anti-theft Nuts (4 units)
- Wrench Tool
- Silicone Anti-slip Pad
- User Manual

Figure 2.1: Masoll M23 TPMS system components.
3. Setup & Installation
3.1 Monitor Setup
- Charging the Monitor: The monitor can be charged via its built-in solar panel or through the provided USB cable. Ensure the monitor is adequately charged before first use.
- Power On/Off: Press and hold the power button (usually marked with a power symbol) for 3 seconds to turn the monitor on or off.
- Placement: Place the monitor on your vehicle's dashboard using the silicone anti-slip pad. Ensure it has clear exposure to sunlight for solar charging.
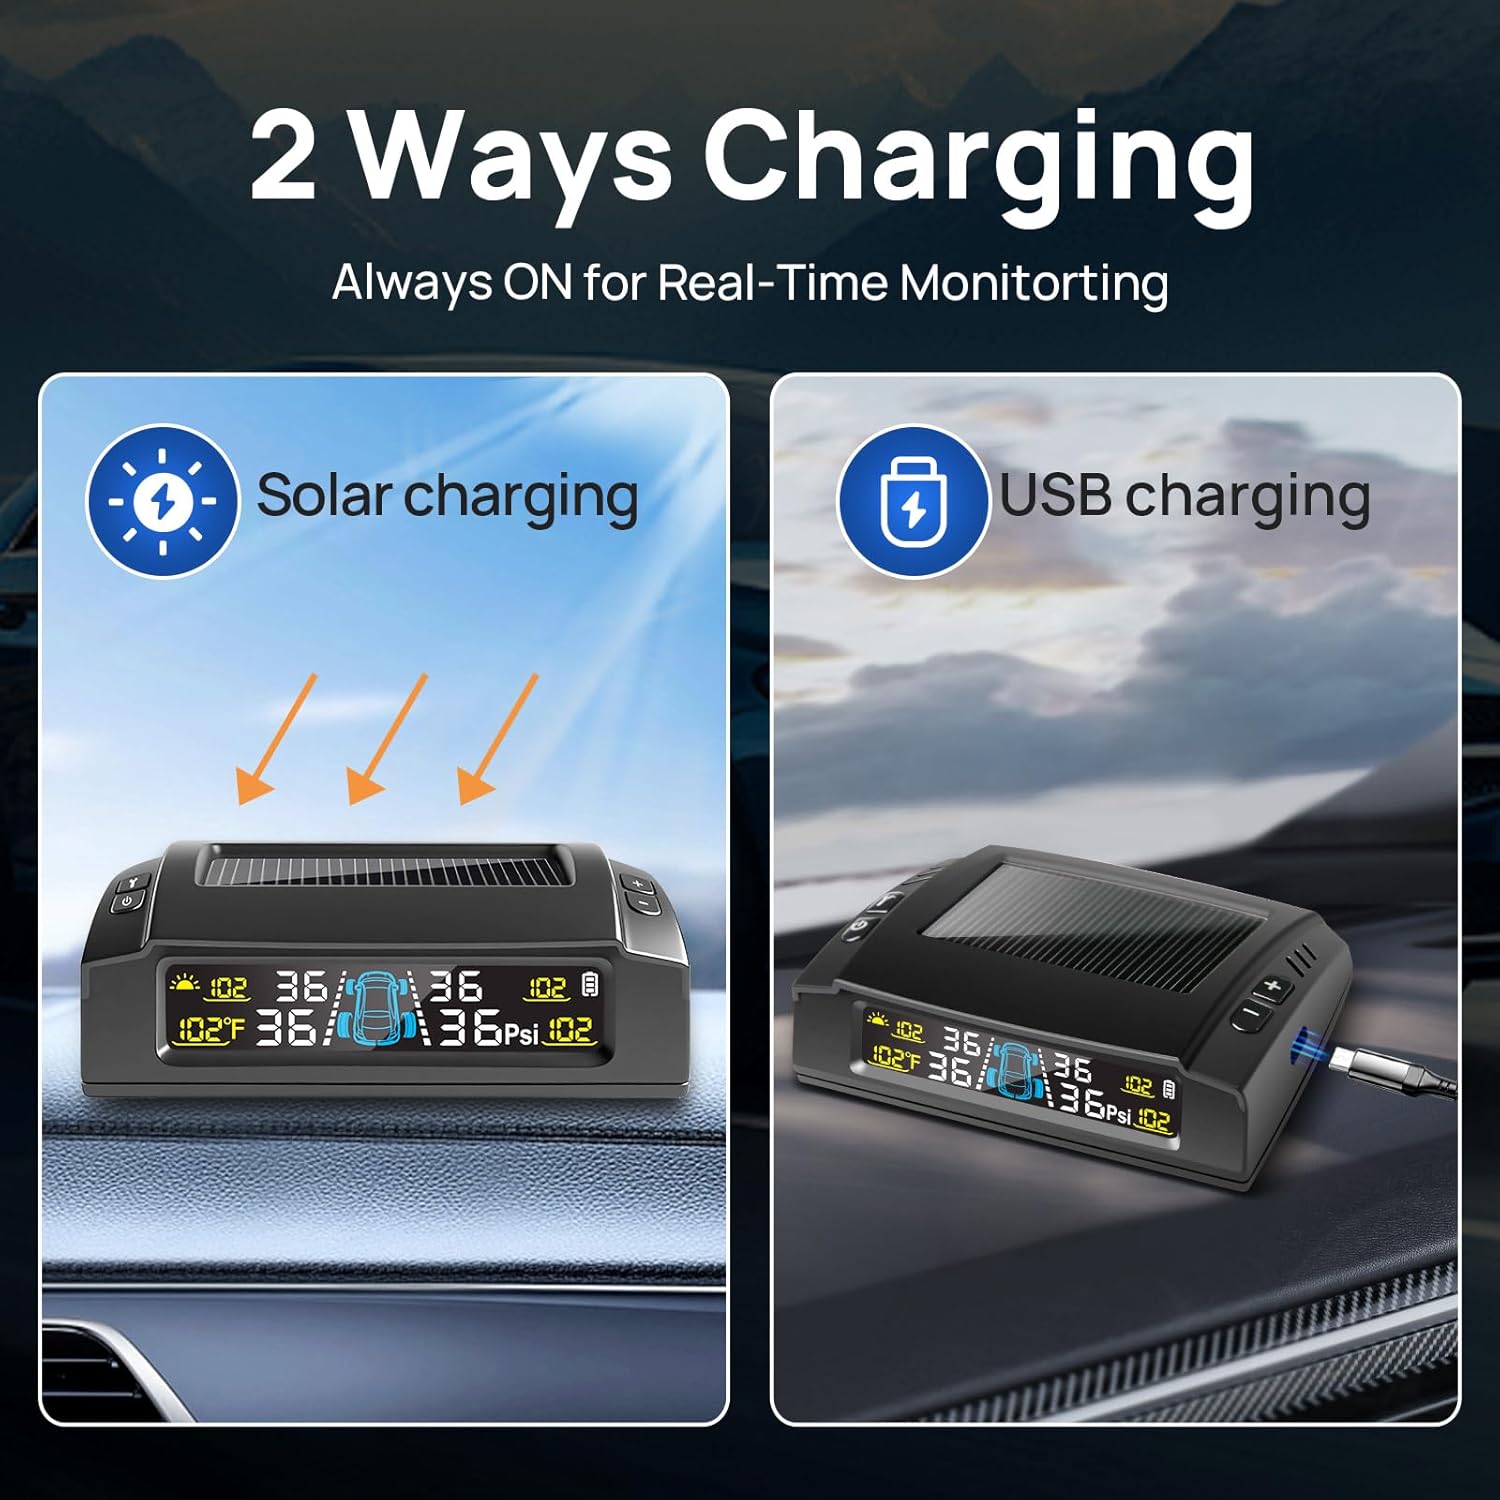
Figure 3.1: Monitor charging options (solar and USB).
3.2 Sensor Installation
Each sensor is labeled for specific tire positions (LF: Left Front, RF: Right Front, LR: Left Rear, RR: Right Rear). Install them according to the labels.
- Unscrew the original valve cap from the tire valve stem.
- Screw an anti-theft nut onto the valve stem.
- Screw the corresponding sensor onto the valve stem until it is snug.
- Using the provided wrench tool, tighten the anti-theft nut counter-clockwise against the sensor to secure it. This prevents accidental loosening and theft.
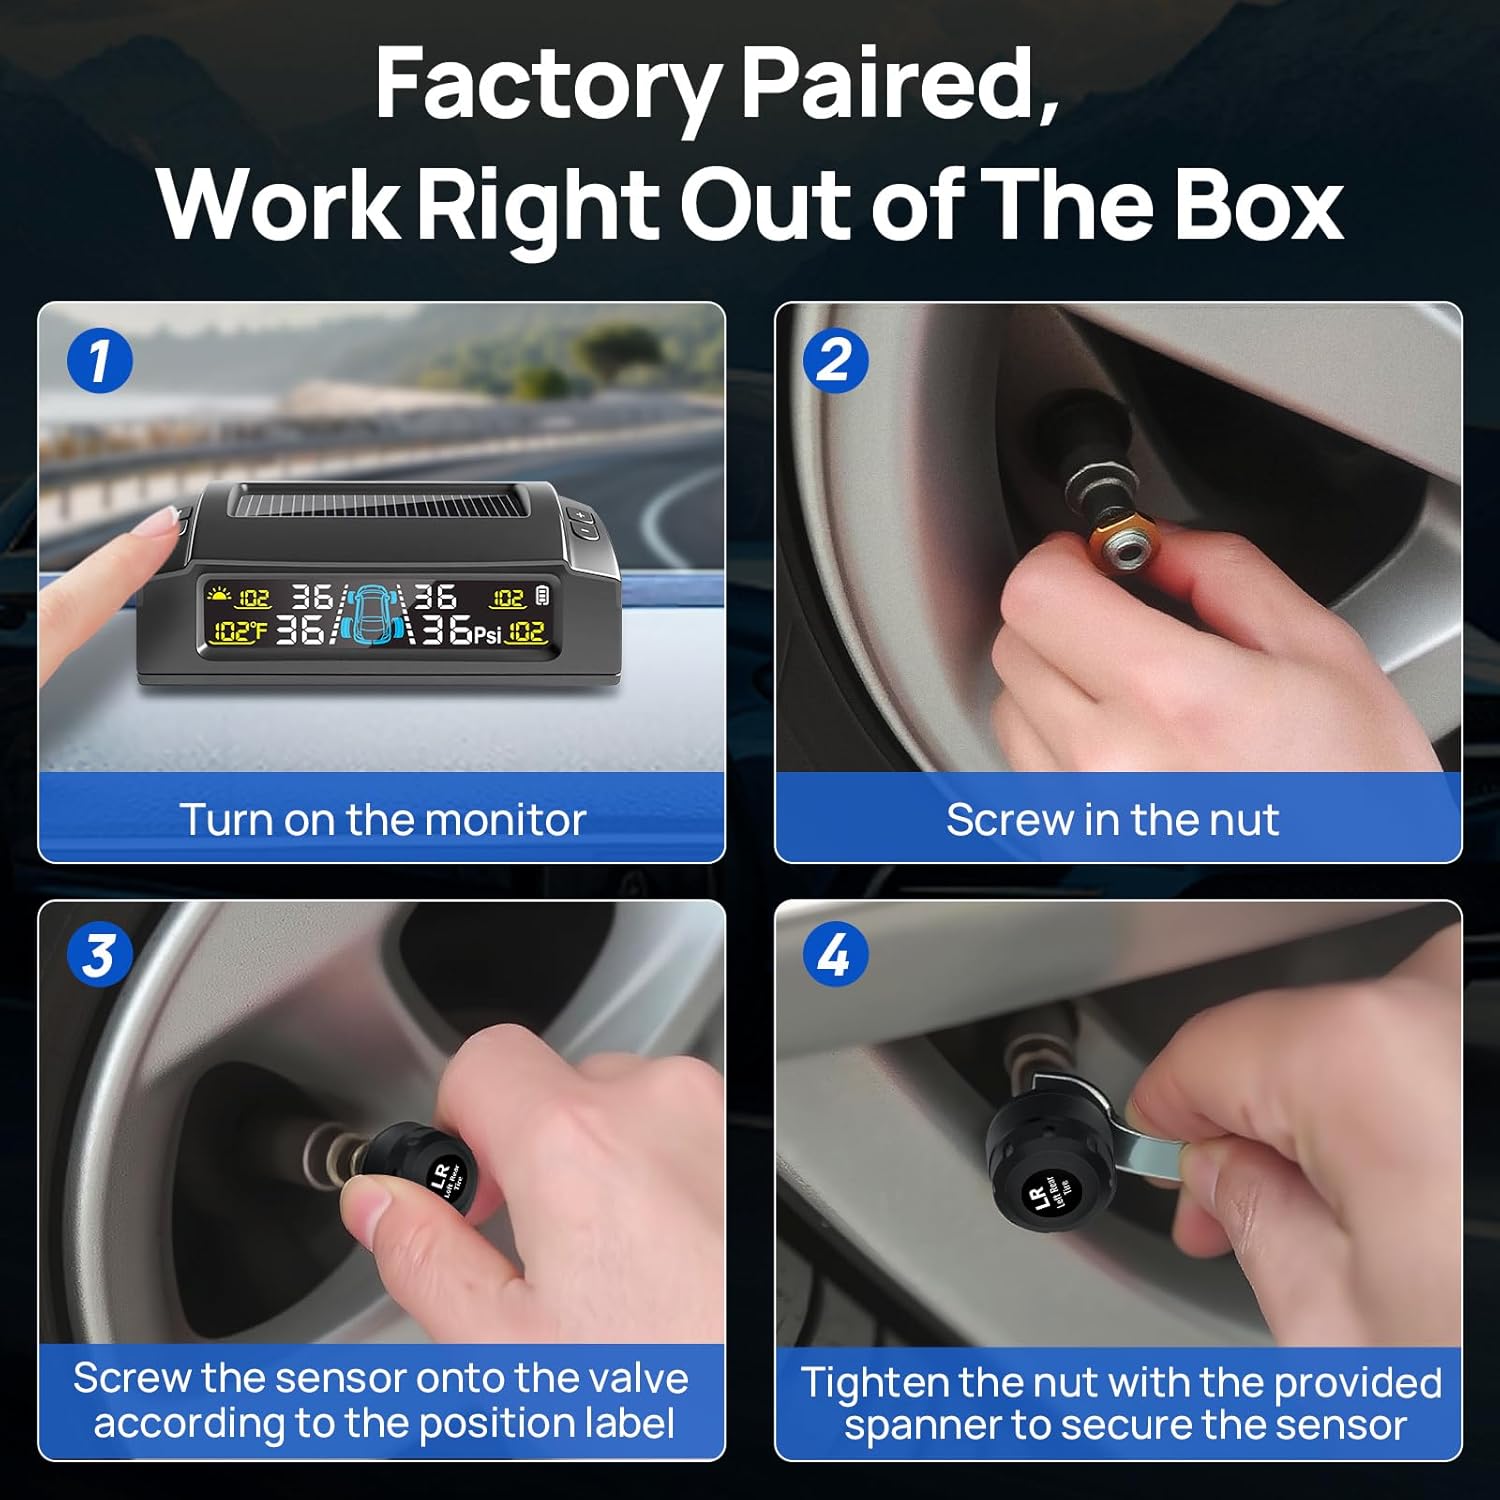
Figure 3.2: Sensor installation steps.
3.3 Sensor Pairing (if needed)
The sensors are factory-paired. If a sensor loses connection or needs replacement, follow these steps to re-pair:
- Press the '▶' key 8 times to enter the pairing mode.
- Press the '▶' key to select the location where the tire data is missing.
- Install the corresponding sensor and wait for 1-2 seconds. The pairing will be successful, and the tire data will be read.
- Hold down the 'M' key for 3 seconds to save and complete the pairing.
Video 3.1: Demonstrates the pairing process for Masoll TPMS sensors.
4. Operating Instructions
4.1 Display Modes
The HD color display shows real-time tire pressure and temperature. You can switch between different units:
- Pressure Units: Press and hold the 'M' key for 3 seconds to enter setting mode. When Bar or Psi flashes, use the left and right keys to switch.
- Temperature Units: In setting mode, press the 'M' key again. When Celsius or Fahrenheit flashes, use the left and right keys to switch.
4.2 Intelligent Alarm Modes
The system provides 6 intelligent alarm modes for ultimate safety:
- Rapid Pressure Loss: Alerts for sudden drops in tire pressure.
- High Pressure: Warns if tire pressure exceeds the safe limit (25% above ideal).
- Low Pressure: Warns if tire pressure falls below the safe limit (15% below ideal).
- Dangerous Tire Temperature: Alerts for excessively high tire temperatures.
- Sensor Low Battery: Indicates a sensor battery needs replacement.
- Signal Lost: Alerts if communication with a sensor is lost.

Figure 4.1: Overview of the 6 intelligent alarm modes.
4.3 Auto Calibration & Reference Pressure
The advanced TPMS sensors automatically set the reference pressure when tires are inflated to the correct level. No manual setup is needed for this feature.
4.4 Auto Sleep & Wake-Up
The monitor is equipped with a built-in vibration detector. It will enter sleep mode after 15 minutes of inactivity to conserve power and will instantly wake up when it detects vibration (e.g., opening a car door or starting the engine).

Figure 4.2: Intelligent design features of the monitor.
5. Maintenance
5.1 Sensor Battery Replacement
The tire sensors use replaceable CR1632 batteries, designed to last approximately 2 years. To replace a sensor battery:
- Carefully unscrew the sensor cap.
- Remove the old CR1632 battery.
- Insert a new CR1632 battery, ensuring correct polarity.
- Replace the O-ring if it appears damaged or worn to maintain the waterproof seal.
- Screw the sensor cap back on tightly.
6. Troubleshooting
- No Signal/Missing Data: Ensure sensors are correctly installed and tightened. Re-pair the sensor if necessary (refer to Section 3.3). Check for obstructions that might interfere with the signal.
- Inaccurate Readings: Verify that the sensors are installed on the correct tire positions. Ensure tires are inflated to the recommended pressure for auto-calibration.
- Monitor Not Turning On: Check the monitor's battery level. Charge via solar panel or USB cable.
- Continuous Alarm: Identify the specific alarm mode displayed on the monitor. Address the underlying issue (e.g., inflate low tire, check for leaks, replace sensor battery).
- Trailer Longer Than 38ft: For trailers exceeding 38ft, a Masoll TPMS signal booster is recommended to enhance transmission distance and ensure reliable data.
Video 6.1: Demonstrates the installation of the TPMS sensors on a tire valve.
7. Specifications
- Model: M23
- Manufacturer: nLONG
- Item Weight: 8.5 ounces
- Package Dimensions: 6.34 x 5 x 2.44 inches
- Sensor Battery Type: CR1632 (replaceable, 2-year lifespan)
- Operating Temperature (Sensors): Down to -40°F
- Pressure Accuracy: <1.5 PSI
- Display: HD Color Display with Auto Backlight
- Charging: Solar & USB
- Vehicle Compatibility: 4-wheel vehicles (sedan, SUV, MPV, pickup truck, RV, camper, travel trailer less than 38ft)

Figure 7.1: High accuracy and clear display of the TPMS.

Figure 7.2: TPMS operational range in varying temperatures.
8. Warranty and Support
For warranty information, technical support, or any inquiries regarding your Masoll M23 TPMS, please refer to the contact details provided in your product packaging or visit the official Masoll website. Keep your purchase receipt for warranty claims.