1. Introduction
This manual provides detailed instructions for the safe and effective use of your AMPFORCE Electric High-Pressure Toilet Plunger. This device utilizes air-pump technology to clear stubborn blockages in various drains. Please read this manual thoroughly before operation and retain it for future reference.
2. Product Features
- High-Pressure Electric Air Pump Technology: Features 1-8 BAR adjustable pressure for effective clog removal. Start with lower pressure and increase as needed to protect pipes.
- 120° Anti-Splash Sewage Design: The angled plunger head creates a vacuum-tight seal against pipes, minimizing splashback during operation.
- Easy to Clean: Plunger heads are designed for simple rinsing under tap water, ensuring hygienic maintenance.
- Multi-Purpose Solution: Includes multiple plunger heads for unclogging toilets, sinks, showers, kitchen drains, and pipelines.
- Type-C Charging: Utilizes convenient and fast Type-C charging technology.
3. Package Contents
Ensure all items are present and in good condition upon unboxing:
- AMPFORCE Electric Plunger Main Unit
- Toilet Head Attachment
- Basin Sink Head Attachment
- Kitchen Sink Head Attachment
- Type-C Charging Cable
- Storage Pouch
- Instruction Manual
- Spare Parts (e.g., O-rings)
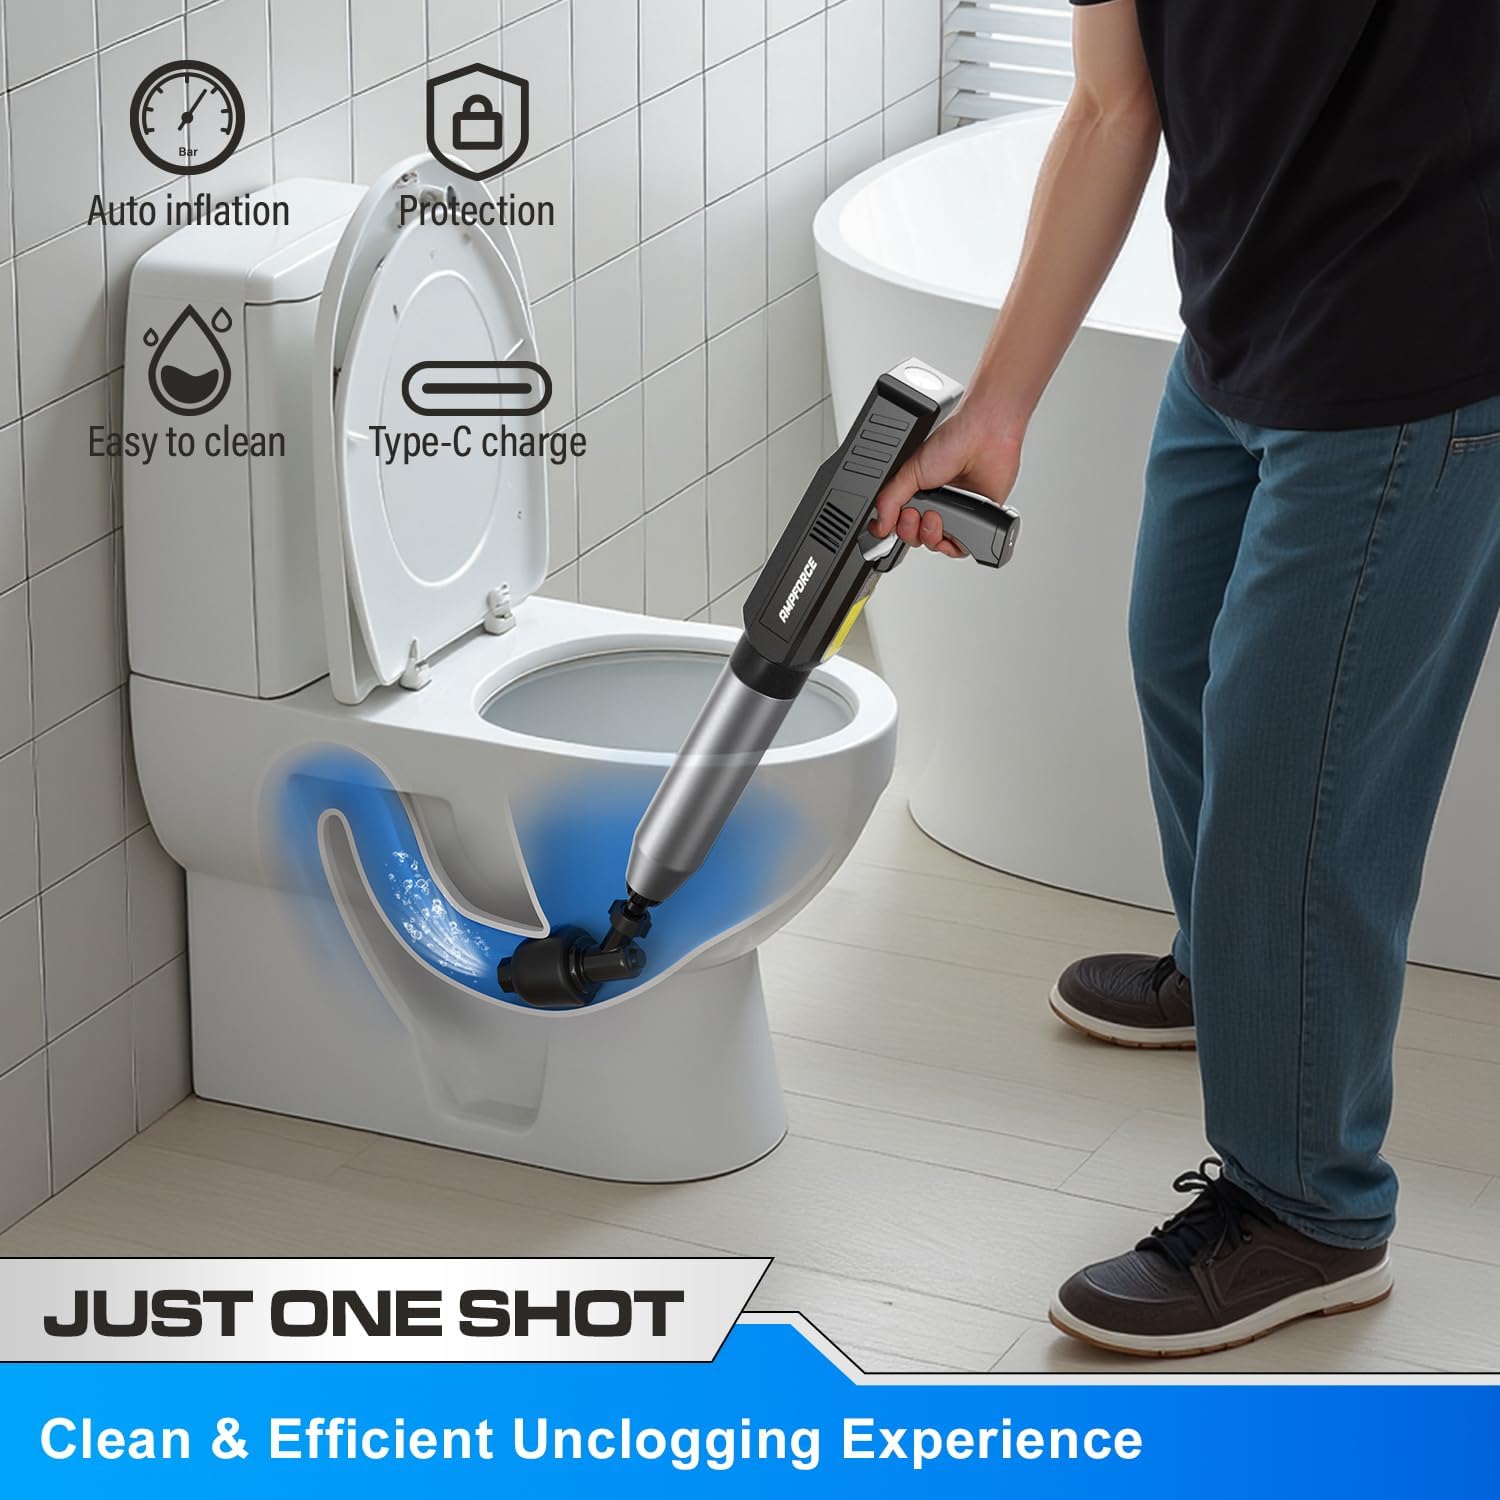
Image: All components of the AMPFORCE Electric Plunger, including the main unit, various plunger heads, charging cable, and storage pouch.
Video: An unboxing and initial setup demonstration of the AMPFORCE Electric Toilet Plunger, showing the various parts included in the package.
4. Setup
4.1 Charging the Plunger
- Connect the Type-C charging cable to the charging port on the plunger unit.
- Plug the other end of the cable into a compatible USB power source (e.g., wall adapter, power bank, computer).
- The indicator light will turn red during charging and green when fully charged.
- Unplug the charger from the wall outlet before using the machine.
4.2 Assembling the Unit
- Screw the air chamber (silver cylinder) onto the main gun body until secure.
- Select the appropriate plunger head for your specific drain type (toilet, washbasin, kitchen sink).
- Press-fit the selected plunger head onto the end of the air chamber. Ensure it is firmly attached to create a tight seal.

Image: A display of the various plunger heads included, designed for different drain sizes and types.
Video: A detailed overview of the electric toilet plunger, including its components, assembly, and how to select the correct adapter for different drain types.
5. Operating Instructions
5.1 Preparing for Use
- Ensure the unit is fully charged.
- Attach the appropriate plunger head for the drain you intend to clear.
- Press and hold the power button for 3 seconds to turn on the unit and begin pumping air. The pressure gauge will indicate the increasing pressure.
- Monitor the pressure gauge. The unit will automatically shut off when it reaches 5-6 BAR (71-87 PSI). For specific applications, refer to the recommended pressure levels below.
5.2 Recommended Work Pressure
| Application For | Recommended Head | Suitable Work Pressure |
|---|---|---|
| Toilet | Toilet Head | 5 Bar (71.25 PSI) |
| Washbasin & Floor Drain | Basin Sink Head | 3 Bar (45 PSI) |
| Kitchen Sink | Kitchen Sink Head | 3 Bar (45 PSI) |
Note: Using the right head and recommended working pressure will help clear the blockage easily and faster.

Image: Close-up of the pressure gauge, indicating the air pressure in BAR and PSI.
5.3 Clearing a Clog
- Insert the plunger head deep into the drain opening, ensuring a tight seal. For toilets, push the angled head as far as possible into the toilet trap.
- Hold the unit firmly with both hands to brace for recoil.
- Pull the trigger to release a controlled burst of air.
- Observe if the clog has cleared. If not, re-pressurize the unit and repeat the process. You may gradually increase pressure if necessary, but always start with the recommended level.

Image: Diagram illustrating the correct deep insertion of the plunger head into a toilet drain to create a tight seal and prevent splashback.
Video: Demonstration of using the AMPFORCE plunger with different adapters for various drains, highlighting its ease of use.
6. Maintenance
6.1 Cleaning
- After each use, detach the plunger head and rinse it thoroughly under tap water.
- Wipe the main unit with a damp cloth if necessary. Do not submerge the main unit in water.
6.2 Storage
- Ensure all components are dry before storing.
- Store the unit and its accessories in the provided mesh storage pouch in a cool, dry place.
6.3 Battery Care
- Recharge the battery before initial use.
- Fully charge the battery before storing the unit for extended periods.
- Charge the battery regularly every 3 months to maintain optimal performance and battery life.
7. Troubleshooting
- Clog not clearing: Ensure the plunger head forms a tight seal. Increase the air pressure gradually, repeating the burst action as needed.
- Water splashback: Verify the plunger head is inserted deeply and securely into the drain to create a complete seal.
- Unit not pressurizing: Check if the unit is fully charged. Ensure the air chamber is securely screwed onto the main body.
- Unit not turning on: Confirm the battery is charged. Press and hold the power button for 3 seconds.
8. Specifications
| Feature | Detail |
|---|---|
| Brand | AMPFORCE |
| Model Number | AFTP-8B |
| Color | Classic Black |
| Material | Plastic |
| Handle Material | Plastic |
| Product Dimensions | 16.85"L x 7.4"W x 3.03"H |
| Item Weight | 2.68 pounds |
| Power Source | 1 Lithium Ion battery (included) |
| Charging Type | Type-C |
| Max Pressure | 8 BAR |
9. Warranty and Support
For warranty information, technical support, or to purchase replacement parts, please refer to the product packaging or contact AMPFORCE customer service directly. Keep your purchase receipt as proof of purchase for any warranty claims.