1. Important Safety Information
Please read and understand all instructions before beginning assembly. Failure to follow these instructions may result in injury or property damage.
- Beware of Sharp Edges: Metal components may have sharp edges. Always wear protective gloves during assembly to prevent cuts and scrapes.
- Two-Person Assembly: This shed requires at least two people for safe and efficient assembly.
- Level Foundation: Ensure the shed is installed on a solid, level foundation to prevent structural instability and water accumulation. Consider anchoring to a raised wooden base (not included) for storm resistance and moisture protection.
- Use Power Tools: Power tools can significantly aid in assembly. Exercise caution when using them.
- Check All Parts: Before assembly, verify all parts are present and undamaged according to the packing list. Contact customer service for free replacements of missing parts.
2. Package Contents
Your LINKHOO 12x10 Ft Outdoor Storage Shed is shipped in multiple reinforced boxes. Please refer to the included parts list for a detailed inventory. Below are examples of components you will find:
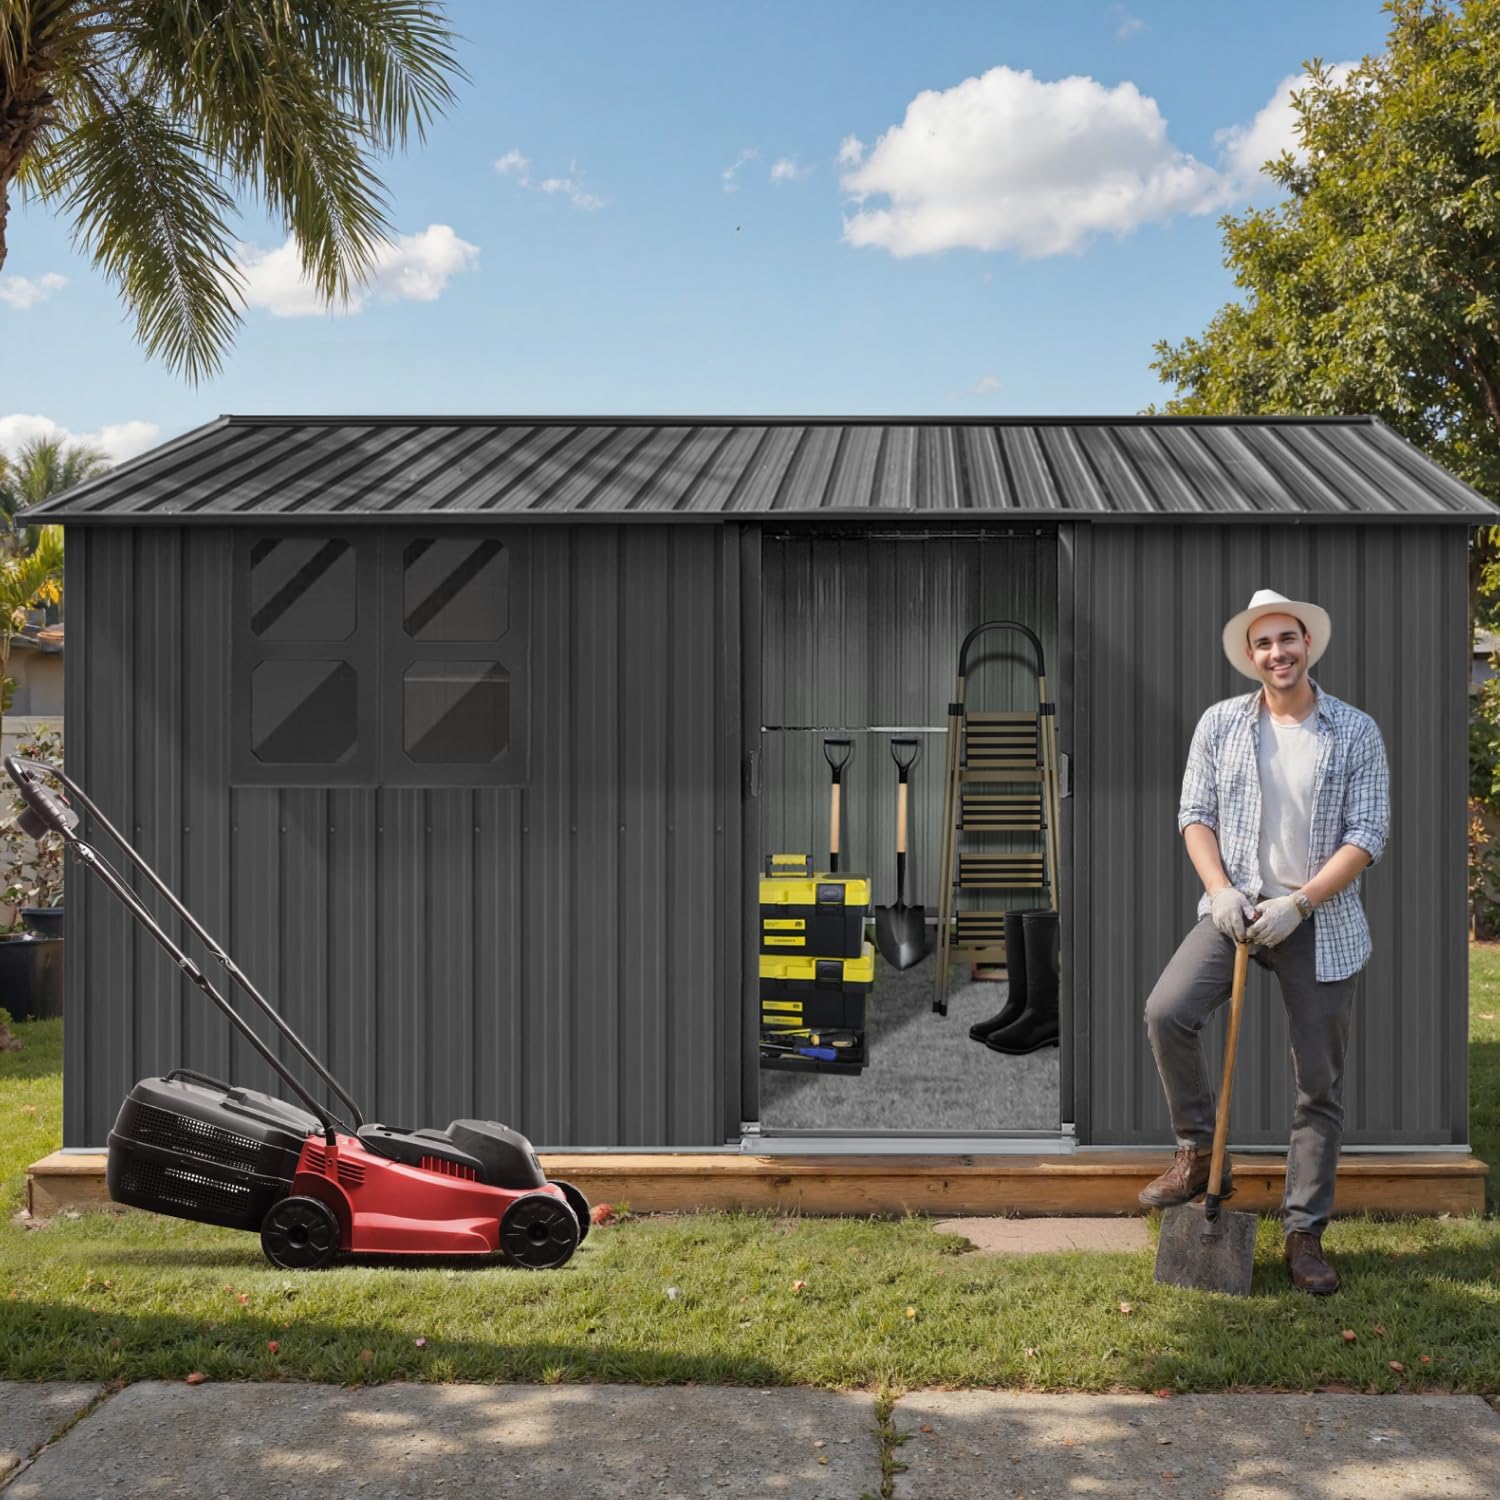
Figure 2.1: Overview of shed components.
This image displays the various metal panels, frame pieces, and hardware bags that constitute the shed kit. Each component is typically labeled for easy identification during assembly.
3. Tools Required
The following tools are recommended for efficient and safe assembly:
- Power Drill (with M4 and M6 bits)
- Measuring Tape
- Level
- Wrench
- Square
- Ladder
- Protective Gloves
- Safety Glasses
4. Assembly Instructions
Follow these steps carefully for proper assembly. It is highly recommended to watch the full assembly video for visual guidance.
4.1 General Assembly Overview
Video 4.1: LINKHOO 11.2x10.6 Ft Shed Assembly Guide.
This video provides a comprehensive visual guide for assembling a shed similar in design to your 12x10 Ft model, covering most general steps from frame construction to roof installation.
4.2 Base Frame Assembly
Begin by assembling the base frame components (e.g., D1, D2, D3, D4 parts) using the provided screws and washers. Ensure all connections are secure and the frame is square before proceeding.

Figure 4.2: Shed dimensions and base frame.
This diagram illustrates the overall dimensions of the shed and highlights the base frame structure, crucial for a stable assembly.
4.3 Wall Panel Installation
Attach the wall panels (e.g., Q1, Q2, Q3, Q4 parts) to the assembled base frame. Work systematically around the shed, ensuring panels are aligned and securely fastened. Use the provided screws and ensure proper overlap where indicated.
4.4 Window Installation
Install the translucent window panels (e.g., WD-1, WD-2, WD-3 parts) into the designated openings in the wall panels. Secure them with the appropriate framing and screws.

Figure 4.4: Translucent window detail.
The translucent windows allow natural light into the shed, enhancing visibility for various uses.
4.5 Roof Assembly
Assemble the roof panels (e.g., W1, W2, W3, W4 parts) and attach them to the top frame of the shed. Ensure all roof panels overlap correctly to prevent water leakage. Secure with screws and install the roof trim (e.g., L1, L2 parts) and corner caps for a complete and weather-tight seal.

Figure 4.5: Weather-resistant roof design.
The shed's roof is designed to withstand various weather conditions, including heavy rain and snow, ensuring the contents remain dry.
4.6 Sliding Door Installation
Install the sliding doors (e.g., DL1, DL2 parts) onto the door tracks. Ensure the rollers are properly seated and the doors slide smoothly. Attach the handles and any locking mechanisms.
Video 4.6: How to Install Sliding Doors.
This detailed video demonstrates the step-by-step process for installing the shed's sliding doors, ensuring correct alignment and functionality.
5. Operating Your Shed
The LINKHOO storage shed features smooth-sliding doors for easy access. To open, simply slide the doors along their tracks. To close, ensure both doors meet in the middle and engage the latch mechanism. The shed also includes four air vents to ensure proper ventilation and prevent humidity buildup inside.

Figure 5.1: Upgraded vents and lockable door.
This image highlights the upgraded vents for improved airflow and the lockable door for enhanced security of your stored items.
6. Maintenance
Regular maintenance will prolong the life of your LINKHOO storage shed:
- Cleaning: Periodically clean the exterior with mild soap and water to remove dirt and debris. Avoid abrasive cleaners.
- Inspection: Annually inspect all screws, bolts, and connections to ensure they are tight. Re-tighten as necessary. Check for any signs of rust or damage to the galvanized steel panels.
- Ventilation: Ensure the air vents remain clear of obstructions to maintain proper airflow and prevent moisture accumulation.
- Door Tracks: Keep door tracks clean and free of debris to ensure smooth operation of the sliding doors.
7. Troubleshooting
If you encounter issues with your shed, refer to the following common problems and solutions:
| Problem | Possible Cause | Solution |
|---|---|---|
| Water Leakage | Improper roof panel overlap or loose screws. | Ensure roof panels are correctly overlapped and all screws are tightened. Consider applying silicone sealant to seams if necessary. |
| Doors do not slide smoothly | Debris in tracks or misaligned rollers. | Clean door tracks thoroughly. Inspect rollers for damage or misalignment and adjust as needed. |
| Shed feels unstable | Uneven foundation or insufficient anchoring. | Verify the foundation is level. Ensure the shed is properly anchored to the ground or a sturdy base. |
| Missing parts | Packaging error. | Contact LINKHOO customer service for free replacements. |
8. Product Specifications
| Feature | Specification |
|---|---|
| Brand | LINKHOO |
| Model Number | SWF-SS-113-W1350-0826 |
| Product Dimensions | 142.5"D x 121"W x 80.6"H |
| Material | Galvanized Steel (24/34-gauge) |
| Color | Black |
| Door Style | Sliding Doors |
| Vents | 4 Air Vents |
| Window | Translucent Window |
| Water Resistance Level | Water Resistant |
| Wind Resistance | Up to 6 Beaufort winds (24-30mph) |
| Estimated Lifespan | 10+ years |
9. Warranty and Support
Your LINKHOO storage shed comes with a commitment to quality. For any issues, including missing parts or assembly questions, please contact our 24/7 customer service. Free replacements for missing parts are available. For further assistance, please refer to the contact information provided in your purchase documentation.