Introduction
This manual provides comprehensive instructions for the safe and effective operation, maintenance, and troubleshooting of your GEVEELIFE 1600W Rotary Buffer Polisher. Please read this manual thoroughly before initial use and retain it for future reference.

Image: The GEVEELIFE 1600W Rotary Buffer Polisher, shown with its included accessories including various polishing pads, sanding discs, and handles.
Key Features
- 1600W Powerful Motor: Equipped with an upgraded 1600W motor, this buffer polisher offers smooth and quiet operation with consistent power, preventing overheating during extended use.
- 7 Variable Speeds: Adjustable speed settings from 1000-3500 RPM to accommodate different car paints and polishing requirements, from delicate sanding to powerful decontamination.
- Compact & Ergonomic Design: Weighs 4.5 lbs, featuring detachable D-handle and side handle for user comfort and control. Includes a safety switch lock for continuous operation without holding the trigger.
- Wide Applications: Suitable for cars, boats, furniture, floors, marble, wood, and metal. Compatible with M14 caliber polishing discs only.
- Included Accessories: Comes with sponge pads, wool pads, and sandpapers for various tasks.
What's in the Box

Image: All components included in the GEVEELIFE Buffer Polisher kit.
- Buffer Polisher Unit
- 6/7 inch Polishing Disk
- 6 Inch High-quality Sponge Pad (x2)
- 6 Inch Sponge Pad (x2)
- 7 Inch Wool Pad (x2)
- Sandpaper (x5)
- D-handle & Side-handle
- Hexagonal Wrench
- Carbon Brush (x2)
- User Manual
- Storage Bag
Setup
Attaching Handles
The polisher comes with both a D-handle and a straight side-handle. These can be attached to either side of the polisher head to suit left-handed or right-handed users, or for different application needs. Use the provided hexagonal wrench to secure the chosen handle.
Changing Polishing Discs and Pads
The polisher features a hook-and-loop (Velcro) design for quick and easy attachment and removal of polishing pads and sanding discs. To change the polishing disk, press the spindle lock button and twist the disk off. Then, attach the desired 6-inch or 7-inch polishing disk. Once the disk is attached, simply press the desired pad onto the Velcro surface.

Image: The polisher's spindle lock button and the Velcro backing pad for attaching accessories.

Image: Visual guide demonstrating the easy installation and removal of pads.
Operating Instructions
Powering On and Speed Adjustment
To power on the polisher, press the main power button. The unit features a 7-speed variable control dial, allowing you to select the appropriate RPM for your task. Speeds range from 1000 RPM to 3500 RPM.
- 1-3 (1000-1500 RPM): Ideal for waxing and buffing.
- 4-5 (1500-2500 RPM): Suitable for polishing and cleaning.
- 6-7 (2500-3500 RPM): For high-speed grinding and fine polishing.

Image: Visual representation of the 7 variable speed settings.
Safety Lock Feature
The polisher includes a safety switch lock button. Press this button to maintain the selected speed without continuously holding the trigger, reducing user fatigue during prolonged operation.

Image: Product information diagram showing the location of the self-locking button.
General Usage Steps
- Step 1: Cleaning - Use a towel to clean the surface thoroughly and allow it to dry.
- Step 2: Waxing - Apply wax evenly on the surface using appropriate sponge pads.
- Step 3: Polishing - Use a sponge pad to polish scratches on the surface. Allow 5-10 minutes after polishing.
- Step 4: Wax Removal & Polishing Again - Remove excess wax and perform final polishing with wool pads.

Image: Step-by-step guide for using the polisher for car detailing.
Maintenance
Easy to Replace Carbon Brush
Regular inspection and replacement of carbon brushes are essential for maintaining optimal performance and extending the lifespan of your polisher. Follow these steps for replacement:
- Unscrew the screw covering the carbon brush compartment.
- Slide the paddle to the side to fix it in place.
- Pull out the original carbon brush.
- Insert the new carbon brush in place.
- Pivot the paddle to the groove to hold it in place.
- Tighten the screw.

Image: Detailed steps for carbon brush replacement.
Troubleshooting
For common issues, ensure the power cord is securely connected and the power outlet is functional. If the unit overheats, allow it to cool down before resuming operation. Refer to the "Maintenance" section for carbon brush replacement if the motor performance degrades. For persistent issues, please contact customer support.
Specifications
| Feature | Specification |
|---|---|
| Brand | GEVEELIFE |
| Model Number | PGJ |
| Maximum Power | 1600 Watts |
| Speed | 1000-3500 RPM (7 Variable Speeds) |
| Item Weight | 7.15 pounds |
| Power Source | Corded Electric |
| Material | Acrylonitrile Butadiene Styrene (ABS), Metal, Plastic |
| Compatible Polishing Discs | M14 caliber (Not for 5/8-11 caliber) |
Applications
The GEVEELIFE Buffer Polisher is a versatile tool suitable for a variety of tasks:
- Car detailing (polishing, waxing, sanding)
- Boat maintenance
- Furniture polishing
- Floor restoration
- Marble and wood surface treatment
- Metal polishing and sanding
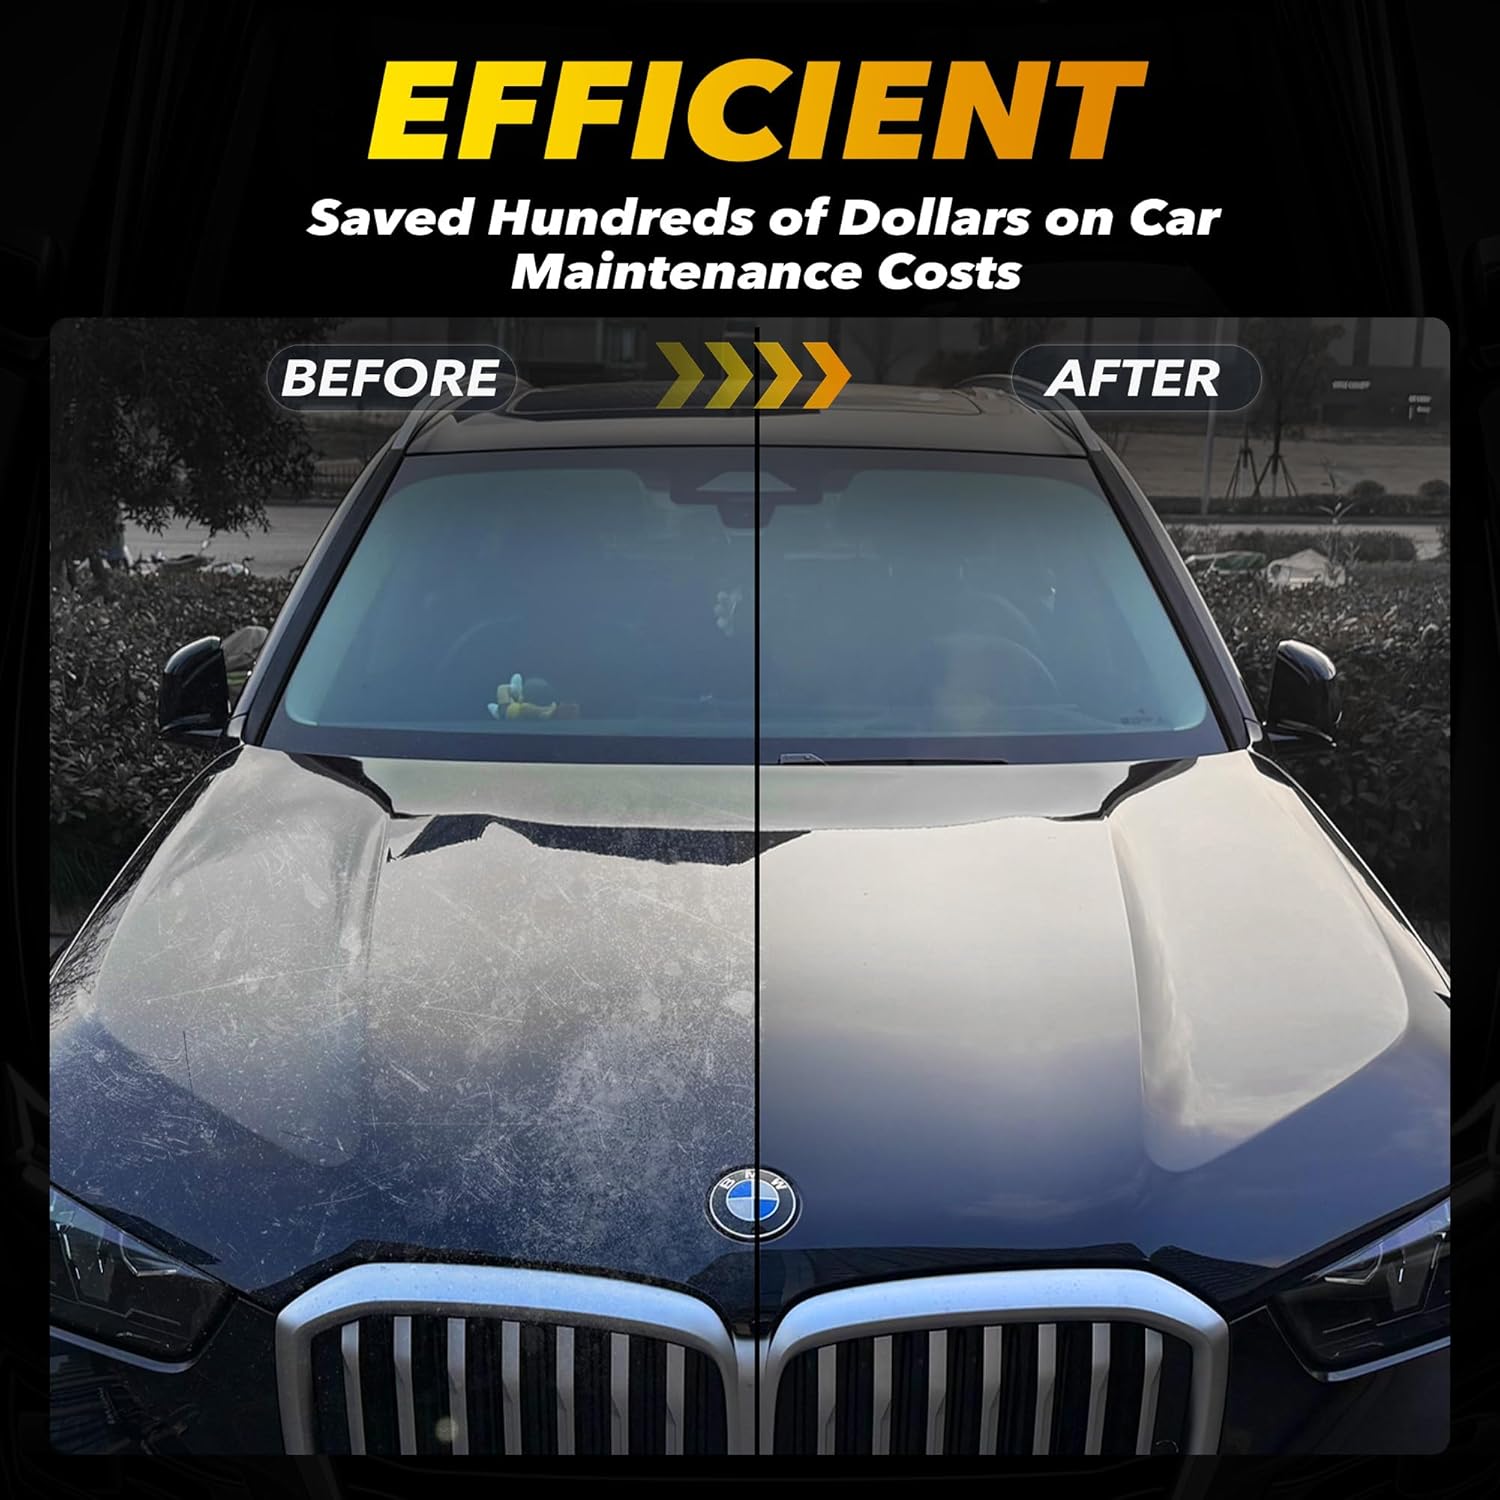
Image: Examples of various applications for the buffer polisher.
Warranty and Support
GEVEELIFE offers a 2-year warranty on this orbital polisher. For any questions regarding the product or issues encountered during use, please contact our professional customer service team. We aim to provide a satisfactory solution within 24 hours.
For support, please visit the GEVEELIFE Store on Amazon.


