1. Introduction
Welcome to the GIGABYTE AORUS Supreme 5 Gaming Desktop PC. This high-performance system is engineered for an exceptional gaming and computing experience, featuring an AMD Ryzen 7 9800X3D Processor, NVIDIA GeForce RTX 5090 Graphics Card, 64GB DDR5 RAM, and a 2TB Gen5 NVMe SSD. This manual provides essential information for setting up, operating, maintaining, and troubleshooting your new desktop PC to ensure optimal performance and longevity.
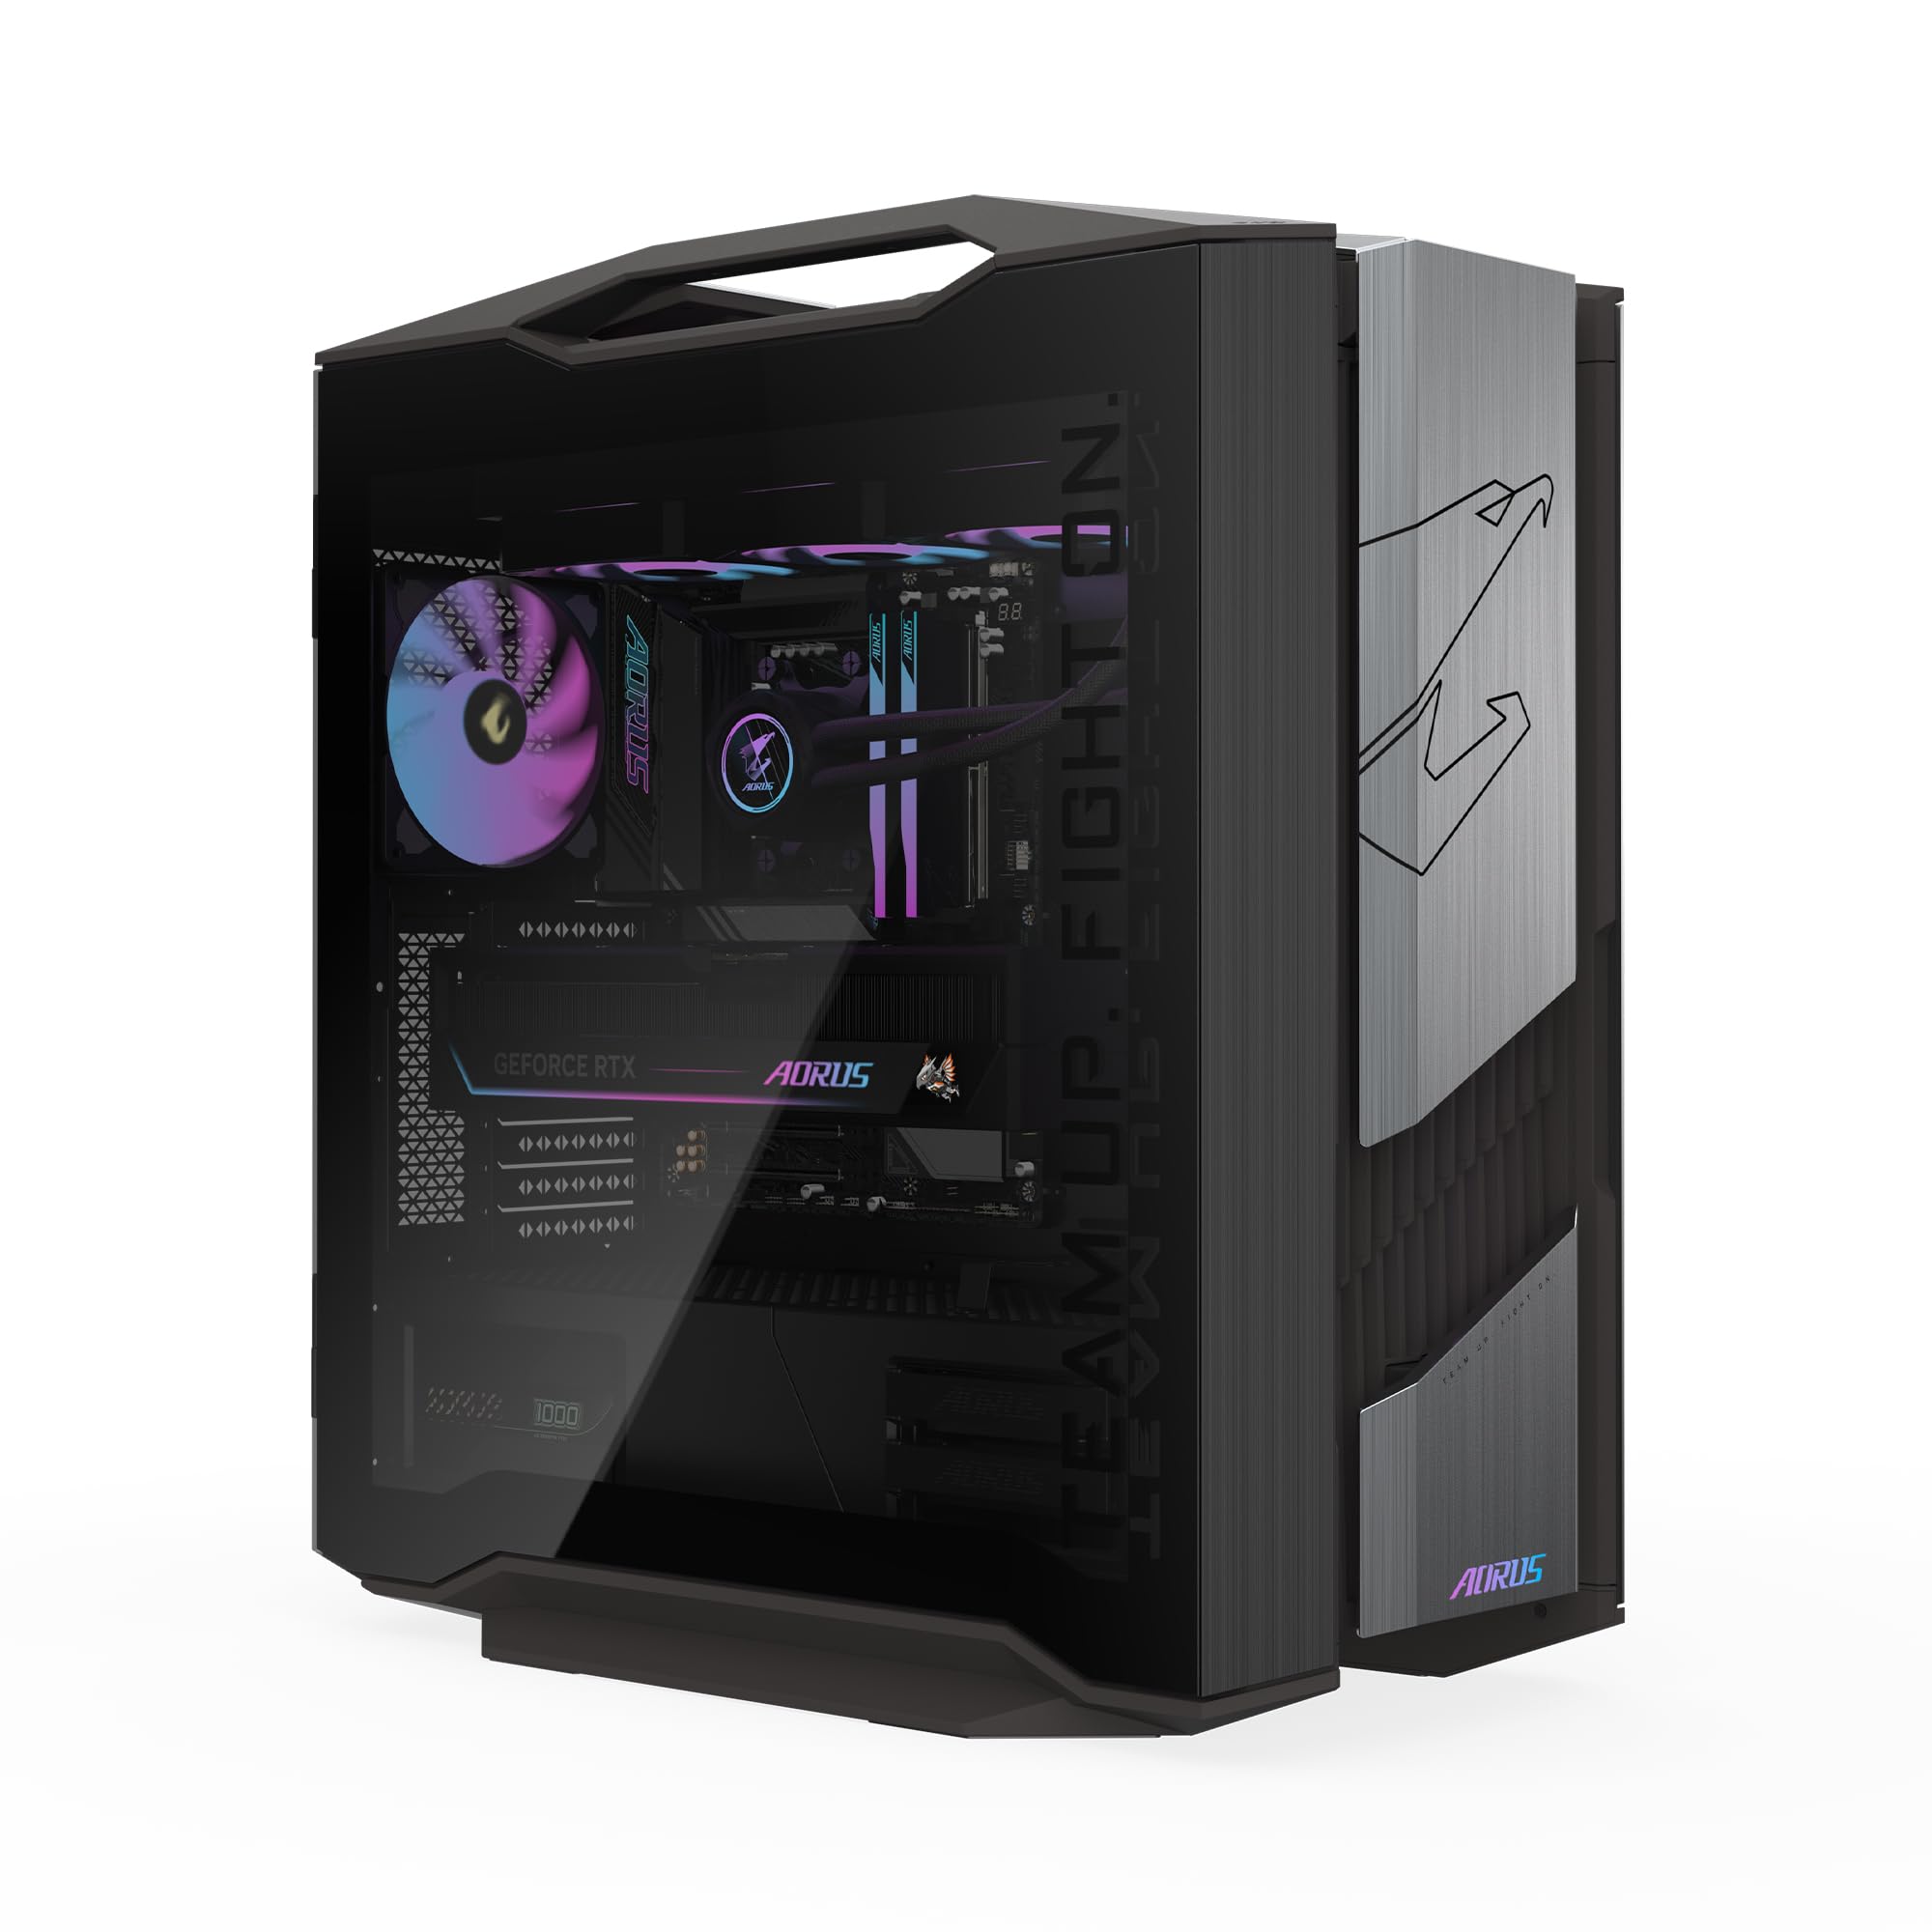
Image 1.1: GIGABYTE AORUS Supreme 5 Gaming Desktop PC.
2. Safety Information
Please read the following safety guidelines carefully before using your GIGABYTE AORUS Supreme 5 Gaming Desktop PC:
- Power Supply: Use only the power supply cable provided with the system. Ensure the power outlet is properly grounded.
- Ventilation: Do not block any ventilation openings. Maintain adequate space around the PC for proper airflow to prevent overheating.
- Liquid and Moisture: Keep the PC away from liquids, moisture, and high humidity environments.
- Placement: Place the PC on a stable, flat surface. Avoid placing it near heat sources or in direct sunlight.
- Servicing: Do not attempt to service the PC yourself. Refer all servicing to qualified service personnel. Opening the chassis may void your warranty.
- Cleaning: Disconnect the power cable before cleaning. Use a soft, dry cloth. Avoid liquid cleaners.
3. Package Contents
Verify that all items are present in your package:
- GIGABYTE AORUS Supreme 5 Gaming Desktop PC
- Power Cable
- User Manual (this document)
- Warranty Card
4. Product Overview
4.1. External Features
The AORUS Supreme 5 features a sleek mid-tower chassis with a tempered glass side panel, allowing a view of the internal components and customizable RGB lighting.

Image 4.1: Front view of the AORUS Supreme 5 PC.

Image 4.2: Side view of the AORUS Supreme 5 PC, showcasing the tempered glass panel.

Image 4.3: Rear view of the AORUS Supreme 5 PC.
4.2. Internal Components
The AORUS Supreme 5 is equipped with cutting-edge hardware for superior performance.
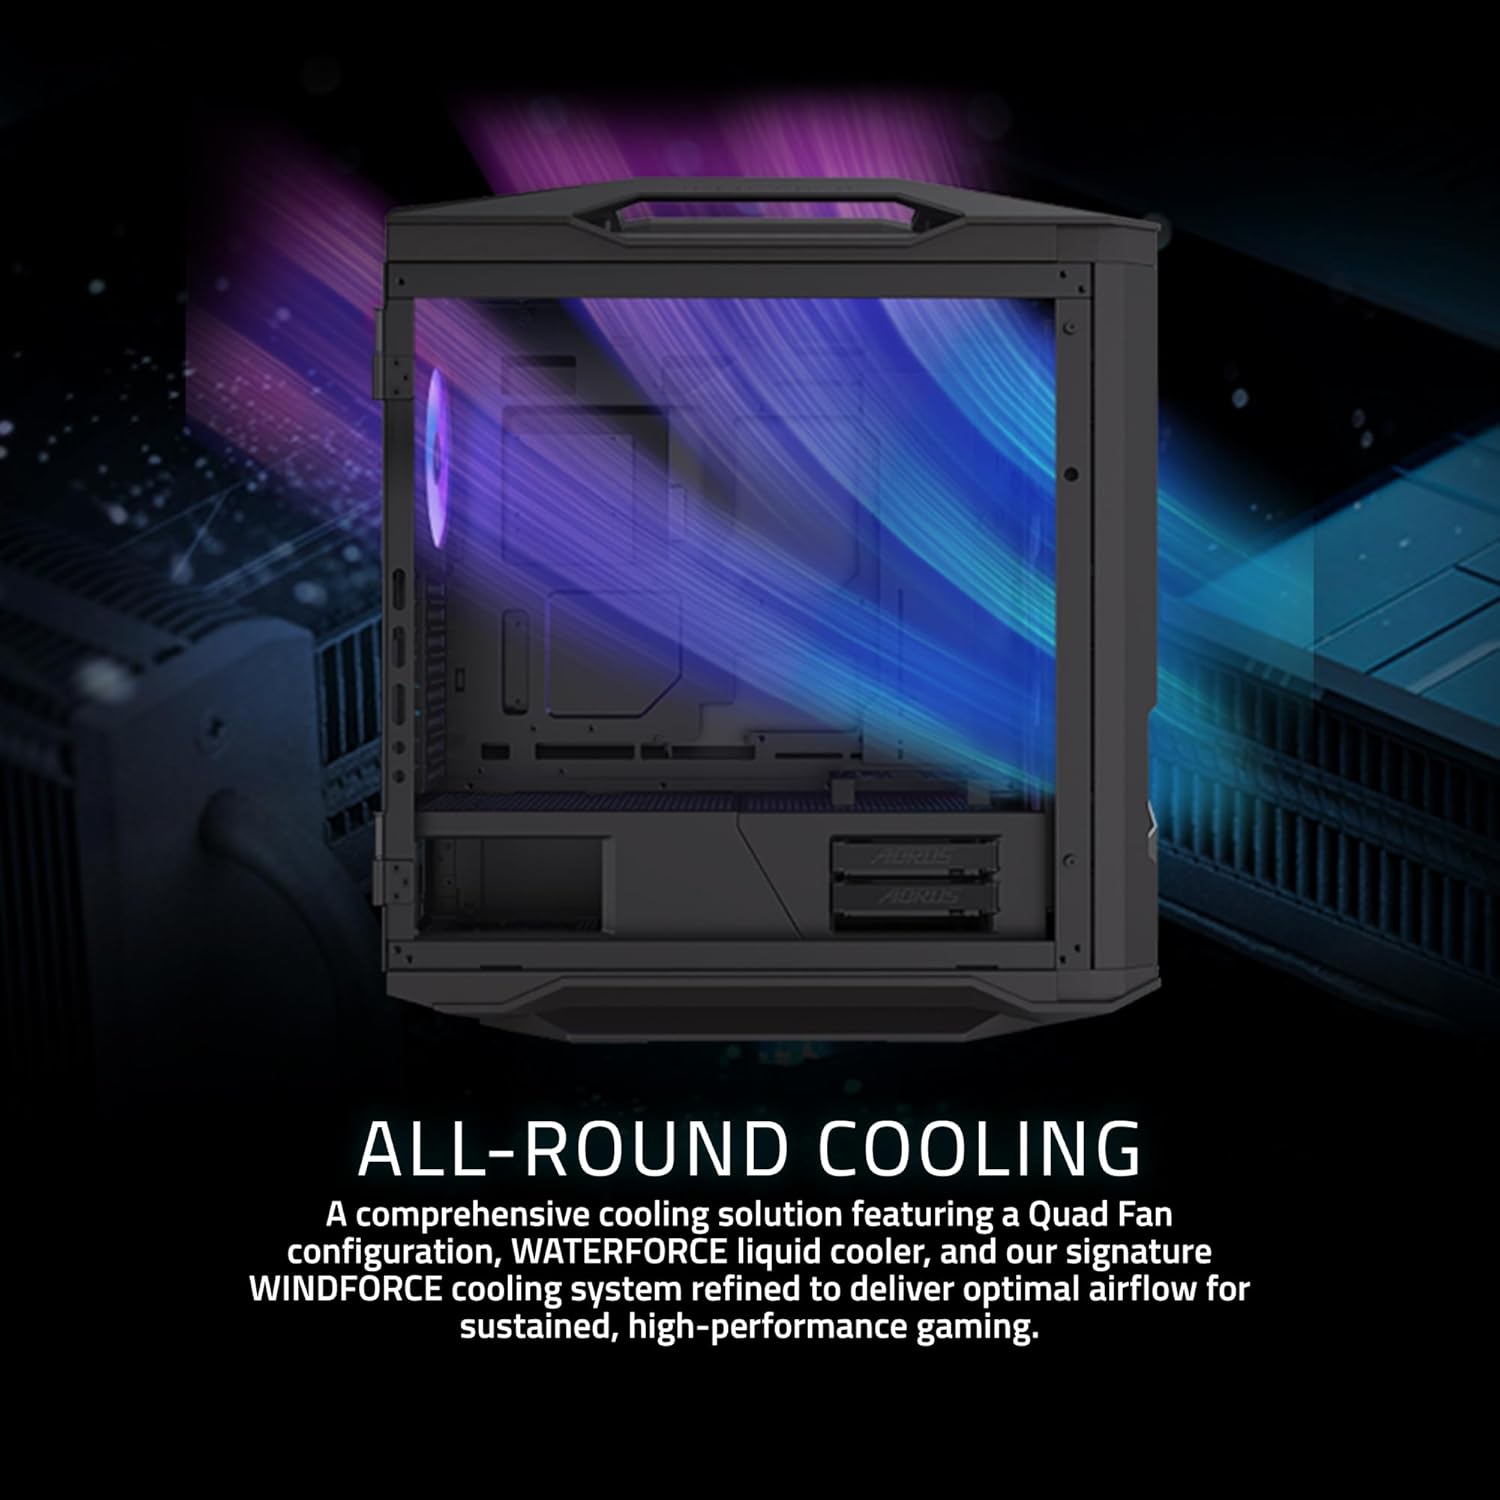
Image 4.4: Internal view of the PC, showing the AMD Ryzen 7 9800X3D Processor, NVIDIA GeForce RTX 5090 GPU, 64GB DDR5 RAM, 2TB Gen5 NVMe SSD, and 1000W 80+ Platinum Power Supply.

Image 4.5: Close-up of the AMD Ryzen 7 9800X3D Processor, featuring 2nd Gen AMD 3D V-Cache Technology.

Image 4.6: Close-up of the NVIDIA GeForce RTX 5090 Graphics Card, powered by NVIDIA Blackwell architecture.
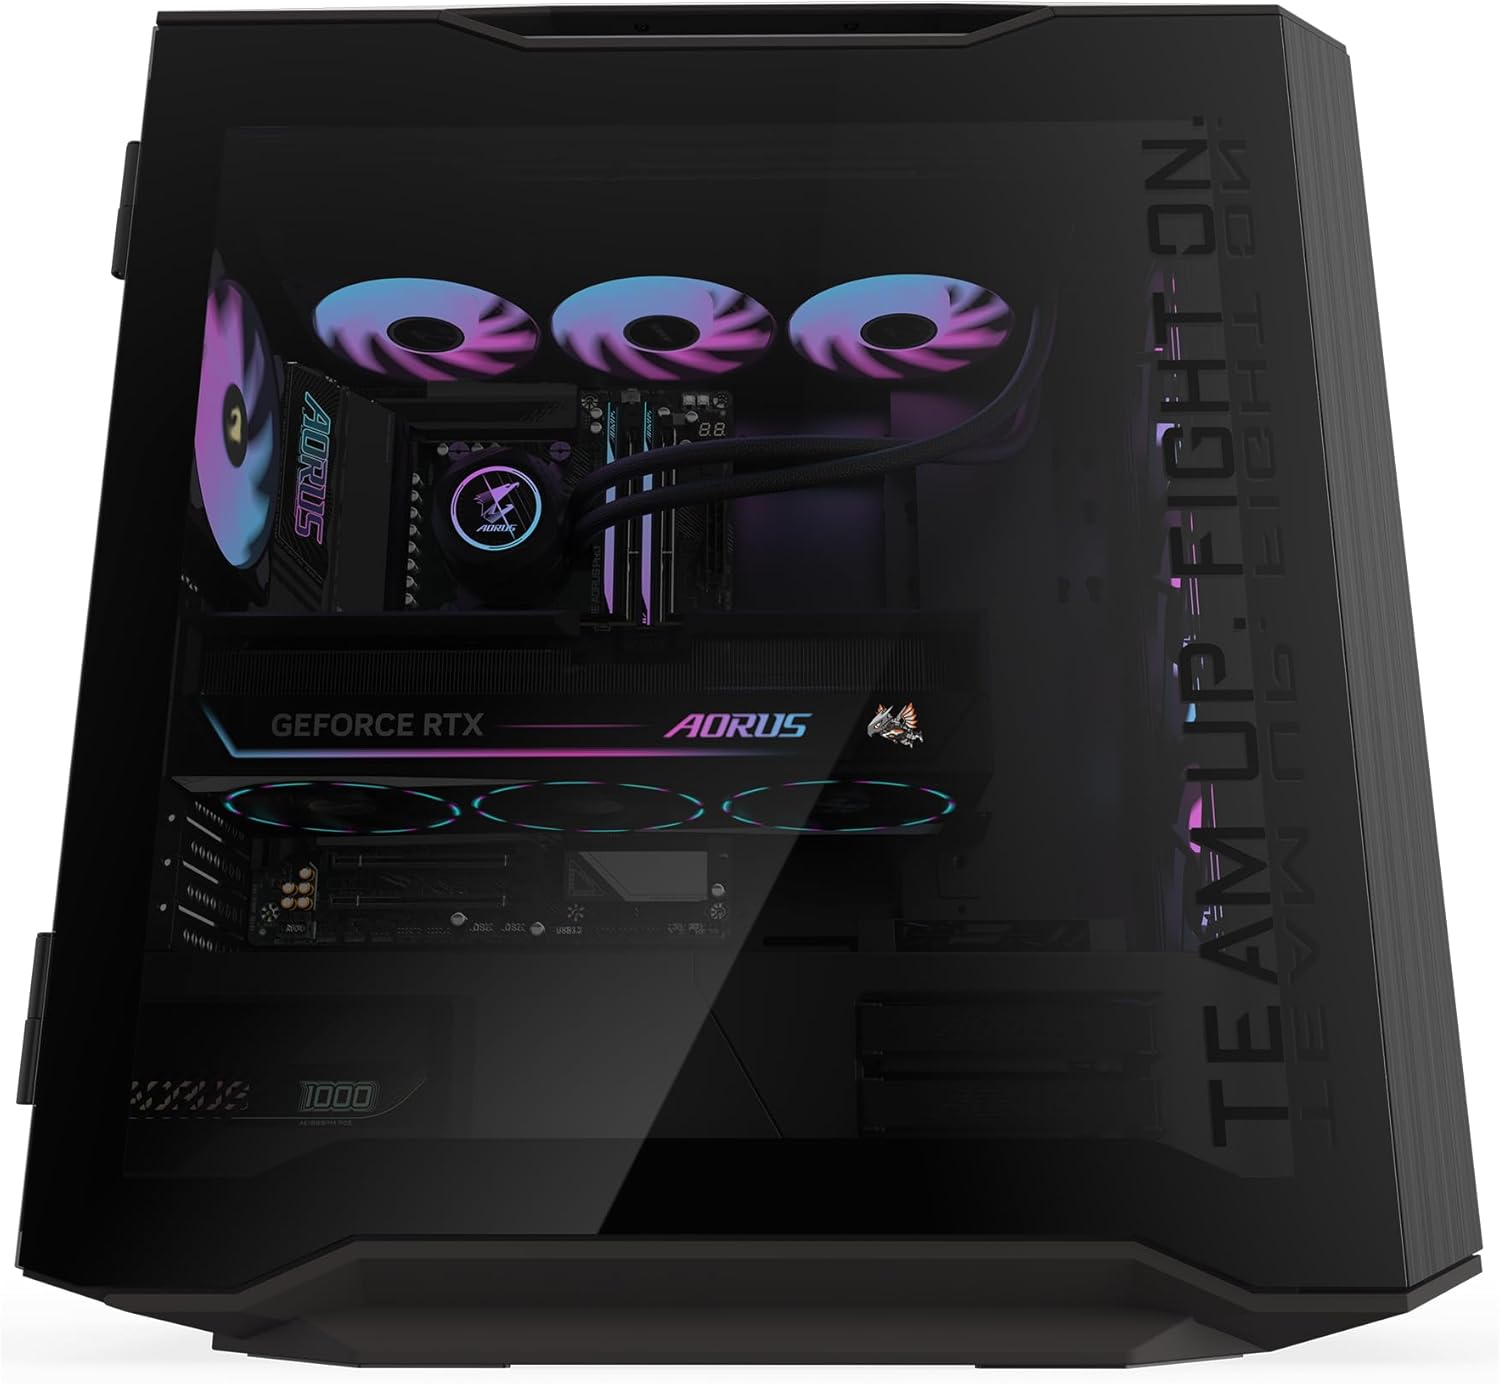
Image 4.7: The comprehensive AORUS liquid cooling solution, featuring a Quad Fan configuration and WINDFORCE cooling system for optimal airflow.
4.3. Front and Rear Ports
The PC provides a variety of ports for connecting peripherals and displays.

Image 4.8: Diagram illustrating the front and rear I/O ports.
Front Panel Ports:
- 1 x USB 3.2 Gen 2 Type-C
- Power Button
- Reset Button
- 4 x USB 3.0
- RGB LED Switch
- 1 x Audio Jack
Rear Panel Ports:
- 2 x USB 2.0
- 1 x HDMI
- 4 x USB 3.2 Gen 1
- 2 x USB 4 Type-C (up to 40Gb/s with DP-Alt)
- 3 x USB 3.2 Gen 2
- Wi-Fi 7 Antenna Connectors
- 1 x Optical S/PDIF Out
- 2 x Audio Jacks
- 2.5 GbE LAN Port
5. Setup
5.1. Unpacking
- Carefully remove the PC from its packaging.
- Place the PC on a stable, flat surface with adequate ventilation.
- Remove any protective films or internal packaging materials.
5.2. Connecting Peripherals
- Monitor: Connect your monitor to the graphics card's DisplayPort or HDMI output. Ensure the cable is securely fastened.
- Keyboard and Mouse: Connect your keyboard and mouse to any available USB ports on the rear or front panel.
- Network: For a wired connection, connect an Ethernet cable from your router/modem to the LAN port on the rear panel. For Wi-Fi, ensure the Wi-Fi antennas are securely attached to the rear panel connectors.
- Audio: Connect speakers or headphones to the appropriate audio jacks on the rear or front panel.
5.3. Power Connection
- Connect the provided power cable to the power input on the rear of the PC.
- Plug the other end of the power cable into a grounded electrical outlet.
6. Operating Instructions
6.1. Initial Power On
- Ensure all peripherals are connected and the power cable is plugged in.
- Press the Power Button on the front panel of the PC.
- Follow the on-screen instructions to complete the Windows 11 setup process. This typically involves selecting your region, language, and setting up a user account.
6.2. RGB Fusion 2.0
Your AORUS Supreme 5 PC features customizable RGB lighting. Use the GIGABYTE Control Center (GCC) software to personalize and synchronize lighting effects across compatible components. The RGB LED Switch on the front panel can also cycle through preset lighting modes.
6.3. System Updates
Regularly update your operating system, drivers, and GIGABYTE software to ensure optimal performance, security, and compatibility. Windows Update can be accessed via Settings > Windows Update. Driver updates can be managed through GIGABYTE's official website or the GIGABYTE Control Center.
7. Maintenance
Proper maintenance helps extend the lifespan and performance of your PC.
- Dust Cleaning: Periodically clean dust from the PC's exterior and ventilation openings using compressed air or a soft brush. Ensure the PC is powered off and unplugged before cleaning.
- Software Maintenance: Keep your operating system and drivers updated. Run antivirus scans regularly and manage startup programs to maintain system responsiveness.
- Cable Management: Ensure internal and external cables are neatly organized to prevent airflow obstruction and accidental disconnections.
- Environmental Conditions: Operate the PC in a cool, dry, and well-ventilated environment to prevent overheating.
8. Troubleshooting
If you encounter issues with your PC, refer to the following common troubleshooting steps:
- No Power:
- Check if the power cable is securely connected to both the PC and the wall outlet.
- Ensure the power switch on the power supply unit (at the rear of the PC) is in the 'ON' position.
- Test the outlet with another device to confirm it has power.
- No Display:
- Verify that the monitor is powered on and the video cable is securely connected to both the PC's graphics card and the monitor.
- Ensure the monitor's input source is set correctly (e.g., HDMI, DisplayPort).
- Try a different video cable or monitor if available.
- System Slowdown/Performance Issues:
- Check for background applications consuming excessive resources using Task Manager (Ctrl+Shift+Esc).
- Ensure all drivers (especially graphics drivers) and Windows are up to date.
- Monitor system temperatures using GIGABYTE Control Center or other monitoring software to check for overheating.
- Peripherals Not Working:
- Try connecting the peripheral to a different USB port.
- Ensure the peripheral's drivers are installed and up to date.
- Restart the PC.
If these steps do not resolve the issue, please contact GIGABYTE customer support for further assistance.
9. Specifications
Key technical specifications for the GIGABYTE AORUS Supreme 5 AS5A7N9-5000:
| Component | Specification |
|---|---|
| Brand | GIGABYTE |
| Model Number | AORUS Supreme 5 AS5A7N9-5000 |
| Operating System | Windows 11 Home |
| CPU Model | AMD Ryzen™ 7 9800X3D |
| CPU Speed | 4.7 GHz |
| Graphics Coprocessor | AORUS GeForce RTX™ 5090 MASTER |
| Graphics Card RAM | 32 GB GDDR7 |
| RAM Memory Installed | 64 GB DDR5 |
| Memory Speed | 5600 MHz |
| Storage | 2 TB Gen5 NVMe SSD |
| Wireless Technology | Wi-Fi 7, Bluetooth |
| LAN | 2.5 Gigabit Ethernet |
| Total USB Ports | 11 (including USB 3.2 Gen 2, USB 4 Type-C, USB 3.2 Gen 1, USB 2.0) |
| Video Output | DisplayPort, HDMI |
| Max Display Resolution | 7680 x 4320 |
10. Warranty and Support
Your GIGABYTE AORUS Supreme 5 Gaming Desktop PC comes with a 1 Year Manufacturer Warranty.
For technical support, warranty claims, or additional information, please visit the official GIGABYTE website or contact their customer service department. Keep your purchase receipt and the product's serial number handy when contacting support.
GIGABYTE Support: www.gigabyte.com/support


