Fanbulous LY46B
Fanbulous 46 Inch Flush Mount Ceiling Fan (Model LY46B) Instruction Manual
Model: LY46B | Brand: Fanbulous
1. Introduction
This manual provides detailed instructions for the safe installation, operation, and maintenance of your Fanbulous 46 Inch Flush Mount Ceiling Fan, Model LY46B. Please read all instructions carefully before beginning installation and retain this manual for future reference.
Important Safety Information: Always disconnect power at the circuit breaker before installing or servicing the fan. Ensure all electrical connections comply with local codes and ordinances. If you are unsure about wiring, consult a qualified electrician.
2. Package Contents
Verify that all components are present before beginning installation:
- Ceiling Fan Motor Housing
- Fan Blades (5x, dual-finish: Black/Walnut)
- Remote Control
- Remote Control Wall Mount Cradle
- Mounting Bracket
- Hardware Pack (screws, wire nuts, washers)
- Instruction Manual

Image: Fanbulous 46 Inch Flush Mount Ceiling Fan with remote control and example dual-finish blades (black and walnut).
3. Specifications
| Brand | Fanbulous |
| Model Name | LY46B |
| Size | 46 Inch |
| Product Dimensions | 46"D x 46"W x 8.27"H |
| Item Weight | 10.94 pounds |
| Power Source | AC/DC |
| Motor Type | Reversible DC Motor |
| Fan Speeds | 6 Speeds |
| Noise Level | Below 35dB |
| Indoor/Outdoor Usage | Indoor |
| Special Features | Remote Controlled, Timer, Quiet Operation, Reversible Airflow |
| Batteries | 2 AAA batteries required (included) |

Image: Dimensional diagram of the 46-inch flush mount ceiling fan.
4. Setup and Installation
Before You Begin:
- Turn off power at the circuit breaker to avoid electrical shock.
- Ensure the mounting location can support the fan's weight (approximately 11 lbs).
- Consult a qualified electrician if you are unfamiliar with electrical wiring.
4.1 Mounting the Fan
- Secure the Mounting Bracket: Attach the mounting bracket to the ceiling junction box using the screws provided. Ensure it is securely fastened and can support the fan's weight.
- Assemble Fan Blades: Attach the fan blades to the motor housing. The blades are dual-sided (black and walnut); choose your preferred finish.
- Wiring Connections: Connect the fan's electrical wires to the household wiring according to local electrical codes. Typically, this involves connecting live (black), neutral (white), and ground (green/bare copper) wires. Use the provided wire nuts.
- Attach Fan to Mounting Bracket: Carefully lift the fan assembly and attach it to the mounting bracket. Ensure all connections are secure and wires are tucked safely into the junction box.

Image: Step-by-step illustration of attaching the fan to the ceiling mounting bracket.

Image: Close-up of the dual-sided fan blades, illustrating the black and walnut finish options.
5. Operating Instructions
Your Fanbulous ceiling fan is controlled by the included remote. Ensure the remote has 2 AAA batteries installed (included).
5.1 Remote Control Functions
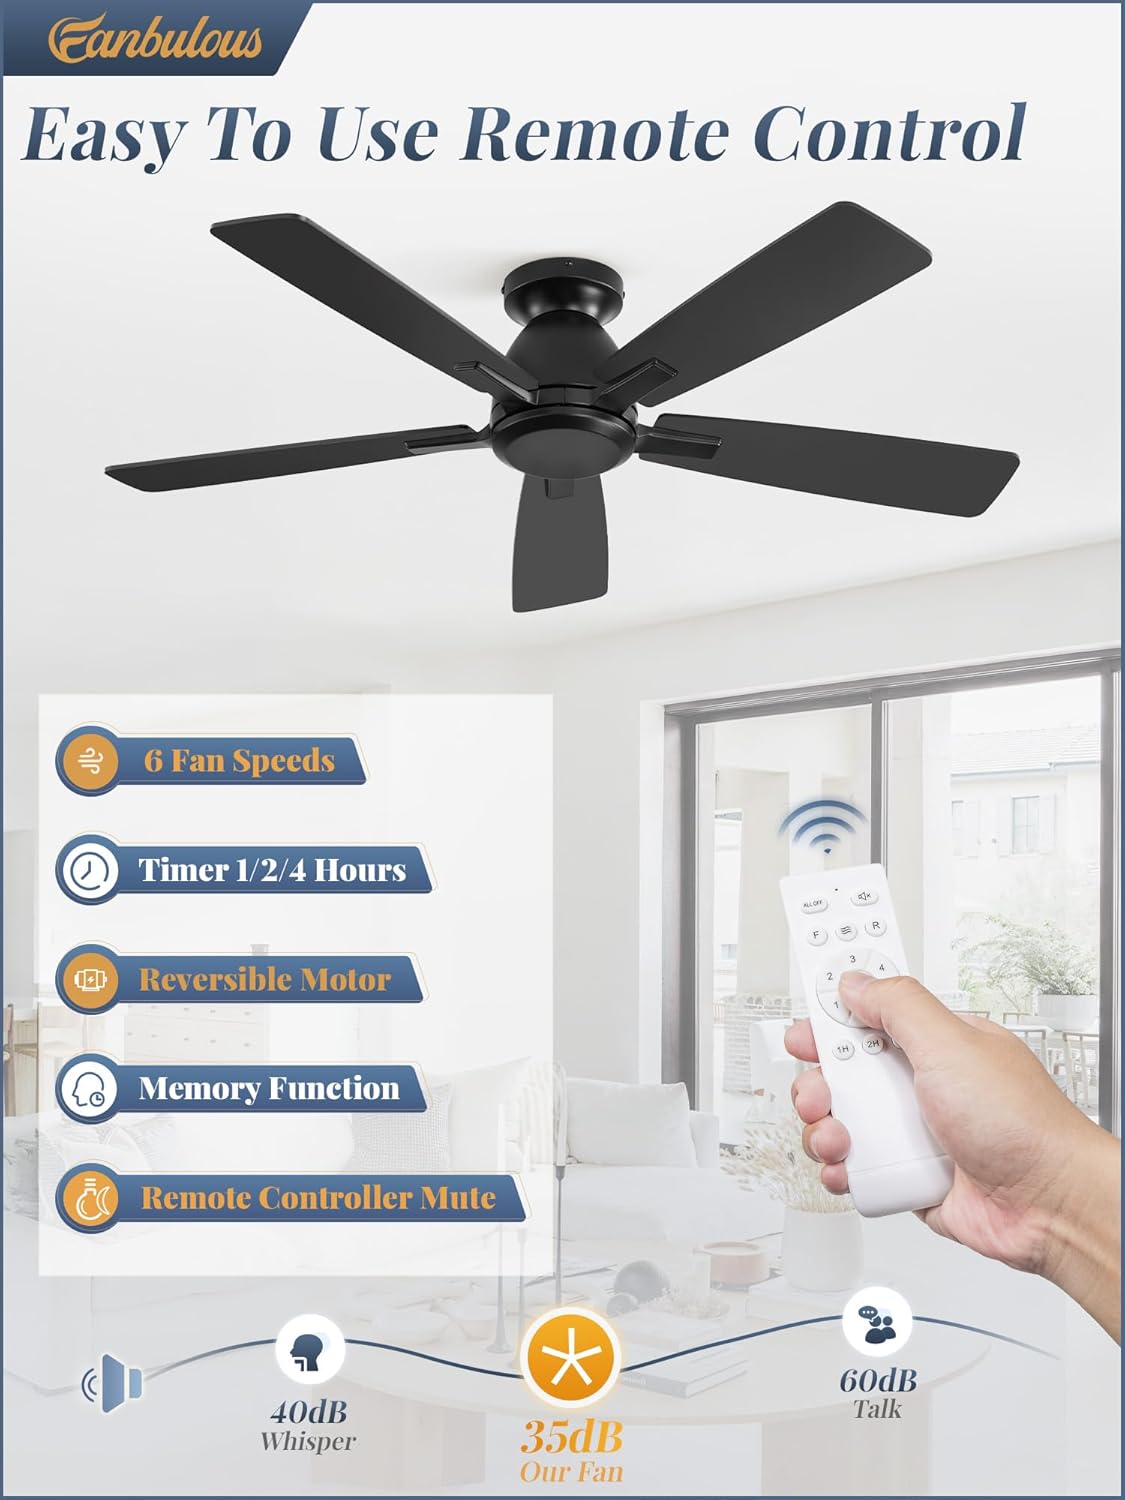
Image: Overview of the remote control and its various functions.
- Power On/Off: Press the Fan On/Off button (often represented by wiggly lines or a fan icon) to turn the fan on or off.
- Fan Speed: Use the speed buttons (1-6) to adjust the fan's rotation speed.
- Levels 1-2: Low Soft Wind
- Levels 3-4: Medium Natural Wind
- Levels 5-6: High Cool Wind
- Timer: Press the timer buttons (1H, 2H, 4H) to set the fan to automatically turn off after 1, 2, or 4 hours.
- Reversible Motor (Forward/Reverse): Press the F/R button to change the direction of the fan blades.
- Summer Mode (Forward): Blades rotate counter-clockwise, pushing air downwards to create a cooling breeze.
- Winter Mode (Reverse): Blades rotate clockwise, drawing air upwards to circulate warm air trapped near the ceiling.
- Mute Function: The remote may have a button (often a speaker icon) to mute the beep sound when operating the fan.
- Memory Function: The fan retains the last speed setting when turned off and on again.

Image: Visual representation of the 6 fan speed settings.
Image: Illustration of the reversible DC motor's summer (forward) and winter (reverse) modes.
6. Maintenance
Regular maintenance ensures optimal performance and extends the life of your fan.
- Cleaning: Periodically wipe the fan blades and motor housing with a soft, damp cloth. Do not use abrasive cleaners or solvents. Ensure the fan is completely dry before operating.
- Blade Tightness: Check all blade screws periodically to ensure they are tight. Loose blades can cause wobbling and noise.
- Electrical Connections: Annually inspect electrical connections for any signs of wear or loosening. Ensure power is off at the circuit breaker before inspection.
7. Troubleshooting
| Problem | Possible Cause | Solution |
|---|---|---|
| Fan does not start |
|
|
| Fan wobbles |
|
|
| Fan is noisy (humming/clicking) |
|
|
| Remote control not working |
|
|
8. Warranty and Customer Support
Fanbulous offers dedicated technical support and responsive service for your product.
- Motor Warranty: 5-year support for the motor.
- Parts Warranty: 2-year support on all other parts.
For technical assistance or warranty claims, please contact Fanbulous customer service. Our team is ready to assist you promptly.
Visit the Fanbulous Store for more information.
Ask a question about this manual
Ask about setup, troubleshooting, compatibility, parts, safety, or missing instructions. Manuals+ will review the question and use this page’s manual context to help answer it.