Important Safety Instructions
Please read all instructions carefully before assembly and use. Keep this manual for future reference.
- Ensure all parts are present and undamaged before beginning assembly.
- Do not overtighten screws during assembly to avoid damaging the engineered wood.
- Keep children and pets away from the assembly area.
- Always use the product on a flat, stable surface.
- Do not exceed the weight capacity of the countertop or shelves.
- For the integrated power outlet, ensure the power cord is not pinched or damaged. Do not overload the outlets.
- Unplug the power cord before cleaning or moving the island.
Package Contents
Verify that all components listed below are included in your package:
- 1 x Kitchen Island with Folding Top
- 1 x Power Outlet Unit
- 1 x Hardware Kit (screws, bolts, connectors, etc.)
- 1 x Instruction Manual

Image: Overview of the RALGEND Kitchen Island, showing its various compartments and features. This image represents the complete product after assembly.
Setup Guide
Assembly Instructions
Follow the detailed guide provided in the hardware kit for step-by-step assembly. All parts are labeled with letters or numbers for easy identification.
- Unpack and Identify: Carefully unpack all components and lay them out. Refer to the parts list in the included instruction manual to identify each piece.
- Assemble the Base: Begin by assembling the main frame of the island, ensuring all connections are secure.
- Install Storage Units: Attach the cabinet doors, drawers, and side shelves according to the instructions. Ensure drawers slide smoothly and cabinet doors align properly.
- Attach Casters: Secure the 5 concealed casters to the bottom of the island. The central caster provides additional stability.
- Install Drop-Leaf Mechanism: Attach the metal brackets for the drop-leaf countertop. Ensure they are securely fastened and operate smoothly.
- Mount Countertop: Carefully place and secure the main countertop and the drop-leaf panel.
Power Outlet Installation
The integrated power outlet unit is designed for easy installation. It typically involves securing the unit into a pre-drilled slot on the island and routing the power cord.
- Locate the designated area for the power outlet on the island.
- Carefully insert the power outlet unit into the opening.
- Secure the unit with the provided screws.
- Ensure the 4.9ft power cord is accessible and can reach a wall outlet without tension.

Image: Detail of the integrated power outlet featuring three 120V 12A AC outlets, ready for appliance use.
Operating Instructions
Using the Drop-Leaf Countertop
The drop-leaf countertop provides flexible space for various activities.
- To Expand: Gently lift the drop-leaf panel. Extend the three metal support brackets underneath until they lock into place, supporting the panel. The countertop expands to 27.6 inches.
- To Fold: Release the locking mechanism on the metal support brackets and carefully fold them back. Lower the drop-leaf panel until it rests flush with the main countertop.

Image: The drop-leaf panel in its extended position, showcasing the three metal brackets that provide stability. This feature allows for increased workspace or dining area.
Utilizing Storage Features
The island offers diverse storage options:
- Drawers: Use the two smooth-gliding drawers for utensils, linens, or smaller kitchen tools.
- Main Cabinet: The large central cabinet provides ample space for dishes, pots, and pans. It may include adjustable shelves for customized storage.
- Side Shelf: The 3-tier side shelf is ideal for spices, cookbooks, or decorative items.
- Trash Storage Cabinet: The dedicated cabinet is designed to accommodate a 13-gallon trash bin (not included), keeping odors contained and your kitchen tidy.

Image: A detailed view of the island's storage capabilities, including a pull-out condiment shelf, an adjustable shelf within a cabinet, and fenced side shelving for secure item placement.
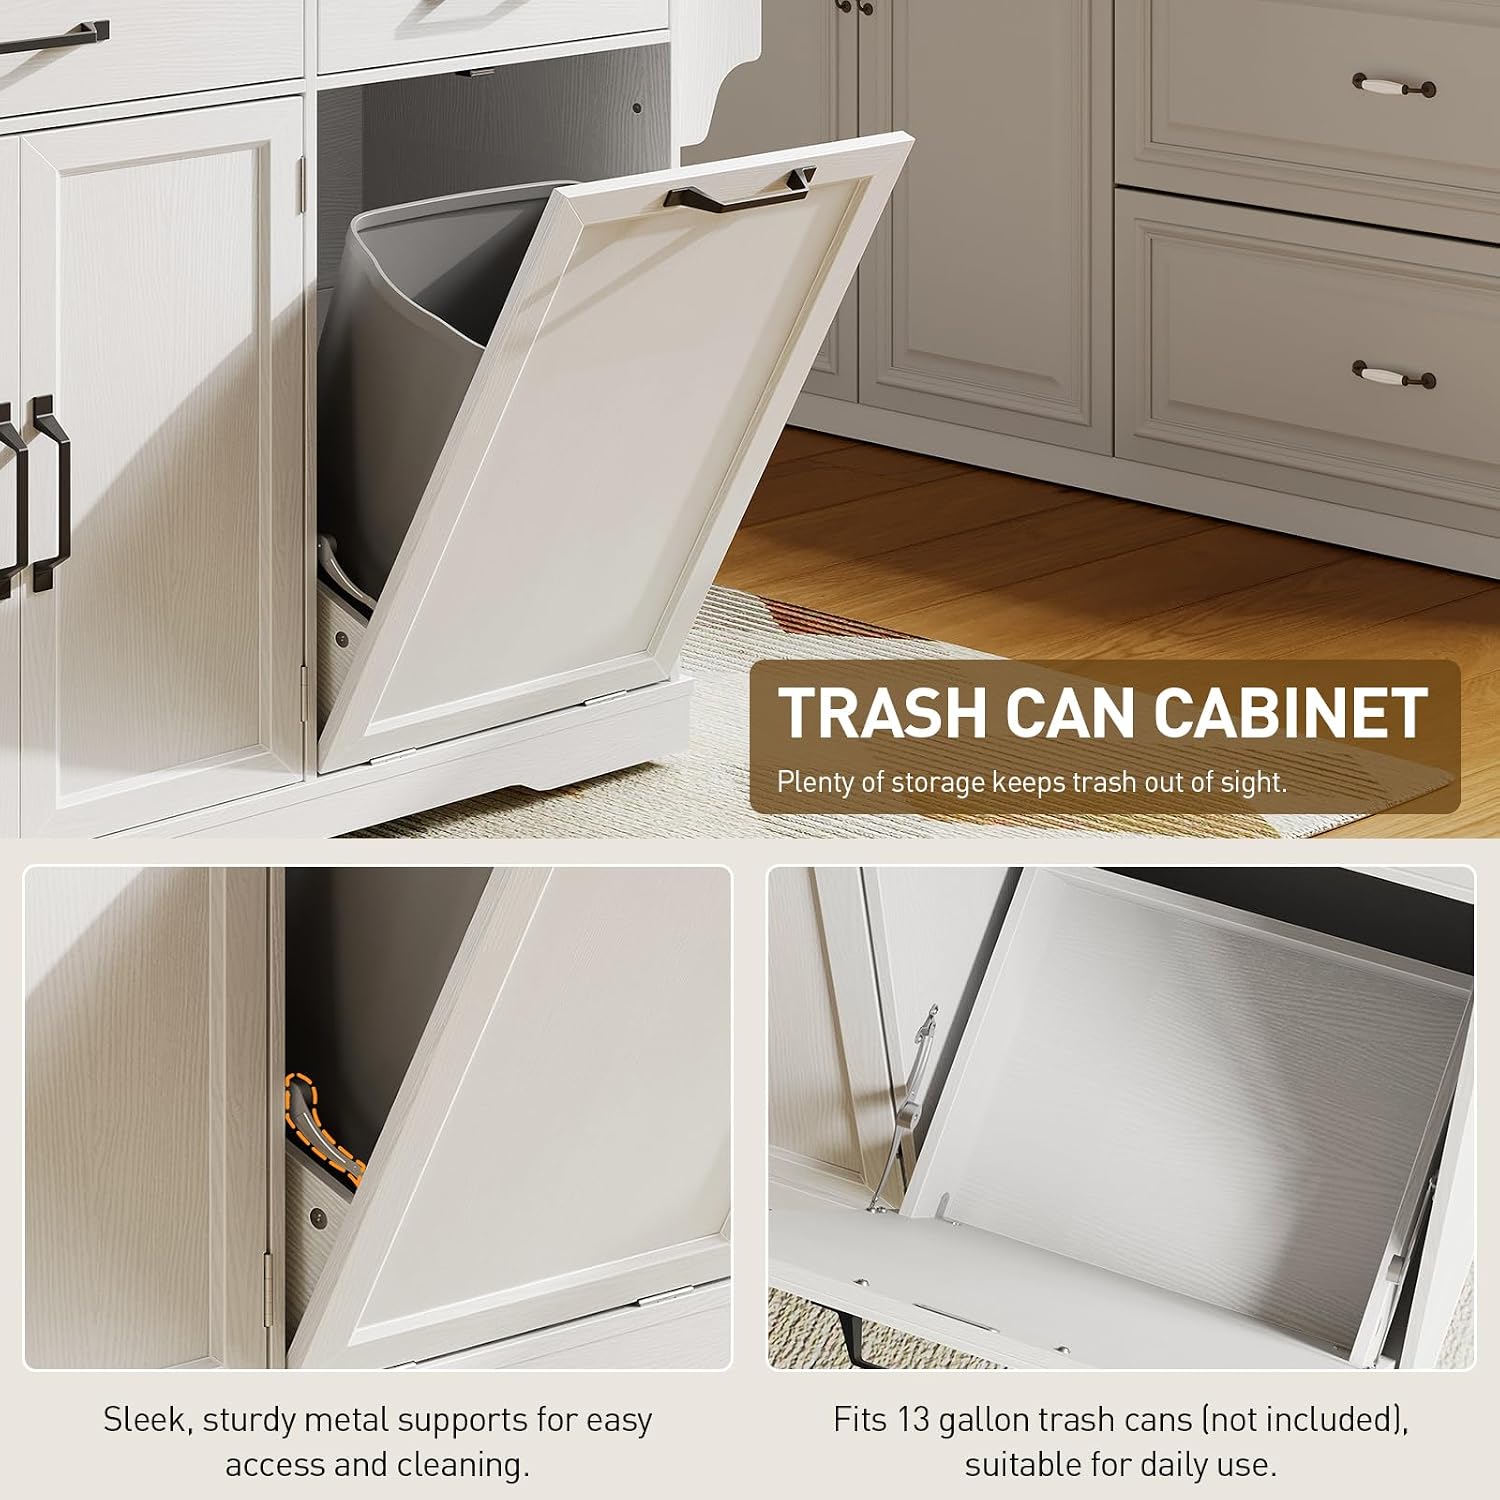
Image: The dedicated trash can cabinet, shown with a 13-gallon trash bin (not included) for discreet waste storage. The cabinet features sturdy metal supports for easy access.
Moving the Island
The island is equipped with 5 concealed casters for easy mobility.
- To move the island, gently push it in the desired direction. The concealed casters allow for smooth movement across various floor types.
- The central caster enhances stability, preventing accidental sliding when the island is stationary.
- Ensure the path is clear of obstacles before moving.

Image: A close-up view of one of the concealed base wheels, illustrating the design for easy and stable movement of the kitchen island.
Power Outlet Usage
The integrated power strip provides convenient access to electricity for kitchen appliances.
- Plug the island's main power cord into a standard 120V wall outlet.
- Use the three 3-prong outlets on the island to power small kitchen appliances like blenders, coffee makers, or chargers.
- Do not exceed the maximum wattage of 1500W for the integrated power strip.
Maintenance and Care
- Cleaning: Wipe surfaces with a soft, damp cloth. Avoid abrasive cleaners or harsh chemicals that may damage the finish. For spills, clean immediately to prevent staining.
- Dusting: Regularly dust all surfaces with a dry, soft cloth.
- Hardware: Periodically check all screws and fasteners to ensure they are tight. Retighten if necessary.
- Power Outlet: Keep the power outlets clean and dry. Do not expose them to liquids.
- Avoid Direct Sunlight: Prolonged exposure to direct sunlight may cause fading or discoloration.

Image: A hand demonstrating the ease of cleaning the countertop surface with a cloth, highlighting its low-maintenance design.
Troubleshooting
| Issue | Possible Cause | Solution |
|---|---|---|
| Island is wobbly or unstable. | Loose fasteners; uneven floor. | Check and tighten all screws. Ensure the island is on a level surface. |
| Drawers do not slide smoothly. | Misaligned runners; obstruction. | Recheck drawer runner alignment during assembly. Remove any obstructions. |
| Drop-leaf panel does not stay up. | Support brackets not fully extended/locked. | Ensure the metal support brackets are fully extended and locked into their supporting position. |
| Power outlets are not working. | Island's main cord unplugged; circuit breaker tripped; overloaded outlets. | Check if the island's power cord is securely plugged into a wall outlet. Reset the household circuit breaker if necessary. Reduce the number of devices plugged into the island's outlets. |
| Difficulty moving the island. | Casters obstructed; heavy load. | Clear any debris around the casters. Ensure the island is not excessively overloaded. |
Specifications

Image: A detailed diagram illustrating the dimensions of the RALGEND Kitchen Island, including height, width, and depth, as well as the expanded drop-leaf measurement.
| Feature | Detail |
|---|---|
| Brand | RALGEND |
| Model Name | Kitchen Island |
| Model Number | 1301ZDUWH |
| Color | White + Walnut |
| Product Dimensions (Folded) | 27.6"D x 56.3"W x 35.4"H |
| Drop-Leaf Expansion | Expands to 27.6 inches |
| Special Feature | Built-In Charging Station (3 AC Outlets, 1500W, 4.9ft cord) |
| Mounting Type | Floor Mount |
| Assembly Required | Yes |
| Frame Material | Engineered Wood |
| Item Weight | 108 pounds |
| Trash Bin Compatibility | 13 Gallon (bin not included) |
| Mobility | 5 Hidden Casters |
Warranty Information
RALGEND products are manufactured to high-quality standards. This product comes with a standard manufacturer's warranty covering defects in materials and workmanship under normal use. Please refer to the warranty card included in your package for specific terms, conditions, and duration. Keep your proof of purchase for warranty claims.
Customer Support
If you have any questions, require assistance with assembly, or encounter any issues with your RALGEND Kitchen Island, please do not hesitate to contact our customer support team.
- Online Support: Visit the official RALGEND website for FAQs and support resources.
- Email Support: Refer to your warranty card or product packaging for customer service email address.
- Phone Support: Refer to your warranty card or product packaging for customer service phone number.
When contacting support, please have your model number (1301ZDUWH) and proof of purchase ready.