1. Important Safety Information
Please read all safety instructions carefully before operating the Klanata 850D Hot Air Rework Station. Failure to follow these instructions may result in injury or damage to the product.
- The air outlet of the hot air desoldering station and its surroundings may reach extremely high temperatures. Exercise caution to prevent burns.
- Always place the heating handle on the designated handle rack. Never place it on the work surface or any other location.
- Ensure the air outlet remains unobstructed at all times.
- After use, place the heating handle on the handle frame. The machine will automatically cool to below 100 degrees Celsius (entering standby mode) before the power switch can be safely turned off.
- Maintain a minimum distance of 2 mm between the air outlet and the object being worked on.
- Unplug the power cord if the station will not be used for an extended period.
- Keep children away from the device and prevent them from touching it.
2. Product Overview
2.1 Package Contents
Verify that all items listed below are included in your package:
- 1 x Host Unit
- 1 x Hot Air Gun Bracket
- 3 x Gun Nozzles (various sizes)
- 1 x User Manual (this document)
- 1 x DC 9V Power Cord
2.2 Key Features
- LED Digital Display: Provides real-time temperature readings for clear and safe operation.
- Automatic Cold Air Function: Extends the lifespan of the heating element and hot air gun.
- Durable Heating Element: Made of high-temperature ceramic and alloy wire for long service life.
- Vortex Brushless Fan: Ensures large air volume with low noise, allowing for convenient temperature adjustment.
- Induction Switch Handle: The system quickly enters working mode when the handle is picked up.
2.3 Product Diagram

Figure 1: Overall view of the Klanata 850D Hot Air Rework Station, showing the main unit, hot air gun, power cord, and three included nozzles.
3. Setup
3.1 Attaching the Hot Air Gun and Nozzles
- Place the hot air gun handle securely into the provided bracket.
- Select the appropriate gun nozzle (5mm, 7mm, or 10mm) for your application.
- Attach the chosen nozzle firmly to the hot air gun's outlet. Ensure it is seated correctly to prevent air leakage.

Figure 2: Close-up view of the three included gun nozzles, illustrating their different diameters: 5mm, 7mm, and 10mm.
3.2 Power Connection
- Connect the DC 9V power cord to the power input port on the rear of the main unit.
- Plug the power cord into a suitable AC power outlet.
4. Operating Instructions
4.1 Powering On and Off
- To power on, flip the red power switch on the front panel to the 'ON' position. The LED display will illuminate.
- To power off, ensure the hot air gun is placed back on its bracket and has cooled down (standby state). Then, flip the power switch to the 'OFF' position.
4.2 Temperature Adjustment
Use the 'TEMP' knob on the front panel to adjust the desired temperature. The LED digital display will show the current temperature in Celsius. The adjustment range is 100℃-450℃.
4.3 Airflow Adjustment
Use the 'AIR' knob on the front panel to control the airflow rate. Adjust as needed for your specific application.
4.4 Induction Switch Functionality
The hot air gun handle is equipped with an induction switch. When you pick up the handle from its bracket, the system automatically enters working mode, and heating begins. When the handle is returned to the bracket, the system automatically cools down and enters standby mode.
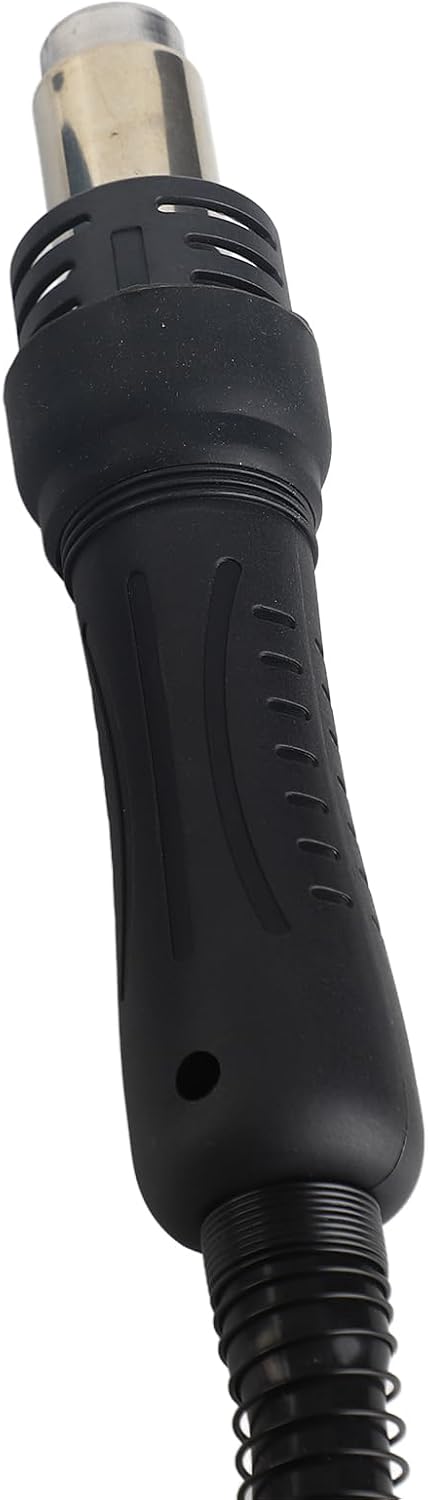
Figure 3: Detailed view of the hot air gun handle, highlighting its ergonomic design and induction switch.
4.5 Typical Applications
This hot air rework station is suitable for a variety of tasks, including:
- Desoldering of components such as SOIC, CHIP, PLCC, QFP, BGA.
- Desoldering of mobile phone cables and cable holders.
- Heat shrinkage applications.
- Drying and paint removal.
- Debonding and thawing.
- Preheating and welding.
5. Maintenance
5.1 Cleaning
Regularly clean the exterior of the unit and the hot air gun handle with a soft, dry cloth. Ensure the device is unplugged and cool before cleaning. Do not use abrasive cleaners or solvents.
5.2 Nozzle Replacement
Nozzles can be easily interchanged as needed. Ensure the hot air gun is cool before attempting to remove or attach nozzles. Periodically inspect nozzles for damage or blockages and replace if necessary.
6. Troubleshooting
If you encounter issues with your Klanata 850D Hot Air Rework Station, refer to the following common problems and solutions:
- No Power: Check if the power cord is securely plugged into both the unit and the wall outlet. Ensure the power switch is in the 'ON' position.
- No Heat/Incorrect Temperature: Verify the temperature setting on the 'TEMP' knob. Ensure the hot air gun handle is properly seated in the bracket and then picked up to activate heating.
- Weak Airflow: Check the 'AIR' knob setting. Ensure the air outlet and nozzles are free from obstructions.
- Hot Air Gun Not Activating: Confirm the handle is correctly placed on the bracket and then lifted. The induction switch may not activate if the handle is not properly engaged.
If problems persist after attempting these solutions, please contact customer support.
7. Specifications
| Feature | Specification |
|---|---|
| Item Type | Hot Air Desoldering Station |
| Shell Material | Aluminum alloy |
| Model | 850D digital display type |
| Airflow | 120L/min (maximum) |
| Fan Power Consumption | 700W |
| Noise | Less than 45dB |
| Temperature Adjustment Range | 100℃-450℃ |
| Display Form | LED digital |
| Working Temperature | 0-40℃ |
| Gun Mouth Diameter | Approx. 10mm / 0.4in, 7mm / 0.3in, 5mm / 0.2in |
| Item Weight | 6.44 pounds |
| Package Dimensions | 12.99 x 11.81 x 7.87 inches |
| Power Source | AC/DC |
| Batteries Required? | No |
| Date First Available | August 22, 2025 |
8. Warranty and Support
8.1 Warranty Information
This product comes with a standard manufacturer's warranty. Please refer to your purchase documentation or contact the seller for specific warranty terms and conditions.
8.2 Customer Support
For technical assistance, troubleshooting not covered in this manual, or warranty claims, please contact Klanata customer support through the retailer where the product was purchased or visit the official Klanata store on Amazon: Klanata Store.