1. Safety Information
Please read all instructions carefully before assembly and use. Keep this manual for future reference.
- Keep all small parts and packaging materials away from children and pets to prevent choking hazards.
- Ensure all components are securely fastened before use. Periodically check and tighten all screws and bolts.
- Do not overload the table. Refer to the "Specifications" section for weight capacities.
- Use the included anti-tipping device to secure the table to a wall, especially if children or pets are present, to prevent accidental tipping.
- Place the table on a flat, stable surface. Adjust the foot pads to ensure stability on uneven floors.
- Avoid placing hot items directly on the tabletop without protection.
2. Parts List
Before beginning assembly, ensure all parts listed below are present and undamaged. If any parts are missing or damaged, please contact customer support.

Figure 2.1: Product Dimensions and Components Overview. This image illustrates the overall dimensions and key components of the console table, including the tabletop, circular metal frame, and storage shelves.
Components (Approximate):
- Top Panel (1x)
- Bottom Panel (1x)
- Circular Metal Frame (1x)
- Internal Shelves (4x, varying sizes)
- Connecting Rods/Supports (various)
- Adjustable Foot Pads (4x)
- Assembly Hardware (screws, bolts, Allen wrench)
- Anti-tipping Device (straps, screws)
3. Setup and Assembly
Assembly is designed to be straightforward and can typically be completed by one person without additional tools beyond what is provided.
- Unpack Components: Carefully remove all parts from the packaging. Lay them out on a clean, soft surface (e.g., carpet or blanket) to prevent scratches. Verify all parts against the "Parts List".
- Assemble the Base Frame: Begin by attaching the circular metal frame components. Follow the included diagram to connect the various metal rods and supports to form the main circular structure. Ensure all connections are finger-tight initially.
- Install Shelves: Insert the four internal shelves into their designated slots within the circular metal frame. The shelves are of varying sizes and should fit snugly. Secure them with the provided hardware.
- Attach Top and Bottom Panels: Secure the bottom panel to the base of the circular frame. Then, attach the top panel to the upper part of the frame. Ensure the panels are aligned correctly before tightening screws.
- Tighten All Fasteners: Once all components are in place, systematically tighten all screws and bolts using the provided Allen wrench. Do not overtighten.
- Attach Adjustable Foot Pads: Screw the adjustable foot pads into the bottom of the table legs/base. These can be adjusted later to level the table.
- Install Anti-Tipping Device: For safety, install the anti-tipping device. Attach one end of the strap to the back of the console table using the provided screw. Secure the other end to a wall stud or use appropriate wall anchors (not always included, may need to be purchased separately based on wall type). Ensure the table is stable and cannot tip forward.

Figure 3.1: Assembled Console Table showcasing the double round design and four storage tiers. This image provides a visual reference for the completed assembly.
4. Operating Instructions (Usage)
The EROMMY Console Table is designed for versatile use in various home environments.
- Placement: This narrow console table is suitable for entryways, hallways, living rooms (behind a sofa), bedrooms, or dining areas. Its compact design allows it to fit seamlessly into both small and large spaces.
- Storage and Display: Utilize the four open, staggered shelves for organizing books, magazines, photo frames, decorative accents, or other small essentials. The top surface can be used for lamps, vases, or other display items.
- Weight Capacity:
- Top Panel: Up to 150 lbs (68 kg)
- Each Internal Shelf: Up to 100 lbs (45 kg)
- Stability Adjustment: If the table wobbles, adjust the non-slip foot pads located at the bottom of the base by screwing them in or out until the table is stable on your floor surface.

Figure 4.1: Versatile Placement Options. This image demonstrates how the console table can be effectively used in different areas of a home, such as a living room, hallway, or bedroom.
5. Maintenance
Proper care will help maintain the appearance and longevity of your console table.
- Cleaning: Wipe surfaces with a soft, damp cloth. Avoid using harsh chemicals, abrasive cleaners, or polishes that may damage the finish. Dry immediately with a clean cloth.
- Spills: Clean up spills immediately to prevent staining or water damage to the wood surfaces.
- Hardware Check: Periodically check all screws and bolts to ensure they remain tight. Re-tighten as necessary to maintain structural integrity.
- Rust Resistance: The metal frame is designed to be rust-resistant, contributing to its durability over time.
- Protection: Use coasters or placemats under drinks and hot items to protect the tabletop from heat and moisture rings.
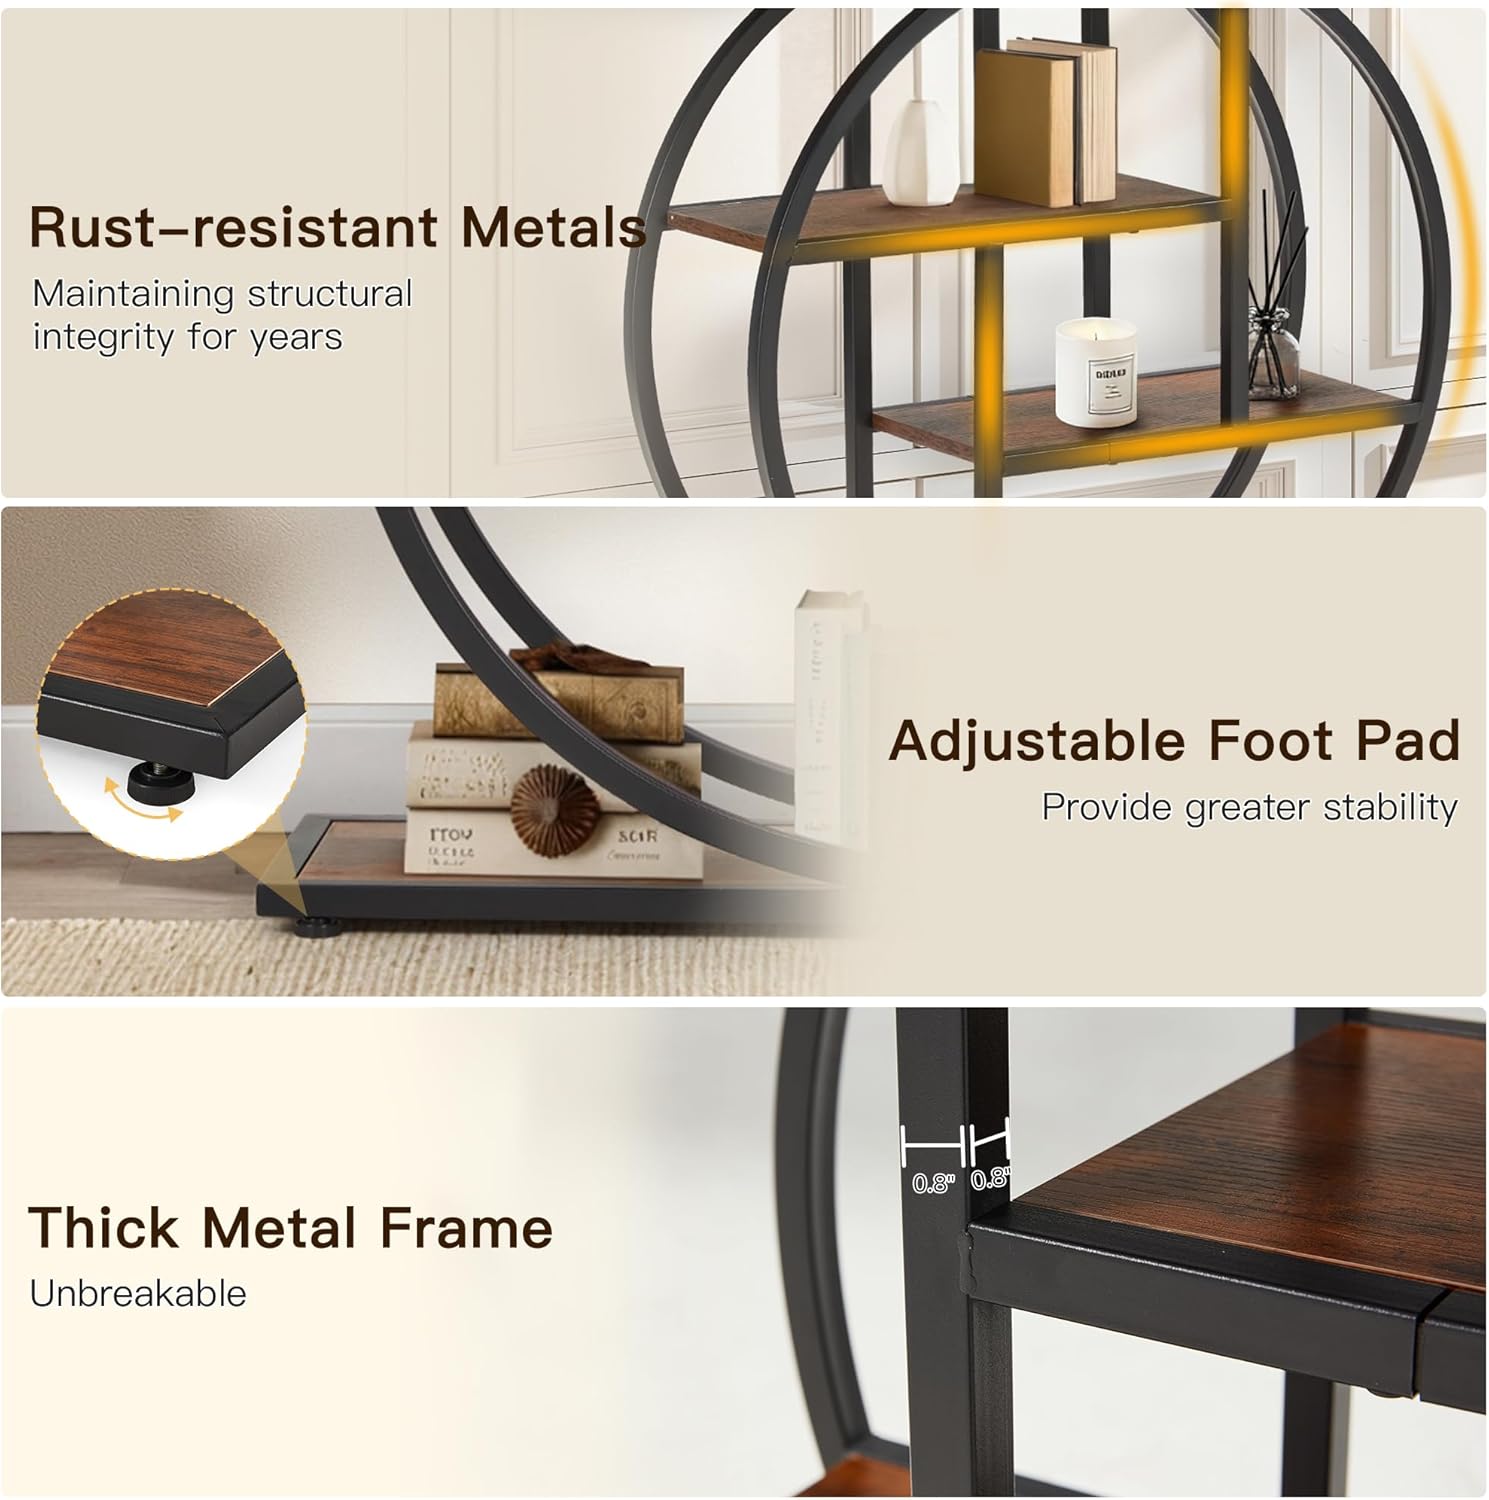
Figure 5.1: Key Features for Durability and Stability. This image highlights the rust-resistant metal components, adjustable foot pads for leveling, and the robust thickness of the metal frame, all contributing to the table's longevity and stability.
6. Troubleshooting
| Problem | Possible Cause | Solution |
|---|---|---|
| Table wobbles | Uneven floor surface; loose connections. | Adjust the non-slip foot pads until the table is stable. Check and tighten all assembly screws. |
| Parts do not fit together | Incorrect orientation; wrong parts used. | Refer to the assembly instructions and diagrams. Ensure parts are oriented correctly. Do not force parts together. |
| Missing hardware or damaged parts | Packaging error; shipping damage. | Do not proceed with assembly. Contact EROMMY customer support for replacement parts. |
7. Specifications
| Brand | EROMMY |
| Model Number | B0FND2FHNL |
| Product Dimensions (D x W x H) | 11.77" x 39.37" x 30" (29.9 cm x 100 cm x 76.2 cm) |
| Top Panel Material | Engineered Wood |
| Frame Material | Engineered Wood, Metal |
| Color | Brown |
| Tabletop Weight Capacity | Up to 150 lbs (68 kg) |
| Shelf Weight Capacity (each) | Up to 100 lbs (45 kg) |
| Assembly Required | Yes |
8. Warranty Information
EROMMY products are manufactured with quality and care. For specific warranty details regarding your console table, please refer to the warranty card included with your purchase or visit the official EROMMY website. Typically, warranties cover manufacturing defects under normal use.
Please retain your proof of purchase for any warranty claims.
9. Customer Support
If you have any questions, require assistance with assembly, or need to report missing/damaged parts, please contact EROMMY customer support.
- Online Support: Visit the official EROMMY website for FAQs and contact forms.
- Email: Refer to your purchase documentation for customer service email addresses.
- Amazon Store: You can also visit the EROMMY Store on Amazon for more information and contact options.