1. Introduction
Thank you for choosing the Temtop W100 Lite Professional Weather Station. This device provides real-time monitoring of indoor and outdoor temperature and humidity, atmospheric pressure, weather forecasts, moon phases, and includes an alarm clock function. This manual will guide you through the setup, operation, and maintenance of your weather station to ensure optimal performance.
2. Package Contents
Please check the package contents upon unboxing:
- Weather Station Main Unit
- Outdoor Sensor
- Power Adapter
- User Manual

Image: Contents of the Temtop W100 Lite package, showing the main weather station unit, the outdoor sensor, and the power adapter.
3. Product Overview
Familiarize yourself with the main components and display features of your Temtop W100 Lite Weather Station.
3.1 Main Unit Display

Image: Front view of the Temtop W100 Lite Weather Station, displaying various weather parameters and time information.
The main unit features a clear color display that shows the following information:
- Outdoor Temperature and Humidity
- Indoor Temperature and Humidity
- Weather Forecast (Sunny, Partially Sunny, Cloudy, Rainy, Snowy)
- Time and Date
- Moon Phase
- Atmospheric Pressure
- Comfort Level Indicator (Wet, Comfort, Dry)
- Sunrise and Sunset Times (for selected city)
3.2 Main Unit Buttons and Outdoor Sensor

Image: Detailed view of the weather station display with labels indicating each data field.
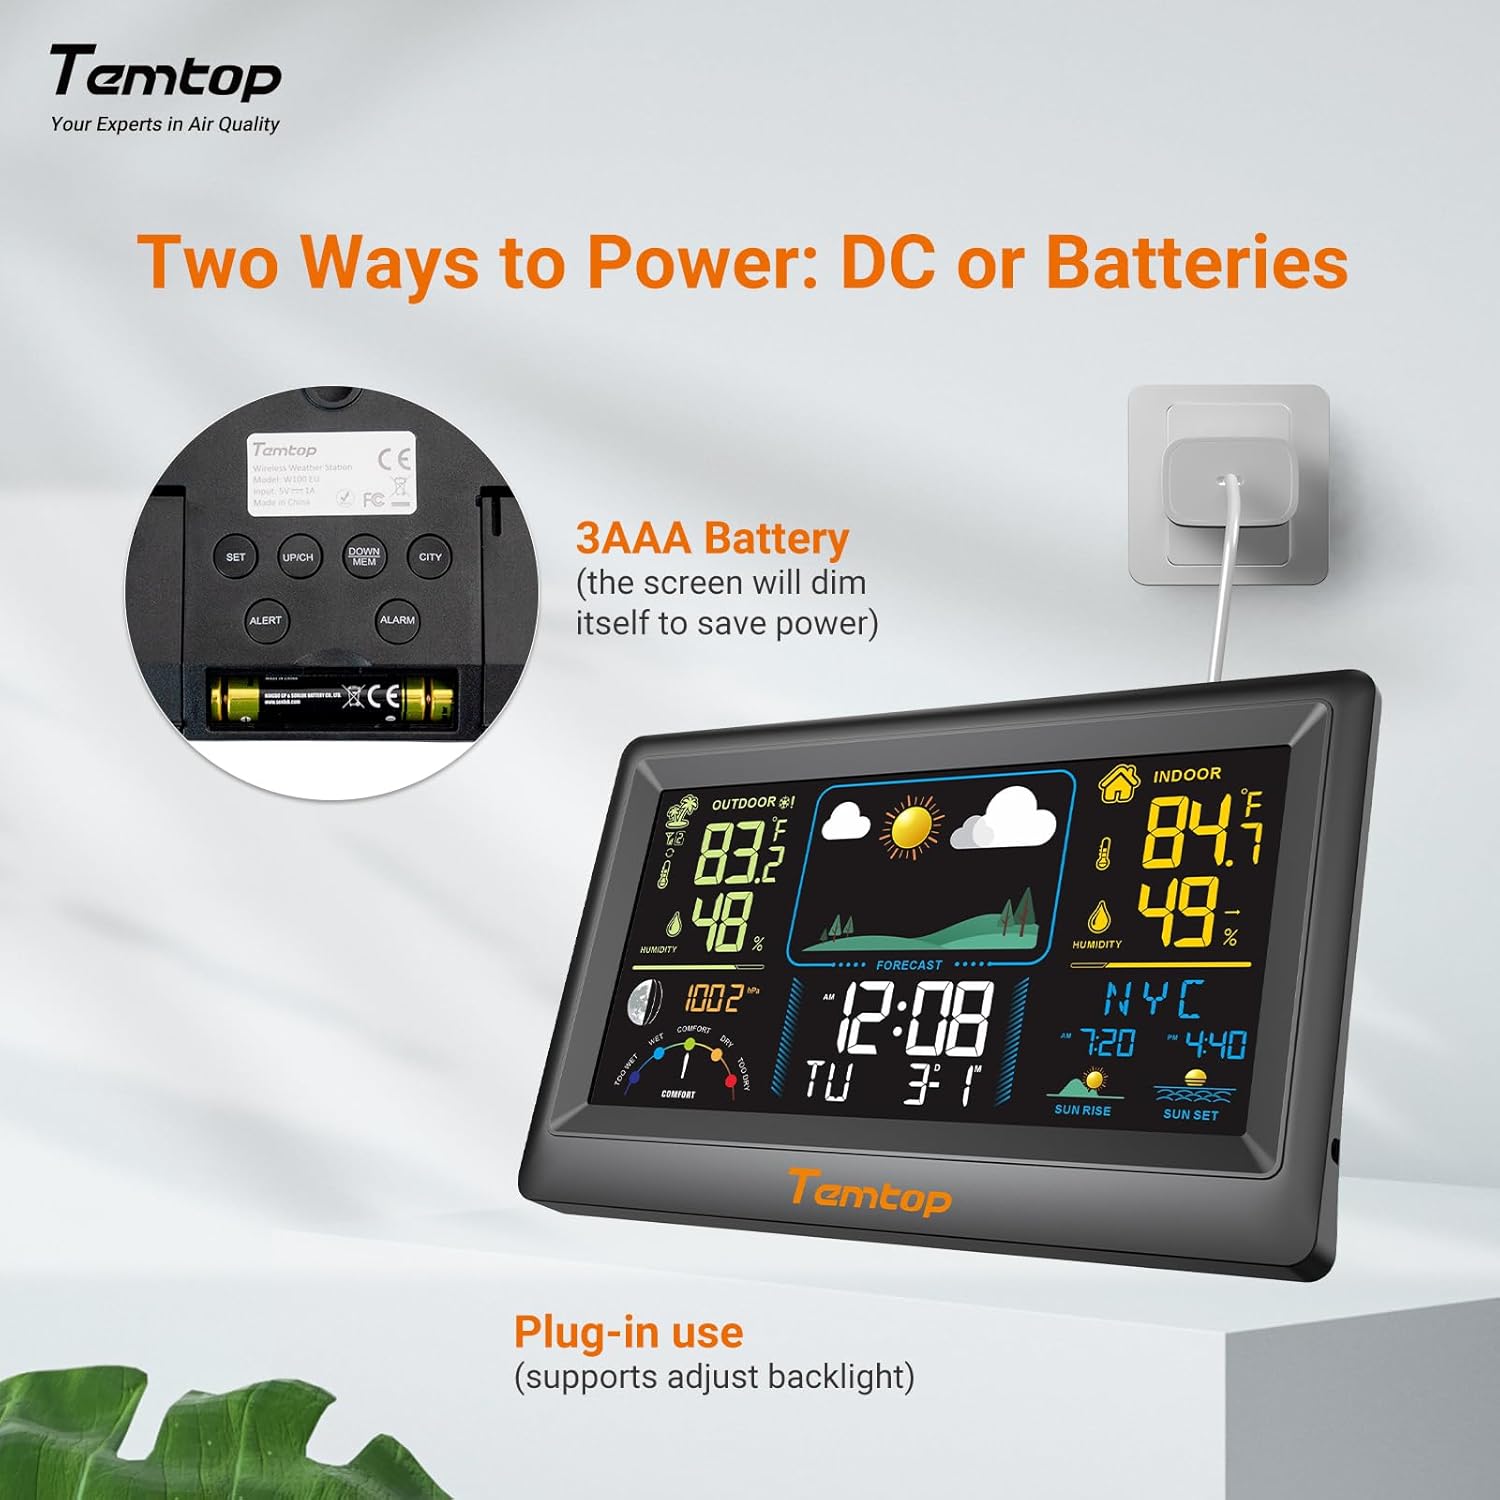
Image: Rear view of the weather station, highlighting the battery compartment, power input, and control buttons.
The main unit features several control buttons on the back for settings adjustment:
- SET Button: Enters/confirms settings.
- UP/CH Button: Adjusts values upwards, changes channels.
- DOWN/MEM Button: Adjusts values downwards, accesses min/max memory.
- ALERT Button: Sets temperature alerts.
- ALARM Button: Sets alarm time.
- CITY Button: Selects city for sunrise/sunset times.
The outdoor sensor transmits temperature and humidity data wirelessly to the main unit.
4. Setup
4.1 Powering the Device
The weather station can be powered by either the included AC adapter or 3x AAA batteries (not included for the main unit, but included for the outdoor sensor). For continuous backlight and optimal performance, AC power is recommended.
- Main Unit: Insert the AC adapter into the power port on the back of the unit and plug it into a wall outlet. Alternatively, insert 3x AAA batteries into the battery compartment.
- Outdoor Sensor: Insert 2x AAA batteries into the outdoor sensor's battery compartment.

Image: Example of digital displays, illustrating the clear readouts of temperature and humidity.

Image: Illustration of power modes, showing the weather station connected via AC adapter and the battery compartment. AC mode allows adjustable backlight, while battery mode conserves power by dimming the display.
4.2 Outdoor Sensor Placement
Place the outdoor sensor in a shaded area, protected from direct sunlight and rain, to ensure accurate temperature and humidity readings. The sensor has a wireless range of up to 100 meters (328 feet) in an open, unobstructed area.

Image: Diagram showing the wireless range of the outdoor sensor from the main unit, suitable for gardens, terraces, or rooftops.
4.3 Initial Settings (Time, Date, City)
Follow these steps to set the correct time, date, and city for accurate sunrise/sunset times:
- Press and hold the SET button to enter setting mode. The hour field will begin to flash.
- Use the UP/CH and DOWN/MEM buttons to adjust the hour.
- Press SET to confirm the hour and move to the next item (minute, year, month, day). Repeat the adjustment and confirmation process for each.
- After setting the date, briefly press the CITY button. The city code will flash.
- Use the UP/CH button to scroll through the list of cities until you find your location.
- Finally, press SET to confirm your city selection. The sunrise, sunset times, and date will now be accurately displayed.
Video: This video demonstrates how to set the time, date, and city on your Temtop W100 Lite Weather Station to ensure accurate display of local sunrise and sunset times.
5. Operation
5.1 Display Interpretation
The main display is divided into several sections for easy reading:
- Outdoor Section: Shows current outdoor temperature and humidity, and temperature trend.
- Indoor Section: Displays current indoor temperature and humidity, and temperature trend.
- Weather Forecast: Icons indicate the predicted weather for the next 12 hours (Sunny, Partially Sunny, Cloudy, Rainy, Snowy).
- Time & Date: Current time, day of the week, and date.
- Moon Phase: Displays the current moon phase.
- Atmospheric Pressure: Shows current barometric pressure and its trend.
- Comfort Level: A gauge indicating indoor comfort levels (Wet, Comfort, Dry).
- Sunrise/Sunset: Displays the local sunrise and sunset times for the selected city.

Image: Visual representation of the five weather forecast modes and moon phases displayed on the weather station.
5.2 Temperature Unit Selection
To switch between Celsius (°C) and Fahrenheit (°F), briefly press the UP/CH button during normal display mode.
5.3 Min/Max Temperature and Humidity Records
The weather station automatically records the minimum and maximum temperature and humidity values over a 24-hour period. Briefly press the DOWN/MEM button to view these records. Press again to cycle through min/max indoor and outdoor values.
5.4 Setting Alarms
The device supports both time alarms and temperature alerts.
- Time Alarm: Press the ALARM button to enter alarm setting mode. Use UP/CH and DOWN/MEM to adjust the alarm time, and ALARM to confirm. The snooze function can be activated by pressing any button (except ALARM) when the alarm sounds.
- Temperature Alerts: Press the ALERT button to set high/low temperature alerts for indoor or outdoor readings. Use UP/CH and DOWN/MEM to set the desired temperature thresholds.
6. Maintenance
- Clean the display and casing with a soft, damp cloth. Do not use abrasive cleaners or solvents.
- Replace batteries in the outdoor sensor when the low battery indicator appears on the main unit.
- Avoid exposing the main unit to direct sunlight, extreme temperatures, or moisture.
7. Troubleshooting
| Problem | Possible Cause | Solution |
|---|---|---|
| No display on main unit. | No power or low batteries. | Ensure AC adapter is properly connected or replace batteries. |
| Outdoor readings are inaccurate or not displayed. | Sensor out of range, interference, or low sensor batteries. | Move sensor closer to main unit, reduce obstructions, or replace sensor batteries. |
| Weather forecast seems incorrect. | The forecast is based on atmospheric pressure changes and is an estimation. | Allow time for the station to calibrate (up to 24 hours). It provides a general trend, not a precise forecast. |
8. Specifications
| Feature | Detail |
|---|---|
| Brand | Temtop |
| Model | EU-W100-Lite |
| Power Source | Battery (Main Unit: 3x AAA, Sensor: 2x AAA) / AC Adapter |
| Special Features | Customizable Alarms, Wireless Connectivity |
| Connectivity Technology | Wireless |
| Color | Black |
| Sensor Technology | Wireless |
| Operating Temperature (Upper) | 40 Degrees Celsius |
| Display Type | Color Display |
| Item Weight | 100 Grams |
9. Warranty and Support
Temtop products are designed for reliability and performance. For warranty information, technical support, or service inquiries, please refer to the warranty card included in your package or visit the official Temtop website. Keep your purchase receipt as proof of purchase.