1. Introduction
Thank you for purchasing the GUEVWES A9 Digital Camera. This compact camera is designed for both photography and vlogging, offering 4K video recording and 64MP still images. Its user-friendly interface, 180° flip screen, and autofocus capabilities make it suitable for beginners and enthusiasts alike. Please read this manual thoroughly before using your camera to ensure proper operation and to maximize its features.
2. Safety Information
- Do not disassemble: Do not attempt to disassemble or modify the camera. This may cause damage and void the warranty.
- Water exposure: This camera is not water-resistant. Avoid exposing it to water, rain, or high humidity.
- Temperature: Operate and store the camera within recommended temperature ranges (0°C to 40°C / 32°F to 104°F). Avoid extreme heat or cold.
- Cleaning: Use a soft, dry cloth for cleaning. Do not use harsh chemicals or solvents.
- Battery safety: Use only the specified battery type. Do not expose batteries to fire or extreme heat. Dispose of batteries properly.
- Children: Keep the camera and its accessories out of reach of small children to prevent accidents.
3. Package Contents
Please check that all items are present in your package:
- GUEVWES A9 Digital Camera
- Rechargeable Battery (AAA type, 1 included)
- USB Cable
- Wrist Strap
- User Manual
- (Optional: Micro SD Card, depending on purchase bundle)
4. Camera Overview
Familiarize yourself with the camera's physical features and controls.
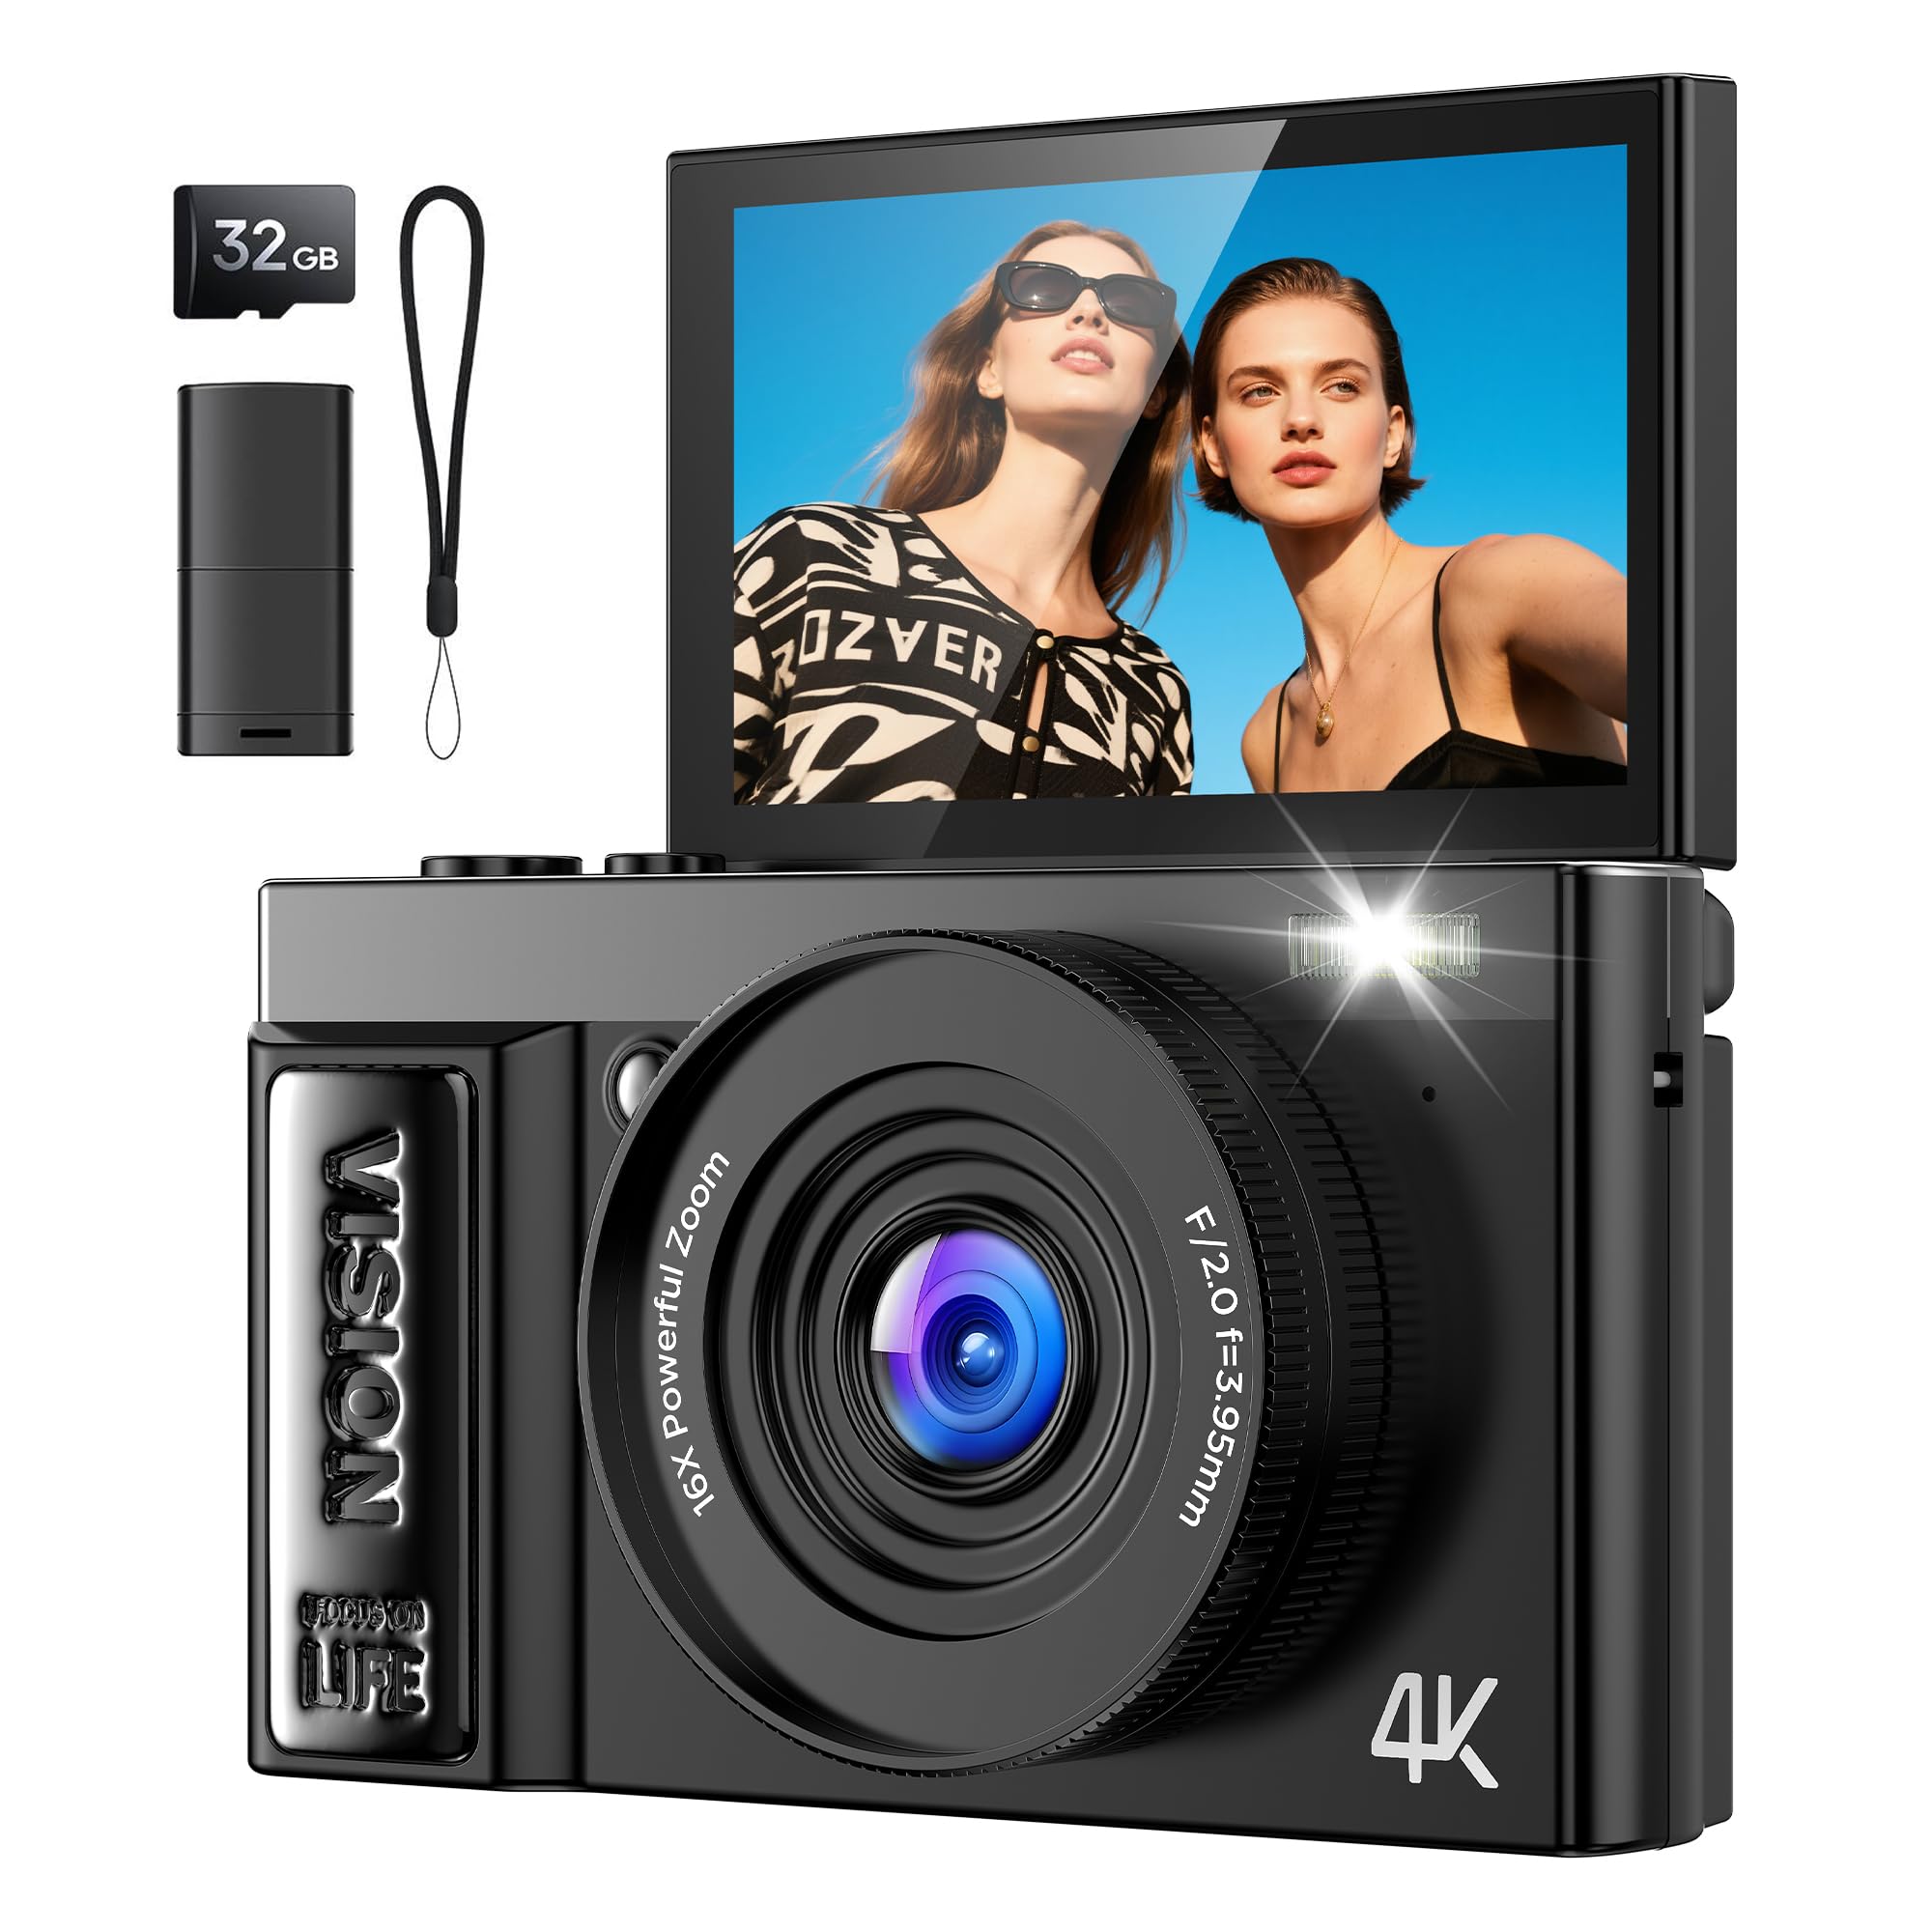
Figure 4.1: Front view of the GUEVWES A9 Digital Camera, highlighting the 180° flip screen in an upward position, ideal for vlogging. The lens, flash, and camera body are visible.
4.1 Front and Top View
- Lens: Captures images and videos.
- Flash: Provides illumination in low-light conditions.
- Shutter Button: Press halfway to focus, fully to take a photo or start/stop video.
- Power Button: Turns the camera on/off.
- Zoom Lever (T/W): Controls optical zoom (Telephoto/Wide-angle).

Figure 4.2: Rear view of the GUEVWES A9 Digital Camera, showing the LCD screen displaying a butterfly image, and the intuitive control buttons on the right side. A hand is holding the camera.
4.2 Rear View and Controls
- LCD Screen: 3-inch display for viewing images, videos, and menu options. Can flip 180°.
- MENU Button: Accesses the camera's settings menu.
- OK Button: Confirms selections in the menu.
- Directional Buttons (Up/Down/Left/Right): Navigate menus and adjust settings.
- Playback Button: Enters playback mode to view photos and videos.
- Delete Button: Deletes selected files.
- Mode Dial/Button: Switches between photo, video, and other shooting modes.
5. Setup
5.1 Battery Installation
- Locate the battery compartment cover on the bottom of the camera.
- Slide the cover latch to open the compartment.
- Insert the AAA battery, ensuring the correct polarity (+/-) as indicated inside the compartment.
- Close the battery compartment cover until it clicks securely.
5.2 Memory Card Installation
The camera supports Micro SD cards up to 32GB (not always included). A memory card is required to save photos and videos.
- Open the battery compartment cover. The memory card slot is usually located near the battery.
- Insert the Micro SD card with the metal contacts facing the front of the camera, pushing it gently until it clicks into place.
- To remove, push the card in again until it springs out.
- Close the battery compartment cover.
5.3 Charging the Battery
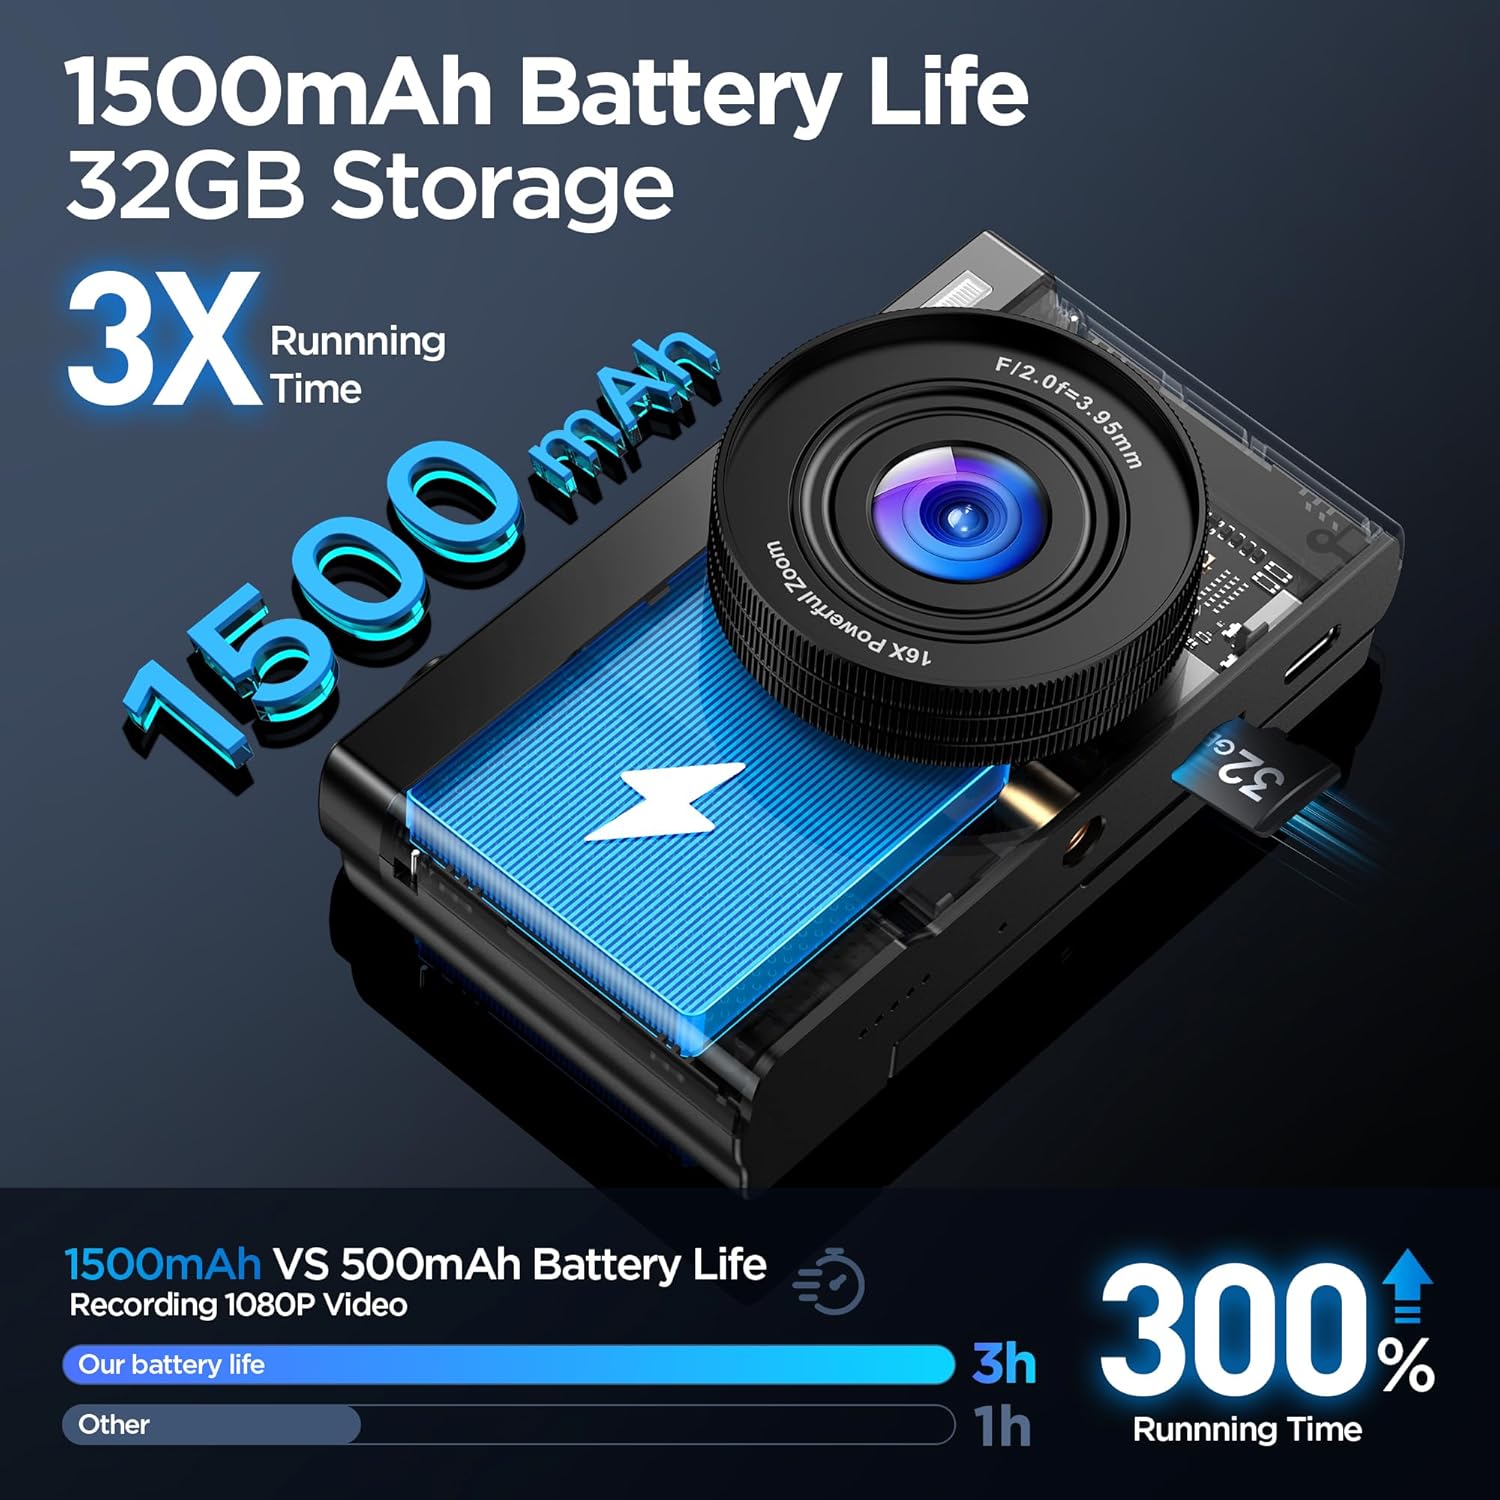
Figure 5.1: Internal view illustrating the 1500mAh battery and 32GB storage capacity of the GUEVWES A9 Digital Camera.
- Connect the camera to a power source (e.g., computer USB port or USB wall adapter) using the provided USB cable.
- The charging indicator light will illuminate. It will turn off or change color when charging is complete.
- A full charge typically takes approximately 2-3 hours.
5.4 Initial Power On and Settings
- Press and hold the Power button to turn on the camera.
- The first time you power on, you may be prompted to set the date, time, and language. Use the directional buttons to navigate and the OK button to confirm.
- It is recommended to format the memory card before first use. Go to MENU > System Settings > Format Card and confirm. This will erase all data on the card.
6. Operating the Camera
6.1 Basic Photography (Photo Mode)
- Turn on the camera. It will usually default to Photo Mode. If not, use the Mode button to select it.
- Frame your shot using the LCD screen.
- Press the Shutter button halfway down to activate autofocus. The focus frame will turn green when focus is achieved.
- Press the Shutter button fully to take the picture.
- Use the Zoom lever (T/W) to zoom in or out.
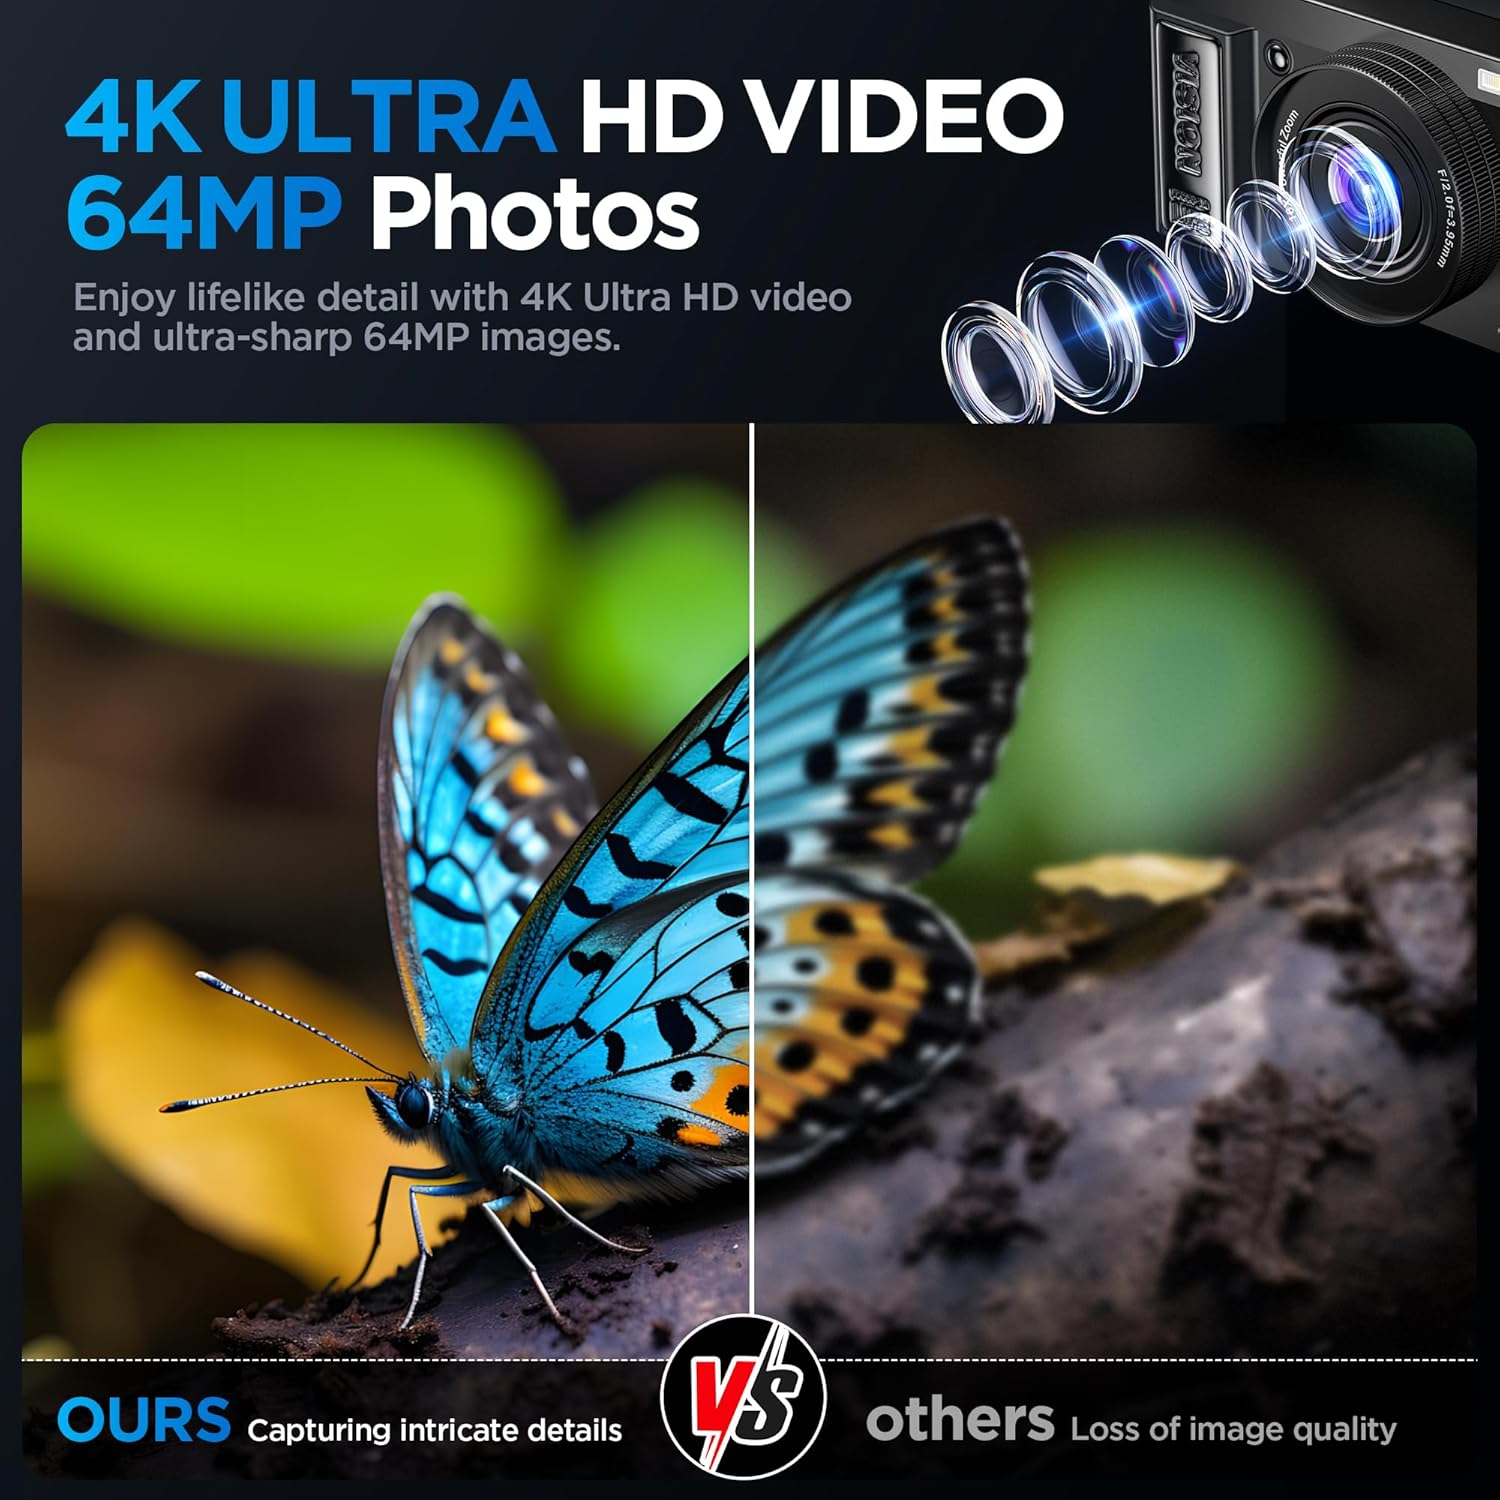
Figure 6.1: Image demonstrating the superior detail and clarity of 4K Ultra HD 64MP photos captured by the GUEVWES A9 camera compared to images with loss of quality from other devices.
6.2 Video Recording (Video Mode)
- Turn on the camera and switch to Video Mode.
- Frame your subject.
- Press the Shutter button fully to start recording. A red recording indicator will appear on the screen.
- Press the Shutter button fully again to stop recording.
6.3 Playback
- Press the Playback button to enter playback mode.
- Use the Left/Right directional buttons to scroll through your photos and videos.
- Press the OK button to play a video.
- Press the Playback button again to exit playback mode.
6.4 Menu Navigation
Press the MENU button to access camera settings. Use the directional buttons to navigate through options and sub-menus. Press OK to select an option and MENU again to exit.
- Photo Settings: Adjust resolution, ISO, white balance, exposure, etc.
- Video Settings: Adjust video resolution, loop recording, etc.
- System Settings: Set date/time, language, format card, auto power off, etc.
6.5 Special Features
- 180° Flip Screen: The LCD screen can be flipped upwards 180 degrees, allowing for easy self-recording (vlogging) or taking selfies.
- Autofocus: The camera features automatic focusing. Press the shutter button halfway to engage autofocus before taking a shot.
- 10x Optical Zoom: Use the zoom lever to optically zoom in on your subject without losing image quality.
- Creative Filters: The camera includes 12 creative filters (e.g., Warm color, Cool color, Nostalgia, Black and white) to enhance your photos directly. Access these through the menu or a dedicated button if available.
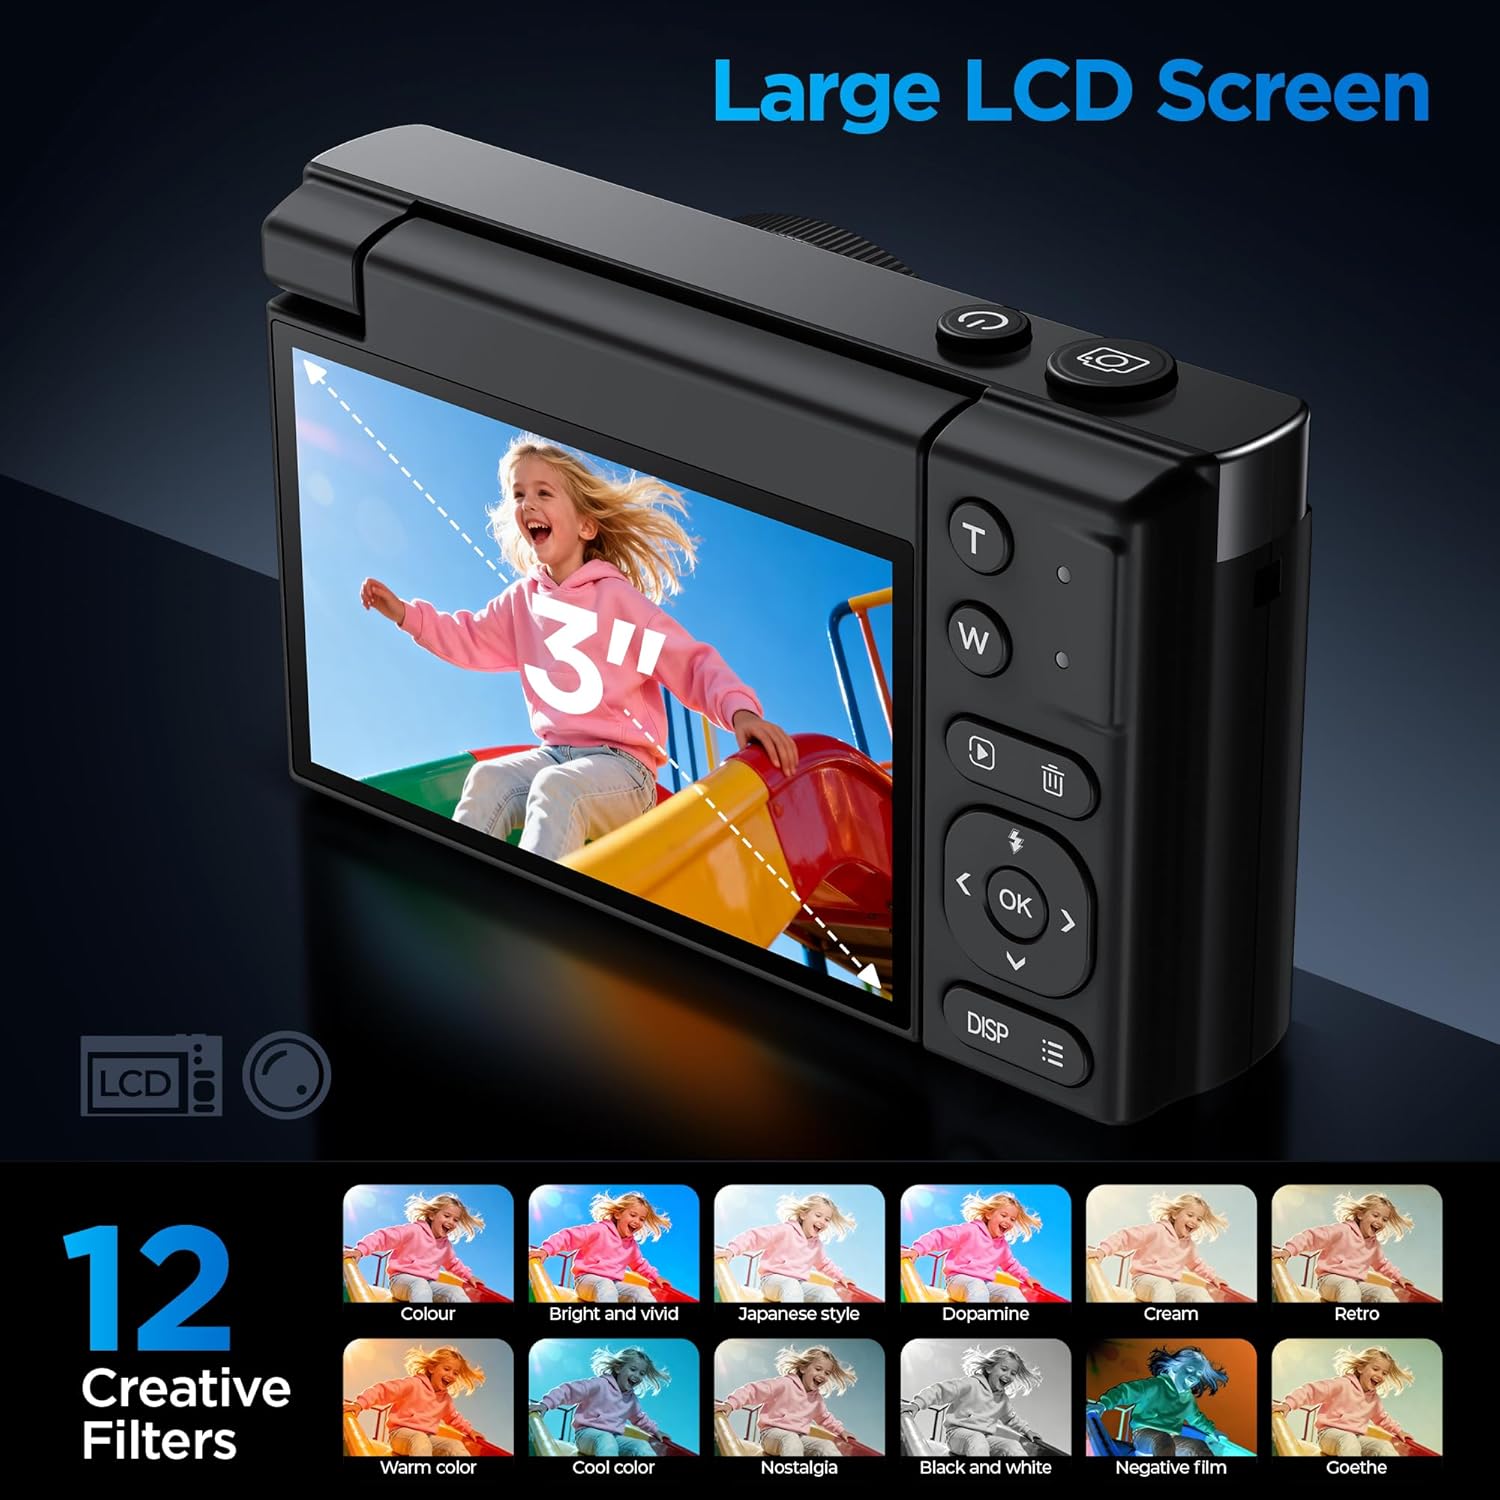
Figure 6.2: The GUEVWES A9 camera's large 3-inch LCD screen and a visual representation of the 12 creative filters available for photo enhancement.
- Anti-Shake Function: Activate the anti-shake feature in the settings to help reduce blur caused by camera movement, especially useful in challenging shooting conditions.

Figure 6.3: Visual demonstration of the Anti-Shake feature, showing a clear, steady shot when activated compared to a blurry image when it is off.
7. Maintenance
7.1 Cleaning the Camera
- Camera Body: Use a soft, lint-free cloth to wipe the camera body. For stubborn dirt, slightly dampen the cloth with water, then wipe dry.
- Lens: Use a lens brush or a blower to remove dust. For smudges, use a specialized lens cleaning cloth and lens cleaning solution. Do not touch the lens with your fingers.
- LCD Screen: Gently wipe the screen with a soft, dry microfiber cloth. Avoid pressing too hard.
7.2 Battery Care
- Charge the battery fully before first use.
- Avoid completely draining the battery regularly, as this can shorten its lifespan.
- If storing the camera for an extended period, remove the battery and store it in a cool, dry place.
7.3 Storage
- Store the camera in a dry, dust-free environment away from direct sunlight and extreme temperatures.
- Use a camera bag or case to protect it from scratches and impacts.
8. Troubleshooting
| Problem | Possible Cause | Solution |
|---|---|---|
| Camera does not turn on. | Battery is dead or incorrectly inserted. | Charge the battery. Reinsert the battery correctly. |
| Cannot take photos/videos. | Memory card is full, not inserted, or corrupted. | Insert a memory card. Delete unnecessary files. Format the card (backup data first). |
| Images are blurry. | Camera shake, out of focus, or low light. | Hold the camera steady. Ensure autofocus locks before shooting. Use flash or enable Anti-Shake. |
| Flash does not fire. | Flash is disabled or in a mode where it won't fire. | Check flash settings in the menu. Ensure it's set to Auto or Forced Flash. |
| Camera freezes. | Software glitch. | Remove and reinsert the battery to reset the camera. |
9. Specifications
| Brand | GUEVWES |
| Model Name | WT-A9 |
| Effective Still Resolution | 64 MP |
| Video Resolution | 1080p (Supports 4K capture) |
| Optical Zoom | 10x |
| Screen Size | 3 Inches |
| Display Type | LCD |
| Autofocus | Yes |
| Memory Storage Capacity | 32 GB (Micro SD, not always included) |
| Battery Type | AAA (1 included) |
| Item Weight | 0.4 Kilograms |
| Connectivity Technology | USB |
| Special Feature | 4K Video Capture, 180° Flip Screen |
10. Warranty and Support
10.1 Product Warranty
The GUEVWES A9 Digital Camera comes with a 6-month warranty from the date of purchase. This warranty covers manufacturing defects and malfunctions under normal use. It does not cover damage caused by misuse, accidents, unauthorized repairs, or natural disasters.
Please retain your proof of purchase for warranty claims.
10.2 Customer Support
If you encounter any issues or have questions regarding your GUEVWES A9 Digital Camera, please contact our customer support team. Refer to the contact information provided with your purchase or visit the official GUEVWES website for assistance.
Online Support: www.guevwes.com/support (Example link, replace with actual if available)


