Introduction
The FEELWORLD FW759PRO is a 7-inch full HD IPS touchscreen camera monitor designed to enhance your video production workflow. It features a 1280x800 resolution, 1000:1 contrast ratio, and a 178° ultra-wide viewing angle, providing a clear and detailed display for precise monitoring. This manual will guide you through the setup, operation, and maintenance of your FW759PRO monitor.
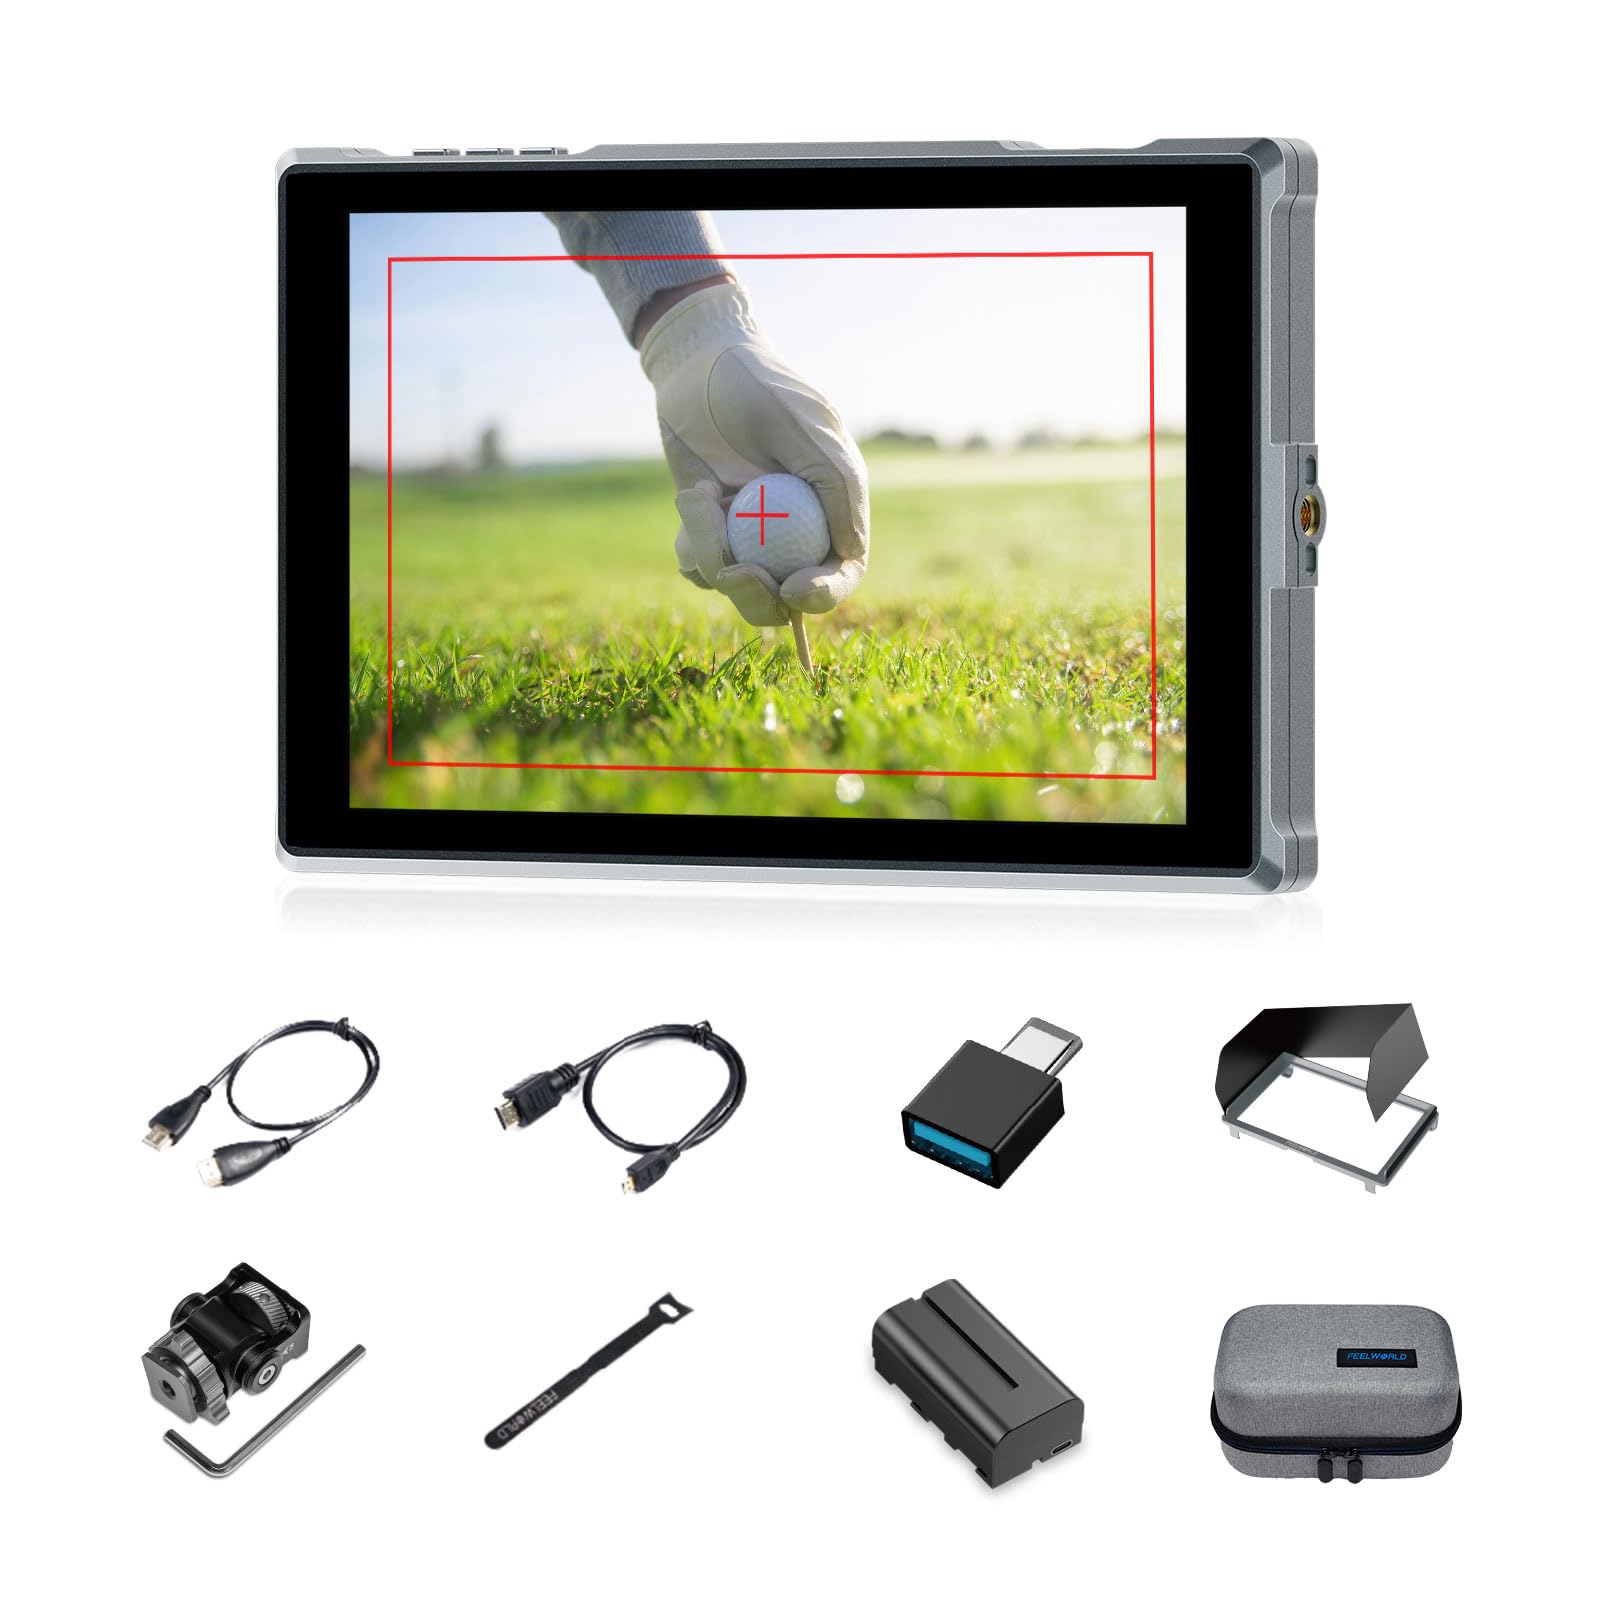
Figure 1: FEELWORLD FW759PRO Monitor Overview
Key Features:
- 7-inch Full HD IPS Touchscreen (1280x800 resolution)
- 4K HDMI Input & Output (up to 4K30Hz) and AV Input
- Slim and Lightweight Design (22mm thickness, 300g weight)
- Multiple Power Options: NP-F series battery, 12V DC IN, 5V Type-C
- Advanced Monitoring Functions: Histogram, Embedded Audio, False Colors, Peaking Filter, etc.
- Customizable Features: 4 groups of menu settings, 9:16 vertical screen marker
Setup
1. Package Contents
Verify that all items are present in the package:
- 1 x FW759PRO Monitor
- 1 x HDMI Cable
- 1 x Micro HDMI Cable
- 1 x Mini Hot Shoe Mount + Hex Wrench
- 1 x USB-A to USB-C Adapter
- 1 x Sun Shade + Frame
- 1 x Cable Management Tie
- 1 x Quick Start Guide
- 1 x F550 Battery
- 1 x Bag

Figure 2: Included Accessories
2. Powering the Monitor
The FW759PRO offers three power options:
- NP-F Series Battery: Attach a compatible NP-F series battery to the battery plate on the rear of the monitor.
- 12V DC IN: Connect a 12V DC power adapter (not included, suitable for 1A, DC 5.5*2.1mm plug) to the "DC IN 12V" port.
- 5V Type-C: Connect a 5V/2A (or higher) Type-C power source to the "TYPE-C 5V" port.

Figure 3: Power Input Options
3. Mounting the Monitor
The monitor features two 1/4"-20 mounting ports on its sides for versatile attachment to camera rigs, arms, or tripods. Use the included mini hot shoe mount to attach it to your camera's hot shoe or cold shoe mount.

Figure 4: 1/4 Inch Mounting Ports
4. Connecting to a Camera/Device
The FW759PRO supports 4K HDMI and AV inputs:
- HDMI Input: Connect your camera or video source using an HDMI cable to the HDMI port. The monitor supports up to 4K30Hz signals.
- AV Input: For specialized or legacy devices, use the AV input port.

Figure 5: Connectivity Ports
Operating Instructions
1. Power On/Off
Press and hold the power button located on the top edge of the monitor to turn it on or off.
2. Touchscreen Operation
The FW759PRO features an intuitive touchscreen interface for menu navigation and function control.
- Adjust Backlight: Swipe up/down on the left half of the screen.
- Adjust Volume: Swipe up/down on the right half of the screen.
- Access Shortcut Menu: Swipe up/down on the bottom of the screen.

Figure 6: Touchscreen Gestures
3. Menu Navigation and Custom Buttons
Access the main menu by tapping the screen. Navigate through options using touch. The monitor also features customizable function buttons (F1, F2, F3) on the top edge, allowing quick access to frequently used features.

Figure 7: Menu and Custom Buttons
4. Advanced Monitoring Functions
The FW759PRO includes several tools for precise exposure and focus control:
- Histogram: Displays the tonal distribution of your image.
- Peaking Filter: Highlights sharp edges to assist with focus.
- Embedded Audio: Monitors audio levels.
- False Colors: Helps set exposure by displaying different exposure levels as distinct colors.
- Check Field: Assists in calibrating the monitor.
- Nine Grid: Aids in composition.
- Screen Marker: Various aspect ratio markers for framing.
- Center Marker: Marks the center of the screen.
- Ratio Marker: Provides different aspect ratio guides.
- Overscan: Adjusts the display area.
- Anamorphic Mode: De-squeezes anamorphic footage (1.33x, 1.6x, 2.0x, or custom).
- Image Flip: Flips the image horizontally or vertically.
- Image Freeze: Freezes the current frame.
- Zoom-In: Magnifies a portion of the image for detailed inspection.
- Pixel-to-Pixel: Displays the image at its native resolution without scaling.

Figure 8: Auxiliary Functions Overview

Figure 9: False Color Function

Figure 10: Anamorphic Mode
5. New Feature Upgrades
- 9:16 Vertical Screen Marker: Ideal for content creators producing vertical video for platforms like TikTok and YouTube Shorts.
- 4 Groups Menu Setting Saving: Save up to four custom menu configurations for quick recall. Once settings are adjusted, they save automatically and can be called directly.

Figure 11: 9:16 Vertical Screen Marker
Maintenance
1. Cleaning the Monitor
- Use a soft, lint-free cloth to gently wipe the screen and body of the monitor.
- For stubborn smudges, slightly dampen the cloth with water or a screen-safe cleaning solution.
- Avoid using harsh chemicals, solvents, or abrasive materials, as these can damage the screen or finish.
2. Battery Care
- Store batteries in a cool, dry place when not in use.
- Avoid fully discharging lithium-ion batteries frequently to prolong their lifespan.
- If storing for extended periods, charge batteries to approximately 50-60% capacity.
Troubleshooting
No Signal Displayed
- Check Cable Connections: Ensure HDMI or AV cables are securely connected to both the monitor and the camera/source.
- Verify Input Source: Confirm that the correct input source (HDMI or AV) is selected on the monitor.
- Camera Output Settings: Check your camera's video output settings to ensure it is sending a signal and that the resolution/frame rate is compatible with the monitor (up to 4K30Hz).
- Test with Another Cable/Device: If possible, try a different HDMI/AV cable or connect the monitor to another video source to isolate the issue.
Monitor Does Not Power On
- Check Battery: Ensure the NP-F battery is charged and correctly installed.
- Verify Power Adapter: If using DC IN or Type-C, confirm the power adapter is connected and providing sufficient power (12V DC IN, 5V/2A Type-C).
- Power Button: Ensure the power button is pressed and held for a few seconds to initiate power-on.
Touchscreen Unresponsive
- Restart Monitor: Power off and then power on the monitor.
- Clean Screen: Ensure the screen is clean and free of debris or moisture that might interfere with touch input.
Specifications
| Feature | Detail |
|---|---|
| Brand | FEELWORLD |
| Model Name | FW759PRO |
| Screen Size | 7 Inches |
| Resolution | 1280x800 |
| Aspect Ratio | 16:10 |
| Contrast Ratio | 1000:1 |
| Display Type | IPS |
| Viewing Angle | 178 Degrees |
| Connectivity Technology | Auxiliary, HDMI |
| Hardware Connectivity | HDMI |
| Additional Features | Touchscreen, Portable |
| Response Time | 2 Milliseconds |
| Total Number of HDMI Ports | 2 |
| Manufacturer | LAIZESKE |
Warranty and Support
Warranty Information
The FEELWORLD FW759PRO monitor comes with a 1-year warranty from the date of purchase. This warranty covers manufacturing defects and malfunctions under normal use. Please retain your proof of purchase for warranty claims.
For detailed warranty terms and conditions, please refer to the official FEELWORLD website or contact their customer support.
Customer Support
If you encounter any issues not covered in this manual or require further assistance, please contact FEELWORLD customer support. Contact information can typically be found on the official FEELWORLD website or in the Quick Start Guide included with your product.