1. Introduction
This manual provides comprehensive instructions for the safe and effective use of your SASKATE Underground Cable Locator Wire Tracker Detector. This device is designed to assist in the maintenance and diagnosis of various cable types, including telephone, data, security, and communication lines. Please read this manual thoroughly before operation to ensure proper functionality and to prevent damage to the unit or injury.
2. Safety Information
- Always ensure the device is powered off when not in use or when connecting/disconnecting accessories.
- Do not attempt to locate live electrical wires carrying high voltage. This device is intended for low-voltage communication and data cables.
- Use only the specified battery type (6F22) and ensure correct polarity during installation.
- Keep the device dry and away from extreme temperatures.
- Do not open the device casing; there are no user-serviceable parts inside.
- Dispose of batteries responsibly according to local regulations.
3. Package Contents
Verify that all items listed below are present in your package:
- 1 x Underground Cable Locator (Transmitter Unit)
- 1 x Receiver (Probe Unit)
- 1 x Connector Accessory (RJ11/RJ45 cable with alligator clips)
- 1 x Earphones
- 1 x Instruction Manual (this document)
- 1 x Carrying Bag
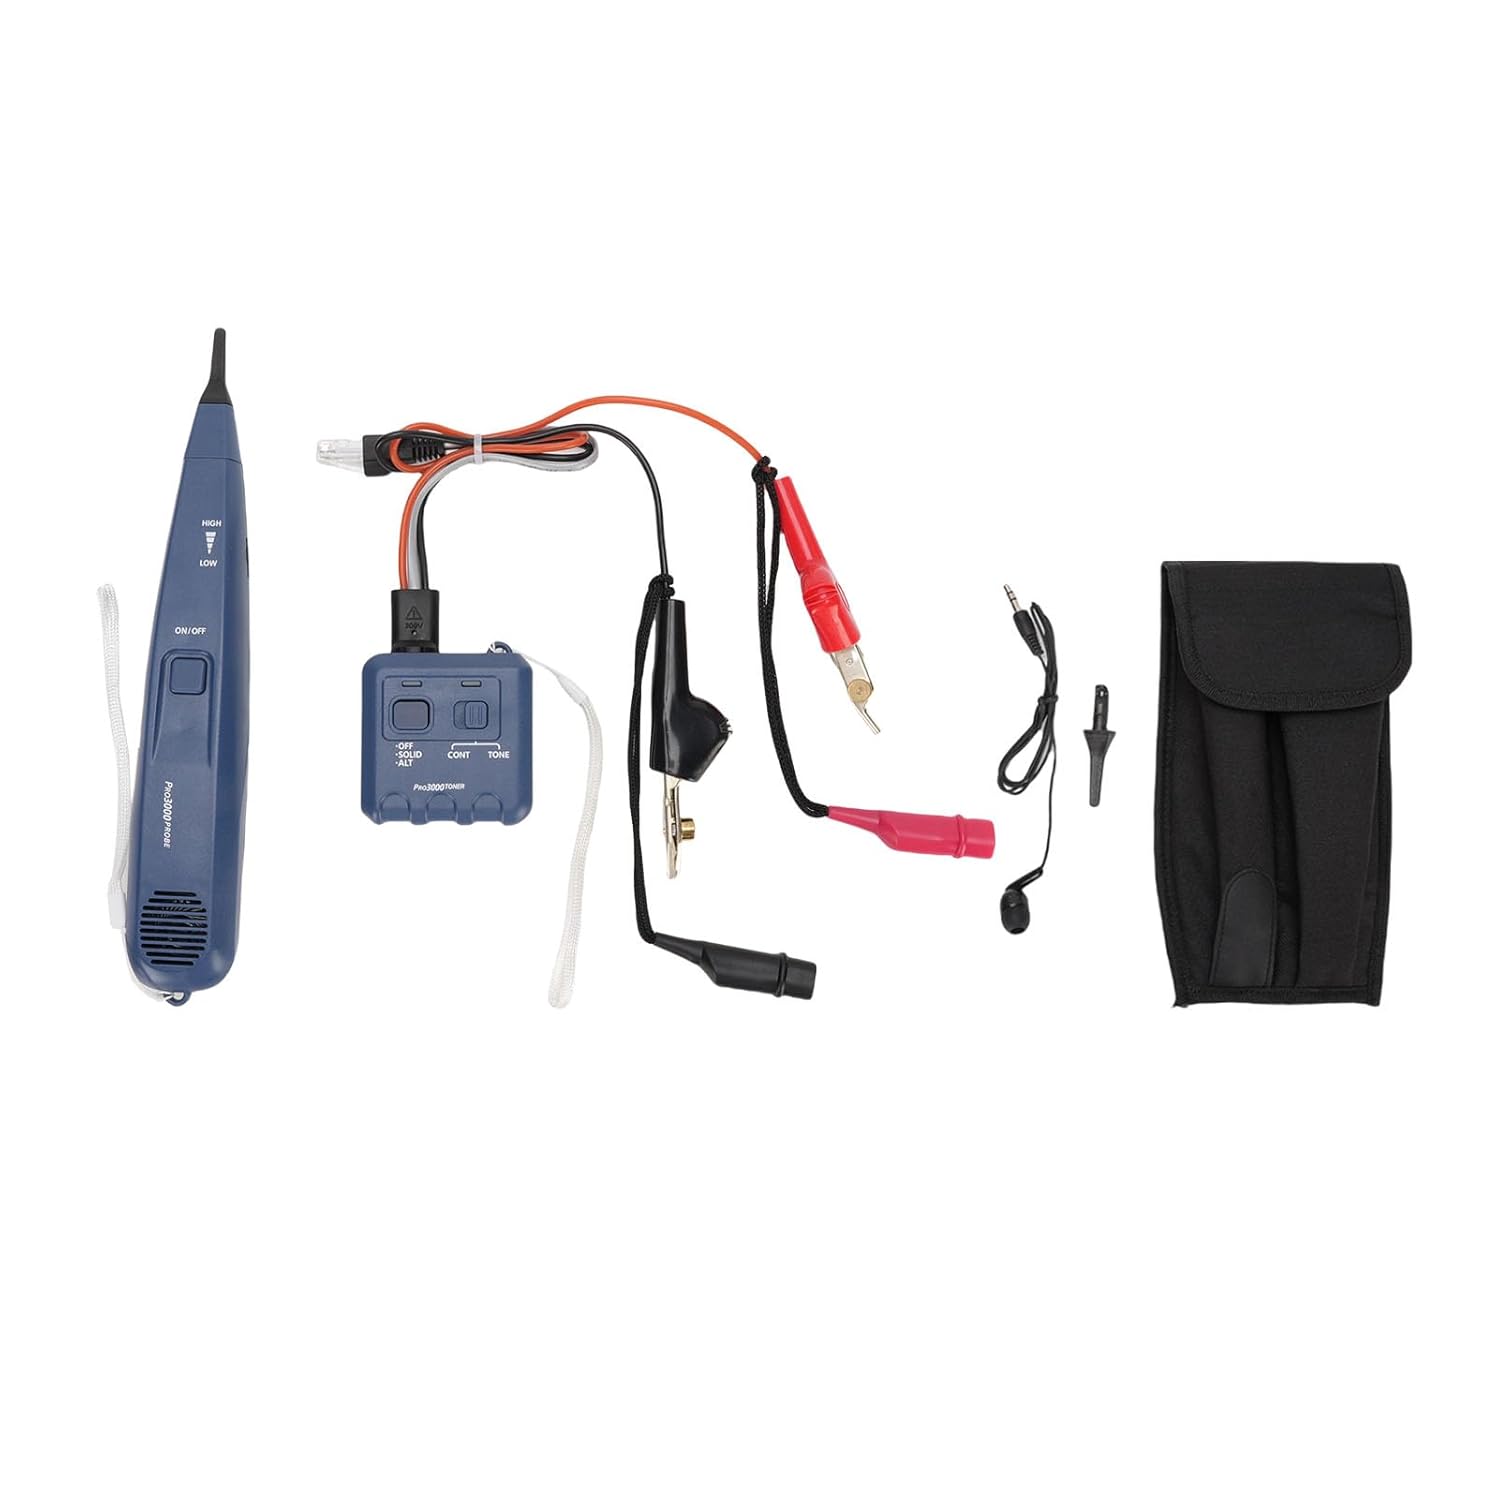
Figure 3.1: Complete package contents including the transmitter, receiver, cables, earphones, and carrying bag.
4. Product Overview
The SASKATE Underground Cable Locator system consists of two main units: the Transmitter and the Receiver (Probe).
4.1. Transmitter Unit
The transmitter generates a signal that is sent through the cable to be traced. It features various modes for different testing scenarios.

Figure 4.1: Transmitter Unit. Features include OFF, CONT (Continuous), and TONE modes, along with an RJ11/RJ45 port and alligator clip connections.
4.2. Receiver (Probe) Unit
The receiver detects the signal emitted by the transmitter, allowing you to trace the cable's path and identify its location. It provides both audible and visual indications.

Figure 4.2: Receiver (Probe) Unit. Features include an ON/OFF switch, HIGH/LOW sensitivity settings, and a speaker for audible signals.
5. Setup
5.1. Battery Installation
Both the Transmitter and Receiver units require one 6F22 battery each (not included).
- Locate the battery compartment cover on the back of each unit.
- Open the cover and insert one 6F22 battery, ensuring correct polarity (+/-).
- Close the battery compartment cover securely.
5.2. Connecting the Transmitter
Connect the transmitter to the cable you wish to trace using the appropriate connector accessory:
- For RJ11/RJ45 Cables: Plug the RJ11 or RJ45 connector directly into the corresponding port on the transmitter.
- For Bare Wires or Alligator Clip Connections: Use the provided connector accessory with alligator clips. Connect the red clip to one wire and the black clip to the other wire or ground, then plug the accessory into the transmitter's RJ11/RJ45 port.
5.3. Earphone Connection
For noisy environments or discreet operation, plug the earphones into the 3.5mm earphone jack on the receiver unit.
6. Operating Instructions
6.1. Powering On/Off
- Transmitter: Select the desired mode (CONT or TONE) to power on. Select OFF to power off.
- Receiver: Slide the ON/OFF switch to ON to power on. Slide to OFF to power off.
6.2. Selecting Transmitter Mode
- CONT (Continuous): Generates a continuous tone (1000Hz nominal value). Useful for general cable tracing.
- TONE (Alternating): Generates an alternating tone (1000Hz/1500Hz nominal value). This mode can help differentiate the signal from background noise.
6.3. Using the Receiver (Probe)
- Power on the receiver unit.
- Adjust the sensitivity switch to HIGH or LOW. Start with HIGH for initial tracing, then switch to LOW for more precise localization.
- Move the tip of the receiver along the suspected path of the cable.
- Listen for the audible tone from the speaker or earphones. The tone will be loudest when the receiver is directly over the cable.
- Observe the LED indicators. Brighter LEDs indicate a stronger signal, confirming proximity to the cable.
6.4. Applications
- Line Searching: Connect the transmitter to one end of the cable. Use the receiver to follow the signal and locate the cable's path.
- Short Circuit Testing: The device can help identify short circuits by changes in the signal. Consult the specific tone characteristics for short circuit indication.
- Clear, Busy, Ringing Recognition: When connected to telephone lines, the device can help identify line status (clear, busy, or ringing) through distinct tone patterns.
7. Maintenance
7.1. Cleaning
Wipe the device with a soft, dry cloth. Do not use abrasive cleaners or solvents, as these may damage the housing.
7.2. Battery Replacement
Replace batteries when the signal becomes weak or the device fails to power on. Always replace both batteries simultaneously for optimal performance. Remove batteries if the device will not be used for an extended period.
7.3. Storage
Store the device in its carrying bag in a cool, dry place, away from direct sunlight and extreme temperatures.
8. Troubleshooting
- No Signal/Weak Signal:
- Check battery levels in both units and replace if necessary.
- Ensure all connections between the transmitter and the cable are secure.
- Verify the transmitter is powered on and in the correct mode.
- Adjust the receiver's sensitivity (try HIGH first).
- Ensure the cable is not too deep or heavily shielded, which can attenuate the signal.
- Interference/False Readings:
- Environmental factors (e.g., nearby electrical lines, metal objects) can cause interference. Try to move away from such sources.
- Ensure the cable being traced is isolated from other active cables if possible.
9. Specifications
| Item Type | Underground Cable Locator |
| Material | ABS |
| Detector Battery | 6F22 Battery x 1 (Not Included) |
| Receiver Battery | 6F22 Battery x 1 (Not Included) |
| Frequency (Continuous) | 1000Hz Nominal Value |
| Frequency (Alternating) | 1000Hz/1500Hz Nominal Value |
| Output in Tone Mode | 8dBm~600Ω |
| Earphone Jack | 3.5mm |
| Package Dimensions | 11.02 x 5.91 x 2.36 inches |
| Item Weight | 15.1 ounces |
| Model Number | SASKATE6bcm98v1tr |
10. Warranty and Support
For warranty information or technical support, please refer to the contact details provided at your point of purchase or visit the official SASKATE website. Keep your purchase receipt as proof of purchase for any warranty claims.