Introduction
This manual provides essential information for the assembly, operation, and maintenance of your PRAISUN 51 Inch Plant Stand with Grow Lights. This multi-tiered indoor plant stand is designed to enhance your living space while providing optimal light conditions for your plants.
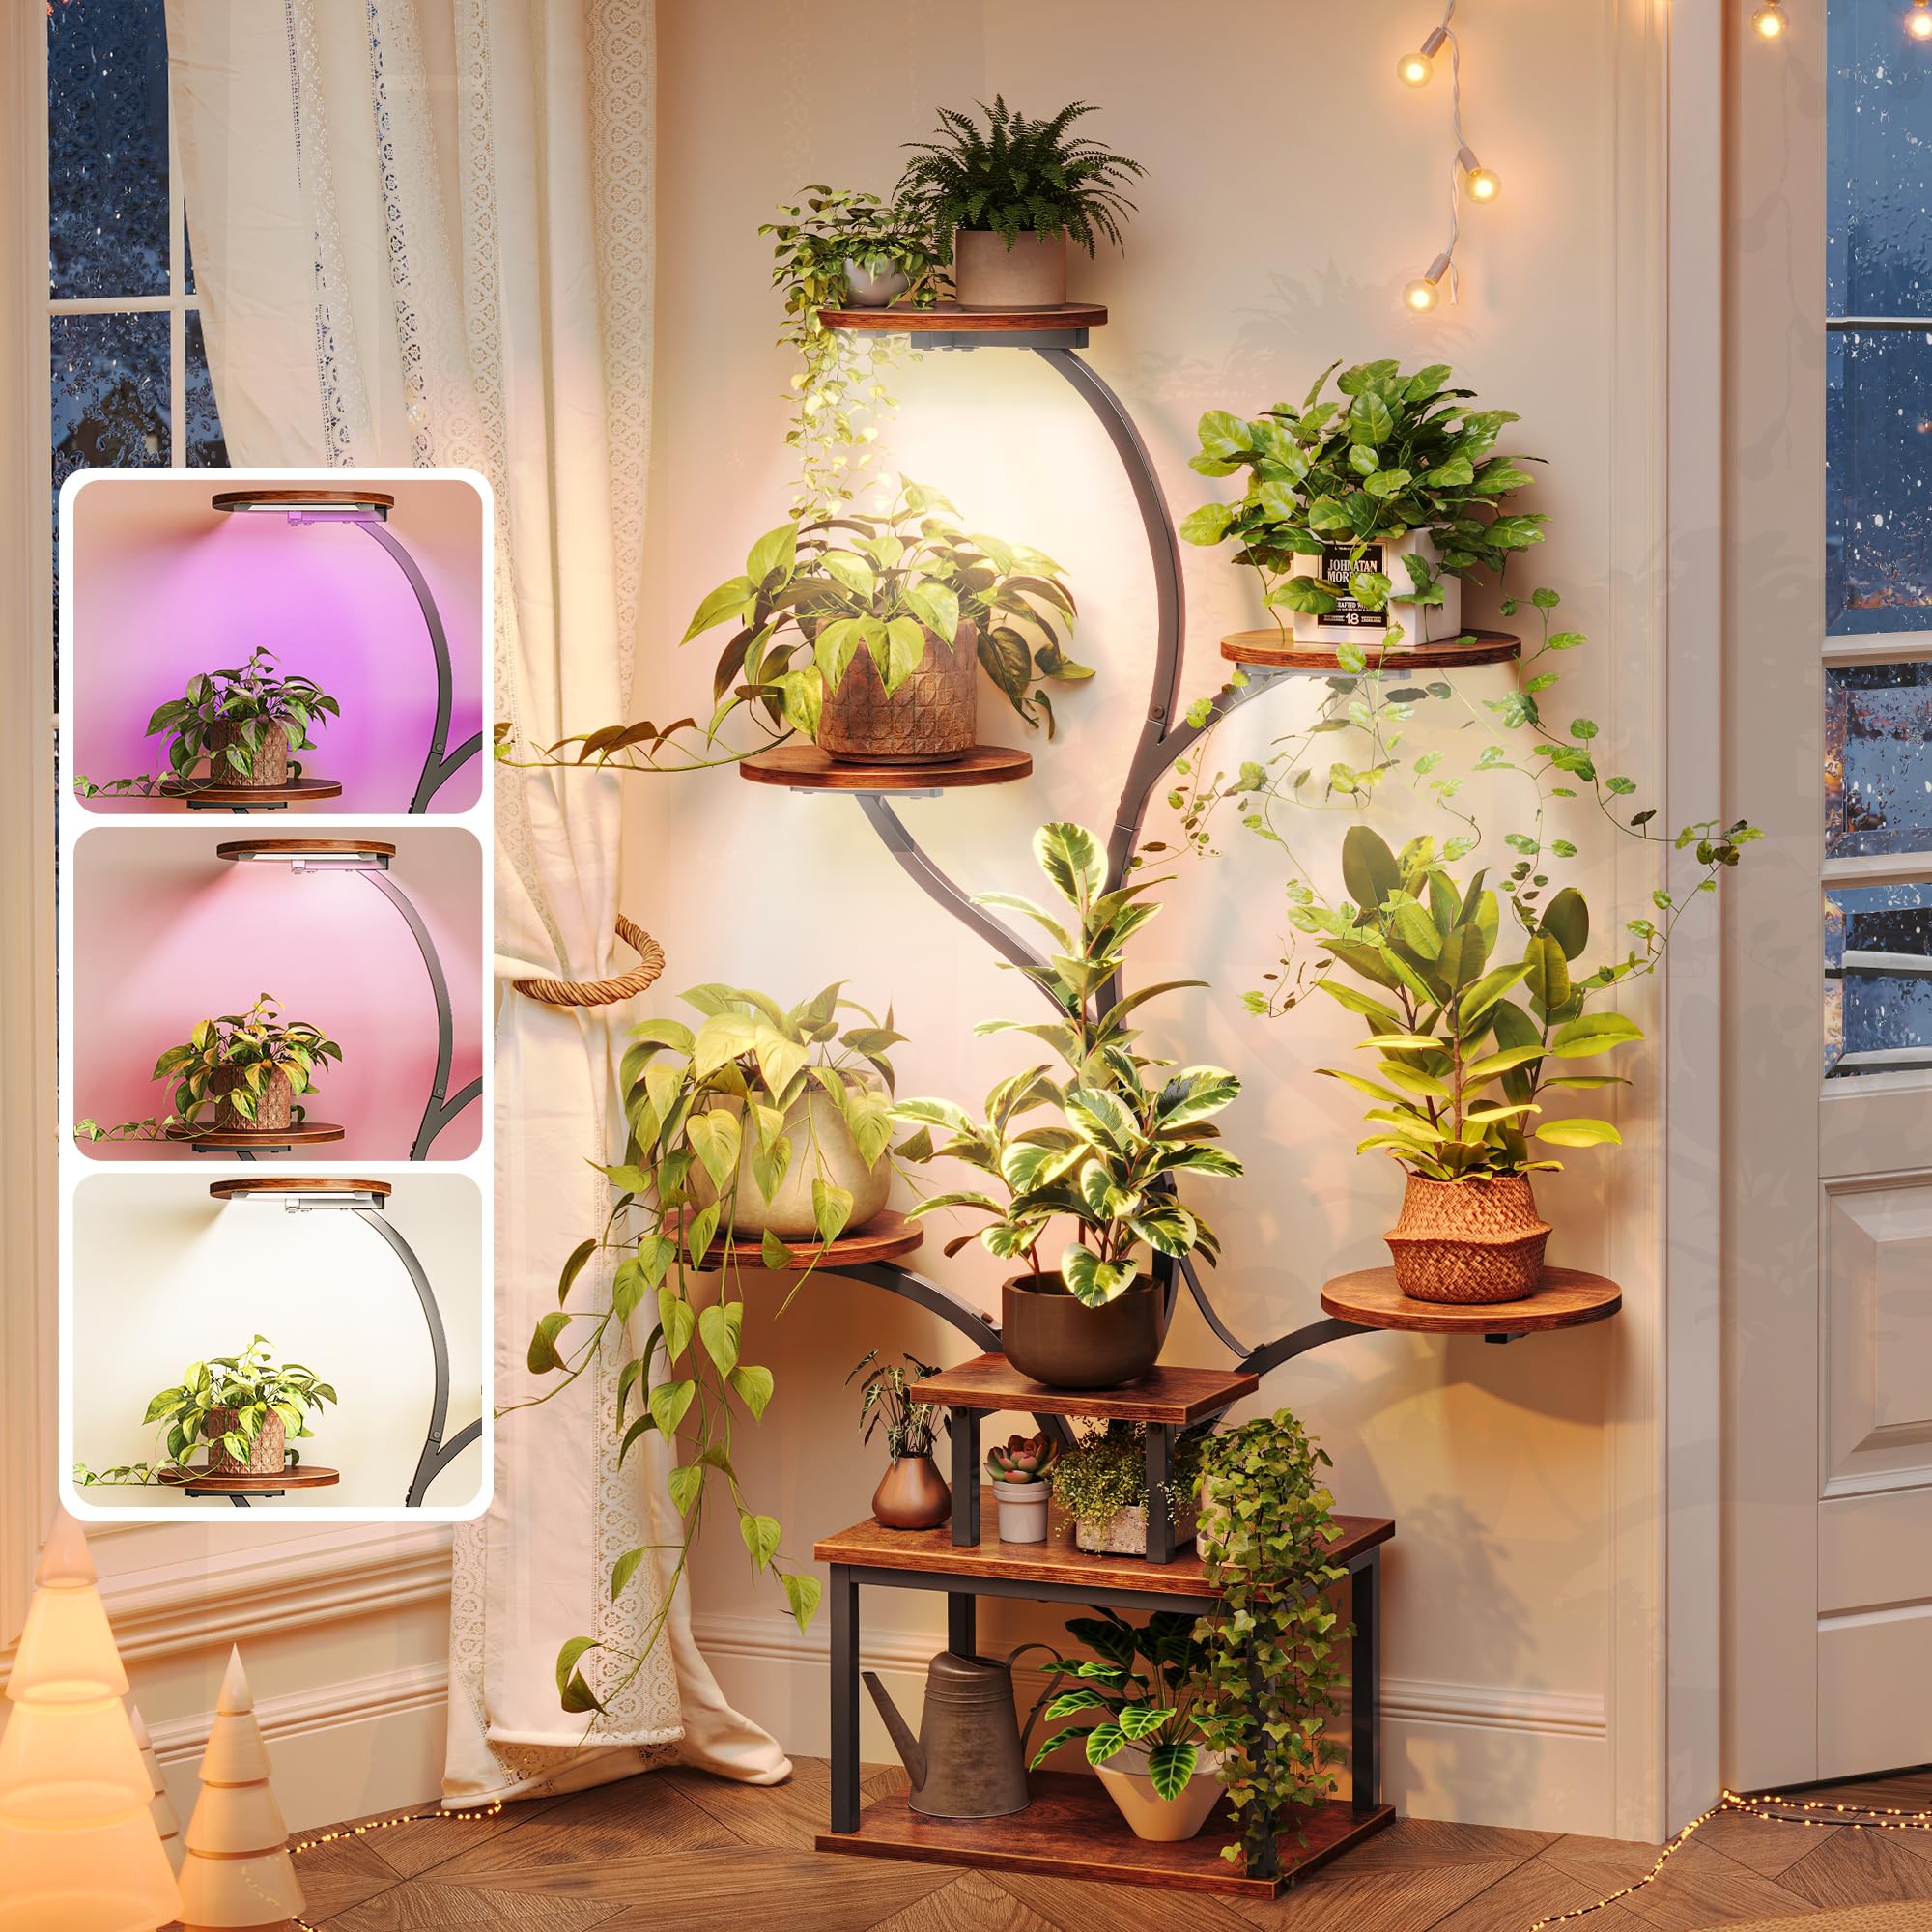
Image: The PRAISUN 51 Inch Plant Stand with Grow Lights in Rustic Brown, showcasing its curved design and multiple shelves.
Safety Information
Please read and understand all safety instructions before assembly and use. Keep this manual for future reference.
- Ensure all components are securely fastened during assembly.
- Do not overload the shelves. Refer to specifications for weight limits.
- Use the provided anti-tipping device to secure the plant stand to a wall, especially in households with children or pets. Failure to do so may result in injury or damage.
- Keep electrical components (grow lights, power adapter) away from water.
- Do not attempt to modify the grow lights or electrical wiring.

Image: Diagram illustrating the correct use of the anti-tipping device to prevent the plant stand from falling.
Package Contents
Verify that all parts are present before beginning assembly. If any parts are missing or damaged, contact customer support.
- Metal Frame Components
- Particleboard Shelves (8 units)
- LED Grow Lights (4 units)
- Grow Light Power Adapter
- Screws and Fasteners
- Screwdriver
- Wrench
- Anti-Tipping Kit
- Instruction Manual
Assembly Instructions
Follow these steps carefully for proper assembly. All necessary tools are included.
- Unpack Components: Carefully remove all parts from the packaging and lay them out on a clean, soft surface to prevent scratches. Identify each part using the provided parts list.
- Assemble Base: Attach the base frame components together using the provided screws and the included screwdriver/wrench. Ensure all connections are snug.
- Attach Vertical Supports: Connect the main curved metal tubes to the assembled base.
- Install Shelves: Secure each particleboard shelf to the designated points on the metal frame. Ensure the shelves are level and firmly attached.
- Mount Grow Lights: Attach the 4 LED grow lights to the underside of the appropriate shelves. Ensure they are positioned to illuminate the plants below.
- Connect Grow Lights: Route the grow light cables neatly using the integrated cable organizer clips. Connect the grow lights to the power adapter.
- Install Anti-Tipping Device: Secure the plant stand to a wall using the anti-tipping kit. This is a critical safety step.
- Final Check: Verify that all screws are tightened and the stand is stable.

Image: Detailed diagram displaying the product dimensions and grow light setup.
Operating Instructions (Grow Lights)
The integrated LED grow lights offer customizable settings to support various plant growth stages.
Grow Light Features:
- 3 Light Modes:
- Full Spectrum: Mimics natural sunlight for overall plant development.
- Red & Blue: Targets enhanced flowering and fruiting.
- Mixed Mode: Provides balanced, full-cycle growth support.
- 10 Brightness Levels: Adjust light intensity from 10% to 100% to suit specific plant needs and environmental conditions.
- 3 Auto Timers: Set for 3, 9, or 12 hours of continuous operation, after which the lights will automatically turn off.
- Power Switch Button: Controls the on/off function of the grow lights.

Image: Visual guide to the grow light's three modes, brightness adjustment, and timer functions.
Maintenance
Regular maintenance ensures the longevity and optimal performance of your plant stand.
- Cleaning: The particleboard shelves feature a waterproof surface. Wipe clean with a damp cloth and mild detergent. Avoid abrasive cleaners.
- Frame Care: The metal frame has an anti-rust coating. Clean with a dry or slightly damp cloth.
- Cable Management: Utilize the cable organizer to keep wires neat and tangle-free, preventing damage and ensuring safety.
- Stability Check: Periodically check all screws and connections to ensure they remain tight. Re-tighten if necessary.

Image: Details highlighting the cable organizer, rustproof metal tubes, and water-resistant shelf surfaces.
Troubleshooting
If you encounter issues, refer to the following common problems and solutions:
- Lights Not Turning On:
- Check if the power adapter is securely plugged into a working outlet.
- Ensure all grow light connections to the power adapter are firm.
- Verify the power switch button on the light controller is pressed.
- Stand is Unstable/Wobbly:
- Ensure all assembly screws are fully tightened.
- Confirm the anti-tipping device is correctly installed and secured to the wall.
- Check that the stand is placed on a flat, level surface.
- Shelves Do Not Align During Assembly:
- Double-check that you are using the correct parts for each step as indicated in the assembly instructions.
- Loosen screws slightly on connected parts, adjust alignment, then re-tighten.
- If issues persist, contact customer support for assistance.
Specifications
| Feature | Detail |
|---|---|
| Brand | PRAISUN |
| Model Number | B0FMRXH2WK |
| Color | Rustic Brown |
| Material | Engineered Wood, Metal |
| Item Weight | 17.62 pounds (8.01 Kilograms) |
| Package Dimensions | 17.36 x 12.91 x 6.54 inches |
| Special Feature | Grow Light (Full-Spectrum LED) |
| Grow Light Modes | Full Spectrum, Red & Blue, Mixed |
| Grow Light Brightness Levels | 10 |
| Grow Light Timer Settings | 3, 9, 12 hours |
| Assembly Required | Yes |
| Finish Type | Polished |
Warranty and Support
For warranty information or technical support, please contact PRAISUN customer service through the retailer where the product was purchased or visit the official PRAISUN website. Please have your model number (B0FMRXH2WK) and purchase date available when contacting support.