1. Introduction
The DNT Grabstar AV V2 is a video digitizer designed to convert analog video recordings from various sources, such as VHS, Video 8, and Betamax, into digital MP4 format. This manual provides detailed instructions for setting up, operating, and maintaining your device, along with troubleshooting tips and technical specifications.
2. Product Overview
2.1 Key Features
- Direct digitization from analog sources (camcorder, VHS, Video 8, Betamax).
- Records directly to SD/SDHC memory card or USB storage media (up to 512GB).
- Adjustable auto-stop recording function (60/90/120/150 min).
- S-video input with separate Y/C signal transmission (luminance/chrominance).
- Integrated 3.5-inch (8.9 cm) color display for monitoring and playback.
- HDMI output for TV connection.
- Built-in speaker for audio playback.
2.2 Package Contents
Verify that all items listed below are included in your package:
- DNT Grabstar AV V2 Video Digitizer
- USB Power Supply
- USB-C Charging Cable
- A/V Cable (RCA)
- Instruction Manual (this document)

Image: Contents of the DNT Grabstar AV V2 retail package.

Image: Front view of the DNT Grabstar AV V2, highlighting the display and control panel.
3. Setup
3.1 Power Connection
- Connect the USB-C charging cable to the USB-C port on the Grabstar AV V2.
- Connect the other end of the USB-C cable to the supplied USB power supply.
- Plug the USB power supply into a standard electrical outlet.
- The device will power on automatically or can be turned on using the power button.
3.2 Storage Media Insertion
The Grabstar AV V2 supports SD/SDHC memory cards and USB flash drives (up to 512GB) formatted in FAT32, NTFS, or exFAT.
- For SD/SDHC Card: Locate the SD/SDHC card slot on the side of the device. Insert the memory card with the contacts facing down until it clicks into place.
- For USB Flash Drive: Locate the USB port on the side of the device. Insert the USB flash drive firmly into the port.
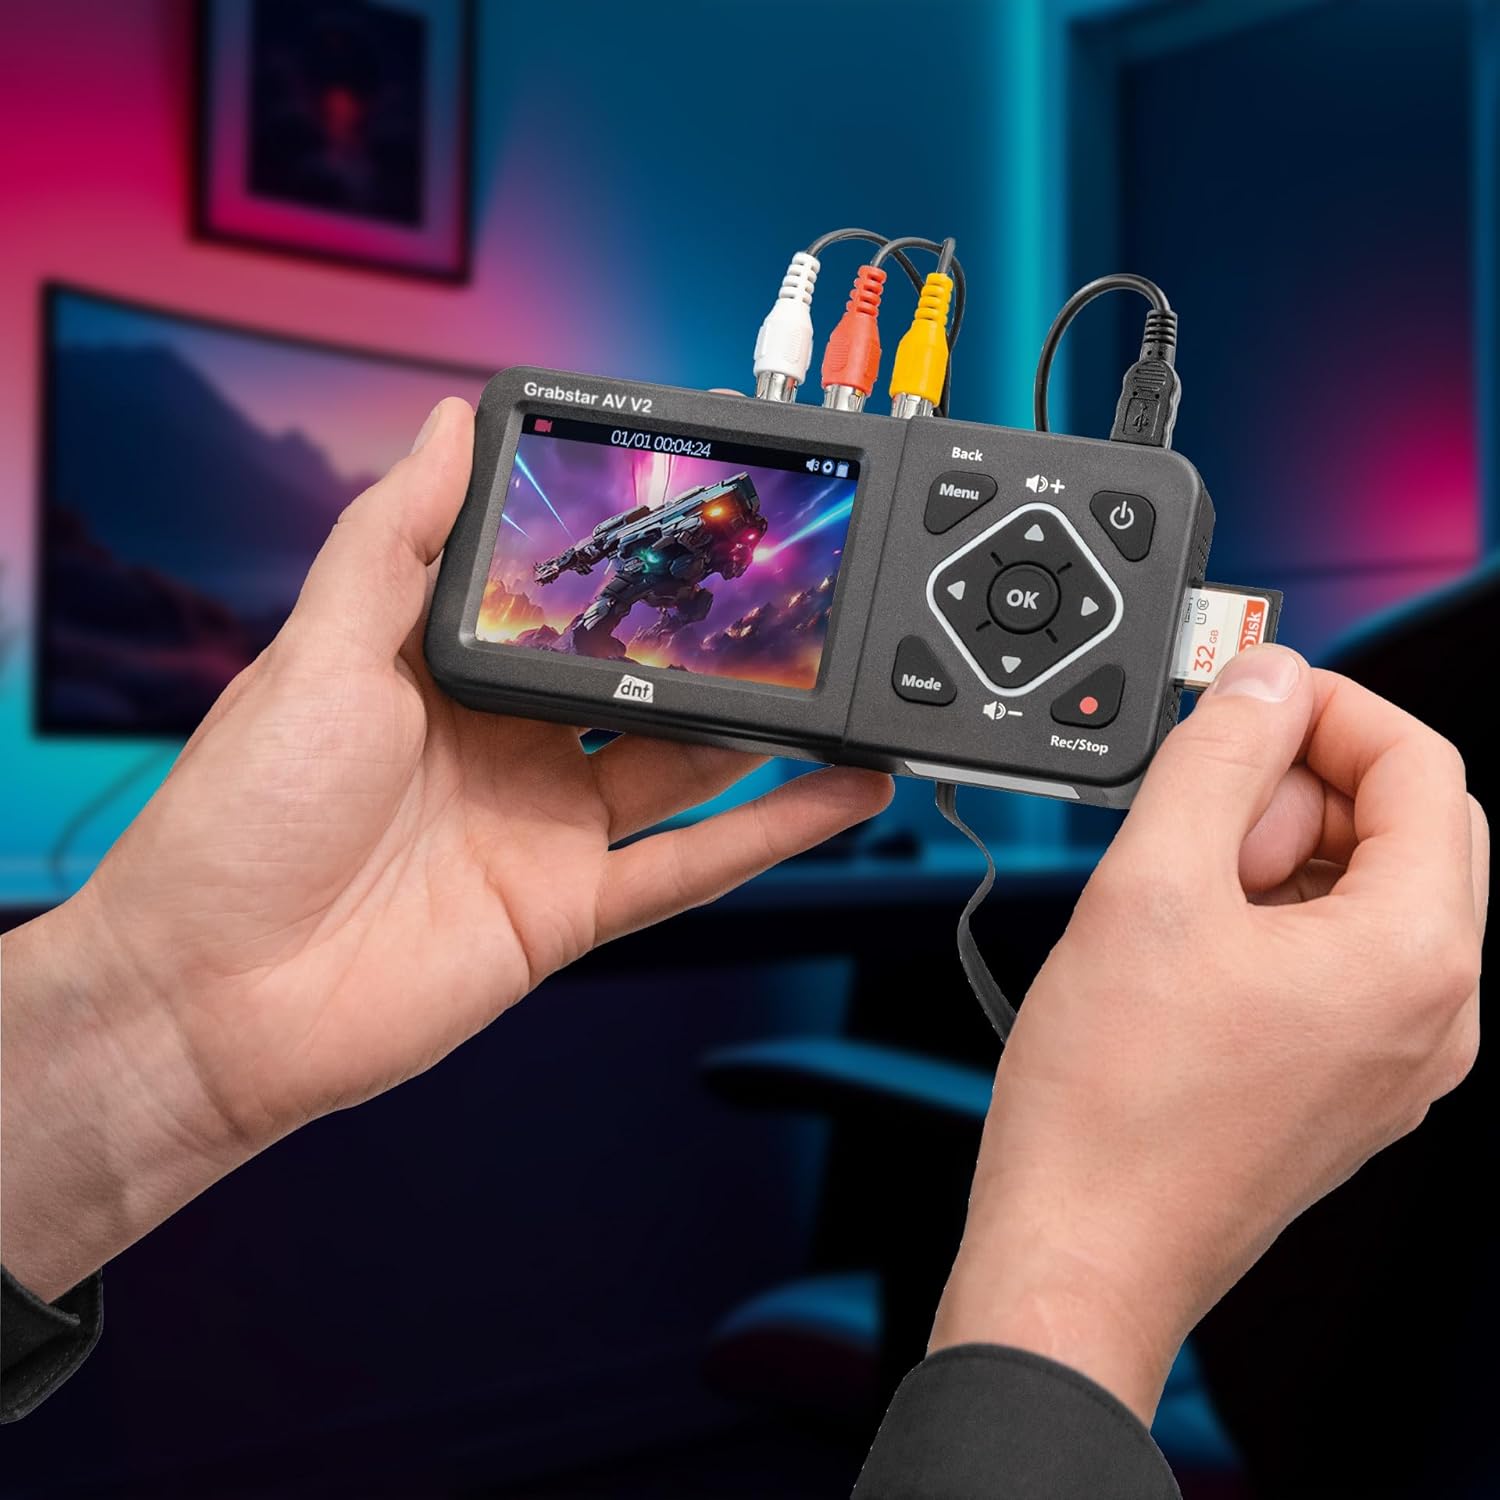
Image: Inserting an SD card into the Grabstar AV V2.

Image: Close-up of the SD card slot and speaker on the side of the device.
3.3 Connecting Analog Video Sources
The Grabstar AV V2 features RCA (composite video) and S-Video inputs.
- RCA Connection: Connect the yellow RCA cable from your analog source (e.g., VCR, camcorder) to the yellow "VIDEO IN" port on the Grabstar AV V2. Connect the red and white RCA cables for audio to the corresponding "R" (right) and "L" (left) audio input ports.
- S-Video Connection: Connect an S-Video cable from your analog source to the "S-VIDEO" port on the Grabstar AV V2. For audio, use the red and white RCA cables connected to the "R" and "L" audio input ports.

Image: Input and output ports on the side of the Grabstar AV V2.

Image: Grabstar AV V2 connected to an analog video cassette recorder (VCR).
3.4 Connecting to a TV (Optional)
To view the input source or recorded videos on a larger screen, connect an HDMI cable from the "HDMI OUT" port on the Grabstar AV V2 to an HDMI input on your television.
4. Operating Instructions
4.1 Basic Controls
The device features several control buttons:
- Power Button: Turns the device on/off.
- Menu Button: Accesses the main menu for settings.
- Back Button: Returns to the previous screen or exits a menu.
- Directional Buttons (Up, Down, Left, Right): Navigate through menus and options.
- OK Button: Confirms selections.
- Volume Buttons (+/-): Adjusts the playback volume.
- Mode Button: Switches between recording and playback modes.
- Rec/Stop Button: Starts and stops recording.
4.2 Recording Analog Video
- Ensure your analog video source is connected and playing.
- Power on the Grabstar AV V2. The display should show the live video feed from your source.
- Press the Rec/Stop button to begin recording. A red indicator light will illuminate, and a recording timer will appear on the screen.
- To stop recording, press the Rec/Stop button again. The recording will be saved to your inserted storage media.
4.3 Playback of Recorded Videos
- Press the Mode button to switch to playback mode.
- Use the directional buttons to navigate through your recorded video files.
- Press the OK button to start playback of the selected video.
- Use the volume buttons to adjust audio output.
- Press the Back button to exit playback or return to the file list.
4.4 Menu Settings
Press the Menu button to access settings such as:
- Recording Resolution: Select from 720x576p, 720x480p, or 640x480p.
- Auto Stop Recording: Set recording duration to 60, 90, 120, or 150 minutes.
- Language: Adjust the device's display language.
- Date and Time: Set the current date and time.
- Format Storage: Format the inserted SD card or USB drive (this will erase all data).
Navigate through menu options using the directional buttons and confirm with the OK button. Use the Back button to exit menus.
5. Maintenance
- Cleaning: Use a soft, dry cloth to clean the device's exterior. Do not use liquid cleaners or solvents.
- Storage: Store the Grabstar AV V2 in a cool, dry place away from direct sunlight and extreme temperatures.
- Software Updates: Check the manufacturer's website for available software updates. Updates can typically be installed via USB or SD/SDHC memory card.
6. Troubleshooting
| Problem | Possible Cause | Solution |
|---|---|---|
| Device does not power on. | No power supply or faulty connection. | Ensure the USB-C cable and power supply are correctly connected and plugged into a working outlet. |
| No video signal on display. | Incorrect input connection or source not playing. | Verify analog cables (RCA/S-Video) are securely connected. Ensure the analog source (VCR, camcorder) is powered on and playing video. |
| Recording fails or stops unexpectedly. | Storage media full, incompatible format, or faulty. | Check available space on SD card/USB drive. Ensure media is formatted correctly (FAT32, NTFS, exFAT). Try a different storage device. |
| No audio during playback. | Volume too low or audio cables not connected during recording. | Increase volume using the '+' button. Ensure red and white RCA audio cables were connected from the source during recording. |
| Display is frozen or unresponsive. | Temporary software glitch. | Press and hold the power button for 10 seconds to force a restart. |
7. Technical Specifications
| Feature | Specification |
|---|---|
| Model | DNT000025 |
| Type | Video Digitizer (analog) |
| Color Display | 3.5 inches (8.9 cm) |
| Video Standard | PAL, NTSC |
| Recording Resolution | 720x576p, 720x480p, 640x480p |
| Recording Format | MP4 (H.264) |
| Recording Size | Up to 150 MB/min |
| Connectors | 1x FBAS/RCA (3x RC), 1x S-Video, 1x HDMI-out, 1x USB-C (power), 1x USB (storage), 1x SD/SDHC slot |
| Built-in Speaker | 1W RMS |
| Supported Memory Types | SD/SDHC memory card, USB flash drive (up to 512GB) |
| Supported File Systems | FAT32, NTFS, exFAT (max. 4 GB/File) |
| Supply Voltage | 5 VDC/1 A |
| Dimensions (W x H x D) | 160 x 25 x 75 mm |
| Weight | 156 g |
| Manufacturer | dnt Innovation GmbH |
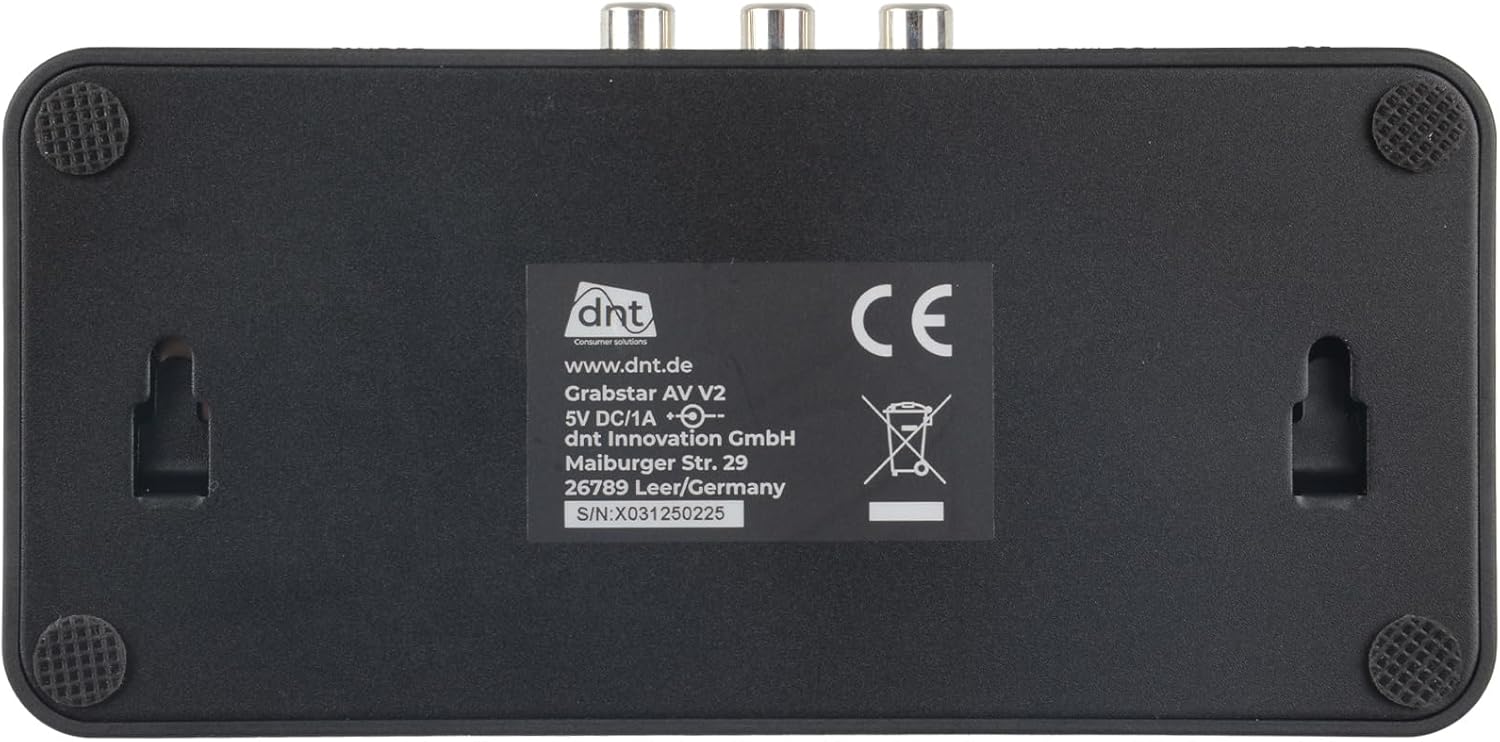
Image: Rear label of the Grabstar AV V2 with technical details.
8. Warranty and Support
For warranty information and technical support, please refer to the documentation provided with your purchase or visit the official DNT website. Keep your proof of purchase for warranty claims.
Manufacturer: dnt Innovation GmbH
Website: www.dnt.de


