1. Introduction
Thank you for choosing the HikTop CM841-65847 USB HUB Docking Station. This manual provides detailed instructions for the proper installation, operation, and maintenance of your device. Please read this manual thoroughly before use to ensure optimal performance and longevity of the product.
2. Product Overview
The HikTop CM841-65847 is a versatile docking station designed to expand the connectivity and storage capabilities of your Mac Mini M4 or M4 Pro. It integrates multiple USB ports, SD/TF card readers, and an M.2 NVMe SSD enclosure into a compact and aesthetically matching design.
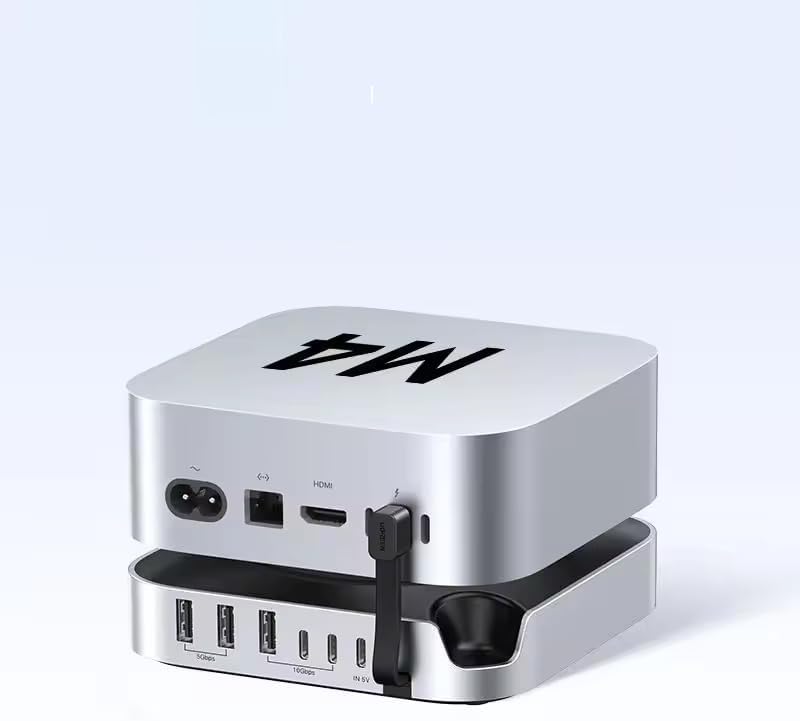
Image 2.1: The HikTop USB HUB Docking Station shown with a Mac Mini M4 unit placed on top, illustrating its seamless integration and compact form factor.
3. Features
- M.2 NVMe SSD Enclosure: Supports M.2 NVMe SSDs up to 8TB with a theoretical transfer rate of 10Gbps. Compatible with 2230, 2242, 2260, and 2280 specifications. Actual continuous read speeds can reach over 900MB/s.
- Extensive USB Connectivity: Equipped with 5 USB 3.2 Type-A ports and 2 USB 3.2 Type-C ports, allowing easy connection of various external devices such as keyboards, mice, USB drives, and portable hard drives.
- Dual SD/TF Card Reader: Features dedicated slots for SD and TF cards, supporting simultaneous reading at speeds up to 104MB/s for quick photo and video transfer.
- Stable Power Delivery: Includes a 15W Type-C power port for connecting an external power source, ensuring stable operation even when multiple devices are connected and under full load.
- Optimized Design: Features a centered curved base design that does not obstruct Mac Mini ventilation, an anti-slip silicone pad for stable placement, and a recessed power button slot for easy operation.

Image 3.1: An illustrative diagram highlighting the multiple functions of the docking station, including its perfect fit for Mac Mini M4, M.2 NVMe SSD support, 10Gbps speed, SD/TF card slots, curved base design, and recessed power button slot.
4. Setup Instructions
4.1. M.2 NVMe SSD Installation
Follow these steps to install an M.2 NVMe SSD into the docking station:
- Disconnect: Ensure the docking station is disconnected from all external devices and power sources.
- Remove Bottom Panel: Carefully flip the product upside down, loosen the screws on the bottom panel, and remove it.
- Loosen SSD Screw: Locate the M.2 SSD slot and loosen the retaining screw.
- Insert SSD: Gently insert your M.2 NVMe SSD into the M.2 slot. Ensure it is fully seated.
- Secure SSD: Tighten the retaining screw to secure the M.2 SSD in place.
- Reattach Panel: Reattach the bottom panel and tighten its screws.
- Connect to Computer: Connect the docking station to your computer. Verify that the newly installed drive appears in your computer's file system. If it does, the installation is successful.

Image 4.1: A detailed view of the internal M.2 drive slot, illustrating the process of inserting an M.2 NVMe SSD and showing the four supported SSD specifications (2230, 2242, 2260, 2280).
4.2. Connecting to Mac Mini
To connect the docking station to your Mac Mini:
- Place your Mac Mini M4 or M4 Pro securely on top of the docking station.
- Connect the integrated short USB-C cable from the docking station to an available USB-C port on your Mac Mini.
- For stable operation, especially when using multiple high-power devices or the M.2 SSD, connect an external 15W power adapter (not included) to the Type-C power port on the docking station.
5. Operating Instructions
5.1. Using USB Ports
Simply plug your USB-A or USB-C devices into the corresponding ports on the docking station. The 10Gbps transfer speed allows for rapid data transfer with compatible devices.

Image 5.1: A user connecting various USB devices to the docking station, demonstrating the expanded connectivity options for peripherals like keyboards, mice, and external drives.
5.2. Using SD/TF Card Readers
Insert your SD or TF (MicroSD) cards into the designated slots. The docking station supports simultaneous reading of both card types, providing quick access to your media files.
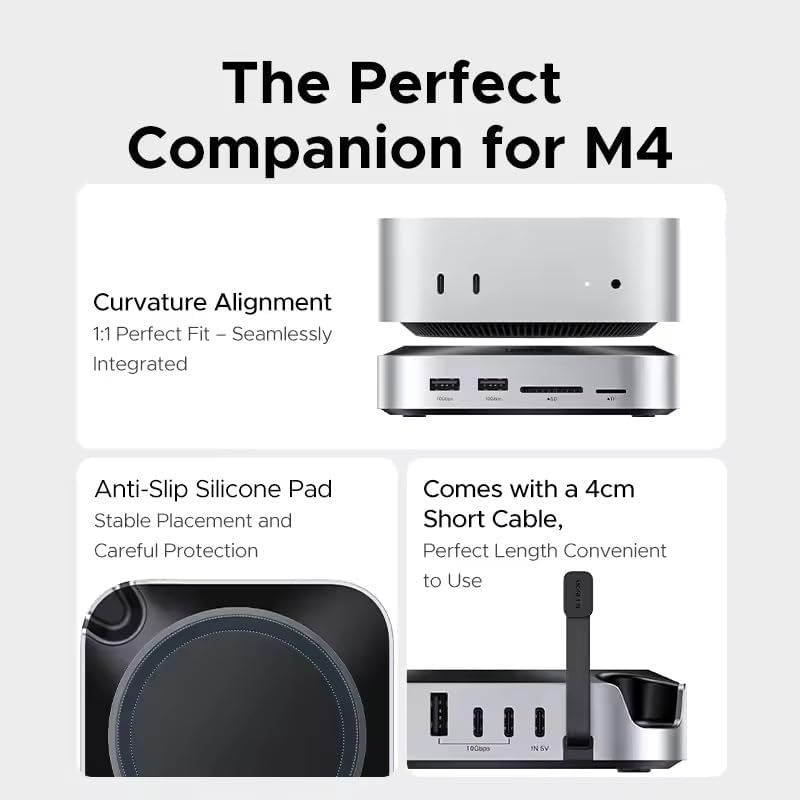
Image 5.2: A user inserting an SD card and a TF card into the docking station's dedicated slots, illustrating the dual card reading capability for quick data access.
5.3. Power Button Operation
The docking station features a recessed power button slot. This design allows you to easily access and press the Mac Mini's power button without needing to lift the Mac Mini from the docking station.
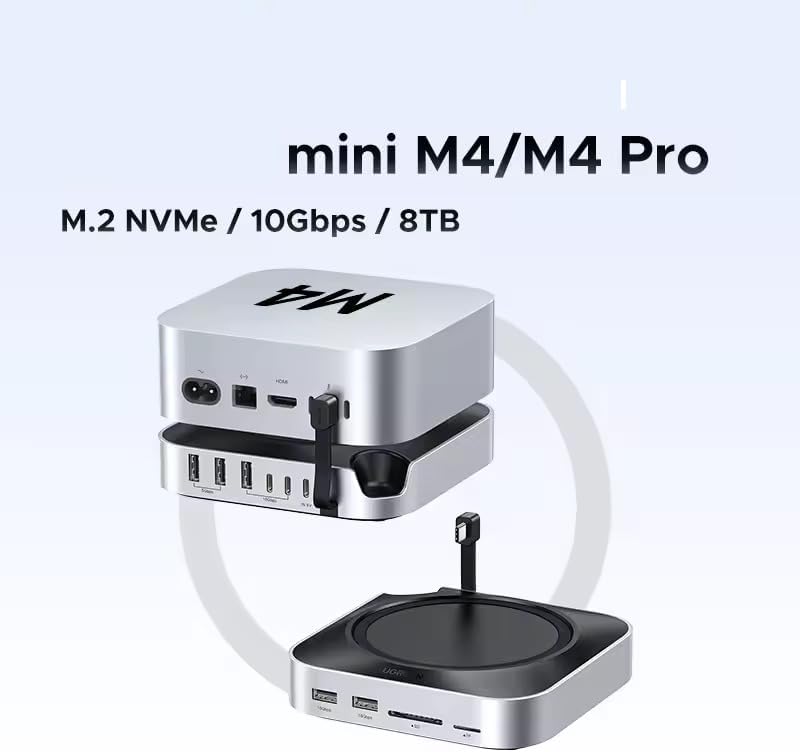
Image 5.3: A hand demonstrating how to press the Mac Mini's power button through the recessed groove on the docking station, highlighting the ease of operation.
6. Maintenance
To ensure the longevity and optimal performance of your docking station:
- Keep the device clean by wiping it with a soft, dry cloth. Avoid using liquid cleaners or abrasive materials.
- Ensure proper ventilation around the device. The curved base design is intended to assist with Mac Mini ventilation; do not block the air vents.
- Avoid exposing the device to extreme temperatures, humidity, or direct sunlight.
- Handle the device with care to prevent physical damage.
7. Troubleshooting
If you encounter issues with your HikTop docking station, refer to the following common problems and solutions:
- Device Not Recognized:
- Ensure the USB-C cable connecting the docking station to your Mac Mini is securely plugged in.
- Try connecting the docking station to a different USB-C port on your Mac Mini.
- Restart your Mac Mini.
- M.2 SSD Not Appearing:
- Verify that the M.2 SSD is correctly installed and secured within the enclosure (refer to Section 4.1).
- Check Disk Utility on your Mac Mini to see if the drive is detected but unformatted. If so, format the drive.
- Ensure the M.2 SSD is NVMe protocol compatible.
- Slow Data Transfer Speeds:
- Ensure you are using USB 3.2 compatible cables and devices to achieve 10Gbps speeds.
- Connect an external 15W power adapter to the docking station's Type-C power port to ensure sufficient power delivery, especially when multiple devices are active.
- Avoid using excessively long or low-quality USB cables.
- SD/TF Cards Not Reading:
- Ensure the card is fully inserted into the correct slot.
- Test the card in another device to confirm it is functional.
- Clean the card's contacts if necessary.
8. Specifications
| Feature | Specification |
|---|---|
| Product Name | mini M.2 SSD Enclosure Docking Station Base |
| Model | CM841-65847 |
| Supported Drives | M.2 NVMe SSDs (NVMe Protocol) |
| Max SSD Capacity | 8TB |
| Theoretical Transfer Rate | 10Gbps |
| USB Ports | 3x USB-A 3.2, 2x Type-C 3.2, 2x USB-A 3.0 |
| SD/TF Card Slots | Supports Dual SD/TF Card Reading (up to 104MB/s) |
| Material | Aluminum Alloy + PVC |
| Type-C Power Port | 15W Power supply (external adapter not included) |
| Cable Length | Approximately 4cm |
| Net Weight | 250g |
| Manufacturer | HikTop |
| Country of Origin | China |
9. Warranty and Support
This HikTop product is manufactured with high-quality standards. For warranty information, technical support, or further assistance, please refer to the warranty card included with your purchase or visit the official HikTop website. Please retain your proof of purchase for any warranty claims.