1. Introduction
This manual provides detailed instructions for the installation, operation, and maintenance of your Inexaccessories Double Din Car Stereo. Please read this manual thoroughly before using the product to ensure proper functionality and safety. Keep this manual for future reference.
2. Setup and Installation
2.1. Package Contents
Before beginning installation, verify that all components are present in the package:
- Double Din Car Stereo Unit
- Power Cable Harness
- RCA Cables
- Backup Camera & Cable
- GPS Antenna
- Microphone
- Disassembly Tool
- Mounting Brackets & Screws
- Trim Ring
- User Manual

2.2. Pre-Installation Checks
Ensure your dashboard opening size is compatible with the double din stereo. If not, a suitable dash kit may be required. Consult your vehicle's manual or an automotive professional for specific dash kit requirements.
2.3. Wiring Instructions
There are two primary methods for wiring your new car stereo:
- Method 1: Using an Aftermarket Wiring Harness (Highly Recommended)
This method involves connecting the stereo's power cable to an aftermarket wiring harness designed for your specific car model. This simplifies the connection process by matching the stereo's wiring to your vehicle's original adapter.
Video 2.1: Detailed installation guide for the 7-inch Double Din Car Stereo, demonstrating wiring with an aftermarket harness. - Method 2: Direct Connection to Original Wiring Harness
If an aftermarket harness is not available, you can connect the power cable directly to your car's original stereo wiring harness. This requires careful identification of each wire's function using a multimeter. Please prepare a multimeter and insulating tape for this method.
Video 2.2: Installation steps for the 7-Inch Car Stereo, including direct wiring methods and multimeter usage. Steps for Direct Wiring:
- Identify Ground Wire (GND): Set the multimeter to the 0Ω position. Insert the black test lead into the keyhole. Check wires until the multimeter beeps, indicating the ground wire.
- Identify Battery Wire (B+): Set the multimeter to the 20V position. Check wires until the multimeter displays 11V-13V. This is the constant power wire.
- Identify ACC Wire: Turn on the car ignition (ACC position). Check wires until the multimeter displays 11V-13V. This wire provides power when the ignition is on.
- Identify Illumination Wire (ILLUMI): Turn on the car headlights. Check wires until the multimeter displays 9V-14V. When headlights are turned off, the multimeter should show 0V.
- Identify Speaker Wires: Set the multimeter to the 200Ω position. Find pairs of wires that display 2-8Ω. These are your speaker wires. Use the DSP settings on the stereo to confirm which speaker each pair corresponds to.
2.4. Backup Camera Installation
The included backup camera enhances parking safety. Connect the camera's video cable to the RCIN input port on the stereo. The red wire on the video cable needs to be connected to the stereo's REVERSE-IN wire, which should be connected to your vehicle's reversing lights for automatic activation.
3. Operating Instructions
3.1. Basic Interface and Navigation
The stereo features a 7-inch touch screen for intuitive control. The main interface provides access to various functions such as USB, Setup, Android Auto, AUX, Micro SD, Disc, and Radio.

3.2. CD/DVD Player
Insert a CD or DVD into the disc slot. The stereo will automatically detect and begin playback. Use the on-screen controls for play, pause, skip tracks, and eject.
3.3. Bluetooth Connectivity
Connect your smartphone via Bluetooth 5.2 for hands-free calling and audio streaming. The external microphone ensures clear call quality. You can play and control music from your phone's apps.

3.4. Apple CarPlay & Android Auto
Connect your iPhone or Android smartphone via a USB cable to access CarPlay or Android Auto. This allows for voice control (Siri/Google Assistant), navigation, music, messages, and other compatible apps directly on the stereo's screen.
3.5. Mirror Link Function
The Mirror Link function supports both iOS and Android phones, allowing you to display your smartphone's screen content directly on the stereo. Connect your phone via a USB cable and follow the on-screen prompts to establish the connection.
3.6. FM Radio
Access FM radio stations using the dedicated Radio icon on the main menu. You can scan for stations, save presets, and adjust settings for optimal reception.

3.7. USB/TF Card Playback
Insert a USB drive or TF card (up to 32GB) into the designated slots. The stereo supports audio and video playback from these storage devices. Select the USB or Micro SD icon from the main menu to browse and play media.
3.8. AUX Input
Connect external audio devices using the AUX input for direct audio playback.
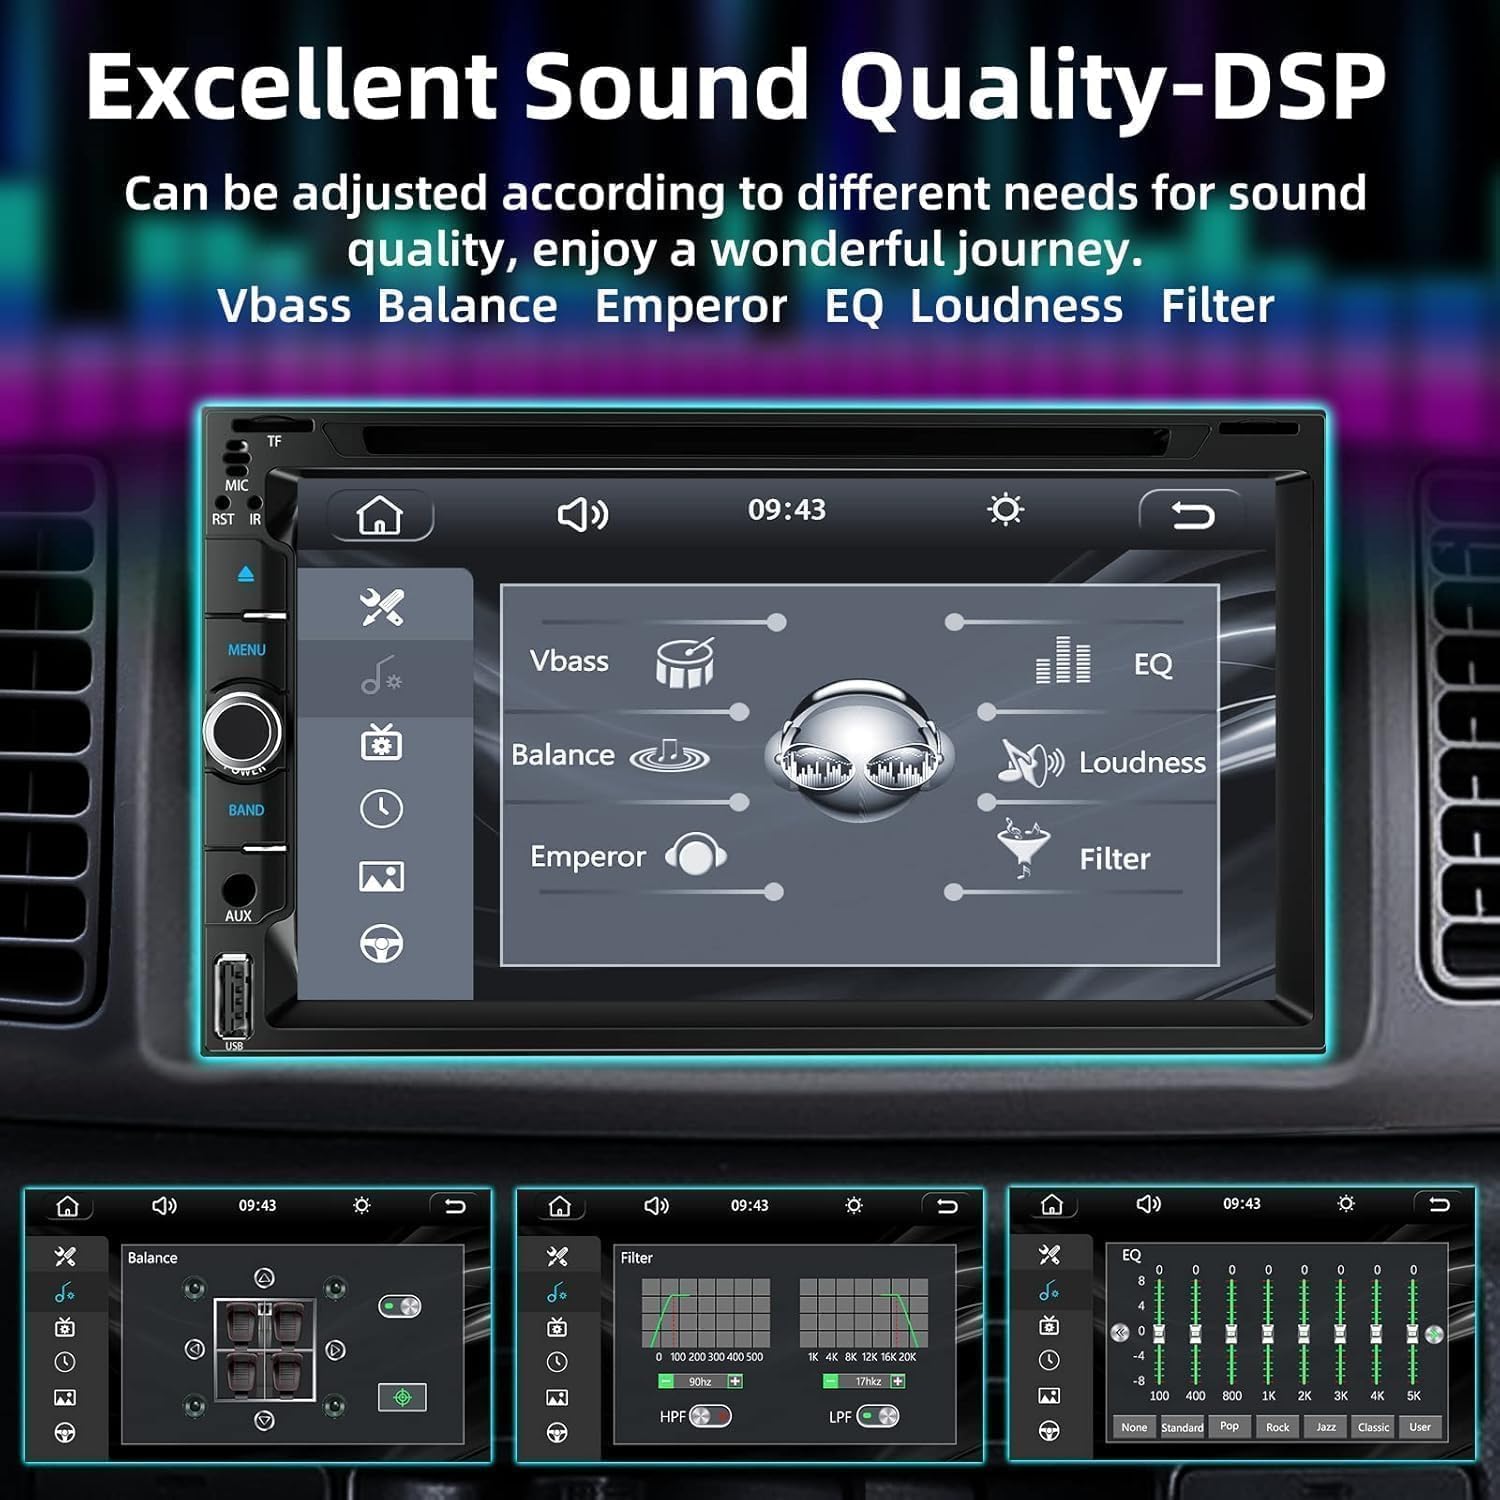
3.9. Sound Settings (Equalizer/DSP)
Customize your audio experience with the built-in equalizer. Adjust balance, fader, bass, and treble settings. The DSP (Digital Signal Processor) allows for fine-tuning of sound output.
3.10. Steering Wheel Control
The stereo supports original steering wheel control functions. This allows you to switch songs, adjust volume, and manage calls without taking your hands off the wheel.

3.11. Rear View Camera Display
When the vehicle shifts into reverse, the car radio receiver automatically displays the image from the connected HD night vision rear view camera. The camera offers an ultra-wide 170° viewing angle and a waterproof design.
4. Maintenance
To ensure the longevity and optimal performance of your car stereo, follow these maintenance guidelines:
- Cleaning: Use a soft, dry cloth to clean the screen and exterior. Avoid abrasive cleaners or solvents.
- Disc Care: Handle CDs and DVDs by their edges to prevent scratches. Keep discs clean and store them in their cases when not in use.
- Software Updates: Periodically check the manufacturer's website for any available software updates to improve performance and add new features.
5. Troubleshooting
If you encounter issues with your car stereo, refer to the following common problems and solutions:
| Problem | Possible Cause | Solution |
|---|---|---|
| No Power | Loose wiring connection; Blown fuse; Incorrect wiring. | Check power and ground connections. Inspect the fuse (10A) on the power cable. Verify wiring against the diagram. |
| No Sound | Volume too low; Mute activated; Incorrect speaker wiring. | Increase volume. Check mute setting. Verify speaker wire connections. |
| Rear View Camera 'No Signal' | Camera not connected; REVERSE-IN wire not connected to reversing light; Faulty camera. | Ensure camera video cable is securely connected to RCIN. Confirm REVERSE-IN wire is correctly connected to the vehicle's reversing light power source. |
| CarPlay/Android Auto Not Connecting | Faulty USB cable; Phone not trusted; App not installed (for Android Auto). | Use an original USB cable. Ensure 'Trust' is selected on your phone. For Android Auto, ensure the app is installed on your phone. |
| Disc Playback Issues | Scratched or dirty disc; Incompatible disc format. | Clean the disc. Try a different disc. Ensure the disc format is supported. |
6. Specifications
- Product Dimensions: 3.9"D x 6.61"W x 7"H
- Item Weight: 4.36 pounds
- Connectivity Technology: Bluetooth, Wi-Fi
- Controller Type: Android
- Special Features: Android Auto, Apple CarPlay, Built-In Bluetooth, Built-In Wi-Fi
- Compatible Devices: Smartphone
- Connector Type: 3.5mm Jack
- Audio Output Mode: Stereo
- Surround Sound Channel Configuration: 5.1
- Video Encoding: MPEG-2
7. Warranty and Support
Inexaccessories provides 7*24 hours of after-sales technical support to assist with any installation or operation problems. For further assistance, please contact our support team.