
1. Introduction
This manual provides detailed instructions for the installation, operation, maintenance, and troubleshooting of the QNAP QSW-L3208-2C6T-US 8-Port Multi-Gig 10GbE Lite-Managed Network Switch. This device offers advanced networking features for enhanced data transfer and network management.
2. Product Overview
The QNAP QSW-L3208-2C6T-US is an 8-port Multi-Gig 10GbE Lite-Managed Network Switch designed for high-speed network environments. It integrates both RJ-45 and SFP+ ports, providing flexible connectivity options.
Key Features:
- 10GbE Multi-Gig Ports: Six RJ-45 ports supporting 10G/5G/2.5G/1G/100M speeds, plus two combo SFP+/RJ-45 ports for fiber or copper connections.
- Lite-Managed Control: Includes features such as VLAN, QoS, LACP, IGMP Snooping, and loop detection for network management.
- High Performance: Offers 160 Gbps switching capacity and 80 Gbps non-blocking throughput.
- Optimized Transfers: Supports Jumbo frames (12K) for efficient handling of large data packets.
- Compact & Energy-Efficient: Features a durable metal design with passive cooling, consuming only 36 W.

Figure 2.1: Front view of the QNAP QSW-L3208-2C6T-US Network Switch.
Understanding Lite Managed Switches:
Lite Managed switches provide a balance of essential features, simplified configuration, and cost efficiency for optimized high-speed networking. They offer more control than unmanaged switches without the complexity of full L2/L3 managed switches.

Figure 2.2: Comparison of Lite Managed, L2 Managed, and Unmanaged Switch Types.
3. Package Contents
Verify that all items listed below are included in your product package. If any item is missing or damaged, contact your vendor immediately.
- QNAP QSW-L3208-2C6T-US Network Switch
- Power supply
- Power Cord
- Bracket screws
- Anchors
- Rubber feet
- Installation guide

Figure 3.1: Included components in the QSW-L3208-2C6T-US package.
4. Setup
4.1 Physical Installation
- Placement: Position the switch on a stable, flat surface or mount it in a rack using the provided brackets. Ensure adequate ventilation around the device.
- Ventilation: Maintain clear space around the side vents for proper airflow.
- Cable Connections: Connect your network devices (PCs, NAS, servers) to the RJ-45 or SFP+ ports using appropriate Ethernet or fiber optic cables.
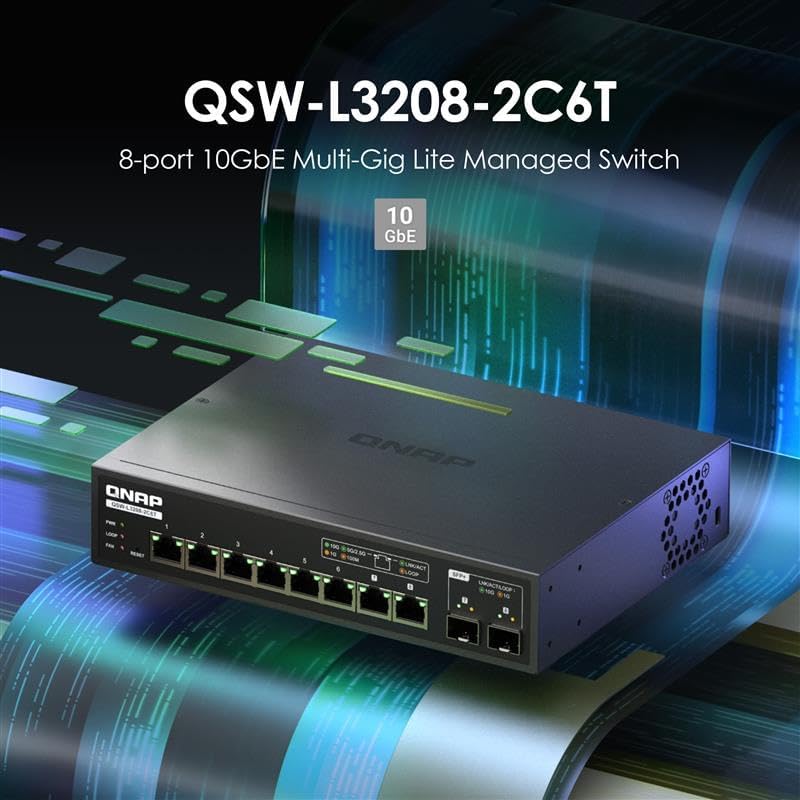
Figure 4.1: Front panel with RJ-45 and SFP+ ports.
4.2 Power Connection
- Connect the power adapter to the DC power input port on the rear of the switch.
- Plug the power cord into a suitable electrical outlet.
- The PWR LED on the front panel will illuminate green, indicating the switch is powered on.

Figure 4.2: Rear panel with power input.
5. Operating the Switch
The QSW-L3208-2C6T-US features a Lite-Managed interface, allowing for configuration and monitoring of network settings.
5.1 Accessing the Web UI (QSS)
- Ensure your computer is connected to one of the switch's ports.
- Open a web browser and enter the default IP address of the switch (refer to the installation guide for the default IP, typically 192.168.1.100 or similar).
- Log in using the default credentials (refer to the installation guide for default username and password).
- The QNAP Switch System (QSS) interface will appear, providing access to various settings.

Figure 5.1: QNAP Switch System (QSS) Web Interface.
5.2 Basic Configuration
Within the QSS interface, you can configure various network settings:
- VLAN: Create Virtual Local Area Networks to segment network traffic.
- QoS (Quality of Service): Prioritize specific types of network traffic for improved performance.
- LACP (Link Aggregation Control Protocol): Combine multiple physical links into a single logical link for increased bandwidth and redundancy.
- IGMP Snooping: Optimize multicast traffic delivery to relevant devices.
- Loop Detection: Prevent network loops that can cause broadcast storms and network instability.
5.3 Network Connectivity Examples
The QSW-L3208-2C6T-US supports various high-speed network configurations, suitable for connecting devices like PCs, Network Attached Storage (NAS), and media hubs.

Figure 5.2: Example 10GbE network connectivity diagram.
6. Maintenance
6.1 Firmware Update
Regularly check the QNAP website for the latest firmware updates. Updating the firmware can improve performance, add new features, and resolve potential issues. Follow the instructions provided on the QNAP support page for the update process.
6.2 Cleaning
To ensure optimal performance and longevity, keep the switch clean. Use a soft, dry cloth to wipe the exterior. Avoid using liquid cleaners or aerosols directly on the device.
6.3 Environmental Considerations
The switch is designed with a durable metal casing for effective heat dissipation. Ensure the operating environment allows for proper airflow to prevent overheating, especially in enclosed spaces.

Figure 6.1: Airflow for heat dissipation in the switch.
7. Troubleshooting
7.1 Common Issues and Solutions
- No Power: Check the power cord connection and the power outlet. Ensure the power adapter is securely connected to the switch.
- No Link Light: Verify that the Ethernet or fiber optic cable is securely connected at both ends. Ensure the connected device is powered on and functioning correctly. Try a different cable or port.
- Slow Network Speed: Confirm that all connected devices and cables support the desired speed (e.g., 10GbE). Check for network congestion or duplex mismatch settings in the QSS interface.
- Cannot Access Web UI: Ensure your computer's IP address is in the same subnet as the switch. Verify the switch's IP address and try resetting the switch to factory defaults if necessary (refer to the installation guide for reset procedures).
7.2 Loop Detection
The switch features loop detection to prevent network loops. A network loop occurs when there are redundant paths between network devices, which can cause broadcast storms and bring down the network. If a loop is detected, the switch will indicate this (e.g., via an LED indicator or QSS alert) and may temporarily disable the affected port to prevent network disruption.

Figure 7.1: Network loop detection illustration.
8. Specifications
| Attribute | Detail |
|---|---|
| Model Number | QSW-L3208-2C6T-US |
| Brand | QNAP |
| Number of Ports | 8 (6x RJ-45, 2x SFP+/RJ-45 Combo) |
| Interface Type | RJ45, SFP+ |
| Data Transfer Rate | 160 Gigabits Per Second (Switching Capacity) |
| Item Weight | 2.84 Pounds |
| Package Dimensions | 13 x 9 x 2 inches |
| Color | Black |
| Compatible Devices | Desktop, Laptop, Printer |
| UPC | 885022028597 |
| Manufacturer | QNAP |
9. Warranty Information
QNAP products are covered by a limited warranty. For detailed warranty terms and conditions, including duration and coverage, please refer to the warranty card included in your product package or visit the official QNAP website.
10. Support Resources
For further assistance, technical support, or to download the latest drivers and firmware, please visit the official QNAP support website:
QNAP Support Website: https://www.qnap.com/go/support
You can also find additional information and community forums on the QNAP website.

