1. Introduction
This manual provides detailed instructions for the installation, operation, and maintenance of your KINGGERI Roof Rack Cross Bars, Model KG2-A102-32. These cross bars are designed for use with Mercedes Benz GLC models from 2016 to 2022 that feature flush side rails. Please read this manual thoroughly before installation and use to ensure proper function and safety.

Image 1.1: KINGGERI Roof Rack Cross Bars on a Mercedes Benz GLC.
2. Package Contents
Verify that all components listed below are present in your package:
- Front crossbar (1)
- Rear crossbar (1)
- Base feet (4)
- Allen wrench (1)
- Screws (set)
- Instructions (1)
- Spare screws (set)
- Keys (set)
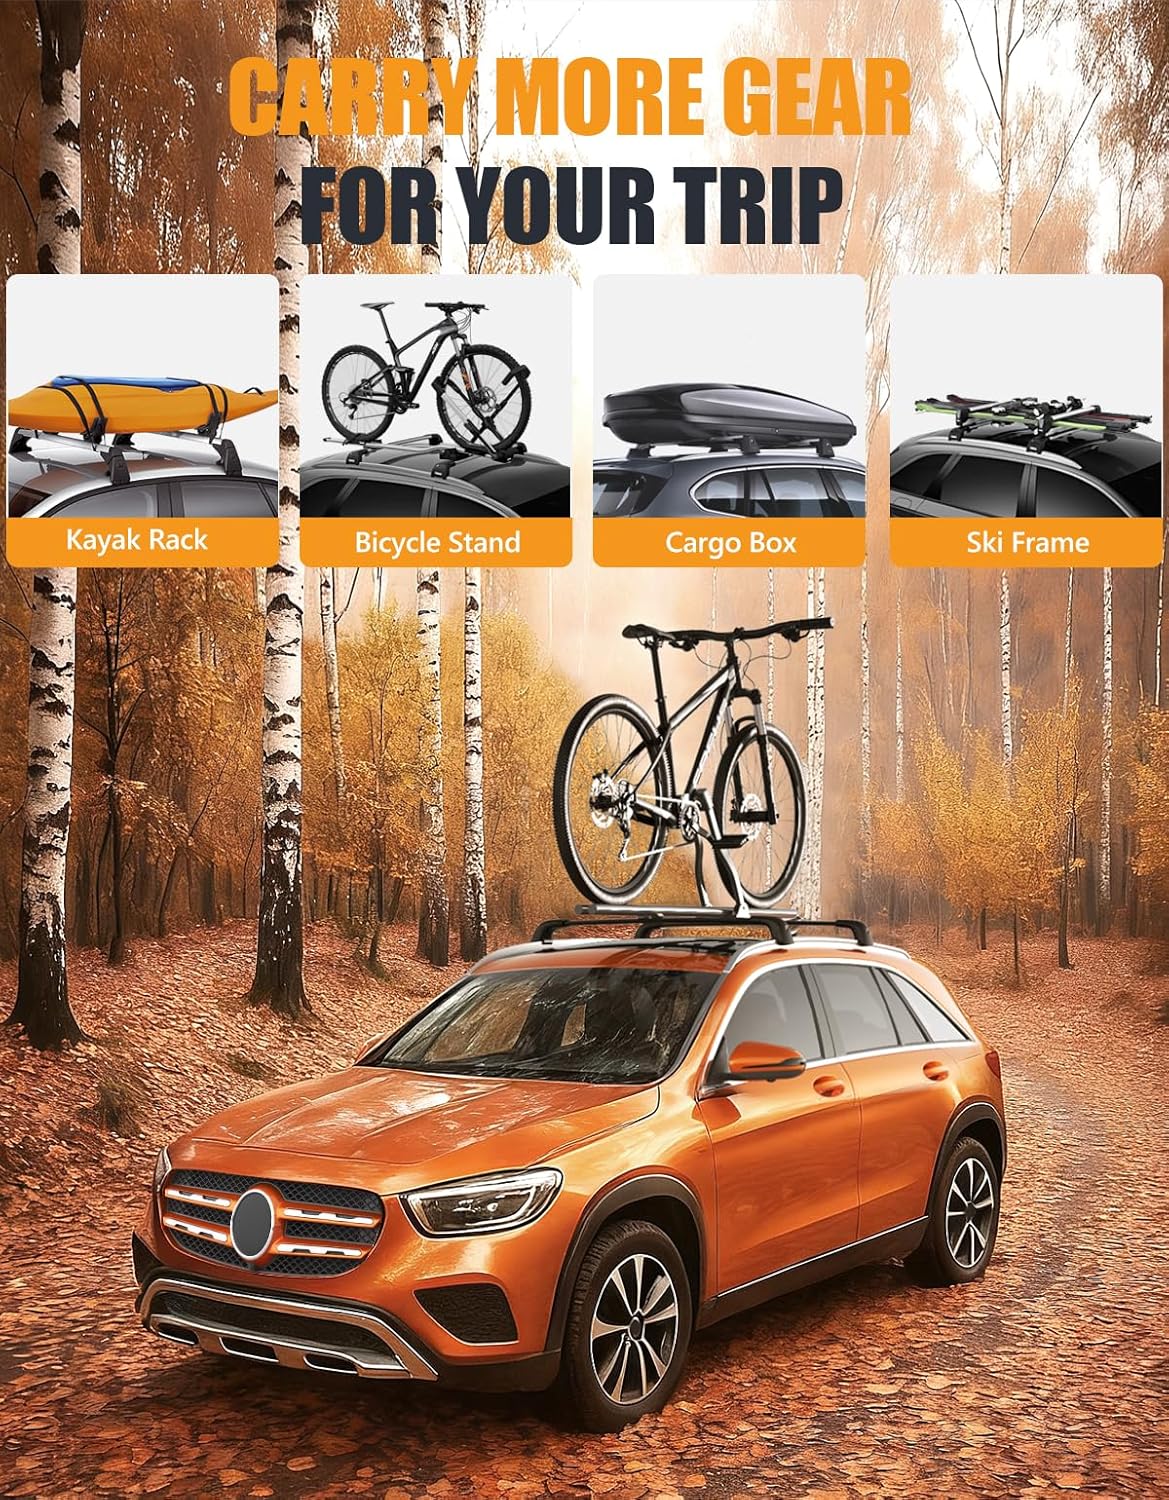
Image 2.1: All components included in the KINGGERI Roof Rack Cross Bars package.
3. Specifications
| Feature | Detail |
|---|---|
| Brand | KINGGERI |
| Model Number | KG2-A102-32 |
| Material | Aluminum (bars), Reinforced Plastic (brackets) |
| Color | Black |
| Load Capacity | 220 lbs (100 kg) |
| Mounting Type | U-Bolt (attaches to existing flush side rails) |
| Product Dimensions | 38 x 6 x 4 inches |
| Item Weight | 9 pounds |
| Special Features | Lockable anti-theft system, Tie-down loops, Aerodynamic design |
4. Compatibility & Fitment
These KINGGERI Roof Rack Cross Bars are specifically designed for:
- Mercedes Benz GLC models from 2016 to 2022.
- Your vehicle must have existing flush side rails for proper installation.
Important: These cross bars are NOT compatible with Mercedes Benz GLC 2023+ models.

Image 4.1: Visual guide for vehicle compatibility with flush side rails.
5. Setup & Installation
Follow these steps for a secure installation. It is recommended to perform initial assembly indoors before mounting on the vehicle.
5.1. Pre-Assembly of Cross Bars
- Identify the front and rear crossbars. The front crossbar is typically slightly longer to match the vehicle's roofline. The bars are labeled "Front" and "Rear".
- Attach the four base feet to the crossbars. Ensure the correct orientation: the "pointy" end of the crossbar should face the rear of your car, and the "round" end should face the front.
- Insert the screws to connect the base feet to the crossbars. Do not fully tighten them at this stage. This allows for length adjustment.
- Unlock the locking mechanism on each base foot using the provided keys. This will expose the screws for tightening the lower clamp.
Video 5.1: Animated installation guide for assembling the cross bars and attaching them to the vehicle's side rails.
5.2. Mounting on Vehicle
- Carefully place the assembled front crossbar onto the front flush side rails of your Mercedes Benz GLC.
- Adjust the length of the crossbar by sliding the ends until the lower clamps fit snugly under the side rails.
- Using the provided Allen wrench, tighten the screws on the base feet to secure the crossbar to the side rails. Ensure they are firmly tightened but do not overtighten.
- Repeat steps 5-7 for the rear crossbar.
- Once both crossbars are securely mounted, re-insert the lock mechanism and turn the key to lock each base foot. This prevents unauthorized removal.
Video 5.2: Demonstration of installing the roof rack cross bars onto a vehicle's existing side rails.

Image 5.1: Detail of the anti-theft lock system for securing the cross bars.
6. Operating Instructions
6.1. Load Capacity
The KINGGERI Roof Rack Cross Bars have a maximum load capacity of 220 lbs (100 kg). Do not exceed this weight limit to ensure safety and prevent damage to your vehicle or the cross bars.

Image 6.1: Examples of items that can be transported, highlighting the 220 lbs load capacity.
6.2. Securing Items
The four brackets of the crossbar are designed with integrated tie-down loops. Use these loops to securely fasten your cargo (e.g., kayak, bicycle, cargo box, ski frame) using appropriate straps or bungee cords. Always ensure cargo is evenly distributed and tightly secured to prevent shifting during transit.
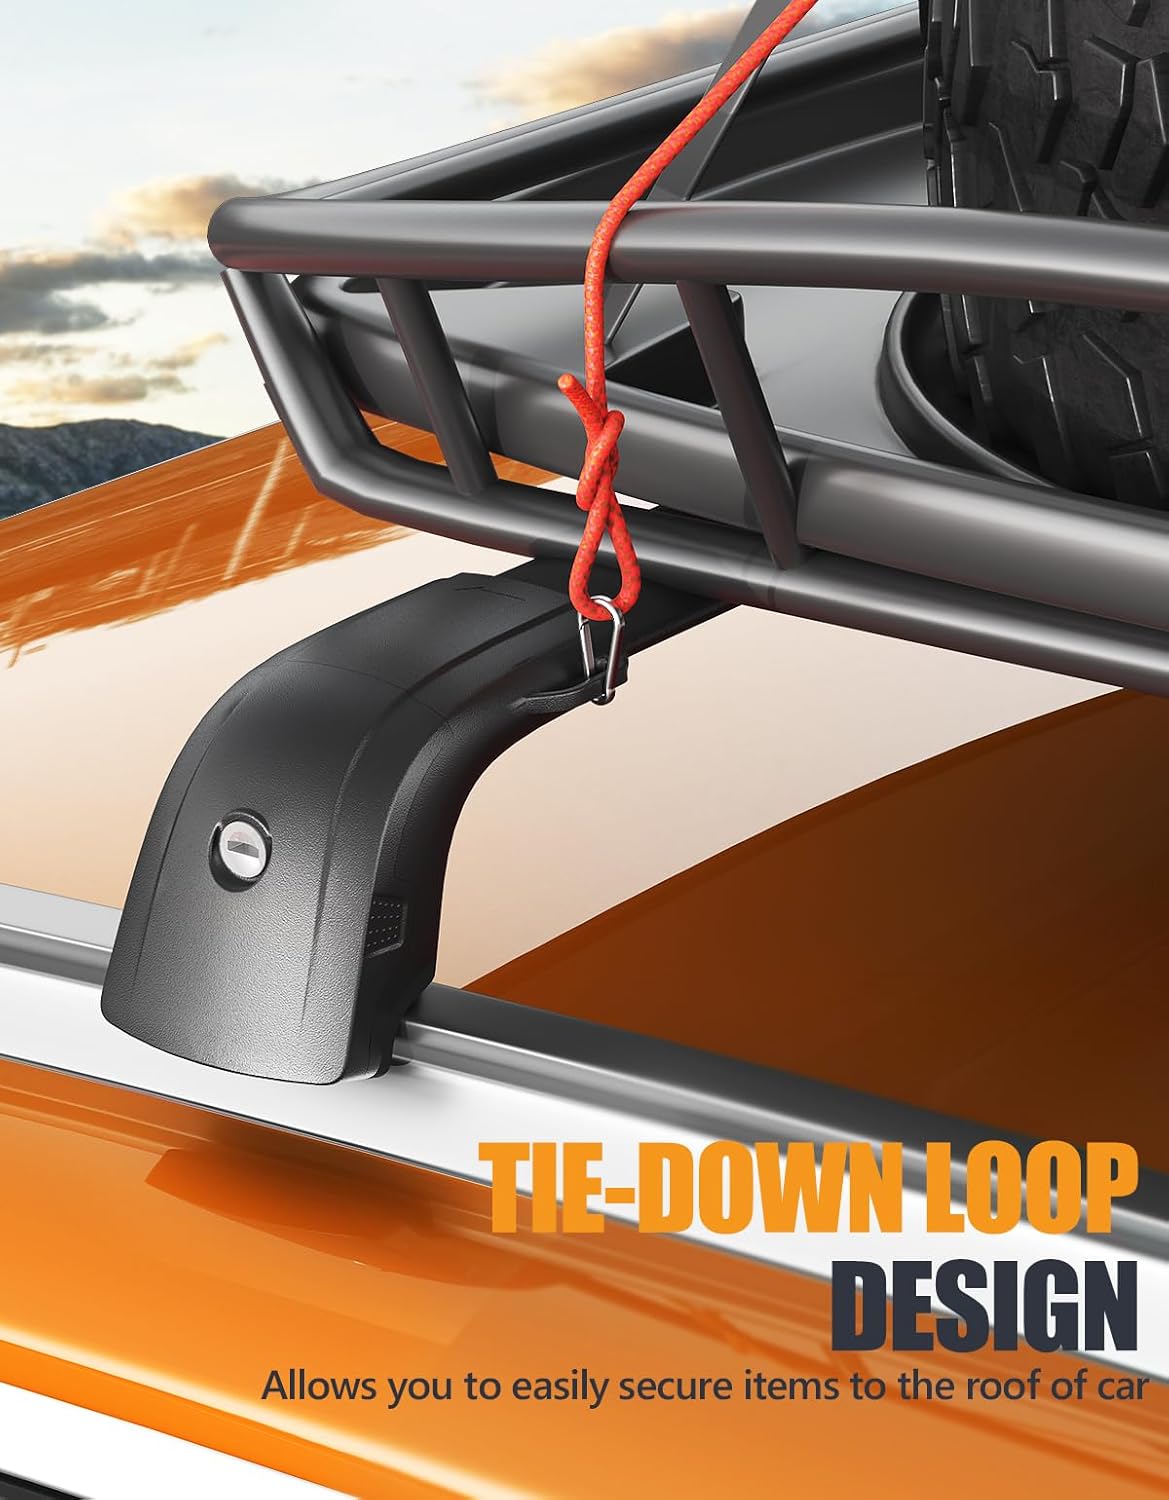
Image 6.2: Detail of the tie-down loop design for securing items.
6.3. Aerodynamic Design
The cross bars feature an aerodynamic profile designed to minimize wind resistance and noise. This contributes to a quieter driving experience, even at highway speeds, and helps maintain fuel efficiency.
7. Maintenance
- Regularly inspect all mounting points, screws, and locking mechanisms for tightness and wear.
- Clean the cross bars periodically with mild soap and water to remove dirt and grime. Avoid abrasive cleaners.
- Ensure the lock mechanisms are free of debris and lubricate them occasionally with a graphite-based lubricant if they become stiff.
- If the cross bars are not in use for extended periods, consider removing them to reduce potential wear and tear and improve fuel economy.
8. Troubleshooting
8.1. Excessive Wind Noise
If you experience unusual wind noise, check the following:
- Ensure both crossbars are installed with the correct front/rear orientation (aerodynamic profile facing forward).
- Verify that all components are securely tightened. Loose parts can vibrate and cause noise.
- Check if any cargo or accessories mounted on the cross bars are contributing to the noise. Adjust their position or secure them more firmly.
8.2. Difficulty Locking/Unlocking
If the locking mechanism is stiff or difficult to operate:
- Ensure the key is fully inserted and turned correctly.
- Check for any debris or dirt obstructing the lock. Clean if necessary.
- Apply a small amount of graphite lubricant to the keyhole and mechanism.
8.3. Cross Bars Feel Loose
If the cross bars feel loose after installation:
- Re-check all screws and ensure they are tightened securely with the Allen wrench.
- Verify that the lower clamps are properly engaged with the vehicle's flush side rails.
- Ensure the crossbar length adjustment is correct for your vehicle's width.
9. Warranty & Support
KINGGERI Roof Rack Cross Bars come with a 12-month warranty.
If you have any concerns, questions, or require assistance with your product, please do not hesitate to contact KINGGERI customer support. Refer to your purchase documentation for contact details or visit the official KINGGERI website.