1. Introduction
Thank you for choosing the Supersonic SC-570DC RoadEYE HD Dash Cam. This manual provides detailed instructions for the proper installation, operation, and maintenance of your device. Please read this manual thoroughly before use to ensure optimal performance and longevity of your dash cam.
What's in the Box
- Supersonic SC-570DC RoadEYE HD Dash Cam
- Car Charger
- User Manual (this document)
2. Product Overview
The Supersonic SC-570DC RoadEYE HD Dash Cam is designed to record your journeys with clarity and provide essential safety features. It features HD video recording, a wide-angle lens, night vision capabilities, and smart sensing for motion detection and impact monitoring.

Image 2.1: Front view of the SC-570DC Dash Cam, showing the display screen and control buttons.
Key Features
- HD Recording: Records video in 720p or 480p, with support for 1080p resolution.
- 120° Wide-Angle Lens: Captures a broad view of the road.
- Night Mode: Enhances video clarity in low-light conditions.
- G-Sensor: Automatically detects sudden impacts and locks video footage.
- Motion Detection: Initiates recording when movement is detected in front of the camera.
- Park Monitor: Records events when your car is parked and motion or impact is detected.
- Loop Recording: Continuously records, overwriting the oldest files when the memory card is full.
- Built-in Microphone: Records audio along with video.
- Photo Mode: Allows capturing high-resolution still images.
- MicroSD Card Support: Supports cards up to 32GB for storage.
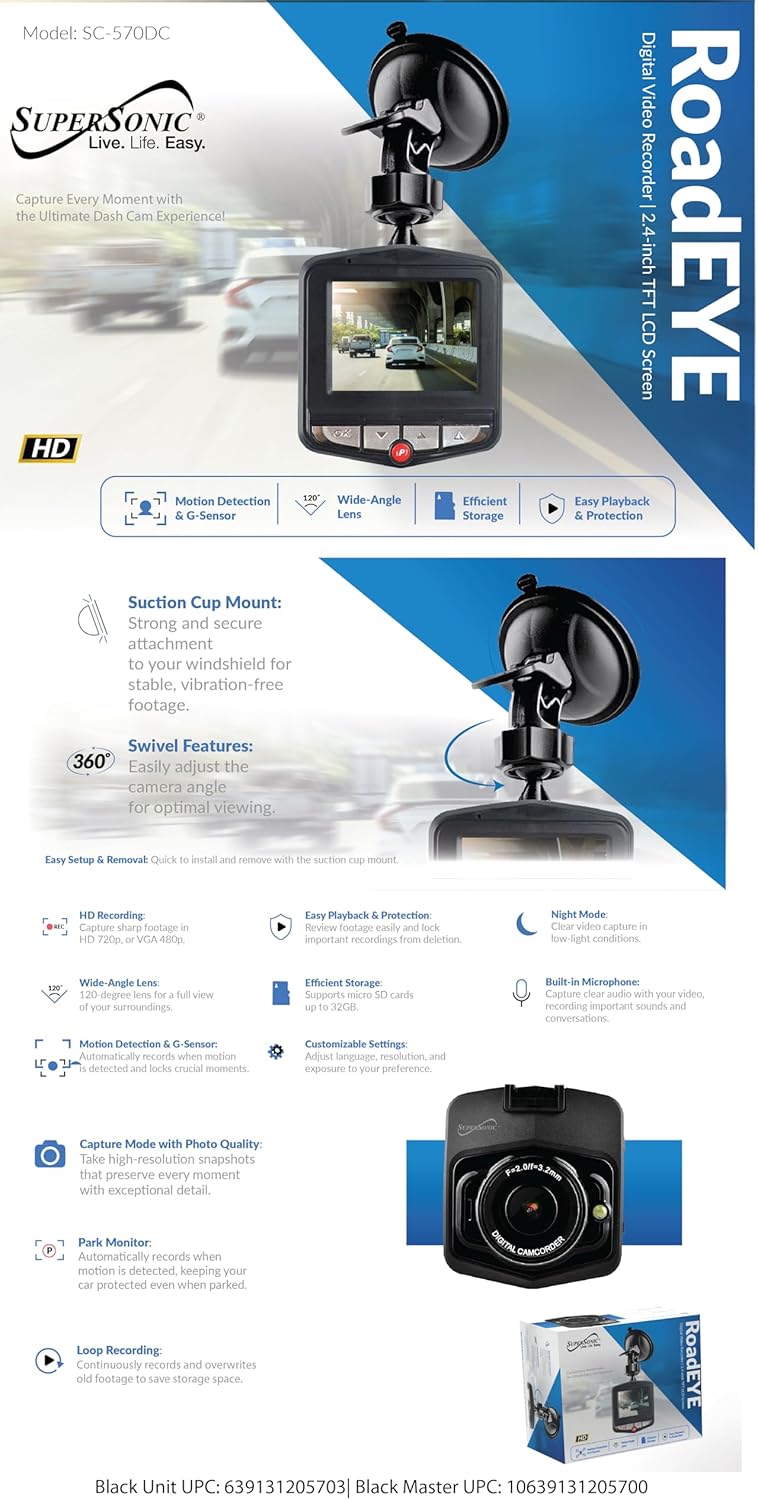
Image 2.2: Infographic highlighting key features such as HD recording, G-Sensor, and wide-angle lens.
3. Setup
3.1 Installing the MicroSD Card
- Ensure the dash cam is powered off.
- Locate the MicroSD card slot on the side of the device.
- Insert a Class 10 or higher MicroSD card (up to 32GB) into the slot until it clicks into place.
- To remove, gently push the card in until it clicks, then release.
3.2 Mounting the Dash Cam

Image 3.1: The dash cam with its suction cup mount, showing the device from two angles.
- Clean the desired area on your windshield where you want to mount the dash cam. Ensure it does not obstruct your view.
- Attach the suction cup mount to the dash cam.
- Press the suction cup firmly against the windshield and flip the lever to secure it.
- Adjust the camera angle using the swivel mechanism for optimal road visibility.

Image 3.2: Side view of the dash cam, illustrating the suction cup mount and swivel adjustment.
3.3 Power Connection
- Connect the car charger to the dash cam's power input port.
- Plug the other end of the car charger into your vehicle's 12V power outlet (cigarette lighter socket).
- The dash cam will typically power on automatically when the vehicle starts and power off when the vehicle is turned off.
4. Operating Instructions
4.1 Basic Operation

Image 4.1: Side view of the dash cam, highlighting the power button, MicroSD card slot, and menu button.
- Power On/Off: Press and hold the Power button (usually on the side) to manually turn the device on or off.
- Recording: Once powered on and a MicroSD card is inserted, the dash cam will typically begin recording automatically (Loop Recording). A red indicator light or icon on the screen usually confirms recording is active.
- Stop/Start Recording: During recording, press the 'OK' button to stop recording. Press 'OK' again to resume.
4.2 Menu Navigation and Settings
Use the menu button (often labeled 'M') to access settings. Use the Up/Down arrow buttons to navigate and 'OK' to select.
- Video Resolution: Select 1080p, 720p, or 480p for recording quality.
- Loop Recording: Set the duration of video segments (e.g., 1, 3, 5 minutes). When the card is full, the oldest unprotected files will be overwritten.
- G-Sensor Sensitivity: Adjust sensitivity (Low, Medium, High, Off). Higher sensitivity means minor impacts will trigger file locking.
- Motion Detection: Enable or disable. When enabled, the camera will start recording if motion is detected while parked.
- Park Monitor: Enable or disable. When enabled, the camera will automatically record if an impact is detected while the vehicle is parked and the camera is off.
- Night Mode: Enable for improved low-light recording.
- Date/Time Stamp: Ensure this is enabled and correctly set for accurate record-keeping.
- Language: Select your preferred language for the menu interface.
4.3 Photo Mode
From video recording mode, press the 'Mode' button (often labeled 'M' or a dedicated mode button) to switch to Photo Mode. Press 'OK' to capture a still image.
4.4 Playback
- Stop recording if currently active.
- Press the 'Mode' button to switch to Playback Mode.
- Use the Up/Down arrow buttons to browse through recorded videos or photos.
- Press 'OK' to play a selected file.
- To exit Playback Mode, press the 'Mode' button again.
4.5 File Protection
During recording, if the G-Sensor detects an impact, the current video file will be automatically locked to prevent it from being overwritten by loop recording. You can also manually lock a file during playback by selecting the file and using the menu option to protect it.
5. Maintenance
- Cleaning: Use a soft, dry cloth to clean the camera lens and screen. Avoid abrasive cleaners or solvents.
- MicroSD Card: It is recommended to format the MicroSD card periodically (e.g., once a month) to maintain optimal performance and prevent data corruption. This can usually be done through the dash cam's menu settings. Note: Formatting will erase all data on the card. Back up important files before formatting.
- Storage: Store the dash cam in a cool, dry place when not in use, away from direct sunlight and extreme temperatures.
6. Troubleshooting
| Problem | Possible Solution |
|---|---|
| Dash cam does not power on. |
|
| Recording stops unexpectedly. |
|
| Video quality is poor. |
|
| Dash cam gets hot during operation. |
|
7. Specifications
| Feature | Detail |
|---|---|
| Model Number | SC-570DC |
| Video Capture Resolution | 1080p (also supports 720p, 480p) |
| Lens Angle | 120° Wide Angle |
| Special Features | G-Sensor, Motion Detection, Loop Recording, Night Mode, Park Monitor, Photo Mode, Built-in Mic, 360 Degree Swivel Mount |
| Storage | MicroSD card up to 32GB (Class 10 recommended) |
| Connectivity Technology | Auxiliary |
| Mounting Type | Windshield Suction Mount |
| Product Dimensions | 4.13"D x 1.77"W x 1.69"H |
| UPC | 639131205703 |
8. Warranty and Support
This product is manufactured by Supersonic. For warranty information, technical support, or service inquiries, please refer to the warranty card included with your purchase or visit the official Supersonic website. Keep your purchase receipt as proof of purchase for any warranty claims.
For further assistance, you may visit the Supersonic store on Amazon: Supersonic Store