Curtainboro Q57J1RGMSKx2nadZXbv-WQxBCze8i
Curtainboro 8X4 FT Outdoor Metal Storage Shed Instruction Manual
Model: Q57J1RGMSKx2nadZXbv-WQxBCze8i
Introduction
This manual provides comprehensive instructions for the assembly, operation, and maintenance of your Curtainboro 8X4 FT Outdoor Metal Storage Shed. Please read this manual thoroughly before beginning assembly or use to ensure safe and efficient operation and to maximize the lifespan of your product.
The Curtainboro 8X4 FT Outdoor Metal Storage Shed is designed to provide a spacious and secure solution for outdoor storage. Constructed from weatherproof galvanized steel, it offers durability and protection for your tools, equipment, and other outdoor items.

Image: Front view of the assembled Curtainboro 8x4 FT Outdoor Metal Storage Shed, showcasing its gray galvanized steel construction and sliding door.
Safety Information
Always prioritize safety during assembly and use. Failure to follow these instructions may result in injury or damage to the product.
- Ensure all parts are present and undamaged before beginning assembly.
- Wear appropriate personal protective equipment (PPE), such as gloves and eye protection, during assembly.
- Assemble the shed on a level, stable surface. A concrete slab or treated timber foundation is recommended.
- Securely anchor the shed to the ground to prevent wind damage. The package includes a heavy-duty anchoring system.
- Keep children and pets away from the assembly area.
- Do not attempt to assemble the shed during strong winds or adverse weather conditions.
- Be aware of sharp edges on metal components. Handle with care.
- Do not store flammable liquids or hazardous materials inside the shed unless properly contained and ventilated.
- Regularly inspect the shed for any signs of wear or damage, especially after severe weather.
Package Contents
Verify that all components listed below are included in your package before starting assembly. If any parts are missing or damaged, please contact customer support.
- Galvanized Steel Panels (Walls, Roof, Doors)
- Frame Components (Beams, Posts, Rails)
- Sliding Door Tracks and Hardware
- Ventilation Grilles
- Fasteners (Screws, Nuts, Bolts, Washers)
- Floor Base Frame Components
- Heavy-Duty Anchoring System
- Assembly Manual
- Included Tools/Accessories:
- Tool Shelf x 2
- Padlock x 1
- Tool Hook x 2
- Gloves x 2 (for assembly)
- Internal Anchors x 4
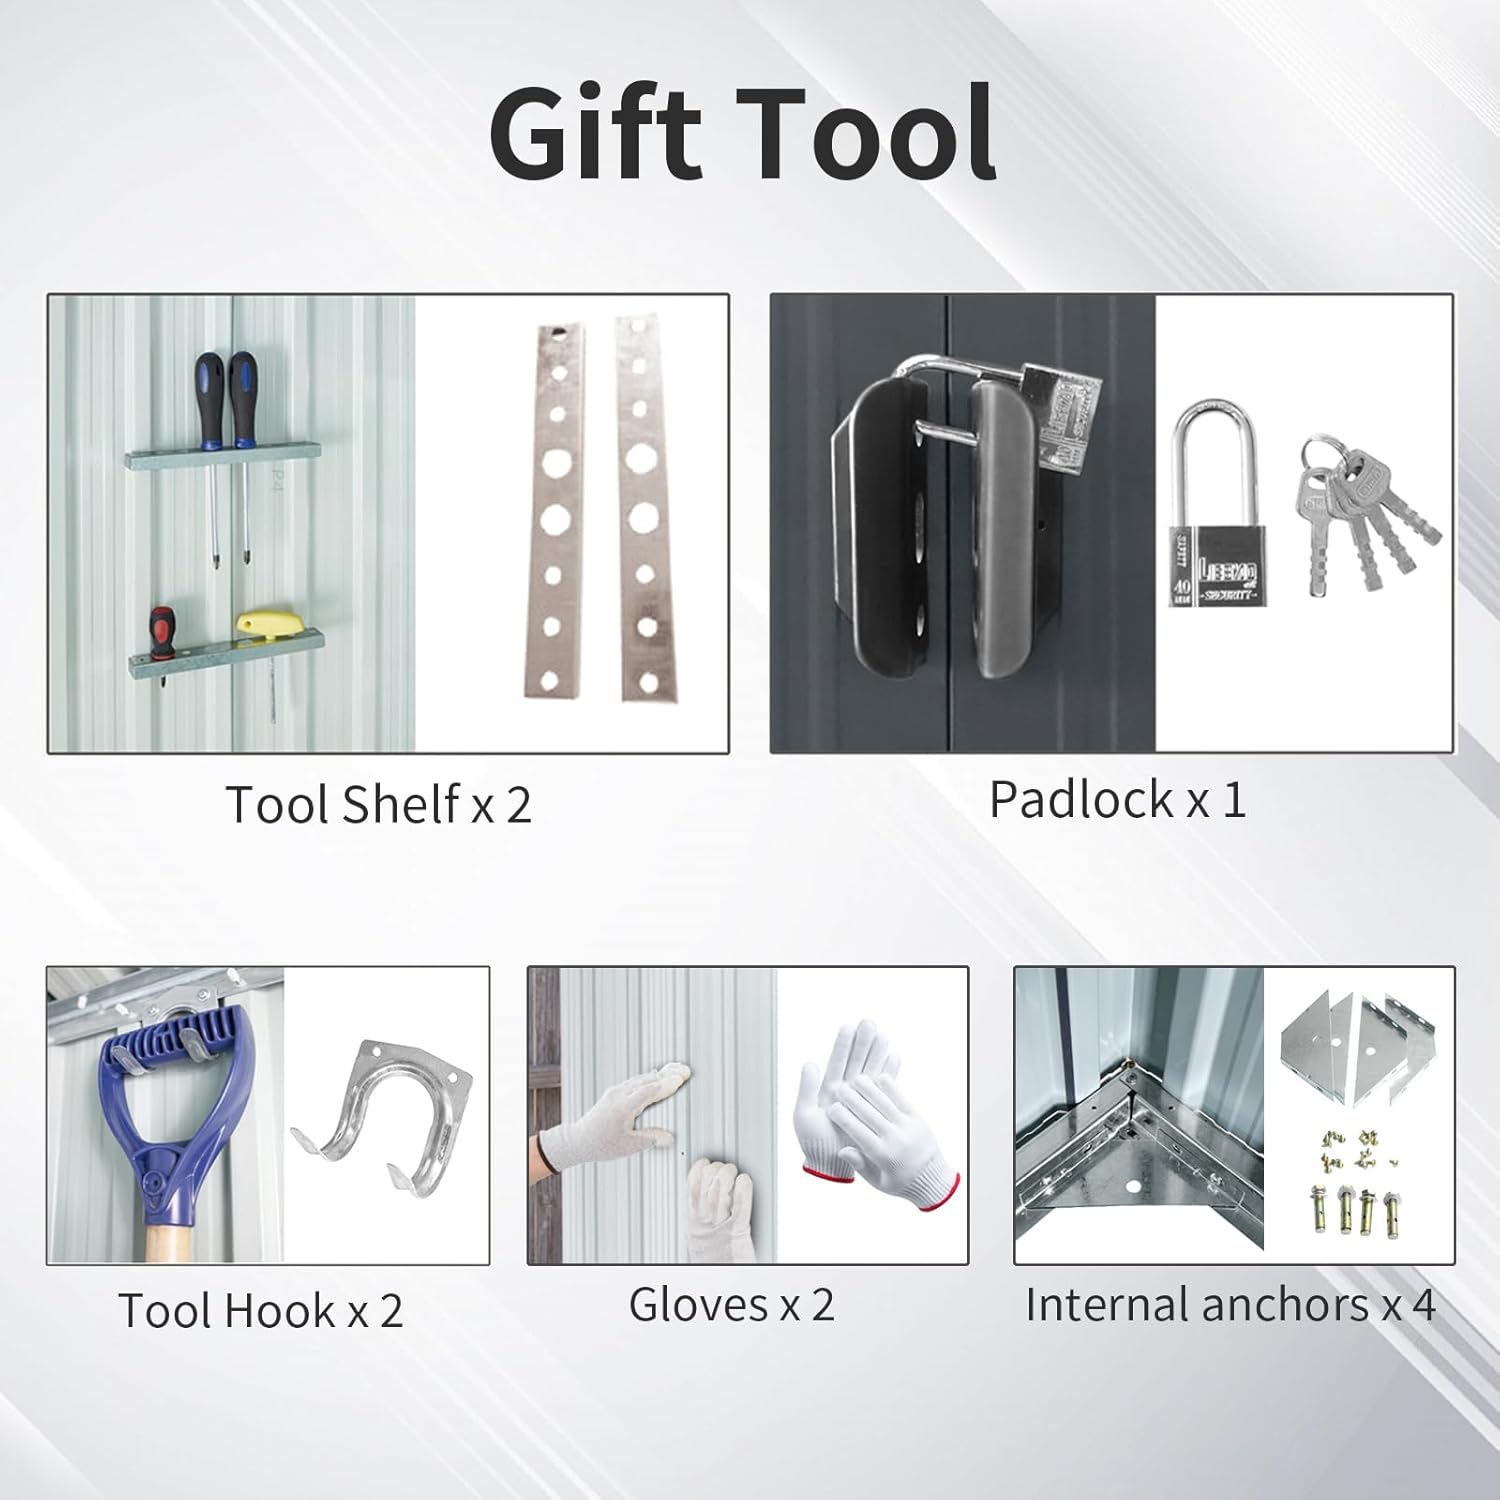
Image: A visual representation of the additional items included with the shed: two tool shelves, a padlock with keys, two tool hooks, two pairs of gloves, and four internal anchors.
Setup and Assembly
The shed features pre-drilled components and numbered connectors for simplified assembly. It is recommended that two people assemble the shed.
1. Site Preparation
Choose a level, well-drained area for your shed. Clear any debris, rocks, or vegetation. A solid foundation (e.g., concrete slab, gravel pad, or treated timber frame) is crucial for stability and longevity. The shed includes a raised metal foundation frame to prevent moisture damage from ground contact.

Image: Diagram illustrating the shed's floor frame and its integrated foundation, designed to protect items from ground moisture.
2. Assemble the Base Frame
Follow the numbered diagrams in the included assembly manual to connect the base frame components. Ensure all connections are secure but do not fully tighten bolts until the entire frame is assembled and squared.
3. Install Wall Panels
Attach the pre-drilled wall panels to the base frame and to each other using the provided fasteners. Pay attention to the orientation of each panel as indicated in the manual. The steel construction and UV-resistant panels are designed for durability.
4. Construct the Roof
Assemble the roof frame and attach the roof panels. Ensure proper overlap for weather sealing. Install the ventilation grilles into the designated openings on the roof or upper wall sections to ensure proper air circulation and prevent condensation.
5. Install Sliding Doors
Mount the sliding door tracks at the top and bottom of the door opening. Carefully insert the sliding doors into the tracks. Test the smooth operation of the doors. The precision-engineered door tracks are designed to block external elements.
6. Secure and Anchor
Once the shed is fully assembled, tighten all bolts and screws. Use the heavy-duty anchoring system to secure the shed to your foundation. This is critical for wind resistance up to 70 mph.
7. Install Accessories
Install the included tool shelves and hooks as desired for internal organization. Attach the reinforced lock hasps to the sliding doors and use the complimentary weatherproof padlock for security.
Operating Instructions
Opening and Closing Doors
The shed features extra-wide sliding doors. To open, simply slide the door along its track. To close, slide it back until it meets the frame. Ensure the doors are fully closed to maintain weatherproofing.

Image: Detailed views of the shed's internal space, the gate lock mechanism, the external base plate, and the air vent, highlighting key functional components.
Ventilation
The shed is equipped with two heavy-duty punched vents to maintain proper air circulation. These vents are designed to prevent condensation and keep stored items dry. Ensure vents are not obstructed by stored items or debris.
Security
Utilize the provided padlock with the reinforced lock hasps on the sliding doors to secure your belongings. Always lock the shed when not in use, especially if storing valuable items.
Maintenance
Regular maintenance will extend the life of your storage shed.
- Cleaning: Clean the exterior of the shed periodically with mild soap and water. Avoid abrasive cleaners or harsh chemicals that could damage the powder coating.
- Door Tracks: Keep the sliding door tracks free of dirt, leaves, and debris to ensure smooth operation. Lubricate the tracks annually with a silicone-based spray if needed.
- Fasteners: Periodically check all bolts and screws for tightness, especially after strong winds. Retighten as necessary.
- Ventilation: Ensure the air vents remain clear and unobstructed to allow for proper airflow and prevent moisture buildup.
- Rust Prevention: The galvanized steel is designed to resist rust. However, if scratches or chips occur, touch up with rust-inhibiting paint to prevent corrosion.
- Snow Load: In areas with heavy snowfall, regularly clear snow from the roof to prevent excessive weight buildup.

Image: Visual representation of the shed's weather resistance, showing its waterproof, insulated, and UV protection capabilities against rain, snow, and sun.
Troubleshooting
| Problem | Possible Cause | Solution |
|---|---|---|
| Doors stick or are difficult to slide. | Debris in tracks, misaligned tracks, lack of lubrication. | Clean tracks thoroughly. Check track alignment and adjust if necessary. Apply silicone lubricant to tracks. |
| Water pooling inside the shed. | Improper foundation, unsealed seams, obstructed vents. | Ensure shed is on a level, well-drained foundation. Check all panel seams and apply sealant if needed. Clear any obstructions from vents. |
| Shed feels unstable or wobbly. | Loose fasteners, inadequate anchoring, uneven ground. | Tighten all bolts and screws. Verify anchoring system is properly installed and secure. Ensure the foundation is level. |
| Condensation inside the shed. | Poor ventilation, high humidity. | Ensure vents are clear. Consider adding a dehumidifier if humidity is consistently high. Avoid storing wet items. |
Specifications
| Feature | Detail |
|---|---|
| Brand | Curtainboro |
| Model Number | Q57J1RGMSKx2nadZXbv-WQxBCze8i |
| Color | Gray |
| Product Dimensions (L x W x H) | 88.98 x 46.85 x 74.8 inches (approx. 8x4 FT) |
| Item Weight | 115 Pounds |
| Material | Galvanized Steel (Powder-Coated) |
| Assembly Required | Yes |
| Ventilation | Two heavy-duty punched vents |
| Door Type | Sliding Doors |
| Wind Resistance | Up to 70 mph (with proper anchoring) |

Image: Detailed product dimension diagram, showing the overall height, width, and depth of the shed in inches.
Warranty and Support
For any questions, missing parts, or assistance with assembly and operation, please contact Curtainboro customer support. Refer to your purchase documentation for specific warranty details. General support is available for product inquiries.
This product is designed for long-lasting performance with proper care and maintenance.