1. Introduction
The Beelink SER9 Mini PC is a compact and powerful desktop computer designed for a wide range of applications, including gaming, image editing, office tasks, creative design, programming, and home theater PC (HTPC) use. It features an AMD Ryzen 7 H 255 processor, 32GB of LPDDR5X RAM, and a 1TB PCIe 4.0 SSD, offering robust performance in a small form factor.
This manual provides essential information for setting up, operating, maintaining, and troubleshooting your Beelink SER9 Mini PC.

Figure 1: Beelink SER9 Mini PC Overview
2. What's in the Box
Please verify that all items listed below are included in your package:
- 1 x Beelink SER9 H 255 Mini PC
- 1 x HDMI Cable (100CM)
- 1 x Power Adapter
- 1 x User Manual (including Certificate and Warranty Card)

Figure 2: Package Contents
3. Setup Guide
3.1 Connecting Peripherals
- Connect Display: Use the provided HDMI cable to connect your monitor to the HDMI 2.1 port on the Mini PC. Alternatively, you can use the DisplayPort 1.4 or USB-C 4.0 port for triple display output.
- Connect Keyboard and Mouse: Plug your USB keyboard and mouse into the available USB 3.2 or USB 2.0 ports. Wireless peripherals can be connected via Bluetooth 5.2.
- Network Connection: For a wired connection, connect an Ethernet cable to the 2.5Gbps LAN port. For wireless, ensure your Wi-Fi network is available.
- Audio Devices: Connect speakers or headphones to the 3.5mm audio jack if needed.
3.2 Powering On
- Connect Power Adapter: Plug the power adapter into the DC IN port on the Mini PC, then connect it to a power outlet.
- Power On: Press the power button located on the front of the Mini PC. The system will boot up, and Windows 11 Pro will load.

Figure 3: Port Layout
4. Operating Instructions
4.1 Display Configuration
The Beelink SER9 supports up to three displays simultaneously, offering 4K resolution at 240Hz via HDMI 2.1, DisplayPort 1.4, and USB-C 4.0. To configure multiple displays:
- Connect your monitors to the available video output ports.
- In Windows, right-click on the desktop and select "Display settings" to arrange and extend your displays as desired.
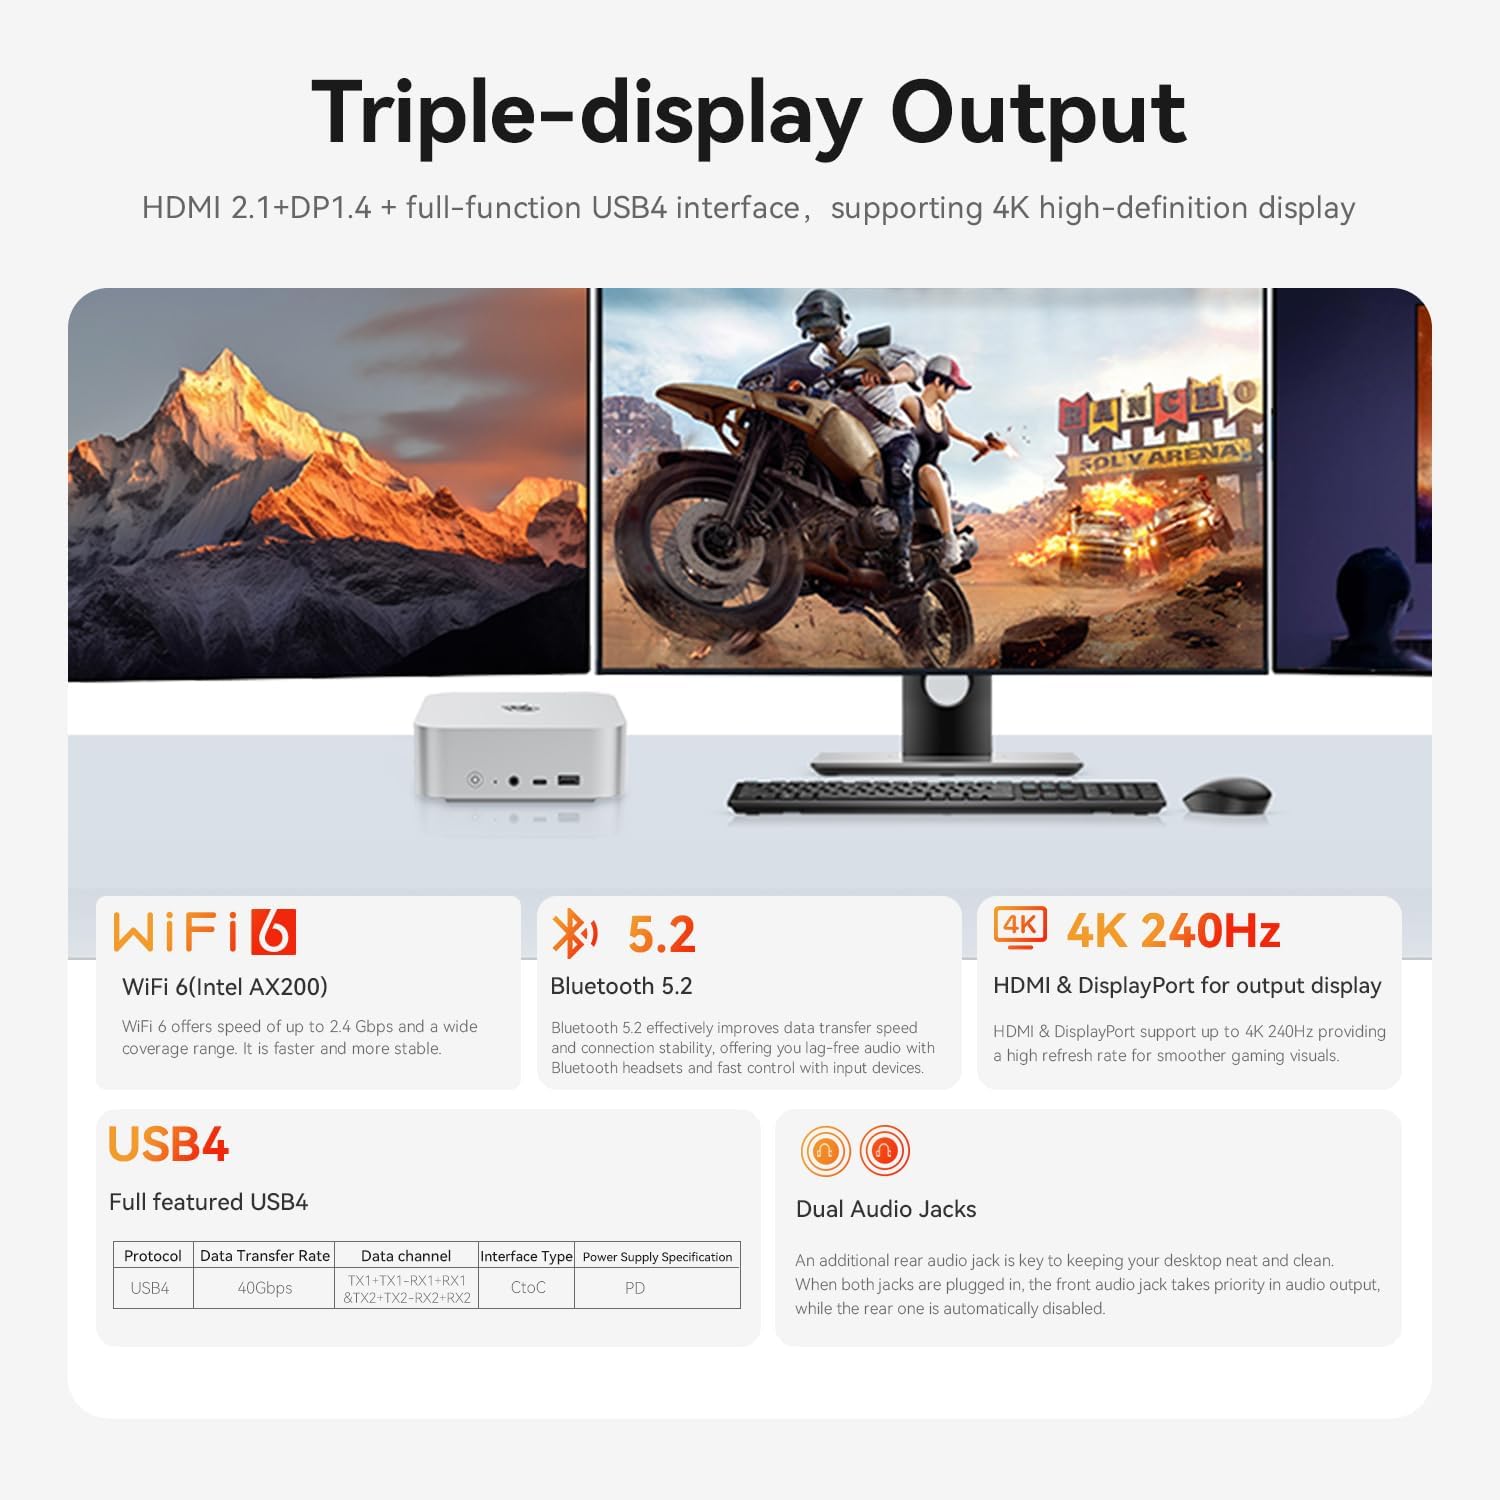
Figure 4: Triple Display Setup
4.2 Network and Wireless Connectivity
- Wi-Fi 6: The Mini PC is equipped with Wi-Fi 6 (802.11ax) for high-speed wireless internet access. Connect to your preferred Wi-Fi network through Windows settings.
- Bluetooth 5.2: Use Bluetooth 5.2 to connect wireless devices such as headphones, speakers, or game controllers. Pair devices through Windows Bluetooth settings.
- 2.5Gbps LAN: For the most stable and fastest network connection, utilize the 2.5Gbps Ethernet port.
4.3 USB4 Functionality
The USB-C 4.0 port on the Beelink SER9 offers versatile functionality:
- Data Transfer: Supports data transfer speeds up to 40Gbps.
- Power Delivery: Capable of 100W power transfer, allowing you to charge compatible devices.
- Display Output: Can be used as an additional display output.
5. Maintenance
5.1 Cooling System
The Beelink SER9 features an MSC2.0 cooling system, including a silent fan, SSD heatsink, and dustproof design. Air intake from the bottom efficiently dissipates heat, ensuring stable operation at 65W TDP with near-silent performance (approximately 32dB).

Figure 5: MSC2.0 Cooling System
5.2 Dust Filter Cleaning
To maintain optimal cooling performance, it is recommended to periodically clean the dust filter. The bottom panel of the Mini PC can be removed by unscrewing the four screws underneath, providing access to the dust filter for cleaning.
5.3 Storage Upgrade
The Mini PC includes dual M.2 PCIe 4.0 2280 SSD slots. You can upgrade or add additional storage, with each slot supporting up to 4TB, for a combined total of 8TB. To access the SSD slots, carefully remove the bottom panel.
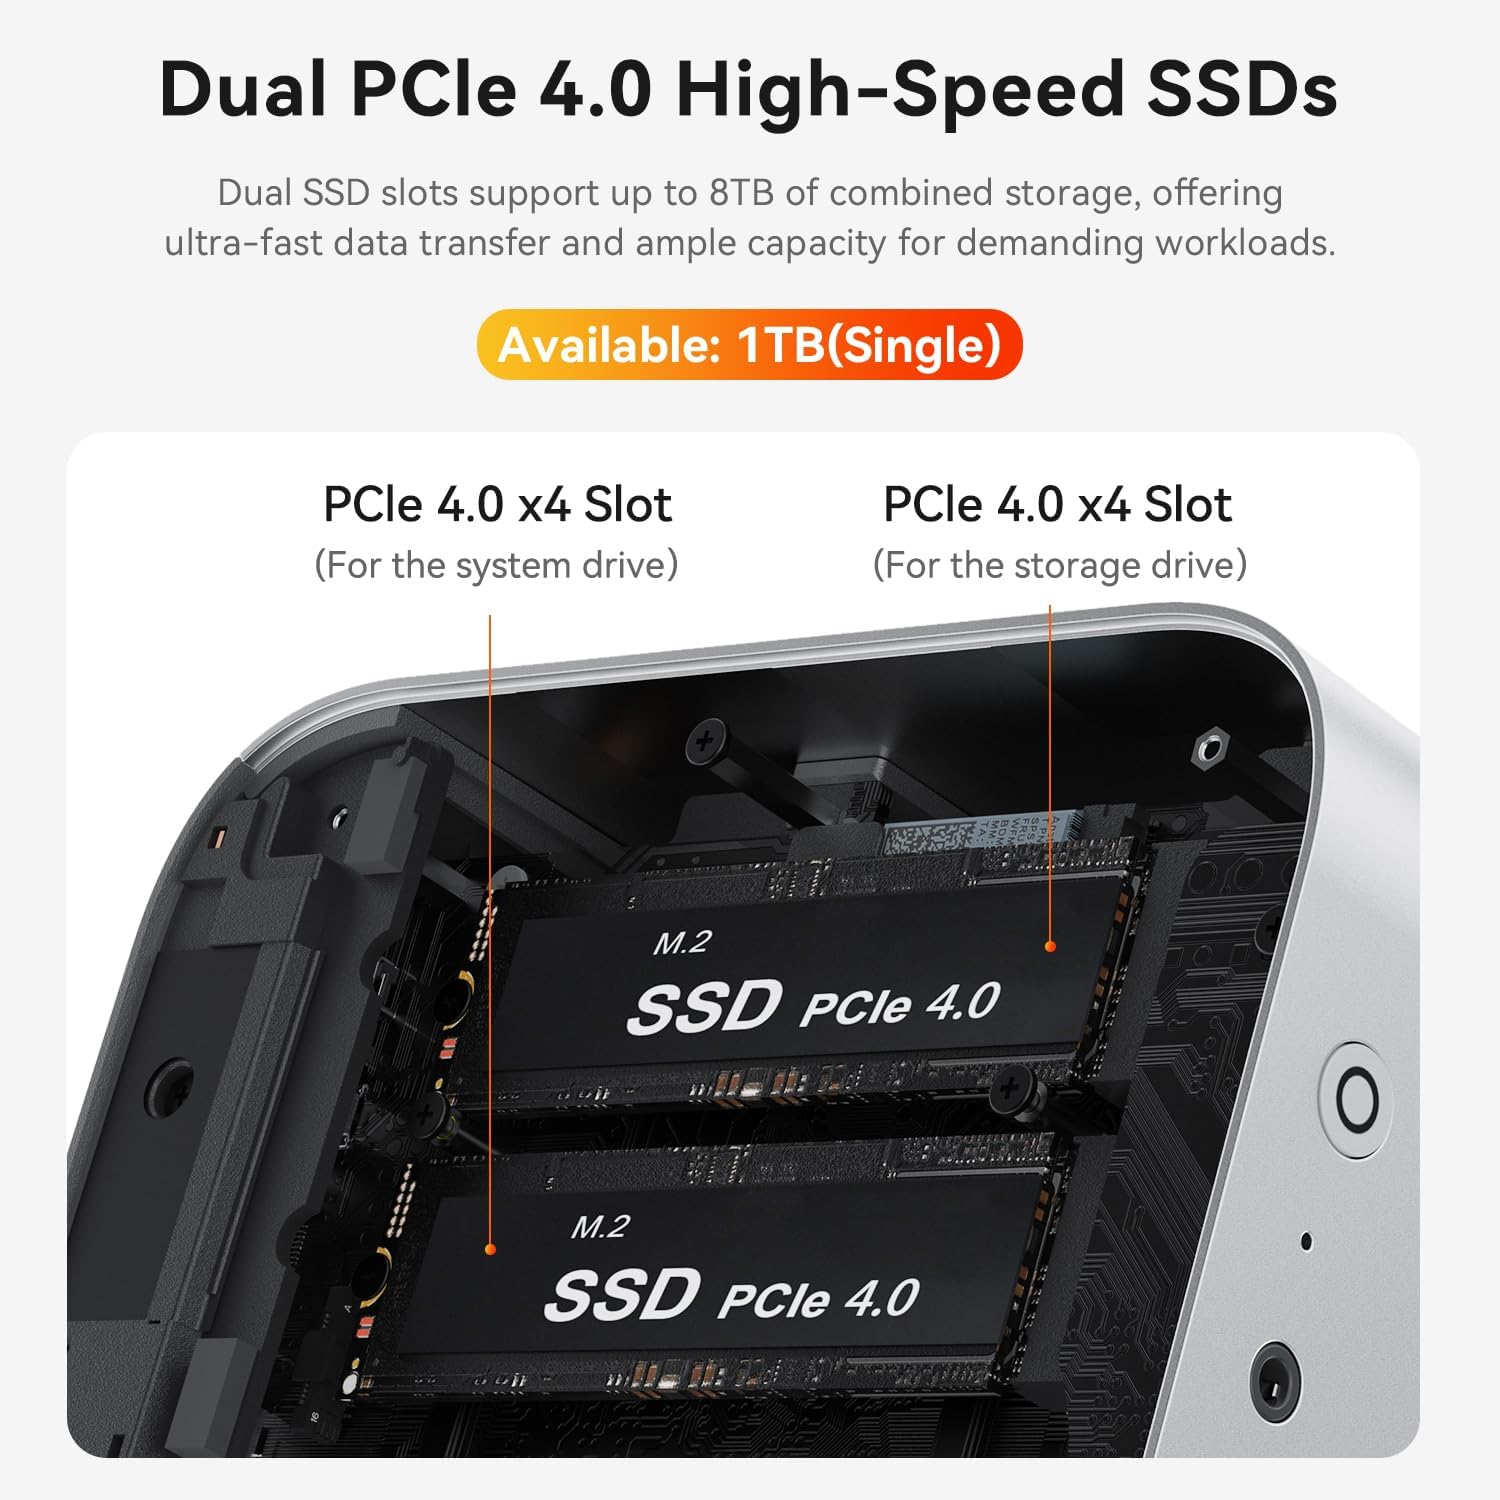
Figure 6: Dual PCIe 4.0 SSD Slots
6. Troubleshooting
6.1 No Power / System Not Starting
- Ensure the power adapter is securely connected to both the Mini PC and a working power outlet.
- Verify the power button is pressed firmly.
- Check if the power outlet is functional by plugging in another device.
6.2 No Display Output
- Confirm that the HDMI, DisplayPort, or USB-C cable is securely connected to both the Mini PC and the monitor.
- Ensure the monitor is powered on and set to the correct input source.
- Try a different display cable or monitor to isolate the issue.
6.3 Network Connectivity Issues
- Wired: Check the Ethernet cable connection and ensure your router/modem is working correctly.
- Wireless: Verify that Wi-Fi is enabled in Windows settings and that you are connected to the correct network with the correct password. Restart your router if necessary.
6.4 Auto Power On Feature
If you require the "Auto Power On" feature, please contact Beelink customer support. You will need to provide the barcode located on the bottom of your Mini PC to receive the necessary tutorial file for activation.
7. Specifications
| Feature | Detail |
|---|---|
| Processor | AMD Ryzen 7 H 255 (8 Cores, 16 Threads, 3.8GHz base, up to 4.9GHz boost) |
| Graphics | AMD Radeon 780M (Integrated, RDNA3, 2600 MB RAM) |
| RAM | 32GB LPDDR5X |
| Storage | 1TB PCIe 4.0 SSD (Dual M.2 2280 slots, max 8TB total) |
| Operating System | Windows 11 Pro |
| Video Output | HDMI 2.1 (4K@240Hz), DisplayPort 1.4 (4K@240Hz), USB-C 4.0 (Triple Display Support) |
| Wireless Connectivity | Wi-Fi 6 (802.11ax), Bluetooth 5.2 |
| Wired Connectivity | 2.5Gbps Ethernet LAN |
| Ports | USB4 (100W PD, 40Gbps data), USB 3.2 (10Gbps), USB 2.0 (480Mbps), 3.5mm Audio Jack, DC IN |
| Dimensions (Package) | 6.65 x 6.61 x 3.9 inches |
| Weight | 3 pounds |
8. Warranty and Support
Beelink provides comprehensive customer support for your SER9 Mini PC:
- Lifetime Technical Support: Enjoy 7-day/24-hour technical support for any product-related questions.
- Certifications: Products have passed CE, EMC, FCC, and RoHS certifications, ensuring quality and safety standards.
8.1 How to Contact Support
For technical assistance or product inquiries, please follow these steps:
- Log in to your Amazon account.
- Navigate to "Your Account."
- Go to "Your Orders."
- Locate your Beelink SER9 Mini PC order and select "Ask Product Question."
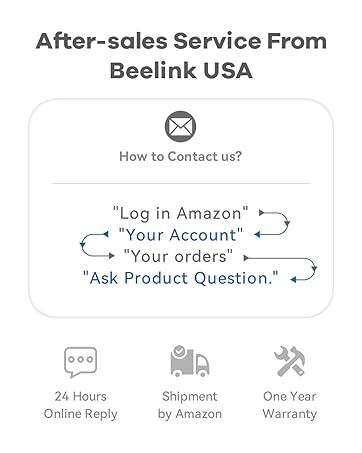
Figure 7: After-sales Service Contact Information


