1. Introduction
This manual provides essential information for the installation, operation, and maintenance of your Acegeek Omniview Mid-Tower Gaming Case, model AG-OMNIVIEW-WH. This case is designed to house various computer components, offering compatibility with advanced configurations and efficient thermal management.
The case features a white finish and a large glass side panel, allowing for a clear view of the internal components. It is constructed from ABS, mesh, and glass materials.
2. Setup and Component Installation
Before beginning installation, ensure you have all necessary tools and components. Always handle components with care and follow anti-static precautions.
2.1 Preparing the Case
- Carefully unpack the Acegeek Omniview case from its packaging.
- Remove the side panels. The glass side panel is typically secured with screws or a latch mechanism.
- Identify the motherboard tray, drive bays, and fan mounting locations.

Figure 1: Interior view of the Acegeek Omniview case, highlighting the motherboard tray and various fan mounting points on the side, top, and rear.
2.2 Motherboard Installation
- Install the necessary motherboard standoffs into the motherboard tray according to your motherboard's form factor (ATX, Micro-ATX, ITX).
- Place the I/O shield into the rear opening of the case.
- Carefully align your motherboard with the standoffs and I/O shield, then secure it with screws.
2.3 Power Supply Unit (PSU) Installation
- Locate the PSU mounting area, typically at the bottom rear of the case.
- Slide the PSU into position and secure it with screws from the rear of the case.
2.4 Storage Drive Installation
- Install 2.5" SSDs into the designated SSD bays (supports 2 SSDs).
- Install 3.5" HDDs into the designated HDD bay (supports 1 HDD).
- Secure drives using the provided screws or tool-less mechanisms.
2.5 Cooling System Installation (Fans and Water Coolers)
The Acegeek Omniview supports various fan and water cooler configurations. Note: Fans are not included with the case.
- Side: Supports 3 x 120 mm or 2 x 140 mm fans. Water cooler support: 240 mm or 280 mm.
- Top: Supports 3 x 120 mm or 2 x 140 mm fans. Water cooler support: 280 mm or 360 mm.
- Rear: Supports 1 x 120 mm fan.
- Bottom: Supports 3 x 120 mm or 2 x 140 mm fans.
- Install fans or radiators into the desired locations, ensuring proper airflow direction.

Figure 2: Front angled view of the Acegeek Omniview case, demonstrating potential fan placements on the side, top, and rear. Note that fans are not included with the case.
2.6 Graphics Card (VGA) and Expansion Card Installation
- Remove the necessary expansion slot covers from the rear of the case (7 expansion slots available).
- Insert your graphics card or other expansion cards into the appropriate PCIe slots on the motherboard.
- Secure the cards with screws. The case supports VGA cards up to 400 mm in length.
2.7 Cable Management
The case provides 20 mm of space for cable management behind the motherboard tray. Utilize cable tie-down points and routing holes to organize cables for improved airflow and aesthetics.
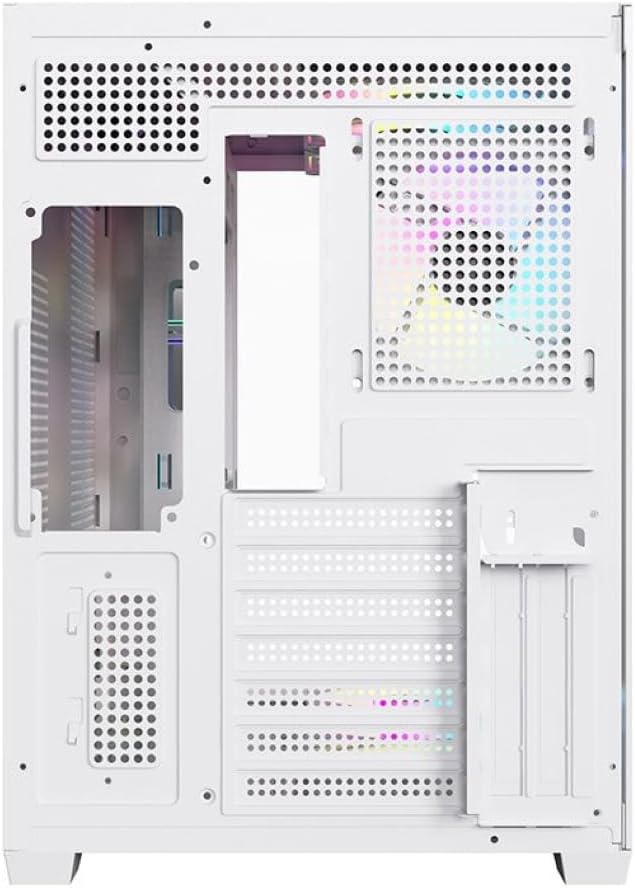
Figure 3: Rear interior view of the Acegeek Omniview case, illustrating the space available for cable management behind the motherboard tray.
2.8 Final Assembly
- Connect all necessary power and data cables to your components.
- Connect the case's front panel connectors (power button, reset button, USB ports, audio jacks) to the motherboard.
- Reattach the side panels, ensuring they are securely fastened.
3. Operating Instructions
Once all components are installed and connected, your computer system is ready for operation.
- Power On: Press the power button located on the front panel of the case to start your system.
- Airflow: Ensure that the case has adequate space around it for proper airflow. Avoid blocking the intake and exhaust vents.
- Visibility: The large glass side panel allows for viewing of internal components. Ensure all internal lighting (if installed) is functioning as desired.
4. Maintenance
Regular maintenance helps ensure optimal performance and longevity of your computer components.
- Dust Filters: The Acegeek Omniview case includes dust filters on the top and bottom. Regularly remove and clean these filters to prevent dust buildup inside the case, which can impede airflow and component cooling.
- Case Cleaning: Use a soft, dry cloth to clean the exterior surfaces of the case. For the glass panel, a glass cleaner can be used, applied to the cloth first, not directly to the panel.
- Internal Dust: Periodically open the case and use compressed air to remove dust from internal components, paying attention to fan blades and heatsinks.
5. Troubleshooting
If you encounter issues, perform the following basic checks:
- No Power: Ensure the power supply unit (PSU) is properly connected to the wall outlet and the motherboard. Check that the power button cable is correctly connected to the motherboard's front panel header.
- Poor Airflow/Overheating: Verify that all installed fans are spinning and oriented correctly for optimal airflow (intake/exhaust). Clean dust filters and internal components as described in the Maintenance section.
- Loose Connections: Recheck all power and data cables connected to the motherboard, graphics card, and storage drives.
- Component Compatibility: Ensure all installed components (motherboard, CPU cooler, GPU, PSU) are within the size and compatibility specifications of the Acegeek Omniview case.
6. Specifications
| Feature | Specification |
|---|---|
| Brand | Acegeek |
| Model | AG-OMNIVIEW-WH |
| Material | ABS + Mesh + Glass |
| Motherboard Support | ATX, Micro-ATX, ITX |
| Drive Bays | 1 x HDD, 2 x SSD |
| Expansion Slots | 7 |
| Supported Fans (Side) | 3 x 120 mm / 2 x 140 mm |
| Supported Fans (Top) | 3 x 120 mm / 2 x 140 mm |
| Supported Fans (Rear) | 1 x 120 mm |
| Supported Fans (Bottom) | 3 x 120 mm / 2 x 140 mm |
| Water Cooler Support (Side) | 240 mm / 280 mm |
| Water Cooler Support (Top) | 280 mm / 360 mm |
| Max CPU Cooler Height | 175 mm |
| Max VGA Length | 400 mm |
| Cable Management Space | 20 mm |
| Supported PSU Length | 190 mm |
| Dust Filters | Top and Bottom |
7. Warranty Information
The Acegeek Omniview Mid-Tower Gaming Case, model AG-OMNIVIEW-WH, comes with a 12-month warranty from the date of purchase. This warranty covers manufacturing defects. Please retain your proof of purchase for warranty claims. The warranty does not cover damage caused by improper installation, misuse, accidents, modifications, or normal wear and tear.
8. Support
For technical assistance, warranty claims, or further inquiries regarding your Acegeek Omniview Gaming Case, please contact Acegeek customer support. Refer to the official Acegeek website for the most up-to-date contact information and support resources.
Visit Acegeek Official Website (Placeholder link, please replace with actual support link if available)