Introduction
This manual provides detailed instructions for the safe installation, operation, and maintenance of your Fanbulous 48-inch Oil Bronze Ceiling Fan with Lights and Remote (Model DS48). Please read this manual thoroughly before installation and retain it for future reference. Proper installation and use are essential for optimal performance and safety.
Safety Information
- Always disconnect power at the main fuse or circuit breaker before installing or servicing the fan.
- All wiring must be in accordance with national and local electrical codes. If you are unfamiliar with wiring, consult a qualified electrician.
- The fan must be mounted to a ceiling joist or support structure capable of supporting a minimum of 35 lbs (15.9 kg).
- Ensure all connections are secure and properly insulated to prevent electrical shock.
- Do not operate the fan if any part is damaged.
- Keep hands, clothing, and other objects away from the fan blades when the fan is in operation.
Package Contents
Verify that all components are present before beginning installation:
- Ceiling Fan Motor Assembly
- Fan Blades (5)
- Light Kit Assembly
- Remote Control with Wall Holder
- Mounting Bracket
- Hardware Pack (screws, wire nuts, washers)
- Instruction Manual
Specifications
| Feature | Specification |
|---|---|
| Brand | Fanbulous |
| Model Number | DS48 |
| Color | Oil Bronze |
| Size | 48 inch |
| Product Dimensions | 48"D x 48"W x 8"H |
| Power Source | AC/DC |
| Voltage | 120 Volts |
| Motor Type | DC Quiet Motor |
| Noise Level | Less than 35 Decibels |
| Fan Speeds | 6 Speeds |
| Light Color Temperature (CCT) | 3000K (Warm White), 4500K (Natural White), 6000K (Cool White) |
| Control Method | Remote Control |
| Timer Functions | 1H, 4H, 8H |
| Blade Material | Engineered Wood (Reversible: Light wood grain / Walnut color) |
| Item Weight | 12.27 pounds |
Installation
Professional installation is recommended. Ensure power is disconnected before proceeding.
- Mounting Bracket Installation: Secure the mounting bracket to a suitable ceiling junction box or support structure. Ensure it is firmly attached and can support the fan's weight.
- Wiring Connections: Connect the fan's electrical wires to the household wiring according to local codes. Typically, this involves connecting live, neutral, and ground wires. Ensure all connections are tight and covered with wire nuts.
- Motor Assembly Attachment: Carefully lift the fan motor assembly and attach it to the mounting bracket. Use the provided safety cable if applicable.
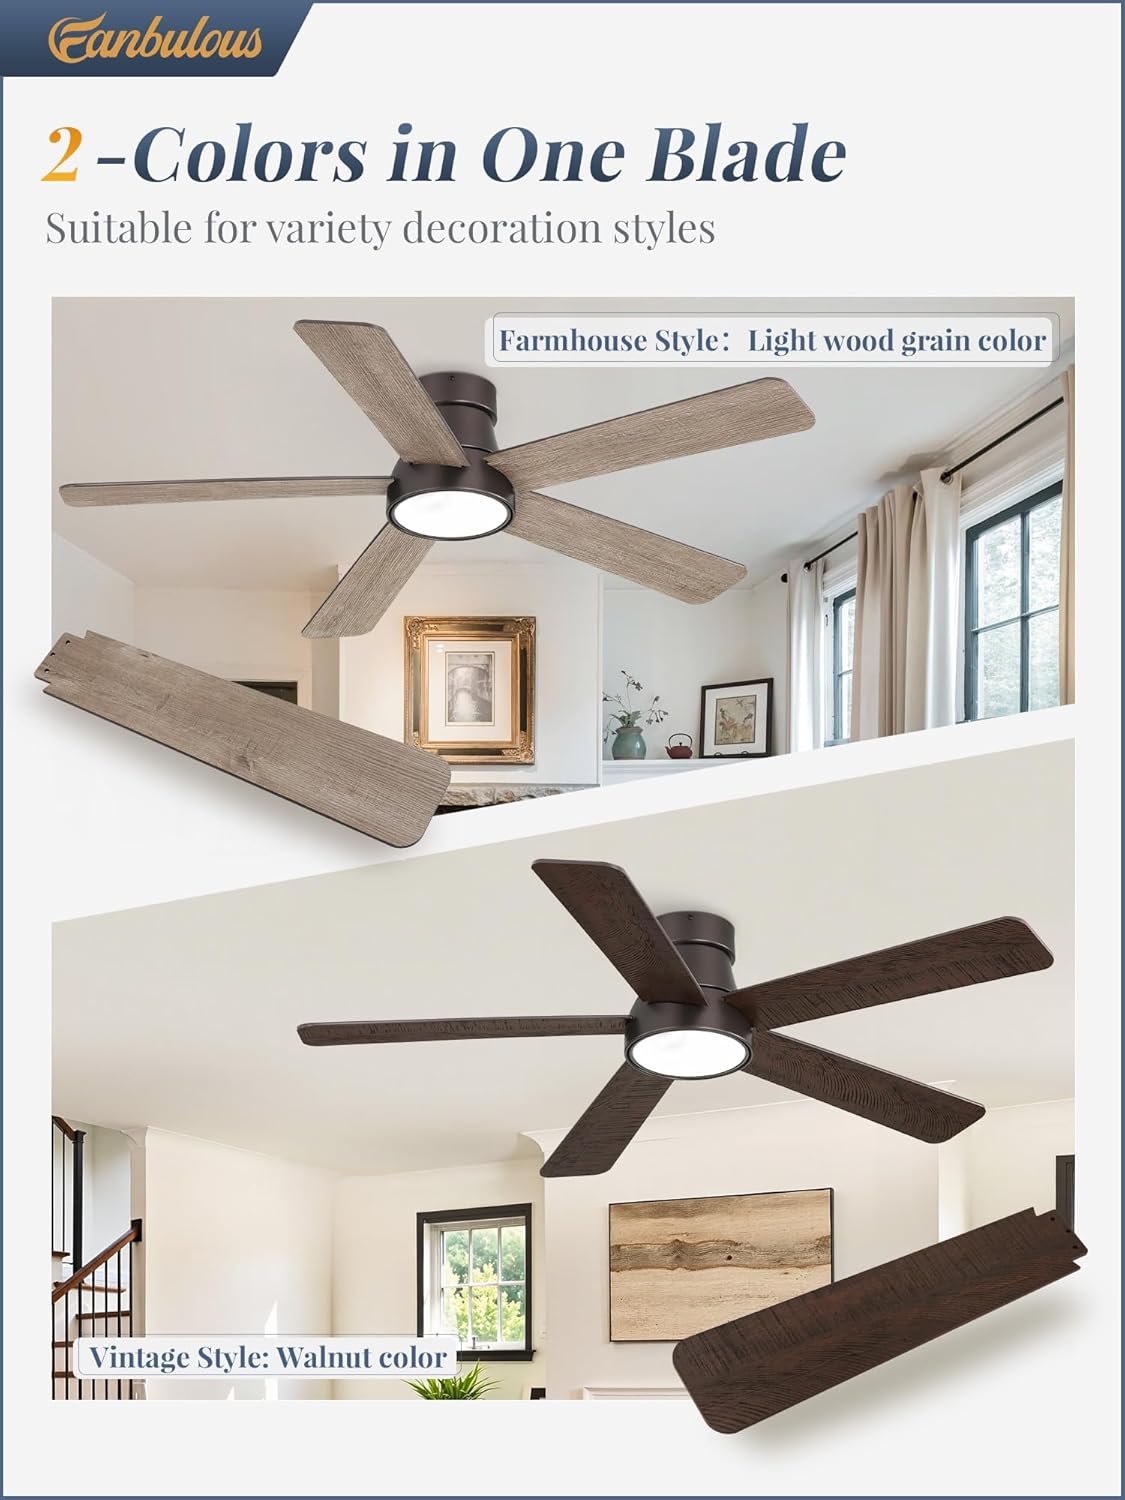
- Blade Installation: Attach the five fan blades to the motor housing. The blades are reversible, offering a choice between a light wood grain and a walnut color finish. Select your preferred side before securing them.
- Light Kit Installation: Connect the light kit wiring to the fan motor assembly and secure the light kit in place.


Operating Instructions
Your Fanbulous ceiling fan is controlled by the included remote. Ensure batteries are installed correctly in the remote.

- Power On/Off: Press the power button (usually red) to turn the fan and light on or off.
- Fan Speed Control: Use the numbered buttons (1-6) to select your desired fan speed. The fan features 6 distinct speeds, from a gentle breeze to a powerful airflow.
- Light Control (3CCT): Press the light button to cycle through the three color temperature options: Warm White (3000K), Natural White (4500K), and Cool White (6000K). Press and hold the light button to dim or brighten the light.

- Reversible Motor Function: Use the reverse button on the remote to change the direction of the fan blades. In summer, blades should rotate counter-clockwise to push cool air down. In winter, blades should rotate clockwise to draw warm air up and circulate it.

- Timer Function: Select 1H, 4H, or 8H on the remote to set the fan to automatically turn off after the specified duration.
Maintenance
- Cleaning: To clean the fan, wipe with a soft, damp cloth. Do not use abrasive cleaners or solvents, as these may damage the finish or electrical components.
- Blade Care: Periodically check the fan blades for dust accumulation. Clean them gently to maintain balance and airflow efficiency.
- Tightness: Occasionally check that all screws and connections are tight.
Troubleshooting
| Problem | Possible Cause | Solution |
|---|---|---|
| Fan does not start | No power to the fan; Loose wire connections; Remote control battery low or not paired. | Check circuit breaker/fuse; Verify all wire connections are secure; Replace remote batteries or re-pair remote. |
| Light does not turn on | Light kit wiring issue; LED driver malfunction; Remote control issue. | Check light kit connections; Ensure remote batteries are fresh; Contact customer support if issue persists. |
| Fan wobbles | Loose blades or mounting hardware; Unbalanced blades. | Tighten all blade screws and mounting hardware; Use a balancing kit (not included) to balance blades if necessary. |
| Remote not responding or inconsistent operation | Low remote battery; Interference; Remote not paired correctly. | Replace remote batteries; Ensure no obstructions between remote and receiver; Re-pair remote according to instructions (if applicable). |
| Delay in light turning on via wall switch | Inherent design characteristic with certain wiring setups. | This may be a normal operational characteristic. Ensure wiring is correct for single-switch operation if dual switches are not supported. |
Warranty and Support
This Fanbulous ceiling fan comes with a 2-Year Manufacturer Warranty from the date of purchase. This warranty covers defects in materials and workmanship under normal use. For warranty claims, technical support, or replacement parts, please contact Fanbulous customer service through the retailer where the product was purchased. Please have your model number (DS48) and proof of purchase available.


