Introduction
This manual provides detailed instructions for assembling and operating your CUBIMANA Dinosaur Fossil with Flowers Building Set & LED Light. This kit allows you to construct a dinosaur skeleton model adorned with botanical elements and integrated lighting. Please read all instructions carefully before beginning assembly.
Safety Information
WARNING: CHOKING HAZARD - Small Parts. Not suitable for children under 3 years. Adult supervision is recommended during assembly and play for younger users.
Package Contents
- 1185 Building Pieces (for dinosaur skeleton, floral elements, and base)
- LED Light Kit
- Instruction Manual (this document)
Assembly Instructions
Follow the steps below to assemble your Dinosaur Fossil with Flowers Building Set. Refer to the included printed instruction manual for detailed, step-by-step diagrams.
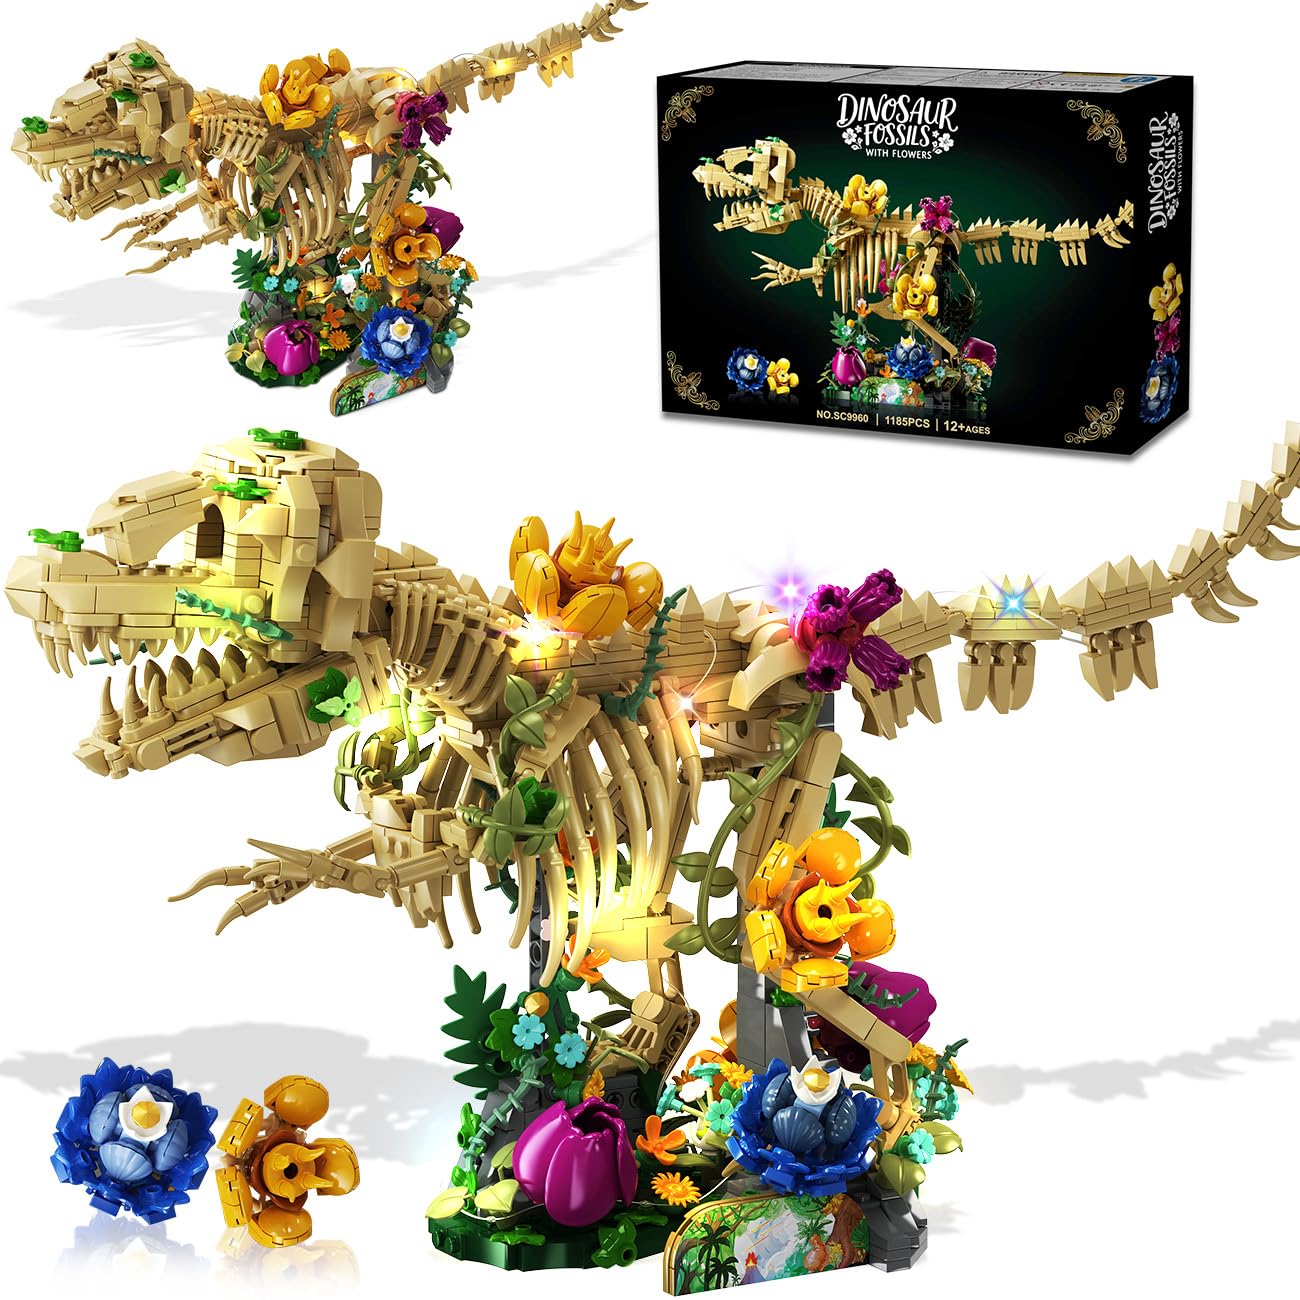
Image: The fully assembled CUBIMANA Dinosaur Fossil with Flowers Building Set, showcasing the dinosaur skeleton intertwined with colorful floral elements.
1. Prepare Components
Unpack all building pieces and sort them by color and type. Familiarize yourself with the different components, including the tan bricks for the skeleton, various colored bricks for flowers, green pieces for vines and leaves, and the LED light kit.

Image: A detailed view of the assembled dinosaur model, highlighting the intricate bone structure and vibrant floral attachments.
2. Construct the Dinosaur Skeleton
Begin by assembling the main structure of the dinosaur skeleton using the tan bricks. Pay close attention to the joints and connections to ensure stability. The skeleton is designed to be anatomically detailed.

Image: A person carefully assembling the tan bricks to form the dinosaur skeleton, with the instruction manual open nearby.
3. Integrate Floral Elements
Once the skeleton is largely complete, attach the various yellow, purple, blue, and pink blossoms, along with the green vines and leaves, to the skeleton and its base. These elements are designed to entwine around the bones, creating a botanical effect.

Image: Close-up view of hands attaching colorful floral pieces and green vines to the dinosaur model, illustrating the assembly process.
4. Install the LED Light Kit
Carefully thread the LED light strings through and around the assembled dinosaur and floral elements as indicated in the detailed instruction manual. Ensure the wires are discreetly placed to enhance the visual effect without being overly visible. Connect the light strings to the power source module.
Video: Demonstrates the assembly process, including the integration of the LED light kit into the dinosaur and floral structure, and showcasing the illuminated model.

Image: A woman adding the final floral touches to the assembled dinosaur model, which is already partially illuminated, highlighting the intricate details.
Operating Instructions
LED Light Operation
To activate the LED lights, locate the power switch on the light kit's battery box (batteries not included). Toggle the switch to the 'ON' position. The lights will illuminate, creating a warm glow and vibrant ribbons of light along the dinosaur skeleton and floral elements. Toggle the switch to 'OFF' to turn off the lights.
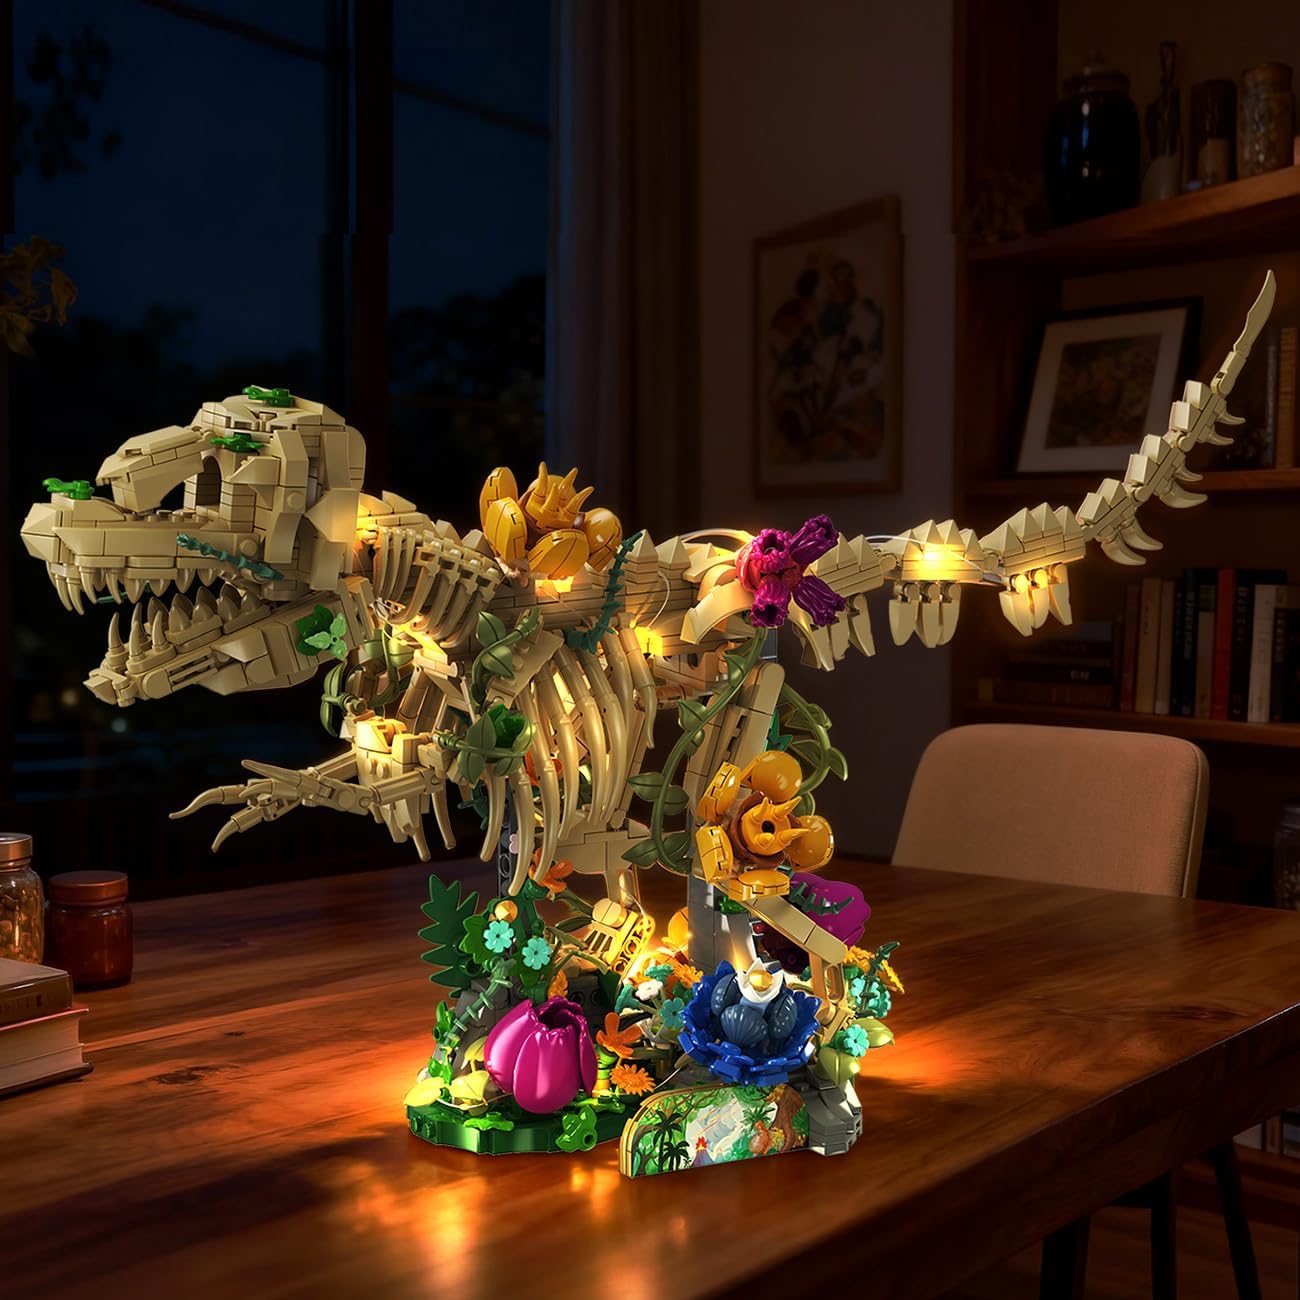
Image: The fully assembled dinosaur model with its LED lights glowing, displayed in a dimly lit room, creating an atmospheric effect.

Image: A side-by-side comparison showing the dinosaur model with its lights off and then fully illuminated, demonstrating the lighting effect.
Maintenance
- Cleaning: Use a soft, dry cloth or a soft brush to gently remove dust from the model. Avoid using water or cleaning solutions, as these may damage the bricks or electrical components.
- Storage: Store the model in a cool, dry place away from direct sunlight to prevent discoloration of the plastic bricks.
- Battery Replacement: If the LED lights dim or stop working, replace the batteries in the light kit's battery box. Ensure correct polarity when inserting new batteries.
Troubleshooting
| Problem | Possible Cause | Solution |
|---|---|---|
| LED lights do not turn on. |
|
|
| Model is unstable. |
|
|
Specifications
- Model Number: SC9960
- Brand: CUBIMANA
- Number of Pieces: 1185
- Product Dimensions: Approximately 50cm (19.7 inches) length x 24cm (9.45 inches) height. (Note: Product dimensions listed as 1 x 1 x 1 inches in some specifications appear to be a placeholder.)
- Item Weight: 2.6 pounds
- Recommended Age: 6 years and up
- Power Source for LED: Battery box (batteries not included)
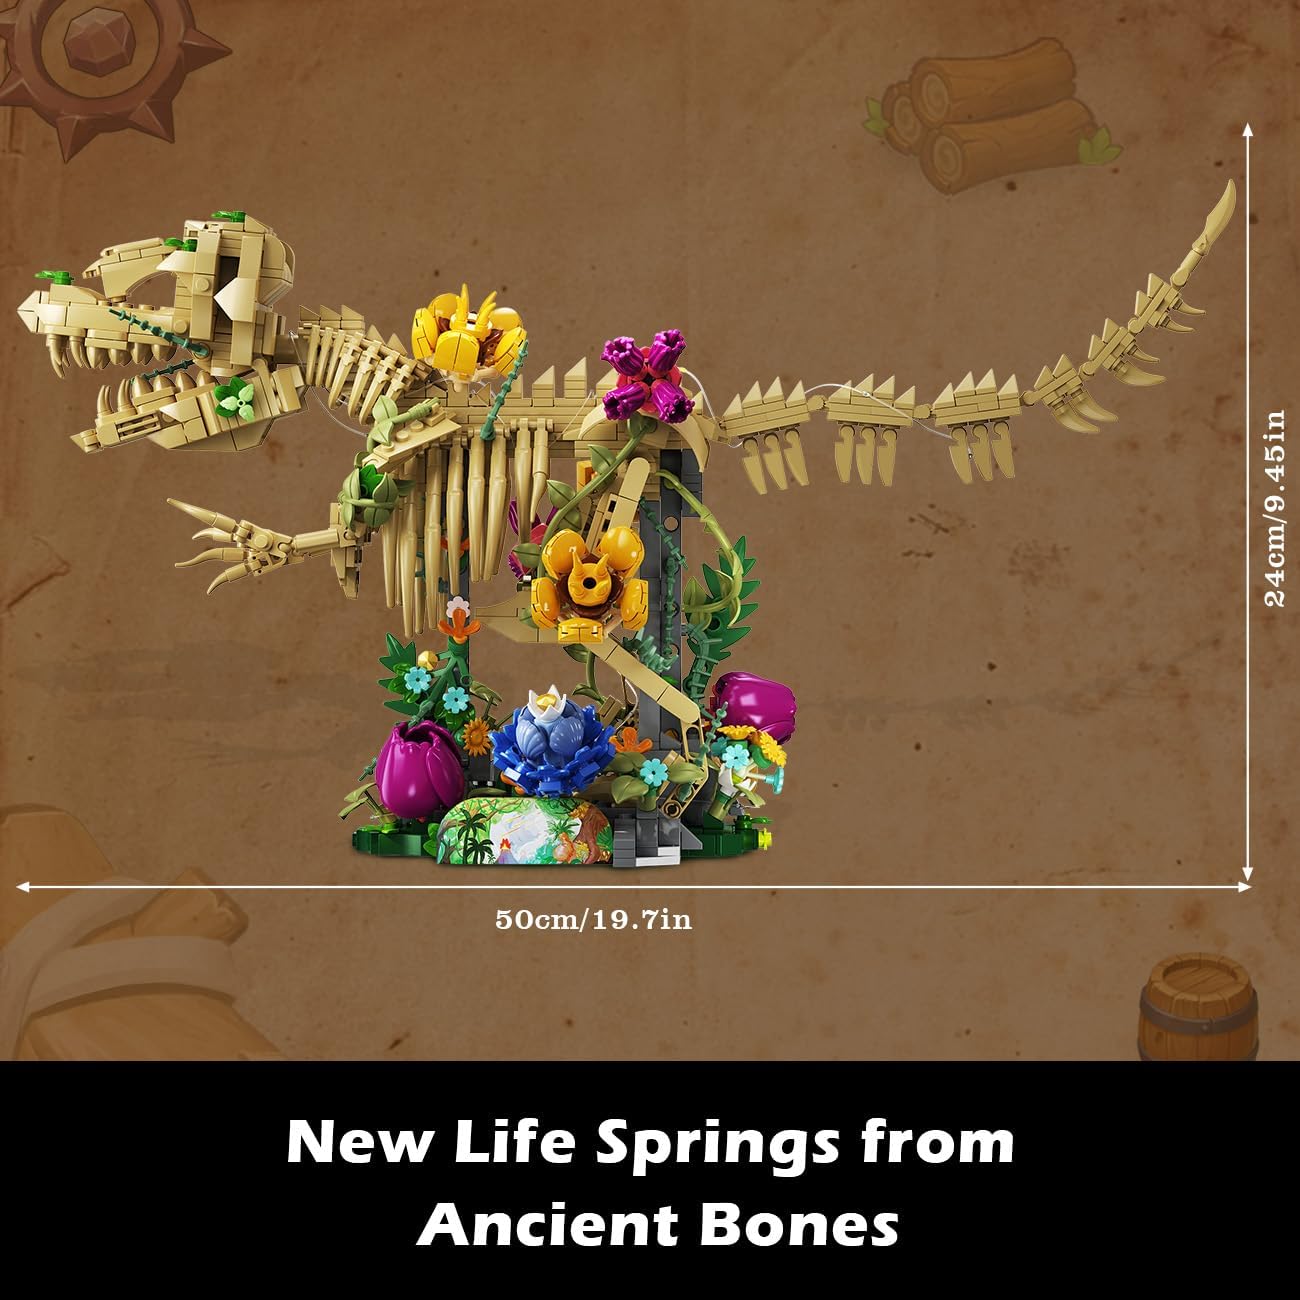
Image: The assembled dinosaur model with its approximate dimensions: 50cm (19.7 inches) in length and 24cm (9.45 inches) in height.
Warranty and Support
For warranty information or product support, please refer to the contact details provided on the product packaging or contact CUBIMANA customer service directly. Specific warranty terms are not detailed in this manual.