1. Introduction
Thank you for choosing the ArcticPro 27-inch FHD 1080p IPS Monitor. This monitor is designed to provide a superior visual experience with its Full HD resolution, 120Hz refresh rate, and vibrant IPS panel. This manual will guide you through the installation, operation, and maintenance of your new monitor to ensure optimal performance and longevity.
2. Safety Information
- Read all instructions carefully before using the monitor.
- Keep the monitor away from water, moisture, and extreme temperatures.
- Do not block ventilation openings.
- Use only the power adapter provided by the manufacturer.
- Avoid placing heavy objects on the power cord.
- Clean the screen with a soft, lint-free cloth. Do not use liquid cleaners or aerosol cleaners directly on the screen.
- If the monitor is damaged or malfunctions, do not attempt to repair it yourself. Contact qualified service personnel.
3. Package Contents
Please check the package contents to ensure all items are present:
- ArcticPro 27-inch Monitor
- Monitor Stand (Base and Neck)
- Power Adapter
- HDMI Cable
- User Manual (this document)
4. Setup
4.1. Assembling the Stand
To assemble the monitor stand:
- Carefully place the monitor face down on a soft, clean surface to prevent scratches.
- Attach the stand neck to the monitor's mounting bracket. Secure it with the provided screws.
- Attach the stand base to the neck. Tighten the screw at the bottom of the base.

Video: Unboxing and assembling the monitor stand. This video demonstrates the process of unpacking the monitor and attaching the stand components.
4.2. VESA Mount Installation
The monitor supports 75x75mm VESA mounting. To install on a VESA mount:
- Remove the pre-attached stand (if any) by unscrewing it from the monitor's back panel.
- Attach your VESA-compatible mount to the four screw holes on the back of the monitor using appropriate M4 screws (not included with the monitor, typically provided with the VESA mount).
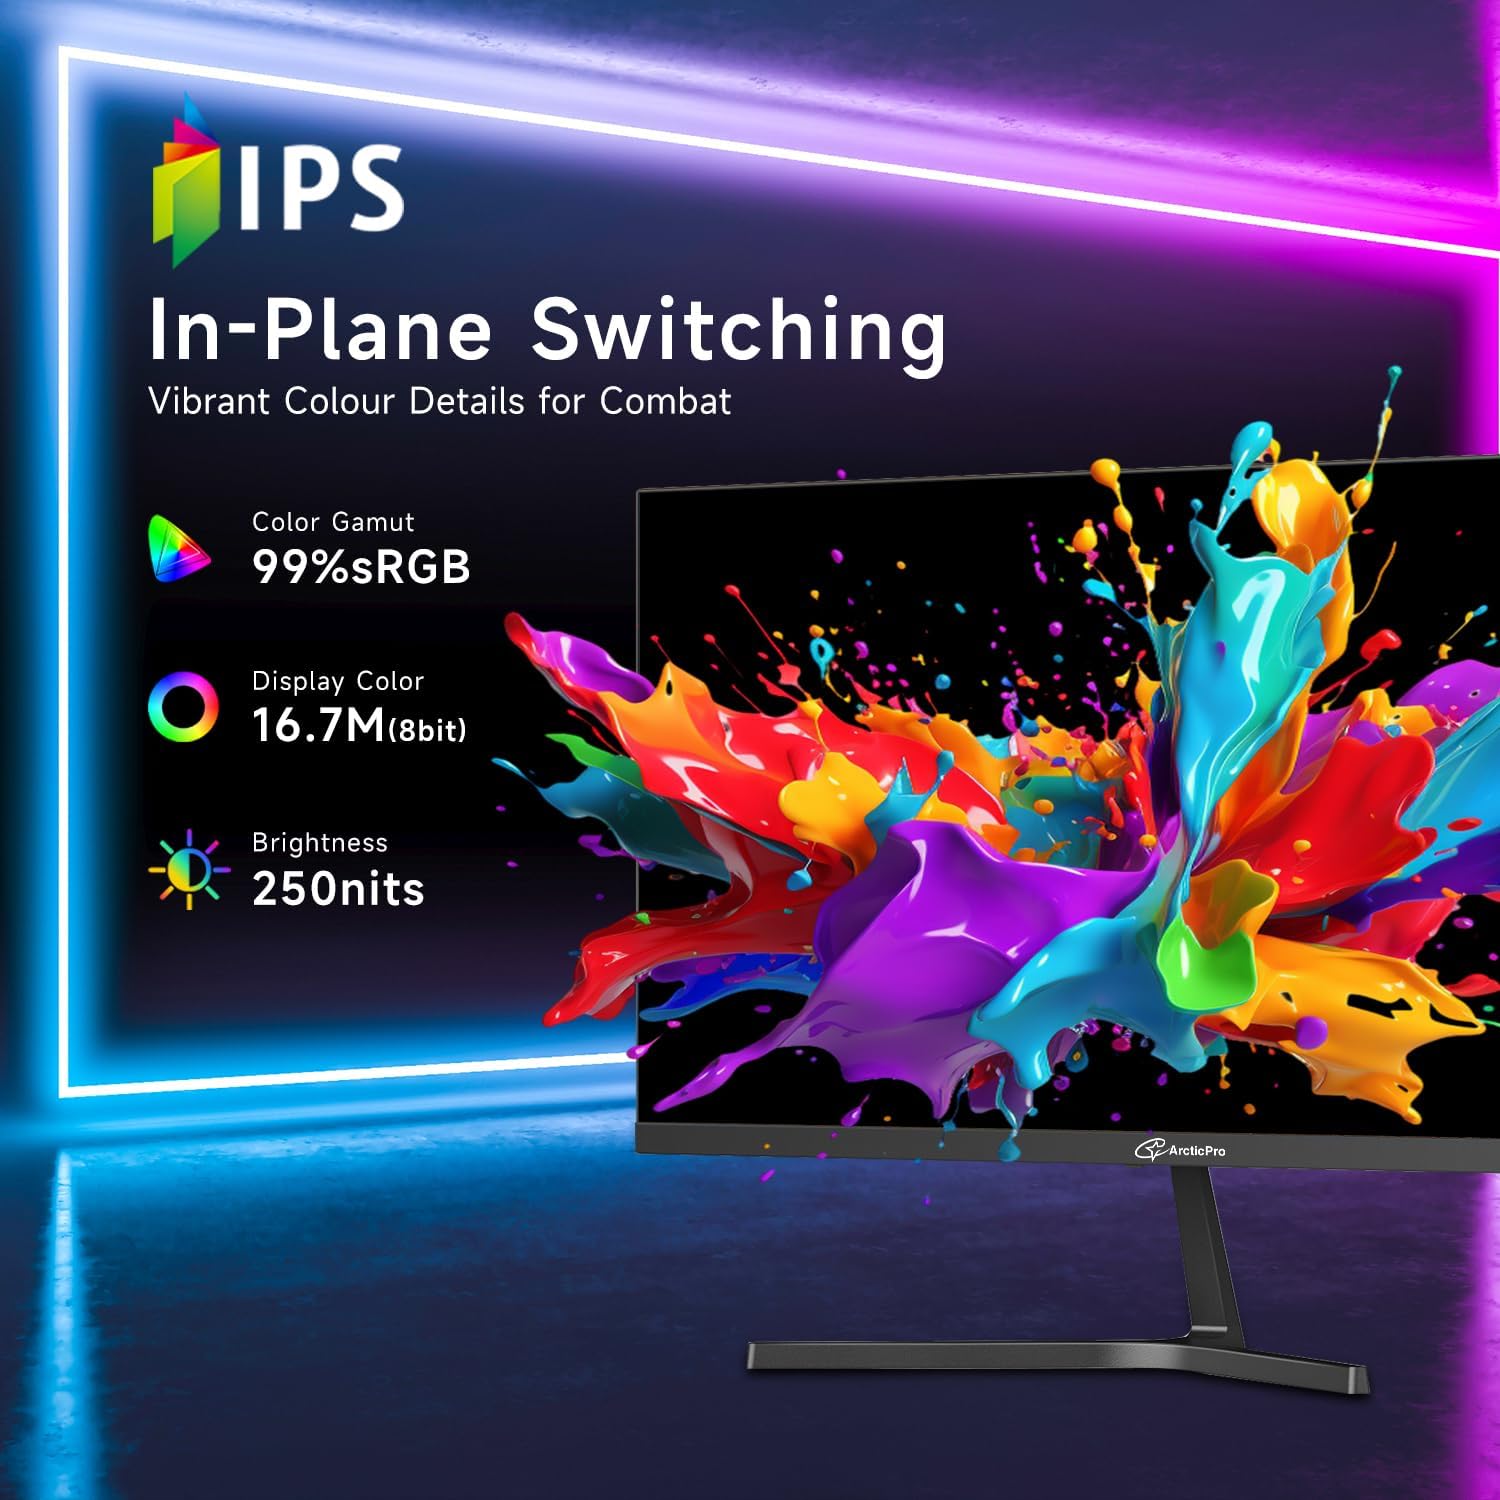
Image: Rear view of the ArcticPro monitor, highlighting the four screw holes for VESA mount compatibility.
4.3. Connecting to a Device
Connect your computer or other devices to the monitor using the available ports:
- HDMI: Connect one end of the provided HDMI cable to the HDMI port on your monitor and the other end to the HDMI output on your device.
- VGA: Connect a VGA cable (not included) to the VGA port on your monitor and the other end to the VGA output on your device.
Ensure the power adapter is connected to the monitor's DC input and then to a power outlet.

Image: The rear of the ArcticPro monitor showing the HDMI and VGA input ports, along with the DC power input. Various devices like gaming consoles and laptops are depicted connecting to these ports.
5. Operating the Monitor
5.1. Power On/Off
Press the power button located on the monitor to turn it on or off. The power indicator light will illuminate when the monitor is on.
5.2. Menu Navigation
Use the control buttons (usually located on the back or bottom right of the monitor) to navigate the On-Screen Display (OSD) menu. These buttons typically allow you to select input sources, adjust display settings, and access various features.
5.3. Display Settings
Adjust the following settings via the OSD menu for your preferred viewing experience:
- Resolution: The monitor supports 1920x1080 Full HD resolution. Ensure your device's output resolution matches for optimal clarity.
- Refresh Rate: Enjoy up to 120Hz refresh rate for fluid visuals. Adjust this setting in your device's display settings.
- Adaptive Sync: Enable Adaptive Sync to eliminate screen tearing and stuttering, providing a smoother gaming and video experience.
- Color Gamut: The IPS panel offers 99% sRGB and 72% NTSC color gamut for vibrant and accurate colors.
- Low Blue Light: Activate the low blue light mode to reduce eye strain during prolonged use.
- Flicker-Free Technology: This monitor features flicker-free technology to minimize eye fatigue.
- Viewing Angle: The 178°H/178°V extra-wide viewing angle ensures consistent image quality from various perspectives.
- Tilt Adjustment: The monitor allows for a tilt adjustment range of -5°±2° to 15°±2°.

Image: A visual representation comparing 120Hz refresh rate to 60Hz, demonstrating the smoother motion provided by the ArcticPro monitor.

Image: A comparison of 1080p Full HD resolution versus 720p, illustrating the superior clarity and detail of the ArcticPro monitor.

Image: A visual showing the effect of Adaptive Sync technology, with a smooth image on one side (Adaptive Sync On) and a torn image on the other (Adaptive Sync Off), emphasizing tear-free performance.
6. Maintenance
6.1. Cleaning the Monitor
To clean your monitor:
- Always unplug the monitor from the power outlet before cleaning.
- Use a soft, lint-free cloth to gently wipe the screen and exterior surfaces.
- For stubborn marks, lightly dampen the cloth with water or a mild, non-abrasive screen cleaner. Do not spray liquids directly onto the monitor.
- Avoid using benzene, thinner, ammonia-based cleaners, or abrasive materials, as these can damage the monitor's surface.
6.2. Storage
When storing the monitor, keep it in a cool, dry place away from direct sunlight and extreme temperatures. Use the original packaging if possible to protect it from dust and physical damage.
7. Troubleshooting
If you encounter issues with your monitor, please refer to the following common solutions:
| Problem | Possible Solution |
|---|---|
| No image on screen | Ensure the power cable is securely connected and the monitor is powered on. Check that the video cable (HDMI/VGA) is properly connected to both the monitor and your device. Select the correct input source via the OSD menu. |
| Image is blurry or distorted | Adjust the display resolution on your computer to match the monitor's native resolution (1920x1080). Check the video cable for damage or loose connections. |
| Screen flickering | Ensure the refresh rate is set correctly (up to 120Hz). Enable Adaptive Sync if supported by your graphics card. Check for external interference. |
| No sound (if using monitor speakers) | Verify that the volume is not muted on the monitor or your connected device. Ensure the audio output is correctly configured on your device. Note: This monitor does not have built-in speakers, so external audio solutions are required. |
| Buttons not responding | Unplug the monitor from the power outlet, wait for a few minutes, and then plug it back in. |
8. Specifications
| Feature | Detail |
|---|---|
| Model Number | AD27ZF1 |
| Screen Size | 27 Inches |
| Panel Type | IPS |
| Resolution | 1920 x 1080 (FHD 1080p) |
| Aspect Ratio | 16:9 |
| Refresh Rate | Up to 120Hz |
| Response Time | 1ms |
| Color Gamut | 99% sRGB, 72% NTSC |
| Viewing Angle | 178°H/178°V |
| Connectivity | 1 x HDMI 1.4, 1 x VGA |
| VESA Mount | 75x75mm |
| Tilt Adjustment | -5°±2° to 15°±2° |
| Product Dimensions | 1.7 x 24.21 x 14.31 inches |
| Item Weight | 11.11 pounds |
9. Warranty and Support
9.1. Warranty Information
ArcticPro monitors typically come with a manufacturer's warranty covering defects in materials and workmanship. Please refer to the warranty card included in your package or visit the official ArcticPro website for specific warranty terms and conditions. Keep your proof of purchase for warranty claims.
9.2. Customer Support
If you require technical assistance or have questions about your ArcticPro monitor, please contact our customer support team. Contact details can usually be found on the ArcticPro website or on the warranty card.