Introduction
The Wiby XZ-YNZ02 Smart Wi-Fi Alarm Clock is a versatile 3-in-1 device designed to simplify your daily routine. It combines a programmable alarm clock, a 20W fast charger, and a real-time weather reminder into one compact unit. Manage up to 10 alarms daily with flexible scheduling, choose from 8 natural sounds, and control settings via the Tuya/Smart Life app. The device automatically updates time and weather, ensuring you always have the latest information at a glance. Its minimalist design fits perfectly on bedside tables, desks, and in bedrooms.
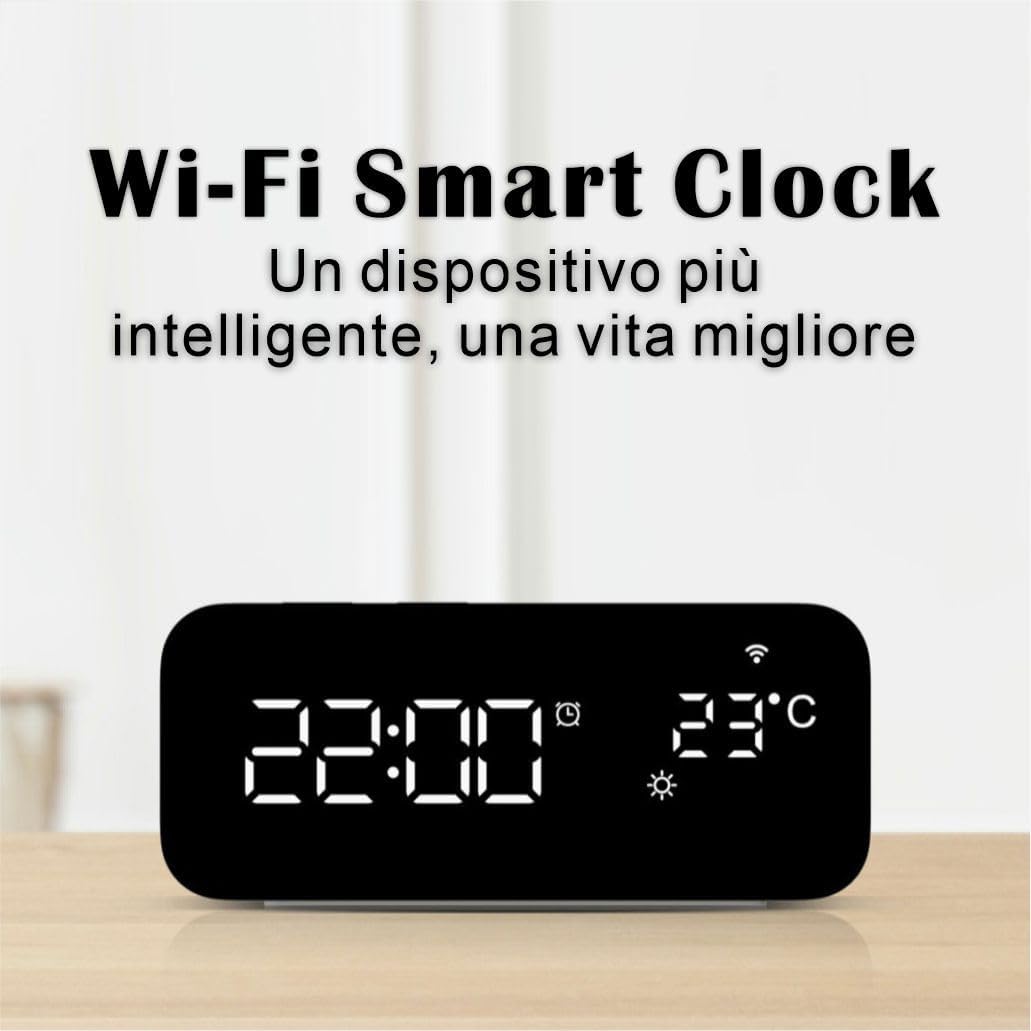
Image: The Wiby Smart Wi-Fi Clock displaying time and temperature, with the slogan "A smarter device, a better life."
Setup
1. Power Connection
Connect the alarm clock to a power source using the provided USB cable and a 5V/1A or 5V/2A adapter. The screen will light up, indicating it's powered on.

Image: The top view of the Wiby Smart Alarm Clock showing its USB-A and USB-C (20W fast charging) ports, suitable for charging smartphones, smartwatches, and tablets.
2. Battery Backup (Memory Function)
To enable the memory function, install 2 AAA batteries (not included) in the battery compartment. This ensures that time and alarm settings are retained during power outages.
3. App Connection (Tuya/Smart Life)
Download the Tuya or Smart Life app (available on iOS/Android). Connect the alarm clock to your 2.4 GHz Wi-Fi network via the app for automatic time synchronization, weather updates, and smart control of alarms and snooze settings.

Image: A graphic illustrating the 3-in-1 design of the Wiby Smart Alarm Clock, featuring an alarm function with 10 alarms, a Type-C PD20W fast-charging port, and a weather reminder display.
Operating Instructions
1. Setting the Time
To set the time, press and hold the "TIME SET" button for 3 seconds. Use the "UP" and "DOWN" buttons to adjust the hours and minutes. Press "TIME SET" again to confirm each step. The clock supports both 12-hour and 24-hour formats.
Video: This video demonstrates how to set the time on the Wiby Smart Alarm Clock. It shows pressing and holding the 'TIME SET' button, then using 'UP' and 'DOWN' to adjust hours and minutes, and finally confirming the settings.
2. Setting Alarms
The clock supports up to 10 alarms. To set an alarm, press and hold the "ALARM SET" button for 3 seconds. Use the "UP" and "DOWN" buttons to set the desired alarm time and select a ringtone. Press "ALARM SET" again to confirm. You can choose from 8 natural sounds (birds, waves, rain, etc.) with 3 volume levels, or opt for a gradually increasing volume for a gentle wake-up.

Image: A visual representation of the Wiby Smart Alarm Clock's ability to set up to 10 alarms, with examples of alarm times and a child in the background, suggesting its use for establishing routines.

Image: The Wiby Smart Alarm Clock displaying time and temperature, with musical notes and a child in the background, illustrating the 8 natural alarm sounds feature and adjustable volume.
3. Adjusting Alarm Volume
To adjust the alarm volume, press the volume button (speaker icon) repeatedly to cycle through the available volume levels. This setting will apply to all alarms.
Video: This video demonstrates how to adjust the alarm volume on the Wiby Smart Alarm Clock. It shows pressing the volume button and the display changing to reflect the volume level.
4. Snooze Function
When an alarm sounds, press the "SNOOZE" button (bell icon) to activate snooze mode. The alarm icon will flash, and the alarm will sound again after 5 minutes. To stop the alarm completely, press any button except "SNOOZE" or "LIGHT".

Image: The Wiby Smart Alarm Clock displaying time, with a smartphone screen showing the snooze mode settings, including custom duration options for an extra nap.
Video: This video demonstrates how to use the snooze function and stop alarms on the Wiby Smart Alarm Clock. It shows the alarm sounding, pressing the snooze button, and then pressing another button to stop the alarm.
5. Manual Brightness Adjustment
To manually adjust the screen brightness, press the "LIGHT" button (sun icon) repeatedly to cycle through different brightness levels (High, Medium, Low, Off).

Image: Four views of the Wiby Smart Alarm Clock demonstrating different brightness levels: High, Medium, Low, and Off.
Video: This video demonstrates how to manually adjust the brightness of the Wiby Smart Alarm Clock. It shows pressing the light button to cycle through brightness levels.
6. Automatic Brightness Adjustment
The clock features automatic brightness adjustment. The screen brightness will automatically adjust to a medium level from 7:00 PM to 11:59 PM, and to a low level from 12:00 AM to 6:59 AM. If you manually set the brightness to high during the automatic adjustment period (e.g., 9:03 PM), it will remain at that brightness until 11:59 PM, then revert to low at 12:00 AM.
Video: This video illustrates the automatic brightness adjustment feature of the Wiby Smart Alarm Clock. It shows the screen brightness changing automatically based on the time of day.
7. Voice Control (Cordless Mode)
In cordless mode (when not connected to USB power), the screen will turn off after 6 seconds to save power. You can activate the display using the voice control function or by pressing any button on the clock.
Video: This video demonstrates the voice control and power-saving features of the Wiby Smart Alarm Clock. It shows the screen turning off in cordless mode and reactivating with a sound or button press.
8. Smart Weather Reminder
When connected to the Tuya/Smart Life app via Wi-Fi, the clock will display real-time weather conditions and temperature.

Image: The Wiby Smart Alarm Clock displaying weather information, including temperature and a sun icon, with a person looking out a window in the background, illustrating the smart weather reminder feature.
Maintenance
To clean your Wiby Smart Alarm Clock, gently wipe the surface with a soft, dry cloth. Avoid using abrasive cleaners or solvents, as these may damage the mirror finish or electronic components. Ensure the device is unplugged before cleaning.
Troubleshooting
1. Clock Not Functioning / Display Issues
If the clock is not functioning correctly or the display is erratic, try resetting the device. Locate the "RESET" hole on the back of the clock and press it with a thin pin or paperclip. This will restore the clock to its factory settings.
Video: This video demonstrates how to reset the Wiby Smart Alarm Clock using the 'RESET' button on the back of the device.
2. Wi-Fi Connection Issues
Ensure your Wi-Fi network is 2.4 GHz. If you experience connection problems, try restarting your router and the alarm clock. Re-attempt the pairing process through the Tuya/Smart Life app.
3. Charging Issues
Verify that the USB cable is securely connected to both the alarm clock and a compatible 5V/1A or 5V/2A power adapter. Ensure the device being charged is compatible with USB charging.
Specifications
- Brand: Wiby
- Model Number: XZ-YNZ02
- Color: White
- Product Dimensions (L x W x H): 14.5 x 3.81 x 6.5 cm (5.7 x 1.5 x 2.56 inches)
- Item Weight: 260 grams
- Material: Plastic
- Display Type: Digital
- Power Source: Corded Electric (USB)
- Special Features: 8 Sound Effects, Wi-Fi Smart Device, 20W Fast Charging, Weather Function, Supports Tuya/Smart Life App
- Indoor/Outdoor Use: Indoor
Warranty and Support
For warranty information or technical support, please refer to the contact details provided in your product packaging or visit the official Wiby website. Keep your purchase receipt for any warranty claims.