Introduction
Thank you for choosing the Silvergear Wireless Weather Station Model 4530. This device provides comprehensive weather information, including indoor and outdoor temperature, humidity, UV index, and atmospheric pressure, along with a 5-day weather forecast. It also features a clock, alarm, and moon phase display. This manual will guide you through the setup, operation, and maintenance of your weather station to ensure optimal performance.
What's in the Box

Image: The Silvergear Weather Station, instruction manual, power adapter, and outdoor sensor as packaged in the box.
- Weather Station Display Unit
- Wireless Outdoor Sensor
- Power Adapter
- Instruction Manual
Product Overview
Key Features

Image: An overview of the weather station's main features, including real-time monitoring and a 5-day forecast.
- Real-time indoor and outdoor temperature and humidity monitoring.
- Clear display with essential weather data.
- Built-in 5-day weather forecast.
- Flexible placement: stand or wall-mount.
- Dual power modes: batteries or included power adapter.
- Integrated clock, alarm, and moon phase display.
Measurements

Image: Visual representation of the key weather parameters measured by the device.
The Silvergear Weather Station provides the following detailed measurements:
- Temperature: Displays current indoor and outdoor temperatures.
- Humidity: Measures indoor and outdoor humidity levels.
- UV Index: Provides information on the current UV radiation level.
- Atmospheric Pressure: Tracks changes in air pressure.
Display Elements

Image: A detailed view of the weather station's display, indicating where each piece of information is shown.
The display unit presents all key weather data at a glance, including time, date, moon phase, barometric pressure, indoor and outdoor temperature and humidity, and a multi-day weather forecast.
Setup
Powering the Weather Station

Image: The weather station can be powered by the included AC adapter or by batteries.
The weather station can be powered in two ways:
- Using the Power Adapter: Connect the included power adapter to the weather station and plug it into a standard wall outlet.
- Using Batteries: Insert 2 AA batteries (not included) into the battery compartment located on the back of the unit. Ensure correct polarity.
Outdoor Sensor Placement

Image: The outdoor sensor should be placed within 50 meters of the main unit for optimal signal reception.
Place the wireless outdoor sensor in a suitable location outside your home. For best results:
- Ensure the sensor is within a 50-meter range of the main weather station unit.
- Choose a shaded area to avoid direct sunlight, which can affect temperature readings.
- Protect the sensor from direct rain and snow.
- The sensor transmits updates to the main unit approximately every 60 seconds.
Initial Setup and Pairing
Once both the main unit and the outdoor sensor are powered on, they should automatically pair. If pairing does not occur, refer to the troubleshooting section or consult the detailed instructions in the included manual for manual pairing procedures.
Flexible Placement
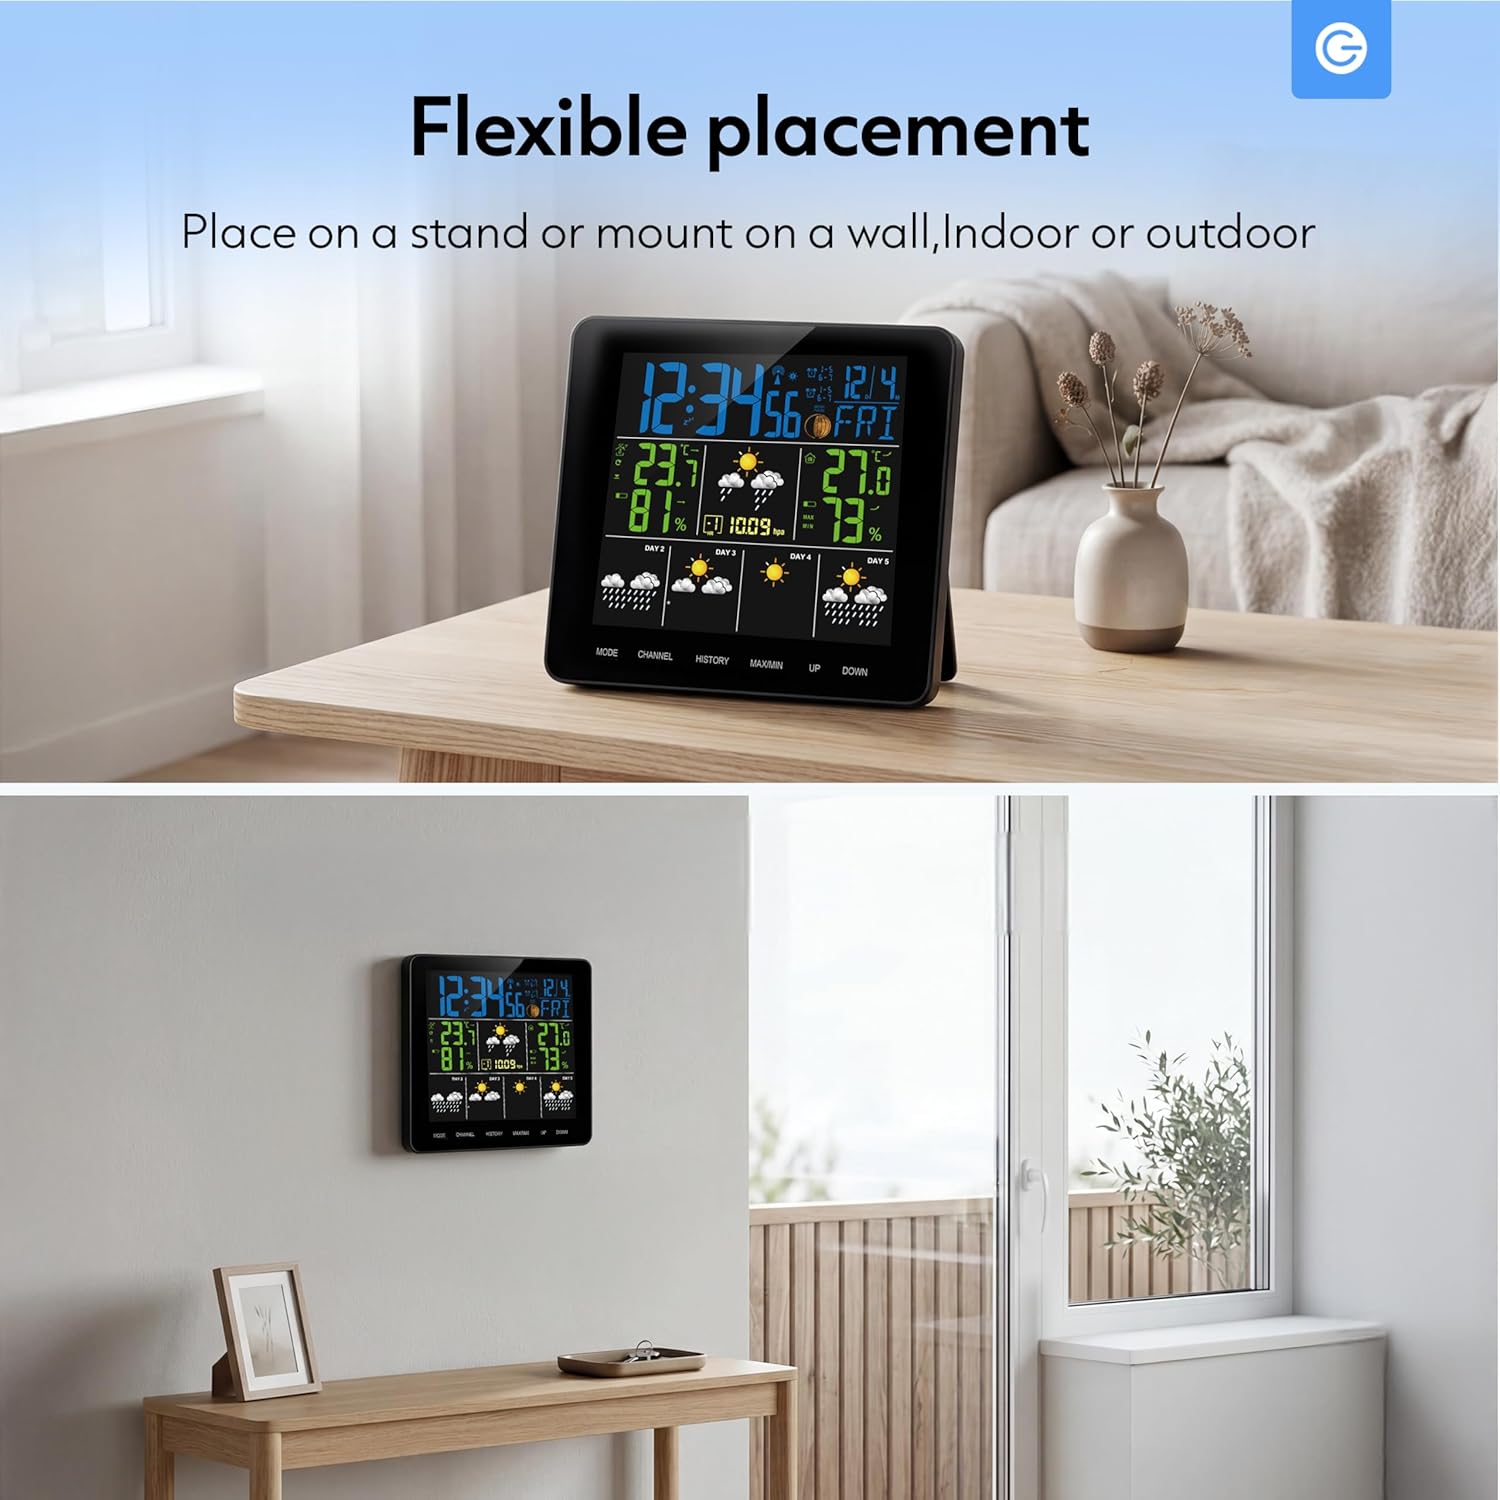
Image: The weather station can be placed on a stand or mounted on a wall, suitable for indoor or outdoor use.
The weather station is designed for flexible placement:
- Stand: Use the integrated stand to place the unit on any flat surface, such as a desk or shelf.
- Wall Mount: The unit can also be mounted on a wall using the designated mounting hole on the back.
Operating
Understanding the Display

Image: The display shows real-time temperature data and a 5-day forecast using intuitive icons.
The main display provides a clear overview of current and forecasted weather conditions. Key indicators include:
- Current Time and Date: Located at the top of the display.
- Indoor/Outdoor Temperature and Humidity: Clearly labeled sections for current readings.
- Weather Forecast Icons: Visual representations for sunny, slightly cloudy, cloudy, rainy, and snowy conditions for the next 5 days.
- Moon Phase: An icon indicating the current lunar phase.
- Barometric Pressure: Displays the current atmospheric pressure.
Button Functions
The weather station features several buttons for navigation and settings:
- MODE: Used to switch between display modes (e.g., time setting, alarm setting) and confirm selections.
- CHANNEL: Selects between different outdoor sensor channels (if multiple sensors are used).
- HISTORY: Displays historical data for temperature and humidity.
- MAX/MIN: Shows maximum and minimum recorded temperature and humidity values.
- UP / DOWN: Adjusts values during setting modes or navigates through options.
Setting Time, Date, and Alarm
To set the time, date, or alarm:
- Press the MODE button repeatedly until the desired setting (time, date, or alarm) is flashing.
- Use the UP or DOWN buttons to adjust the value.
- Press MODE again to confirm the setting and move to the next adjustable parameter.
- Continue until all settings are complete, then press MODE to exit the setting mode.
Maintenance
To ensure the longevity and accuracy of your Silvergear Weather Station, follow these maintenance guidelines:
- Cleaning: Wipe the display unit and sensor with a soft, damp cloth. Do not use abrasive cleaners or solvents.
- Battery Replacement: Replace batteries in both the main unit and the outdoor sensor when the low battery indicator appears on the display. Ensure to use fresh batteries of the correct type (AA for the main unit, typically AAA for the sensor, refer to the specific manual for sensor battery type).
- Sensor Protection: Periodically check the outdoor sensor for any debris or obstructions that might affect its readings.
Troubleshooting
If you encounter issues with your weather station, refer to the following common problems and solutions:
| Problem | Possible Cause | Solution |
|---|---|---|
| No outdoor temperature/humidity reading | Sensor out of range or low battery; interference. | Move sensor closer to the main unit; replace sensor batteries; avoid placing near electronic devices. |
| Inaccurate readings | Sensor exposed to direct sunlight or moisture; unit not calibrated. | Relocate sensor to a shaded, dry area; consult manual for calibration steps if available. |
| Display is blank | No power or low batteries. | Ensure power adapter is securely connected or replace main unit batteries. |
| Time/Date incorrect | Not set correctly. | Follow the 'Setting Time, Date, and Alarm' instructions. |
Specifications
| Feature | Detail |
|---|---|
| Brand | Silvergear |
| Model Number | 4530 |
| Color | Black |
| Connectivity | Wireless |
| Manufacturer Warranty | 2 Years |
| Spare Parts Availability | Information unavailable |
| Guaranteed Software Updates Until | Information unavailable |
| ASIN | B0FM3X2T3D |
| Date First Available | August 19, 2025 |
Warranty Information
The Silvergear Wireless Weather Station Model 4530 comes with a 2-year manufacturer warranty. This warranty covers defects in materials and workmanship under normal use. It does not cover damage caused by misuse, accidents, unauthorized modifications, or improper installation. Please retain your proof of purchase for warranty claims.
Support
For further assistance, technical support, or warranty inquiries regarding your Silvergear Wireless Weather Station Model 4530, please refer to the contact information provided in the original product packaging or visit the official Silvergear website. You may also contact the retailer where the product was purchased.