MAYKI ACD01-BLK
MAYKI Automatic Chicken Coop Door User Manual
Model: ACD01-BLK | Brand: MAYKI
1. Product Overview
The MAYKI Automatic Chicken Coop Door (Model ACD01-BLK) is designed to provide a secure and convenient solution for managing your flock. This solar-powered door integrates advanced features such as multiple operating modes, anti-pinch safety, and robust weather resistance to ensure optimal performance year-round. It is certified for safety and compliance, offering peace of mind for poultry keepers.

Figure 1: MAYKI Automatic Chicken Coop Door in use with a flock.
2. What's in the Box
Verify that all components are present in the package:
- Automatic Chicken Coop Door Unit
- Solar Panel with connecting cable
- USB Type-C Charging Cable
- Remote Control
- Mounting Screws and Anchors
- User Manual
- Chicken Leg Bands (Assorted Colors)

Figure 2: Package contents including the door unit, solar panel, remote, cables, and accessories.
Description: This image displays the complete set of items included with the MAYKI Automatic Chicken Coop Door. The main door unit with its control panel is visible, alongside the solar panel, a white remote control, a USB-C charging cable, a bag of mounting screws, and colorful chicken leg bands. A user manual is also present, indicating comprehensive instructions are provided.
3. Setup and Installation
Follow these steps to properly install your MAYKI Automatic Chicken Coop Door:
- Prepare the Coop Opening: Ensure your chicken coop has an opening compatible with the door's dimensions (approximately 14.25" H x 10.8" L).
- Mount the Door Unit: Position the door unit securely over the coop opening. Use the provided mounting screws and anchors to fasten it firmly to the coop structure. Ensure there is sufficient clearance behind the door for it to slide vertically.
- Install the Solar Panel: Mount the solar panel in a location that receives maximum direct sunlight throughout the day. Connect the solar panel's cable to the designated port on the main door unit.
- Initial Power-Up: Locate the ON/OFF switch on the door unit and turn it on. The display should illuminate.
- Remote Control Setup: Insert the battery into the remote control. The remote can be used for manual open/close operations.
- Connect Charging Cable (Optional): If solar charging is insufficient or for initial charging, connect the USB Type-C cable to the door unit and a power source (e.g., USB adapter, power bank).
Video 1: Installation overview of the MAYKI Automatic Chicken Coop Door. This video demonstrates the process of mounting the door unit and connecting the solar panel to a chicken coop.

Figure 3: Solar panel installation on the coop roof for optimal sun exposure.
4. Operating Modes
The MAYKI Automatic Chicken Coop Door offers four programmable operating modes to suit various needs:
- Timer-Timer (T-T): The door opens and closes at specific times set by the user.
- Light-Light (L-L): The door opens and closes based on ambient light levels (sunrise/sunset).
- Timer-Light (T-L): The door opens at a set time and closes based on light levels.
- Light-Timer (L-T): The door opens based on light levels and closes at a set time.
Use the control panel buttons (M for mode selection, up/down arrows for adjustment) to configure your desired mode and settings. Refer to the detailed instructions in the included user manual for precise programming steps.

Figure 4: Control panel interface showing the 4-in-1 operating modes.
Description: This image provides a clear view of the MAYKI Automatic Chicken Coop Door's control panel. The LCD screen displays current time, current mode (L-T is visible), and open/close settings. Buttons for manual operation, resetting timer/light, and mode selection are clearly labeled, allowing users to easily program the door's functions.
5. Anti-Pinch Technology
For the safety of your flock, the door is equipped with an anti-pinch safety sensor. If a chicken is detected underneath the door during closing, the door will automatically reverse its movement. It will then attempt to close again after 10 seconds, preventing accidental injury.

Figure 5: Anti-pinch feature in action, showing the door reversing to protect a chicken.
Description: This image illustrates the anti-pinch technology of the MAYKI Automatic Chicken Coop Door. A chicken is shown partially underneath the door as it closes, with orange arrows indicating the door's upward reversal. This visual confirms the safety sensor's function to prevent injury to the birds.
6. Charging Methods
The door unit features a built-in battery that can be charged via three methods:
- Solar Panel: The primary charging method, utilizing the included solar panel to convert sunlight into energy.
- USB Type-C: For backup or faster charging, connect the provided USB Type-C cable to a compatible power adapter or power bank.
- Internal Batteries: The unit also supports internal batteries for continuous operation, especially during prolonged overcast conditions. A full charge can last over 30 days.
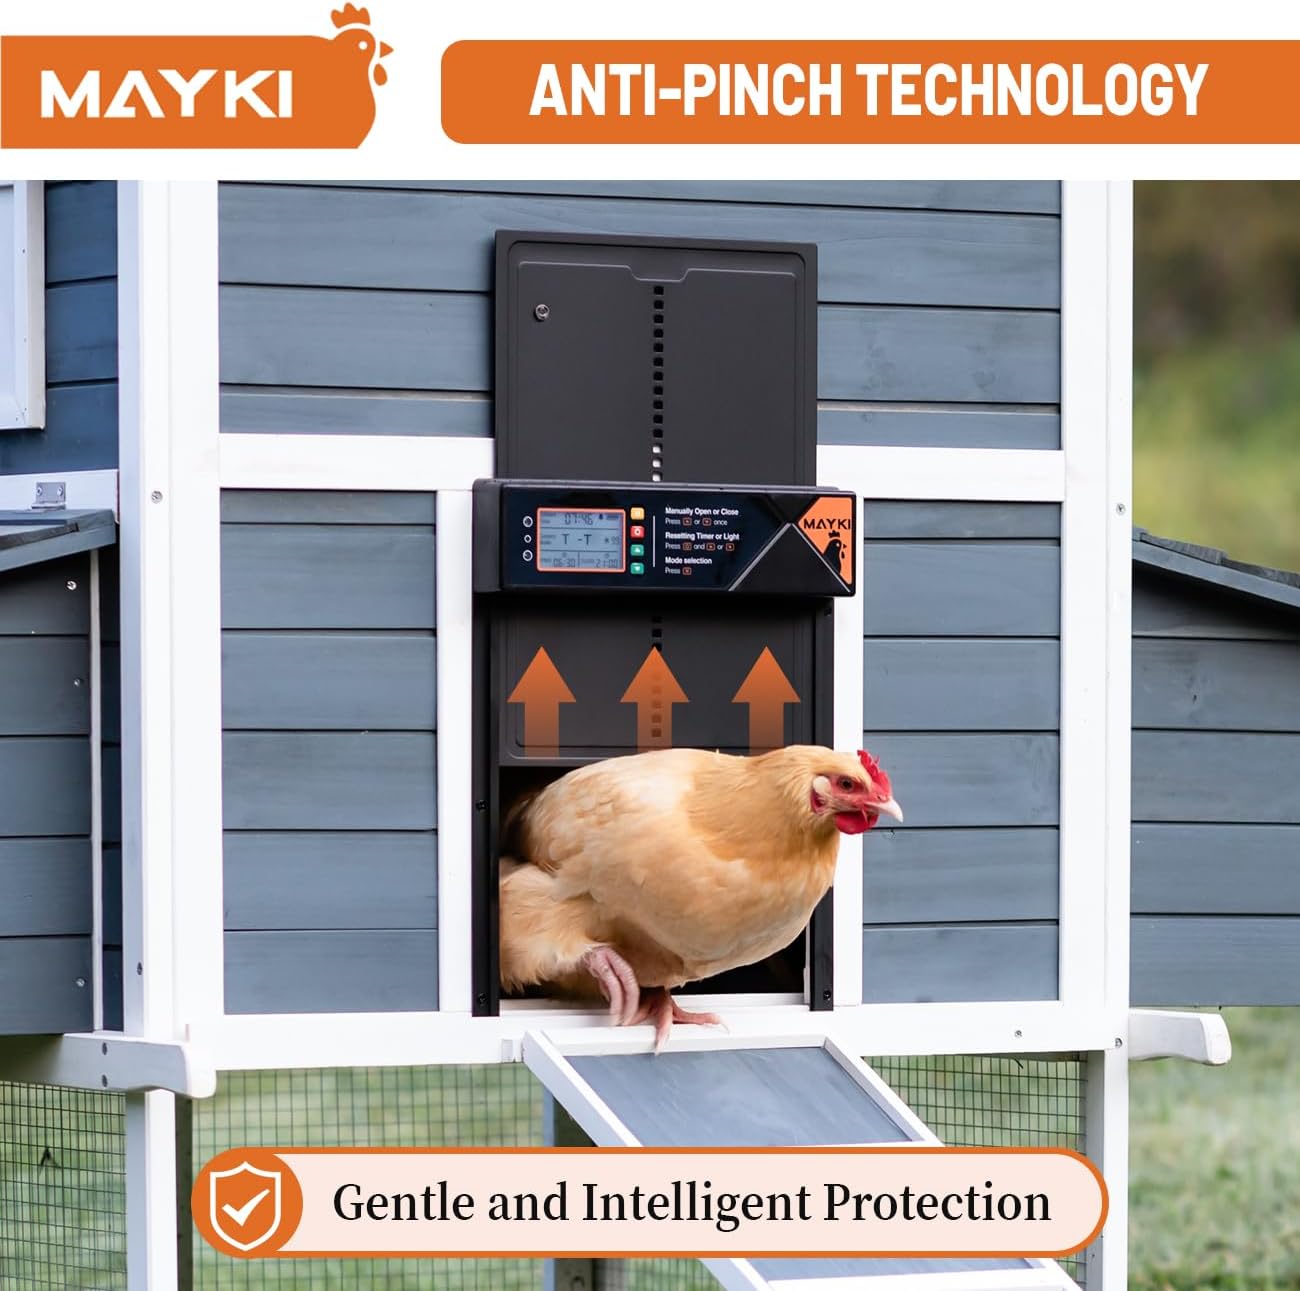
Figure 6: Three available charging methods for the door unit.
Description: This image visually represents the three charging options for the MAYKI Automatic Chicken Coop Door. Icons for a solar panel, a wall outlet (implying USB-C adapter), and a power bank are displayed, highlighting the versatility of the charging system. A text overlay indicates that a full charge provides over 30 days of operation.
7. Waterproof & Cold-Resistant Build
Constructed from durable aluminum alloy and sealed against environmental elements, the MAYKI Automatic Chicken Coop Door is designed to withstand various weather conditions. It features IPX4-5 waterproofing and freeze resistance, ensuring reliable operation in cold and wet environments.

Figure 7: The chicken coop door operating effectively in cold weather conditions.
Description: This image shows a chicken coop, equipped with the automatic door, surrounded by snow. This visual emphasizes the product's claim of being cold-resistant and waterproof, demonstrating its ability to function in harsh winter conditions.
8. Extra-Large Size
With dimensions of 362×275mm (14.25" H × 10.8" L), the door provides ample space for various poultry breeds, including large hens and small roosters, ensuring easy access without crowding.

Figure 8: Size comparison highlighting the extra-large opening of the MAYKI door.
Description: This image presents a side-by-side comparison of the MAYKI Automatic Chicken Coop Door's opening size against a smaller, standard coop door. Dimensions of 14.25 inches in height and 10.8 inches in width are clearly indicated, demonstrating the "Extra-Large Size" feature for easy access for poultry.
9. Alarm Feature
A built-in alarm system alerts you if the door fails to close properly, providing an extra layer of security and peace of mind for your flock overnight.
10. Certified Safe
The MAYKI Automatic Chicken Coop Door is FCC, CE, and RoHS certified, ensuring it meets high standards for safety, environmental protection, and electromagnetic compatibility.

Figure 9: Display of FCC, CE, and RoHS certifications.
Description: This image showcases three certificates of conformity for FCC, CE, and RoHS standards, positioned in front of a chicken coop with the automatic door. This visual confirms the product's adherence to international safety and environmental regulations.
11. Maintenance
To ensure the longevity and optimal performance of your MAYKI Automatic Chicken Coop Door, regular maintenance is recommended:
- Clean the Door Tracks: Periodically inspect and clean the door tracks to remove any dirt, debris, or feathers that could obstruct smooth operation.
- Inspect Solar Panel: Keep the solar panel clean and free of dust, leaves, or snow to ensure efficient charging.
- Check Battery Level: Monitor the battery indicator on the control panel and recharge as needed, especially during extended periods of low sunlight.
- Verify Sensor Functionality: Occasionally test the anti-pinch sensor by gently placing an object in the door's path during closing to confirm it reverses.
12. Troubleshooting
If you encounter issues with your chicken coop door, refer to the following common troubleshooting tips:
- Door Not Opening/Closing:
- Check if the unit is powered on and the battery has sufficient charge.
- Verify that the selected operating mode and programmed times/light levels are correct.
- Inspect the door tracks for obstructions.
- Alarm Sounding:
- Ensure the door is closing completely without any obstructions.
- Check for any debris preventing the door from fully seating.
- Solar Panel Not Charging:
- Clean the solar panel surface.
- Ensure the panel is positioned to receive direct sunlight and is not shaded.
- Check the connection cable between the solar panel and the door unit.
For further assistance, please contact customer support.
13. Specifications
| Feature | Detail |
|---|---|
| Model Number | ACD01-BLK |
| Door Dimensions (H x L) | 14.25" x 10.8" (362 x 275mm) |
| Item Dimensions (L x W x H) | 10.8 x 1.6 x 14.25 inches |
| Item Weight | 3 Pounds |
| Material | Acrylonitrile Butadiene Styrene (ABS), Aluminum |
| Power Source | Solar Panel, USB Type-C, Lithium Ion Battery (included) |
| Battery Life (Full Charge) | Over 30 days |
| Operating Modes | Timer-Timer, Light-Light, Timer-Light, Light-Timer |
| Safety Features | Anti-Pinch Technology, Built-in Alarm |
| Weather Resistance | IPX4-5 Waterproof, Cold-Resistant, Freeze Resistant |
| Certifications | FCC, CE, RoHS |
| Target Audience | Chicken, Duck, Livestock |
14. Warranty and Support
Your MAYKI Automatic Chicken Coop Door comes with a 1-Year Limited Warranty. This warranty covers manufacturing defects and ensures peace of mind. For warranty claims, technical support, or any product-related inquiries, please contact MAYKI Customer Support.
Warranty Benefits:
- 1-Year Warranty Coverage
- Priority Customer Support
- Hassle-Free Replacement for Covered Issues
- Early Access to Product Updates & Offers
To activate your warranty, scan the QR code provided on the product packaging or send a quick message to register. No forms are needed; just one email and you're covered.
Ask a question about this manual
Ask about setup, troubleshooting, compatibility, parts, safety, or missing instructions. Manuals+ will review the question and use this page’s manual context to help answer it.