1. Introduction
Thank you for choosing the Generic RideView Hands-Free POV Camera. This compact and versatile camera is designed to capture your adventures from a unique perspective, especially for equestrians and outdoor enthusiasts. With features like 1080P resolution, waterproof capability, magnetic mounting, and Wi-Fi connectivity, you can easily record and share your experiences. This manual provides detailed instructions to help you set up, operate, and maintain your camera for optimal performance.
2. Safety Information
- Read all instructions carefully before using the camera.
- Keep the camera and accessories away from children and pets.
- Do not expose the camera to extreme temperatures or direct sunlight for extended periods.
- Use only the specified charging method (Type-C interface) and compatible accessories.
- Ensure the waterproof case is properly sealed before submerging the camera in water.
- Avoid dropping or subjecting the camera to severe impacts.
- Do not attempt to disassemble or modify the camera, as this will void the warranty and may cause damage.
3. Package Contents
Please check the package to ensure all items are present:
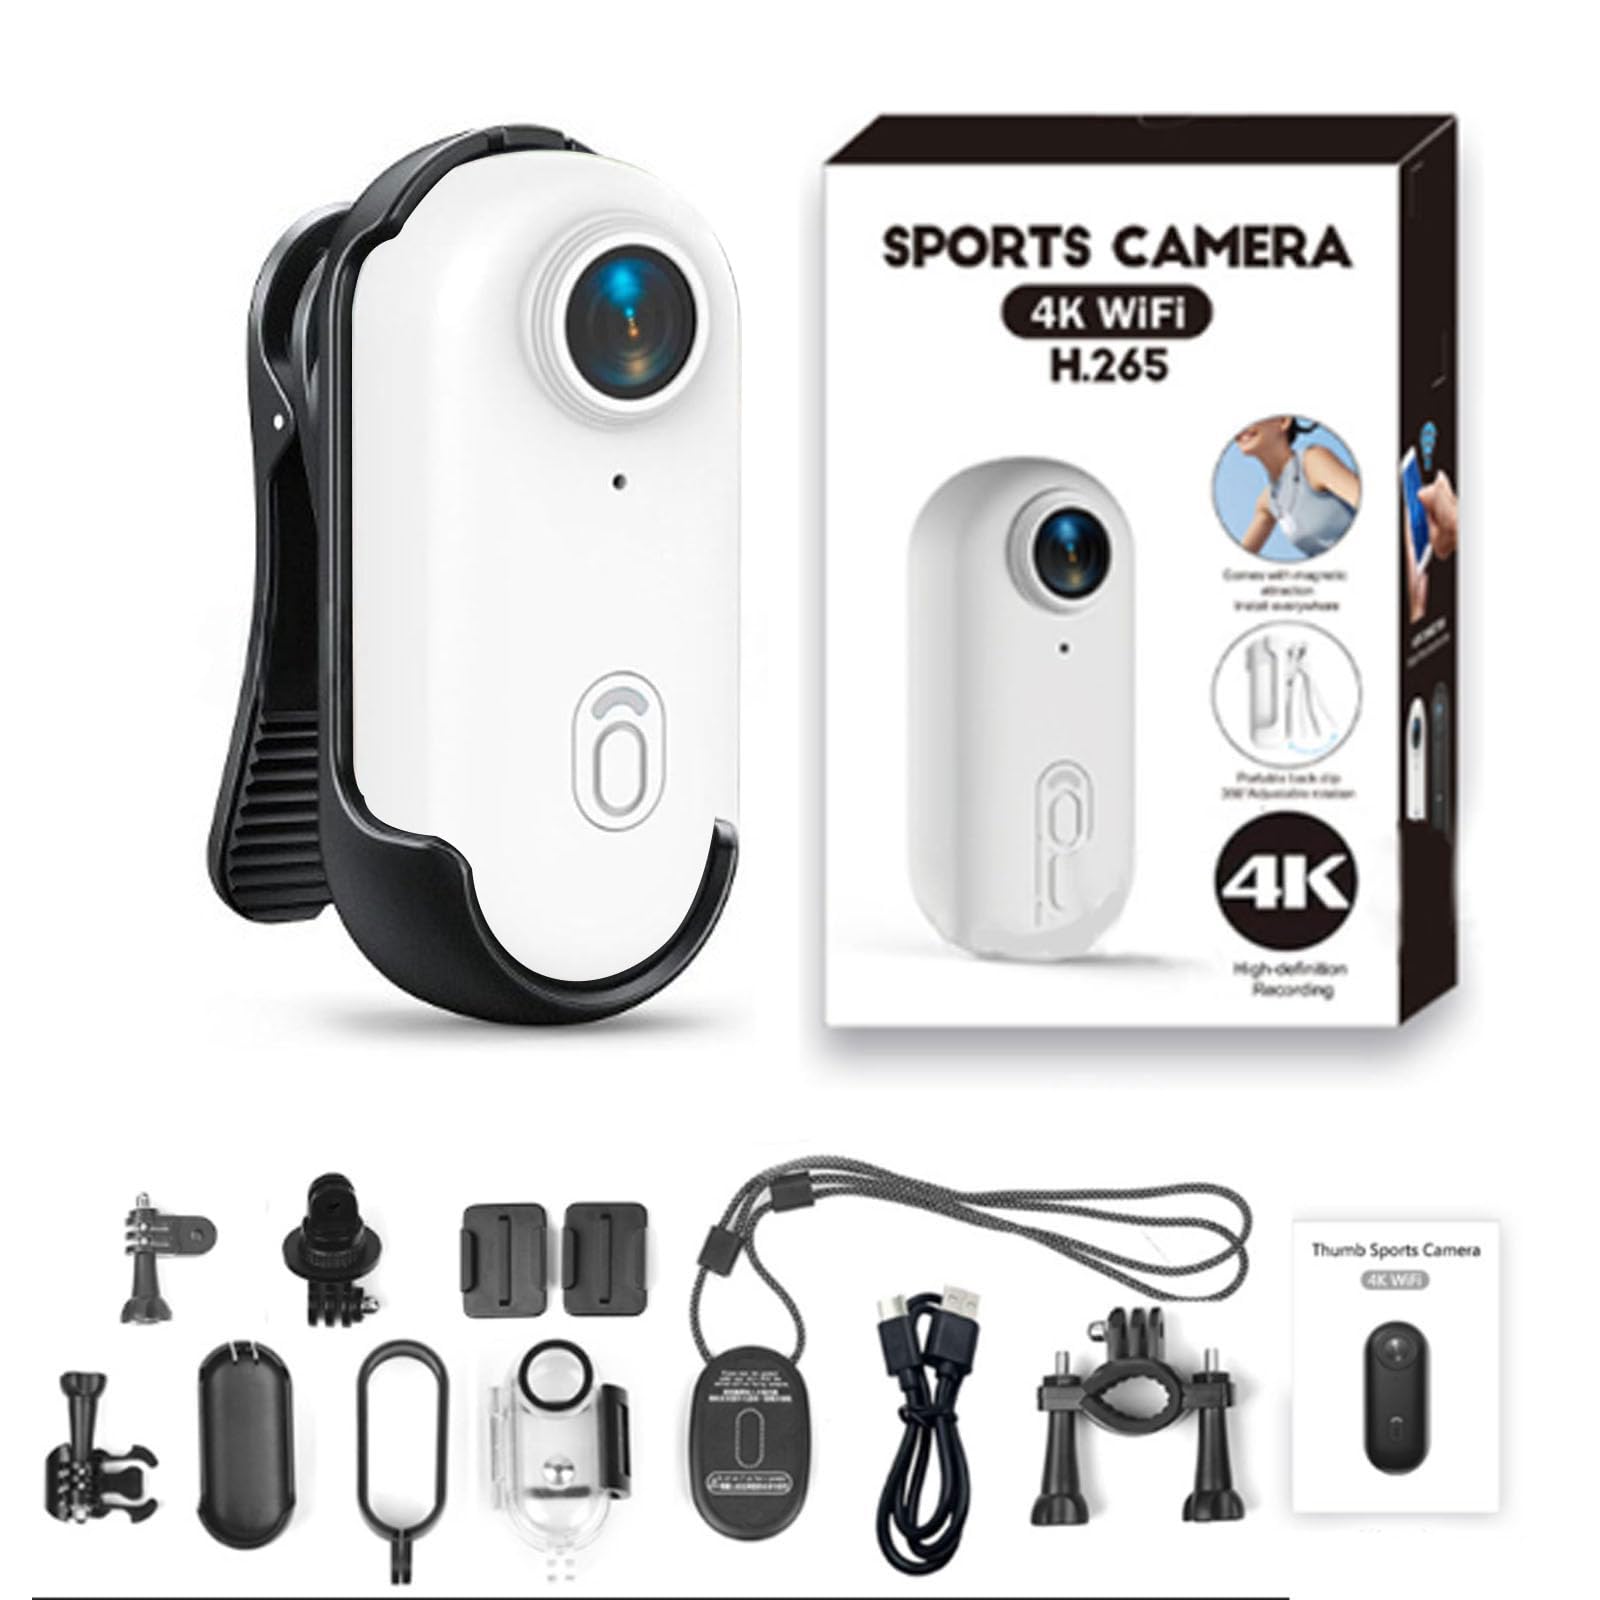
- Hands-Free POV Camera (1080P White, 64G)
- Magnetic Clip
- Mounting Bracket
- Type-C Charging Cable
- User Manual
- Magnetic Lanyard (may be included depending on package)
4. Product Overview
Familiarize yourself with the camera's components:
- Lens: Wide-angle lens for capturing expansive views.
- Power/Record Button: Used for powering on/off and starting/stopping recording.
- Indicator Light: Displays camera status (e.g., recording, charging, Wi-Fi).
- Type-C Port: For charging and data transfer.
- Micro SD Card Slot: For memory card insertion.
- Magnetic Base: Allows for easy attachment to metallic surfaces or compatible mounts.

The camera features a strong magnetic base, enabling flexible and secure attachment to various surfaces and accessories. This allows for diverse mounting options to capture your desired perspective.

For hands-free operation, the camera can be attached to a magnetic lanyard, providing a stable and comfortable way to record while on the move.
5. Setup
5.1 Charging the Camera
Before first use, fully charge the camera. Connect the provided Type-C charging cable to the camera's Type-C port and the other end to a USB power adapter (not included) or a computer's USB port. The indicator light will show charging status.

The camera can record footage even while it is connected to a power source and charging, allowing for continuous operation during longer activities.
5.2 Inserting the Micro SD Card
The camera requires a Micro SD card (not included) for storing recordings. Insert the Micro SD card into the designated slot with the contacts facing down until it clicks into place. Ensure the card is formatted for optimal performance. If the card is new or not recognized, format it using the camera's settings (refer to the app instructions) or on a computer.
5.3 Mounting the Camera
The camera offers versatile mounting options:
- Magnetic Attachment: Directly attach the camera to any metallic surface.
- Magnetic Clip: Use the included magnetic clip to attach the camera to clothing, straps, or other non-metallic surfaces. The clip allows for 360° rotation to adjust the recording angle.
- Mounting Bracket: Utilize the mounting bracket for secure attachment to helmets, handlebars, or other gear.
5.4 Connecting to Wi-Fi and Mobile App
For advanced control, live preview, and file management, connect your camera to the dedicated mobile application via Wi-Fi.
- Download the official app from your smartphone's app store (search for "RideView Camera" or refer to the QR code in the quick start guide).
- Power on the camera.
- Activate Wi-Fi on the camera (refer to camera specific button press or app instructions).
- On your smartphone, go to Wi-Fi settings and connect to the camera's Wi-Fi network (SSID and password usually found on the camera or in the quick start guide).
- Open the app and follow the on-screen instructions to connect to your camera.

The integrated Wi-Fi allows for seamless connection to your mobile device, facilitating live viewing, easy file transfer, and instant sharing of your captured moments.
6. Operating Instructions
6.1 Powering On/Off
- Power On: Press and hold the Power/Record button for approximately 3 seconds until the indicator light illuminates.
- Power Off: Press and hold the Power/Record button for approximately 3 seconds until the indicator light turns off.
6.2 Recording Video
The camera is designed for simple one-button recording.
- Ensure the camera is powered on and an SD card is inserted.
- Start Recording: Briefly press the Power/Record button. The indicator light will change to indicate recording is in progress (e.g., flashing red).
- Stop Recording: Briefly press the Power/Record button again. The indicator light will return to standby mode.

The camera captures video in 1080P resolution, ensuring high-definition footage of your activities. While the camera line may offer 4K variants, this specific model provides excellent 1080P clarity.
6.3 Waterproof Usage
The camera is designed to be waterproof up to 30 meters with its IPX8 waterproof case. This makes it suitable for various water-related activities.
- Ensure the waterproof case is securely closed and all seals are intact before submerging the camera.
- After use in saltwater, rinse the camera and case with fresh water and allow them to dry completely.

With its robust waterproof shell, the camera is capable of being submerged to a depth of 30 meters, making it suitable for diving, fishing, cycling in wet conditions, mountaineering, surfing, and other outdoor activities.
7. Maintenance
7.1 Cleaning the Camera
- Use a soft, lint-free cloth to clean the camera body.
- For the lens, use a specialized lens cleaning cloth and solution to avoid scratches.
- Do not use harsh chemicals or abrasive materials.
7.2 Battery Care
- Avoid fully discharging the battery frequently.
- Charge the camera regularly, even if not in use, to maintain battery health.
- Store the camera in a cool, dry place when not in use for extended periods.
7.3 Storage
When storing the camera for long periods, ensure it is fully charged and kept in a protective case to prevent dust and damage. Remove the Micro SD card if you plan to store it separately.
8. Troubleshooting
Camera Not Turning On
- Ensure the battery is charged. Connect the camera to a power source and try again.
- Press and hold the Power/Record button for at least 5 seconds.
Cannot Record
- Check if a Micro SD card is inserted correctly.
- Ensure the Micro SD card has sufficient free space.
- Format the Micro SD card if it's new or corrupted.
- Check battery level; low battery may prevent recording.
Wi-Fi Connection Issues
- Ensure Wi-Fi is enabled on the camera and your smartphone.
- Verify you are connecting to the correct camera Wi-Fi network.
- Restart both the camera and your smartphone.
- Ensure the camera and smartphone are within close proximity.
Poor Video Quality
- Clean the camera lens with a soft cloth.
- Ensure adequate lighting conditions.
- Check if the camera is set to the desired resolution (1080P for this model).
9. Specifications
| Feature | Detail |
|---|---|
| Model Name | RideView |
| Color | 1080P White |
| Dimensions (D x W x H) | 0.78"D x 2.54"W x 0.78"H |
| Video Capture Resolution | 1080p |
| Effective Video Resolution | 1920x1080 Pixels (for 1080p recording) |
| Lens Type | Wide Angle |
| Connectivity Technology | Wi-Fi, SD card slot |
| Flash Memory Type | Micro SD (up to 64G for this variant) |
| Water Resistance Level | Waterproof (up to 30m with case) |
| Special Features | Waterproof, Wi-Fi Connectivity, Magnetic Mounting |
| Compatible Devices | Smartphone, Tablet, Personal Computer |
Note: Specifications are subject to change without prior notice.
10. Support and Warranty
For any questions, technical assistance, or warranty inquiries regarding your Generic RideView Hands-Free POV Camera, please refer to the contact information provided at the point of purchase or on the product packaging.
Our Promise: If you are not satisfied with your purchase for any reason, please do not hesitate to contact us. We are committed to addressing your concerns and offering a simple solution.
Please retain your proof of purchase for warranty claims.


