
1. Introduction
This manual provides detailed instructions for the assembly, operation, and maintenance of your YITAHOME King Size Bed Frame. This bed frame is designed to offer comfort and functionality with its adjustable headboard, integrated RGB LED lighting, convenient USB charging ports, and four under-bed storage drawers. Please read all instructions carefully before beginning assembly and retain this manual for future reference.
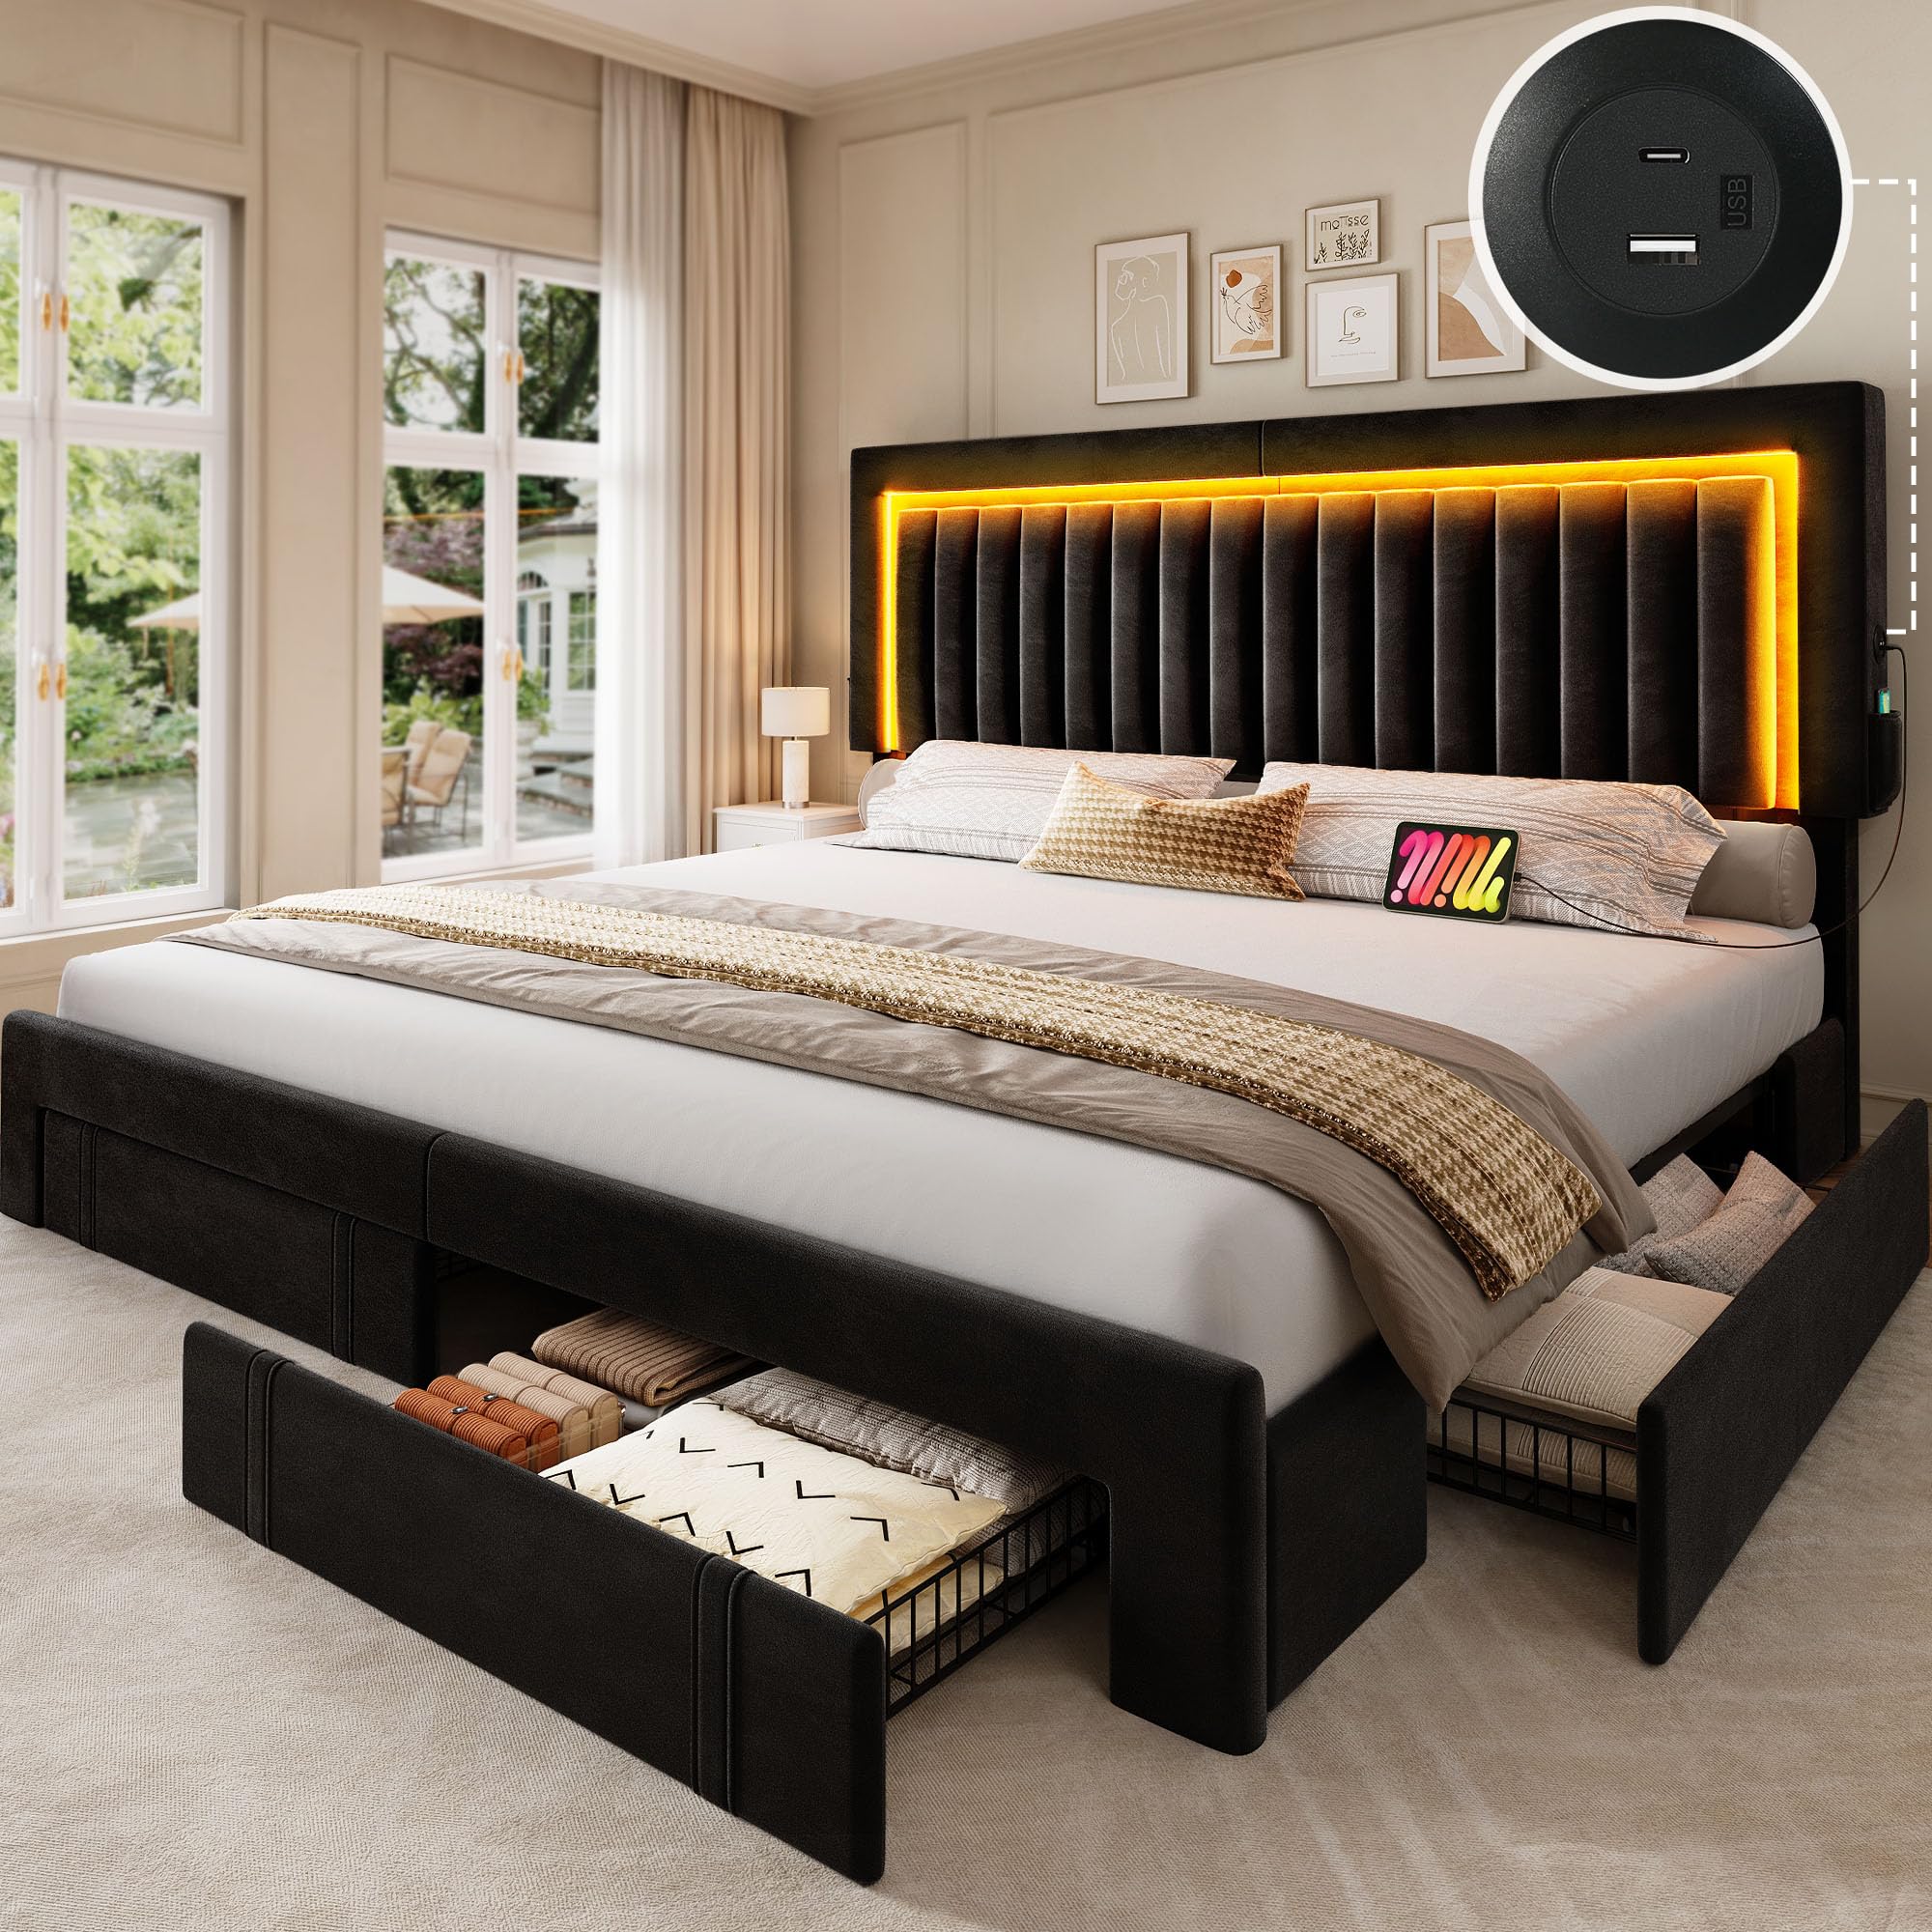
Figure 1: YITAHOME King Size Bed Frame Overview
2. Safety Information
- Exercise caution when operating the sliding storage drawers to prevent finger pinching.
- Maintain the velvet upholstery by keeping it clean and away from open flames to mitigate fire hazards.
- Adhere strictly to the assembly instructions to ensure the bed frame's stability and user safety.
- Do not exceed the maximum weight capacity of 1200 lbs for the bed frame.
3. Package Contents
Verify that all components listed below are present before starting assembly. If any parts are missing or damaged, please contact customer support.
| Part No. | Description | Quantity |
|---|---|---|
| 1 | Headboard | 1 |
| 2 | Headboard Support Bar | 2 |
| 3 | Headboard Crossbar | 1 |
| 4, 5, 6, 18 | Drawer Frames (various sections) | 4 sets |
| 7, 9, 12 | Side Rails (various sections) | 2 sets |
| 8, 10, 11 | Center Support Legs | Multiple |
| 14, 15 | Wooden Slats | Multiple |
| 16 | Plastic Slat Caps | Multiple |
| 17 | Corner Brackets | 4 |
| 19, 22 | Drawer Front Panels | 4 |
| 20 | Drawer Wheels | 16 |
| 23 | USB Charging Unit | 1 |
| 25 | RGB LED Light Strip | 1 |
| 26 | Power Adapter | 1 |
| A, B, C, D, E, F, G | Various Screws & Washers | As needed |
4. Assembly Instructions
Follow these steps carefully to assemble your YITAHOME King Size Bed Frame. An installation video is provided for visual guidance.
Video 1: Bed Frame Assembly Guide
This video provides a step-by-step visual guide for assembling the YITAHOME King Size Bed Frame, including all major components.
- Step 1: Attach LED Strip to Headboard
Carefully attach the RGB LED light strip (Part 25) along the inner groove of the headboard (Part 1). Ensure the adhesive is secure and the strip is evenly placed. - Step 2: Attach Headboard Support Bars
Secure the two headboard support bars (Part 2) to the main headboard unit (Part 1) using the provided screws (B) and washers (D). Tighten securely. - Step 3: Attach Headboard Crossbar
Connect the headboard crossbar (Part 3) between the two headboard support bars using screws (A). Ensure it is centered and stable. - Step 4: Assemble Side Rails (Part 1)
Connect the various sections of the side rails (Parts 7 and 12) as indicated in the diagram. Attach the center support legs (Part 8) to these sections using screws (B). Repeat this process for the other side rail. - Step 5: Assemble Side Rails (Part 2)
Attach the remaining center support legs (Parts 10 and 11) to the side rail sections (Part 9) using screws (E). - Step 6: Attach Side Rails to Headboard
Connect the assembled side rails (from Steps 4 and 5) to the headboard assembly using screws (A). Ensure all connections are firm. - Step 7: Connect USB and LED Wiring
Connect the wiring from the USB charging unit (Part 23) and the RGB LED light strip (Part 25) to the main power adapter (Part 26). Route the cables neatly to avoid entanglement. - Step 8: Attach Corner Brackets
Secure the corner brackets (Part 17) to the bed frame corners using screws (D) and (E). These provide additional stability. - Step 9: Install Center Slats
Place and secure the center wooden slats (Part 14) to the bed frame using screws (G). These slats provide central support for the mattress. - Step 10: Install Remaining Slats
Insert the remaining wooden slats (Part 15) into the plastic caps (Part 16) and then place them across the bed frame, ensuring they are evenly spaced and securely seated. - Step 11: Assemble Drawer Frames
Assemble the wire drawer frames (Parts 4, 5, 6, 18) by connecting the sides as shown in the diagram. - Step 12: Attach Wheels to Drawer Frames
Attach the wheels (Part 20) to the bottom of the assembled drawer frames. Ensure all wheels are securely fastened and can rotate freely. - Step 13: Attach Drawer Front Panels (Part 1)
Secure the drawer front panels (Part 19) to the assembled drawer frames using screws (F). - Step 14: Attach Drawer Front Panels (Part 2)
Secure the remaining drawer front panels (Part 22) to the assembled drawer frames using screws (C) and (F). - Step 15: Insert Drawers
Slide the completed storage drawers into the designated spaces under the bed frame. Ensure they slide smoothly on their rollers.
5. Operating Instructions
5.1 RGB LED Lights
The integrated RGB LED lights in the headboard offer customizable ambiance for your bedroom. They can be controlled via the included 24-key remote control or a smart application on your mobile device.
- Color Selection: Choose from a variety of RGB colors to match your mood or decor.
- Modes: Select from multiple lighting modes, including static colors, dynamic transitions, and flashing effects.
- Music Synchronization: Activate music sync mode to have the lights react to audio.
- Timing Function: Set a timer for the lights to automatically turn on or off.

Figure 2: RGB LED Light Control Options
This image illustrates the various RGB color options and control methods (remote and smartphone app) for the integrated LED lights.
Video 2: King Size Bed Frame Product Display
This video showcases the features of the King Size Bed Frame, including the RGB LED lights and storage drawers.
5.2 USB Charging Ports
The headboard is equipped with built-in USB ports (Type-A and Type-C) for convenient charging of your electronic devices.
- Locate the USB ports on the side of the headboard.
- Plug your device's charging cable into the appropriate USB port.
- Ensure the bed frame's power adapter is connected to a functional power outlet.

Figure 3: USB Charging Station and Side Pocket
This image highlights the convenient USB charging ports (Type-A and Type-C) and the side storage pocket located on the headboard.
5.3 Storage Drawers
The bed frame includes four under-bed storage drawers designed for easy access and organization.
- Gently pull the drawer front to slide the drawer out.
- Place items such as extra bedding, clothing, or other belongings inside.
- Push the drawer back in until it is fully closed and flush with the bed frame.

Figure 4: Under-Bed Storage Drawers
This image displays the four under-bed storage drawers, highlighting their wheeled design for smooth operation.
6. Maintenance
- Cleaning: For the velvet upholstery, use a soft, damp cloth for general cleaning. For deeper cleaning, consult a professional upholstery cleaner. Avoid harsh chemicals.
- Fasteners: Periodically check all screws and connections to ensure they remain tight. Re-tighten as necessary to maintain stability and prevent noise.
- Drawers: Keep the drawer rollers free of dust and debris to ensure smooth operation. Lubricate if necessary with a silicone-based spray.
- LED Lights: If the LED lights dim or flicker, check the power connections. If issues persist, contact customer support.
7. Troubleshooting
| Problem | Possible Cause | Solution |
|---|---|---|
| LED lights not working | Loose power connection, remote battery dead, app not connected. | Check if the power adapter is securely plugged into the wall and the bed frame. Replace remote batteries. Ensure the app is correctly paired via Bluetooth. |
| USB ports not charging devices | Power adapter unplugged, device cable faulty, insufficient power. | Verify the power adapter is connected. Try a different USB cable or device. Ensure the bed frame is receiving power. |
| Drawers do not slide smoothly | Obstruction under the bed, dirty rollers, misaligned drawer. | Check for any items blocking the drawers. Clean the rollers and tracks. Re-align the drawer if necessary. |
| Bed frame is noisy or wobbly | Loose screws or connections. | Inspect all assembly points and tighten any loose screws or bolts. |
8. Specifications
- Model Number: MAYIH7AYUi
- Size: King
- Material: Metal (frame), Velvet (headboard)
- Product Dimensions: 81.8"L x 80.7"W x 45.7"H
- Adjustable Headboard Height: 43-45 inches
- Recommended Mattress Height: 8-12 inches
- Weight Capacity: 1200 lbs
- Special Features: RGB LED Lighting, USB Charging Station (Type-A and Type-C), 4 Sliding Storage Drawers, No Box Spring Needed, Remote Control, Side Storage Pockets.
- UPC: 199449405948
9. Warranty and Support
For warranty information or any questions regarding your YITAHOME King Size Bed Frame, please contact YITAHOME customer service. Our team is dedicated to assisting you with any concerns or issues you may encounter.
Contact information can typically be found on the product packaging or the official YITAHOME website.


