
1. Safety Information
WARNING: To reduce the risk of fire, electric shock, or personal injury, always turn off the power at the main circuit breaker or fuse box before beginning installation or performing any maintenance.
All wiring must be in accordance with national and local electrical codes. If you are unfamiliar with wiring, consult a qualified electrician.
Do not operate the fan with damaged blades. Replace any damaged blades immediately.
Ensure the mounting structure can support the weight of the fan (approximately 16.3 lbs).
Keep hands clear of the fan blades when the fan is in operation.
2. Package Contents
Verify that all components are present before beginning assembly.
- Fan Motor Base
- Caged Light Shade
- Retractable ABS Fan Blades (4)
- Downrods (5" and 7.9")
- Mounting Bracket
- Canopy
- Remote Control
- Hardware Bag (screws, wire nuts, etc.)
- Instruction Manual
Note: 5 E26 bulbs (60 watt maximum) are required and not included.
3. Specifications
| Feature | Detail |
|---|---|
| Brand | MOOONICHE |
| Model Name | CFL-8388-48B |
| Product Dimensions | 48"D x 48"W x 21"H |
| Color | Black |
| Electric Fan Design | Ceiling Fan |
| Power Source | DC |
| Style | Industrial |
| Room Type | Bedroom, Dining Room, Home Office, Kitchen, Living Room |
| Special Feature | Remote Controlled, Timer |
| Noise Level | 35 Decibels |
| Wattage | 40 watts |
| Voltage | 120 Volts (AC) |
| Item Weight | 16.3 Pounds |
| Indoor/Outdoor Usage | Indoor |
| Control Method | App, Remote |
| Number of Power Levels | 6 |
| Motor Type | Brushless DC Motor |
| Installation Type | DIY |
| UPC | 733241252296 |
4. Assembly and Setup
Follow these steps carefully for proper installation. It is recommended to have a second person assist during installation.
4.1. Prepare the Light Fixture
- Attach the light bulb sockets to the fan motor base. Ensure all wires are securely connected according to the wiring diagram in the manual.
- Secure the caged light shade to the fan motor base using the provided screws.
- Install 5 E26 bulbs (not included) into the sockets.
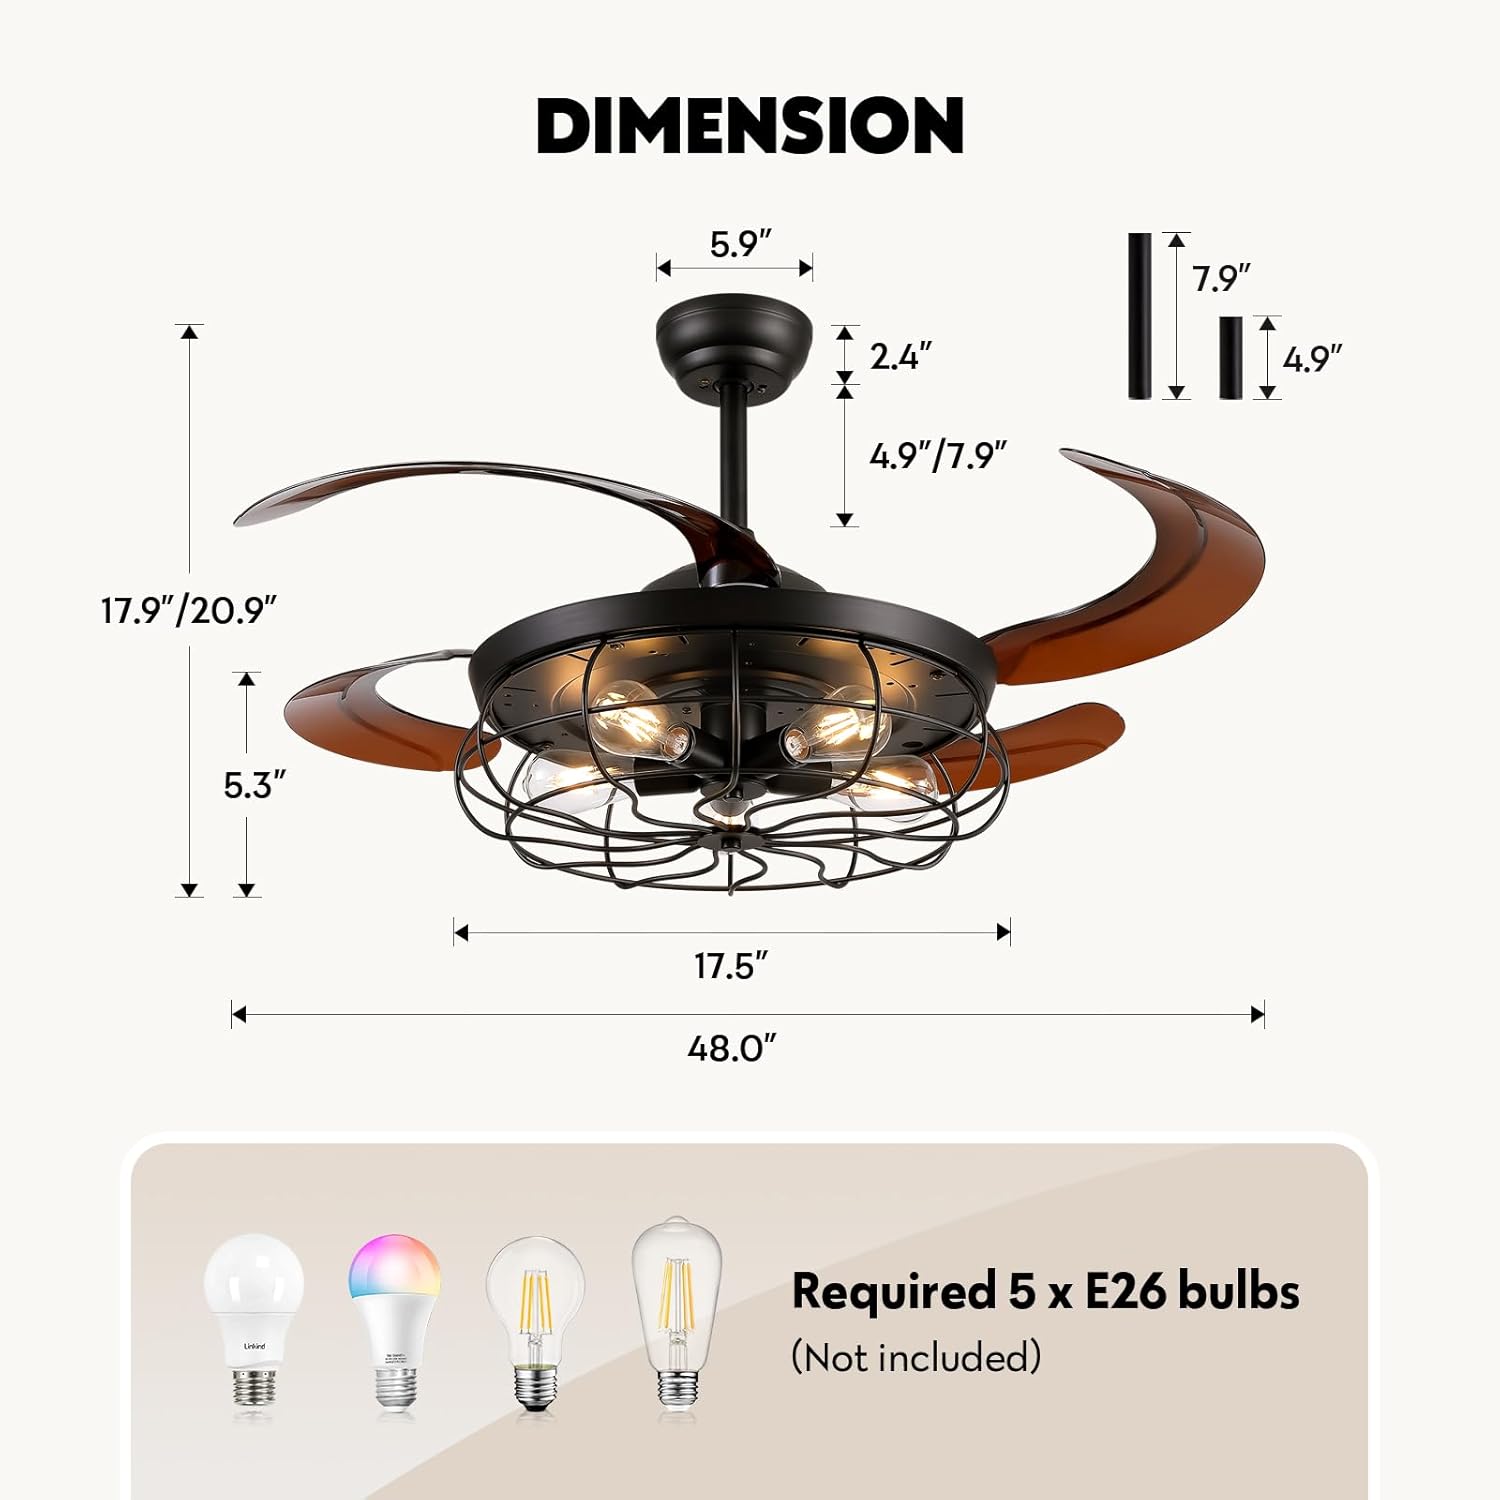
Image: Assembled MOOONICHE 48 inch Industrial Caged Ceiling Fan with Light and Remote.
4.2. Attach Fan Blades
- Carefully attach each retractable fan blade to the designated slots on the fan motor base. Ensure they are securely fastened with the provided screws.
Video: Detailed assembly steps for the MOOONICHE 48 inch industrial caged ceiling fan with light, including blade attachment.
4.3. Downrod and Canopy Assembly
- Select the appropriate downrod length (5" or 7.9") for your ceiling height.
- Feed the fan wires through the downrod and attach the downrod to the fan motor assembly.
- Slide the canopy over the downrod.
4.4. Mounting to Ceiling
- IMPORTANT: Turn off power at the circuit breaker before proceeding.
- Secure the mounting bracket to the ceiling junction box using the provided screws. Ensure the bracket is firmly attached and can support the fan's weight.
- Connect the electrical wires: Live (black) to Live (black), Neutral (white) to Neutral (white), and Ground (green/yellow) to Ground (green/yellow). Use wire nuts to secure connections.
- Carefully lift the fan assembly and hang it onto the mounting bracket.
- Slide the canopy up to cover the mounting bracket and secure it with screws.
Video: General guide on how to install a fandelier, demonstrating wiring and mounting.
Video: Installation process for a similar farmhouse ceiling fan with lights.
5. Operating Instructions
5.1. Remote Control Functions
The fan and light can be controlled independently using the provided remote control.
- Fan ON/OFF: Press the fan button to turn the fan on or off.
- Speed Control: Select from 6 wind speeds (1-6) to adjust airflow.
- Light ON/OFF: Press the light button to turn the light on or off.
- Timer: Set the fan to turn off automatically after 1, 2, or 4 hours.
- Reverse Function: Use the reverse function to change the direction of the fan blades for summer (downward airflow) or winter (upward airflow) operation.

Image: Remote control for the MOOONICHE 48" Industrial Caged Ceiling Fan.
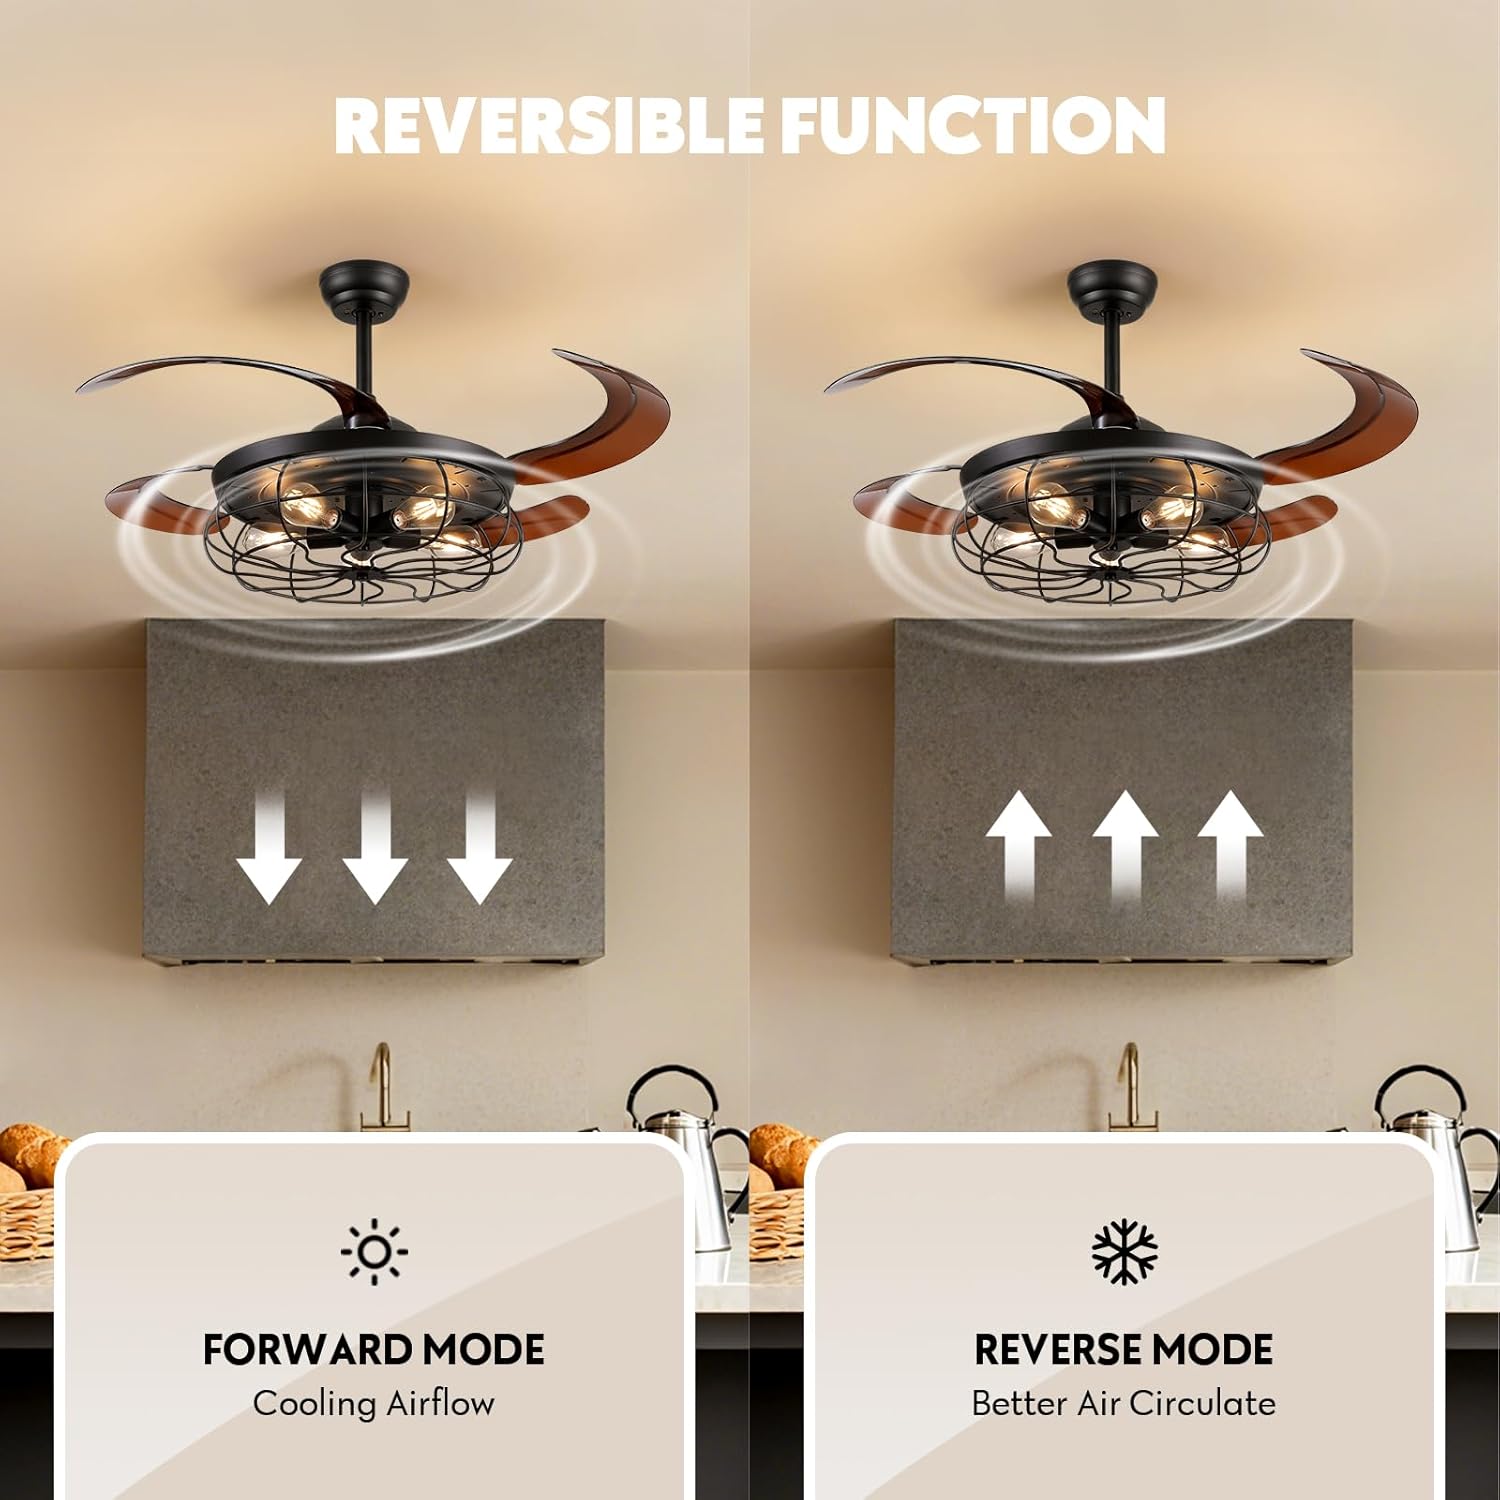
Image: Illustration of the fan's reverse function for cooling airflow (forward mode) and better air circulation (reverse mode).
5.2. App Control
This fan supports app control. Refer to the specific app instructions for pairing and operation.
Video: Instructions on how to pair the fan light with a mobile application for smart control.
6. Maintenance
6.1. Cleaning
To clean the fan, wipe with a soft, damp cloth. Do not use abrasive cleaners or solvents that may damage the finish.
6.2. Bulb Replacement
This fan requires 5 E26 bulbs, with a maximum of 60 watts per bulb. Ensure the power is off at the circuit breaker before replacing bulbs.
7. Troubleshooting
If you experience issues with your fan, refer to the following common problems and solutions:
- Fan does not start: Check that the power is on at the circuit breaker and wall switch. Ensure all wire connections are secure.
- Light does not work: Verify bulbs are correctly installed and not burnt out. Check wire connections to the light kit.
- Fan wobbles: Ensure all blade screws are tightened. Check that the mounting bracket is securely fastened to the ceiling.
- Remote control not working: Replace remote control batteries. Ensure the fan is receiving power.
For further assistance, please contact customer service.
8. Warranty and Support
We offer 30 days free return and refund, and a 1-year warranty for this ceiling fan. If you receive a product with defects in workmanship or any broken parts, we will replace it as soon as possible.
If you encounter any problems during use, our customer service team is available to assist you promptly.