Introduction
This manual provides instructions for the JORREP RGB Switch Controllers. It covers setup, operation, maintenance, and troubleshooting to ensure optimal performance and longevity of your controllers. Please read this manual thoroughly before use.
Package Contents
- 2 x JORREP Wireless RGB Switch Controllers
- 2 x USB Charging Cables
- 2 x User Manuals (this document)
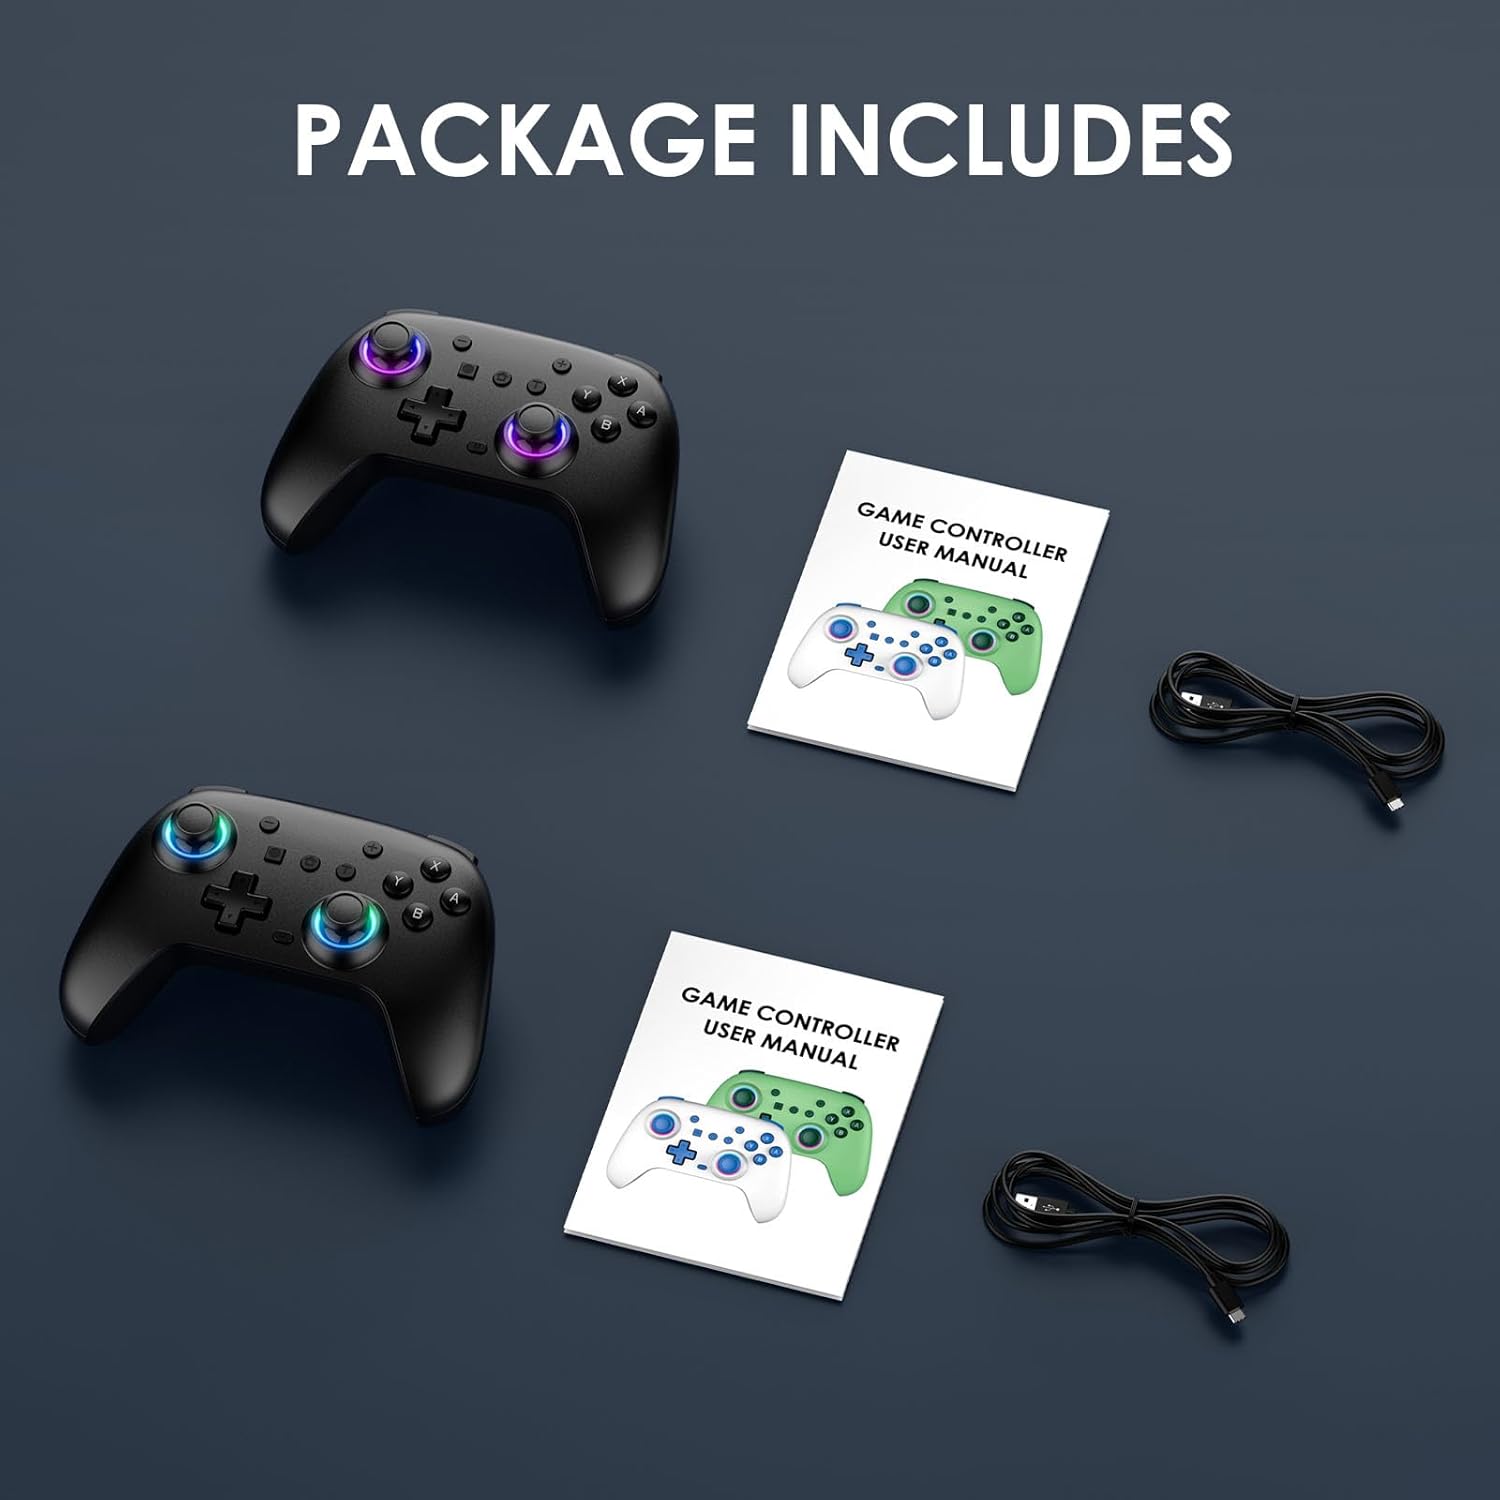
Figure 1: Package Contents. Includes two controllers, two USB cables, and two user manuals.
Controller Overview
Familiarize yourself with the various buttons and features of your JORREP RGB Switch Controller.

Figure 2: Front and Rear View of the Controller with Labeled Components. Key components include analog sticks, D-pad, action buttons, shoulder buttons, trigger buttons, Home button, Capture button, Turbo button, Menu Selection buttons, USB Charging Jack, Programming Mode Key, Motor Switch, Light Adjustment Switch, and programmable MR/ML buttons.
- Home Button: Power on/off, return to home screen.
- Menu Selection (-/+): System menu navigation.
- Capture Button: Take screenshots.
- Turbo Button: Activates turbo function for assigned buttons.
- Left/Right Analog Sticks: Hall Effect joysticks for precise movement.
- Direction Pad (D-Pad): Directional input.
- Action Buttons (A/B/X/Y): Game-specific actions.
- Shoulder Buttons (L/R): Top-mounted buttons.
- Trigger Buttons (ZL/ZR): Bottom-mounted buttons.
- USB Charging Jack: For charging the controller.
- Programming Mode Key: For custom button assignments (MR/ML).
- Motor Switch: Adjusts vibration intensity.
- Light Adjustment Switch: Controls RGB lighting effects.
- MR/ML Buttons: Programmable back buttons.
Setup
1. Charging the Controller
Before initial use, fully charge the controller. Connect the provided USB charging cable to the controller's USB Charging Jack and the other end to a USB power source (e.g., console, PC, USB wall adapter).
- Charging Time: Approximately 2 hours.
- Battery Life: 8-10 hours of gameplay on a full charge.

Figure 3: Battery Information. The controller features an 800mAh battery, providing 8-10 hours of play after a 2-hour charge.
2. Pairing with Devices
The JORREP RGB Switch Controllers offer wide compatibility. Follow the specific pairing instructions for your device:
2.1. Pairing with Nintendo Switch / Switch Lite / Switch OLED
- From the HOME Menu, select Controllers, then Change Grip/Order.
- While on the "Change Grip/Order" screen, press and hold the Home button on the JORREP controller for a few seconds until the indicator lights begin to flash.
- Once paired, the player LED(s) on the controller will light up solid.
- The controller supports the console's wake-up function.
2.2. Pairing with PC (Windows 10 and above)
- Connect the controller to your PC using the USB charging cable. The controller will be recognized as a wired controller.
- For wireless connection, ensure your PC has Bluetooth capabilities. Go to Settings > Devices > Bluetooth & other devices.
- Select Add Bluetooth or other device, then Bluetooth.
- Press and hold the Home button on the JORREP controller until the indicator lights flash rapidly.
- Select the controller from the list of available Bluetooth devices to pair.
2.3. Pairing with iOS (16.3 and above) / Android (9.0 and above)
- Enable Bluetooth on your mobile device.
- Press and hold the Home button on the JORREP controller until the indicator lights flash rapidly.
- On your device, select the controller from the list of available Bluetooth devices to pair.

Figure 4: Multi-Platform Compatibility. The controllers are compatible with Windows (10+), Switch (3.0.0+), iOS (16.3+), and Android (9.0+).
Operating Instructions
1. Hall Effect Joysticks
The controllers are equipped with Hall Effect joysticks, which use magnetic fields for input detection. This technology provides enhanced precision, reduces stick drift, and increases durability compared to traditional potentiometers.

Figure 5: Hall Effect Joystick Technology. This image demonstrates the internal workings of the Hall Effect joystick, highlighting its anti-drift and durability features.
2. Dual Vibration & 6-Axis Gyro Sensor
Experience immersive gameplay with adjustable dual vibration motors and a precise 6-axis gyro motion sensor.
- Vibration Adjustment: Use the Motor Switch (located on the back of the controller, as shown in Figure 2) to cycle through different vibration intensities (0%, 30%, 60%, 100%).
- Motion Control: The 6-axis gyro sensor detects tilt and rotation, providing responsive motion control in compatible games.

Figure 6: Dual Vibration and 6-Axis Gyro Sensor. This image illustrates the adjustable vibration levels and the motion-sensing capabilities of the controller.
3. RGB Lighting Effects
The controllers feature customizable RGB lighting around the analog sticks. Use the Light Adjustment Switch (located on the back of the controller, as shown in Figure 2) to change lighting modes or colors.

Figure 7: RGB Lighting. The controller offers multiple RGB lighting effects for personalization.
4. Programmable Back Buttons (MR/ML)
The MR and ML buttons on the back of the controller can be programmed for custom functions or macro commands. Refer to the detailed programming instructions below:
- Press the Programming Mode Key (M button) once. The indicator light will start flashing.
- Press the MR or ML button you wish to program. The indicator light will flash slower.
- Press the button(s) or sequence of buttons you want to assign to the MR/ML button.
- Press the Programming Mode Key (M button) again to save the setting. The indicator light will turn off.
- To clear a programmed button, repeat steps 1-2, then press the Programming Mode Key (M button) twice.

Figure 8: Programmable Back Buttons. The MR and ML buttons allow for custom key assignments and combo actuations.
5. Turbo Function
The Turbo function allows a button to be pressed repeatedly as long as it is held down. To activate:
- Press and hold the button you wish to set for Turbo (e.g., A button).
- While holding the button, press the Turbo button once. The button now has Turbo enabled.
- To disable Turbo for a specific button, repeat steps 1-2.
- To clear all Turbo settings, press and hold the Turbo button for 5 seconds.
Maintenance
- Keep the controller clean by wiping it with a soft, dry cloth. Avoid using harsh chemicals or abrasive materials.
- Store the controller in a cool, dry place away from direct sunlight and extreme temperatures.
- Avoid dropping the controller or subjecting it to strong impacts.
- Do not attempt to disassemble the controller, as this may void the warranty and cause damage.
- Charge the controller regularly, even if not in use, to maintain battery health.
Troubleshooting
Controller Not Pairing/Connecting
- Ensure the controller is sufficiently charged.
- Verify that Bluetooth is enabled on your device (if connecting wirelessly).
- Make sure the device is within range (typically 10 meters or 30 feet).
- Remove any previous pairings of the controller from your device's Bluetooth settings and attempt to pair again.
- Restart your console/PC/mobile device and the controller, then try pairing again.
- For Switch, ensure you are on the "Change Grip/Order" screen before attempting to pair.
Input Lag or Disconnections
- Ensure there are no strong electromagnetic interferences nearby (e.g., Wi-Fi routers, other wireless devices).
- Move closer to the console/device.
- Ensure the controller is fully charged. Low battery can affect wireless performance.
Buttons Not Responding or "Ghost Presses"
- Ensure the controller is fully charged.
- Try resetting the controller. Locate the small reset hole (often on the back) and use a thin object (like a paperclip) to press the reset button.
- If the issue persists, contact customer support.
Specifications
| Feature | Specification |
|---|---|
| Model | JORREP RGB Switch Controllers |
| Connectivity | Wireless (Bluetooth), Wired (USB-C) |
| Compatibility | Nintendo Switch / Switch Lite / Switch OLED, PC (Windows 10+), iOS (16.3+), Android (9.0+) |
| Joystick Type | Hall Effect Joysticks |
| Motion Sensor | 6-Axis Gyro |
| Vibration | Dual Vibration, 4-level adjustable |
| Lighting | RGB Lighting (7-color) |
| Programmable Buttons | MR, ML (2 back buttons) |
| Battery Capacity | 800mAh Lithium Polymer |
| Charging Time | Approx. 2 hours |
| Operating Time | Approx. 8-10 hours |
Note: Individual controller weight and dimensions are not explicitly provided in the product specifications, only package dimensions and weight.
Warranty and Support
For warranty information and technical support, please refer to the documentation included with your purchase or contact JORREP customer service directly. Contact details can typically be found on the manufacturer's official website or through your retailer.