1. Introduction
This manual provides essential information for the proper installation, operation, and maintenance of the VOTOL EM50-4 48-72V 72300 Programmable Controller. This controller is designed for electric scooters and motorcycles, offering advanced control over motor functions. Please read this manual thoroughly before using the product to ensure safe and efficient operation.
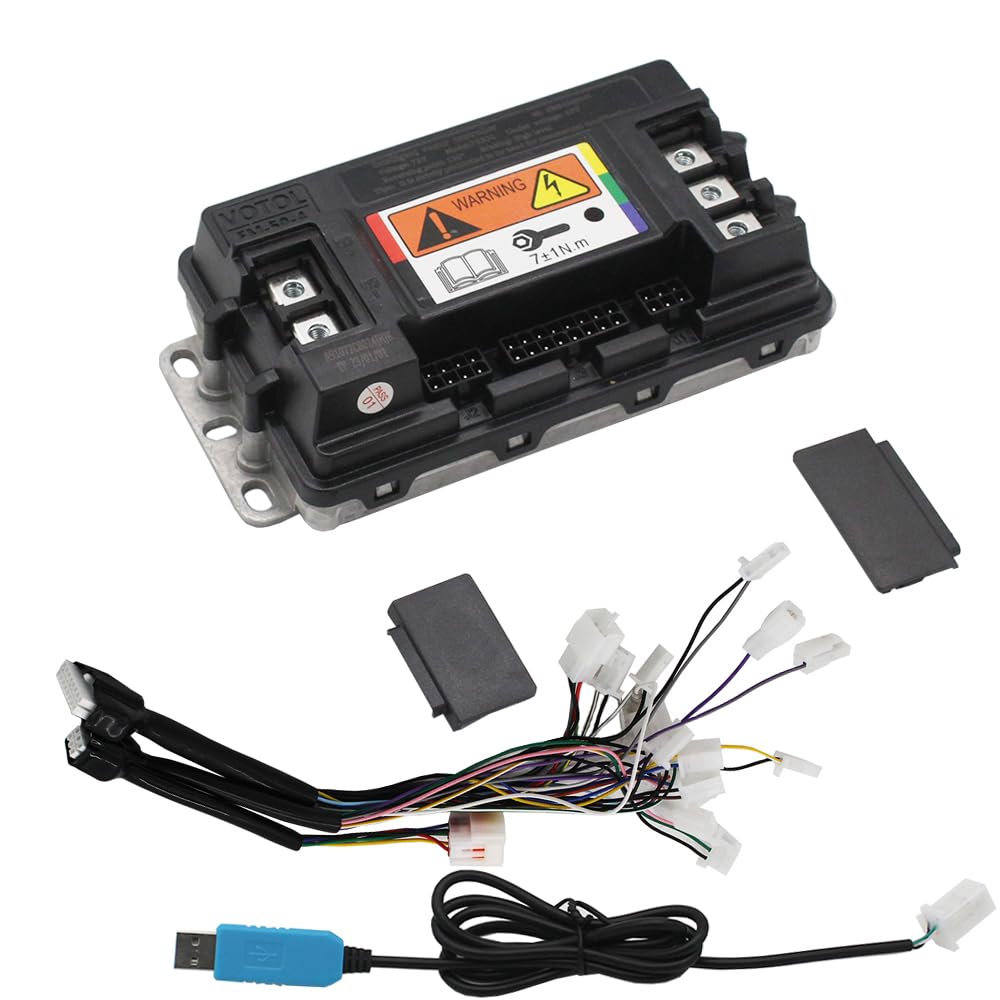
Figure 1: VOTOL EM50-4 Programmable Controller, top view, showing various connectors and warning labels.
The VOTOL EM50-4 controller supports a universal voltage range of 48V to 72V and is compatible with motors ranging from 400 watts to 2000 watts. It features a maximum release current of 80A and a phase line current of 300A.
2. Product Features
- Wide Voltage Compatibility: Operates universally across 48V to 72V systems.
- High Current Capacity: Maximum release current of 80A and phase line current of 300A.
- Motor Adaptability: Suitable for motors from 400W to 2000W.
- Programmable Functions: Customizable settings via a dedicated software interface.
- Integrated Functions: Includes Hall Plug, Reverse, Low Brake (0V), Throttle (0-5V), High Brake (12V), Ignition, One-line/Hall Meter Wire, Program Port, Three Speed, Sport Model, Parking, Anti-Theft, Regen Charge, and Flux Weaken Current.
- Weak Magnetic Technology: Designed to enhance power and speed.
3. Package Contents
Verify that all items are present in the package:
- 1 x VOTOL EM50-4 Controller
- 1 x Matching Wiring Harness
- 1 x USB Debugging Data Cable

Figure 2: VOTOL EM50-4 Controller and its packaging box.
4. Specifications
| Parameter | Value |
|---|---|
| Model Name | EM50-4 72300 |
| Voltage Range | 48V to 72V (Universal) |
| Max Release Current | 80A |
| Phase Line Current | 300A |
| Adaptive Motor Power | 400W to 2000W |
| Material | Metal, Plastic |
| Operating Temperature | Up to 60 Degrees Celsius |
| Package Dimensions | 7.87 x 4.72 x 3.94 inches |
5. Safety Information
- Always disconnect power before installation or maintenance.
- Ensure all wiring connections are secure and correctly polarized to prevent damage to the controller or motor.
- Avoid exposing the controller to water, excessive moisture, or extreme temperatures beyond its operating range.
- Do not attempt to open or modify the controller casing, as this may void the warranty and pose electrical hazards.
- Consult a qualified technician if you are unsure about any installation or wiring procedures.
6. Setup and Installation
6.1 Physical Mounting
Mount the controller in a location that is protected from direct water exposure and allows for adequate airflow to facilitate cooling. Use appropriate fasteners to secure the controller firmly to the vehicle frame.
6.2 Wiring Connections
Connect the wiring harness to the controller and then to the corresponding components of your electric vehicle. Key connections include:
- Battery: Connect the main power cables (positive and negative) from your battery to the controller. Ensure correct polarity.
- Motor: Connect the three phase wires and the Hall sensor wires from the motor to the controller.
- Throttle: Connect the throttle input (0-5V).
- Brakes: Connect the low brake (0V) and high brake (12V) signals.
- Ignition: Connect the ignition switch wire.
- Other Functions: Connect wires for Reverse, One-line/Hall Meter, Three Speed, Sport Model, Parking, Anti-Theft, and Regen Charge as required by your vehicle setup.
6.3 Software Connection
To program the controller, connect the USB debugging data cable from the controller's program port to your computer. Install the VOTOL programming software (LD-EM-V3 or similar) on your computer.
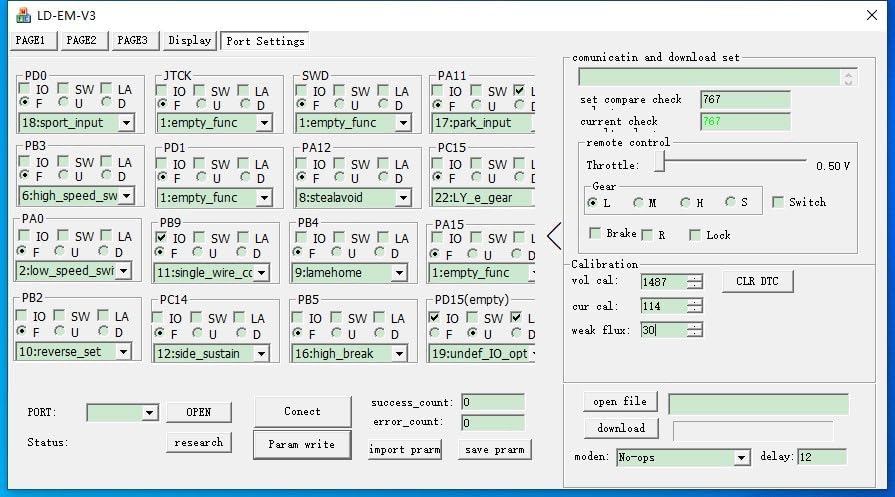
Figure 3: Software interface showing Port Settings for various input/output functions.
7. Operating Instructions
The VOTOL EM50-4 controller is programmable via its dedicated software. The software allows for fine-tuning of various parameters to match your motor and riding preferences.
7.1 Basic Settings
Upon connecting the controller to the software, navigate to the 'Basic Settings' tab. Here you can configure:
- Model: Select the controller model.
- Battery Voltage (V): Set the nominal battery voltage.
- Overvoltage (V) / Undervoltage (V): Define the voltage protection thresholds.
- Busbar Current (A) / Phase Current: Adjust the maximum current limits.
- Throttle Voltage Set: Calibrate the throttle input range.

Figure 4: Software interface showing 'Basic Settings' for voltage, current, and throttle.
7.2 Sport Mode and Flux-Weakening
The 'Sport mode setup' tab allows for advanced performance adjustments:
- Current-Limiting (A): Set the maximum current in sport mode.
- Flux-Weakening Value: Adjust the flux-weakening intensity for higher speeds.
- Three-speed: Configure power output for different speed modes (Low, Mid, High).
- Downhill electric brake assist (HDC/HHC): Enable and configure hill descent control.

Figure 5: Software interface showing 'Sport mode setup' and 'Flux-Weakening' parameters.
7.3 Motor Settings
In the 'Motor Setting' tab, you can configure parameters specific to your motor:
- Pole pairs: Input the number of pole pairs for your motor.
- Hall shift Angle: Adjust for optimal motor commutation.
- Motor type: Select between surface-mount or V-type.
- Moving vehicle booster: Configure cruise control and power assist functions.
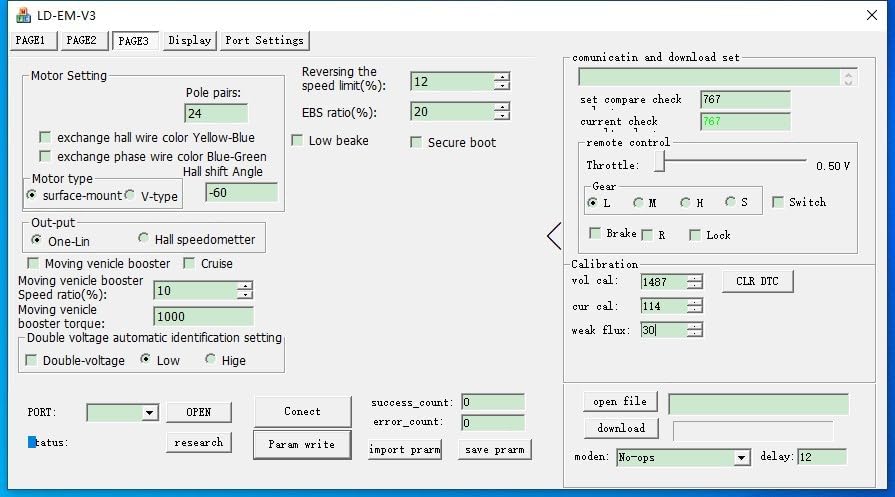
Figure 6: Software interface showing 'Motor Setting' parameters like pole pairs and Hall shift angle.
8. Maintenance
To ensure the longevity and optimal performance of your VOTOL EM50-4 controller, follow these maintenance guidelines:
- Regular Inspection: Periodically check all wiring connections for looseness or corrosion.
- Cleaning: Keep the controller clean and free from dust, dirt, and debris. Use a soft, dry cloth for cleaning. Do not use liquid cleaners directly on the unit.
- Heat Dissipation: Ensure that the heat sink fins on the bottom of the controller are not obstructed, allowing for efficient heat dissipation.
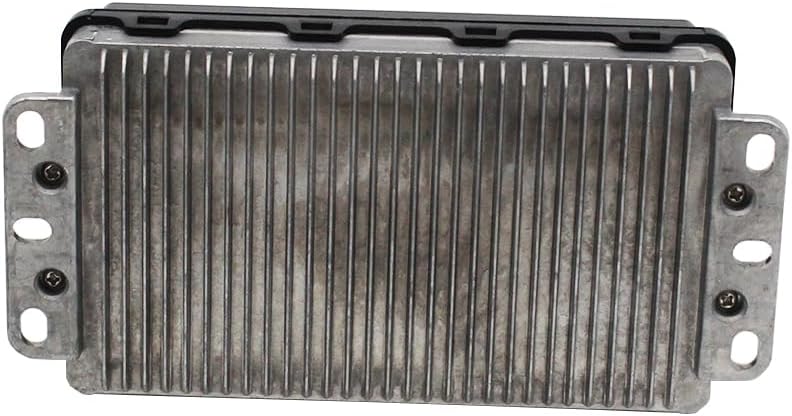
Figure 7: Bottom view of the VOTOL EM50-4 Controller, highlighting the heat sink fins.
9. Troubleshooting
If you encounter issues with your controller, consider the following basic troubleshooting steps:
- No Power: Check battery connections, ignition switch, and main fuse.
- Motor Not Responding: Verify throttle connection, motor phase wires, and Hall sensor connections. Check software settings for any disabled functions or incorrect parameters.
- Erratic Behavior: Inspect for loose wiring, electromagnetic interference, or incorrect software configurations.
- Overheating: Ensure adequate ventilation around the controller and that the heat sink is clean. Reduce current limits if necessary.
For persistent issues, refer to the software's diagnostic tools or contact technical support.
10. Warranty and Support
This product comes with a standard manufacturer's warranty against defects in materials and workmanship. Please retain your proof of purchase for warranty claims. For technical support, programming assistance, or warranty inquiries, please contact your retailer or the manufacturer's customer service department.


