1. Introduction
This manual provides comprehensive instructions for the installation, operation, and maintenance of your AmeriLite Switchback LED DRL Tube Sequential Signal Gun-Metal Projector Headlights. Designed specifically for 2009-2020 Nissan Frontier Pickup models, these headlights enhance vehicle visibility and aesthetics. Please read this manual thoroughly before installation and use to ensure proper function and safety.
2. Product Overview
The AmeriLite Headlight Assembly Set includes both driver and passenger side units, featuring a gun-metal housing, clear polycarbonate lens, and advanced lighting technology. Key features include:
- Switchback LED DRL Tube: Provides bright white daytime running lights and switches to amber for sequential turn signals.
- Projector Headlights: Offers focused and precise light output for improved visibility.
- Gun-Metal Housing: Durable construction with a stylish finish.
- DOT & SAE Compliant: Meets or exceeds all U.S. and Canadian safety standards.
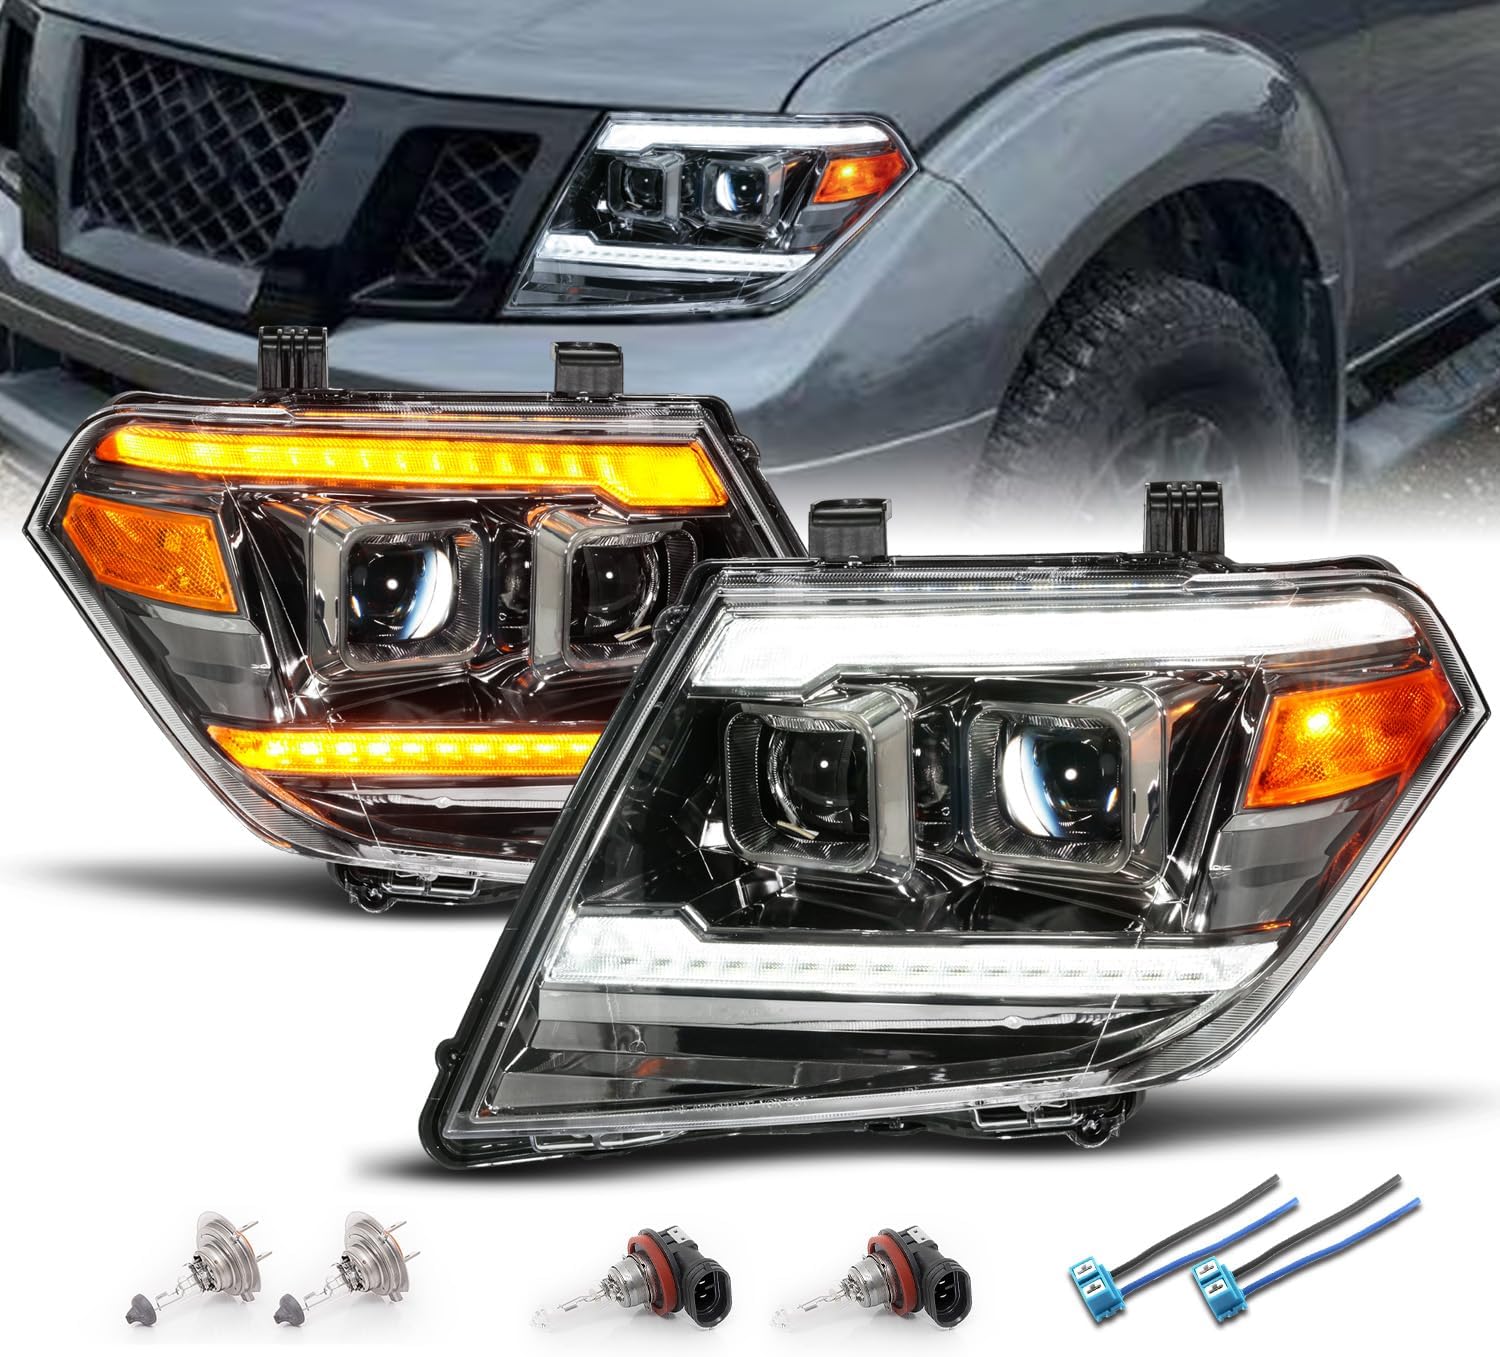
Image: The AmeriLite Gun-Metal Projector Headlights, showing both driver and passenger side units with their distinct design and lighting elements.
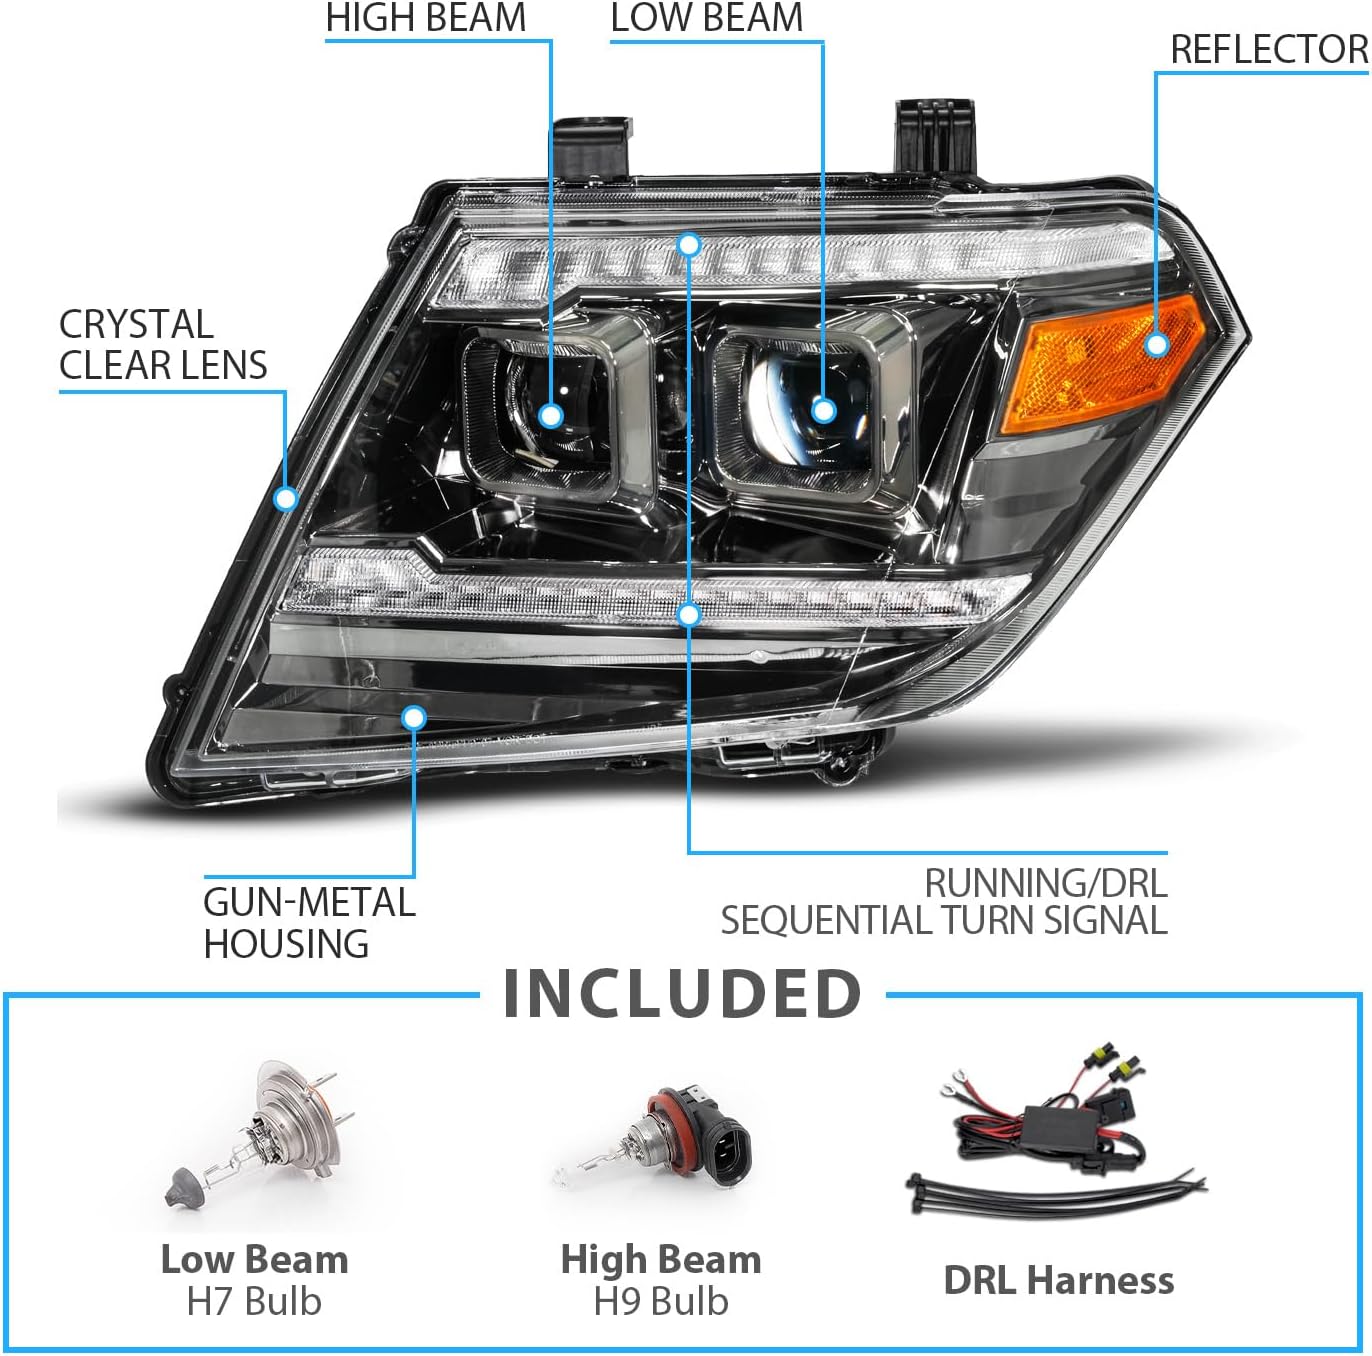
Image: A detailed diagram labeling the components of the headlight, including high beam, low beam, reflector, crystal clear lens, gun-metal housing, and running/DRL sequential turn signal. Also shown are the included H7 Low Beam bulb, H9 High Beam bulb, and DRL Harness.
3. Safety Information
Always prioritize safety during installation and operation. Failure to follow safety guidelines may result in injury or damage to the product or vehicle.
- Disconnect the vehicle's battery before beginning any electrical work.
- Wear appropriate personal protective equipment, including safety glasses and gloves.
- Ensure the vehicle is parked on a level surface with the parking brake engaged.
- Avoid touching the glass of new bulbs directly, as oils from your skin can reduce bulb lifespan.
- Professional installation is highly recommended due to the complexity of automotive electrical systems and body panel removal.
4. Setup and Installation
These headlights are designed as a direct OEM replacement. However, installation typically requires removal of the front bumper and other components. Professional installation is strongly advised.
4.1 Pre-Installation Steps
- Gather necessary tools: basic automotive tools, trim removal tools, zip ties (optional, for secure connections).
- Disconnect the negative terminal of the vehicle's battery.
- If upgrading to aftermarket LED bulbs (not included), install them into the new headlight housing before mounting the headlight assembly onto the vehicle. Access to bulb sockets can be restricted after installation, especially with air intake systems.
4.2 Removal of Existing Headlights
- Carefully remove the front bumper and any other components obstructing access to the headlight assemblies. Refer to a vehicle-specific service manual or online resources for detailed instructions on bumper removal for your Nissan Frontier model year.
- Unbolt and detach the existing headlight assemblies.
- Disconnect all electrical connectors from the old headlights.
4.3 Installation of New Headlights
- Connect the electrical harnesses from the vehicle to the new AmeriLite headlights. Ensure all connections are secure. Some users have reported that the main bulb harness connector can be tight and may require a zip-tie for added security to prevent disconnection.
- The DRL (Daytime Running Light) feature requires a separate wiring harness (included) as Nissan Frontiers typically do not have factory DRLs. Connect this harness directly to the vehicle's battery. This setup is designed to activate the DRLs when the vehicle starts.
- Mount the new headlight assemblies into position and secure them with the appropriate bolts.
- Reinstall the front bumper and any other removed components.
- Reconnect the vehicle's battery.

Image: The rear view of the headlight assembly, clearly showing the High/Low Beam Connector, Running Light Connector, and Turn Signal Connector, indicating where electrical connections are made.
4.4 Headlight Adjustment
After installation, it is crucial to adjust the headlight beam pattern for proper alignment and to avoid blinding oncoming traffic. There is a screw adjuster located at the bottom rear of the housing for high beam adjustment. Park the vehicle on a level surface facing a wall approximately 25 feet away to perform adjustments.
5. Operating Instructions
Your new AmeriLite headlights integrate several lighting functions:
- Daytime Running Lights (DRL): The white LED tubes will illuminate automatically when the vehicle is started, provided the DRL harness is correctly connected to the battery.
- Sequential Turn Signals: When the turn signal is activated, the DRL tube will switch from white to amber and illuminate in a sequential pattern, indicating your turning intention.
- Low Beams: Activated via your vehicle's standard headlight switch. These provide the primary illumination for night driving.
- High Beams: Activated via your vehicle's standard high beam switch, providing maximum illumination for clear visibility in dark conditions.

Image: A split image demonstrating the high intensity white LED Daytime Running Lights on one side and the amber sequential turn signal illumination on the other, highlighting the switchback functionality.
6. Maintenance
Proper maintenance ensures the longevity and performance of your headlights.
- Cleaning: Clean the headlight lenses regularly with a soft cloth and mild automotive soap or glass cleaner. Avoid abrasive cleaners or harsh chemicals that can damage the polycarbonate lens or UV coating.
- Bulb Replacement: The headlights use H7 bulbs for low beams and H9 bulbs for high beams. If a bulb needs replacement, ensure the vehicle is off and cool. Carefully remove the old bulb and install the new one, avoiding direct contact with the glass.
- Inspection: Periodically check all wiring and connectors for signs of wear, corrosion, or loose connections.
7. Troubleshooting
| Problem | Possible Cause | Solution |
|---|---|---|
| DRLs are intermittent or not working | Loose connection in DRL harness; faulty DRL harness; battery connection issue. | Check all connections on the DRL harness, especially at the battery. Ensure the harness is not damaged. Contact AmeriLite support if issues persist. |
| Headlights flickering or not illuminating | Loose bulb connection; faulty bulb; wiring issue; insufficient power. | Verify bulbs are seated correctly. Check all electrical connectors for tightness. Inspect wiring for damage. Replace faulty bulbs. |
| Beam pattern is incorrect or too high/low | Improper headlight adjustment. | Adjust the headlight aim using the adjustment screw on the back of the housing. Refer to Section 4.4. |
| Main harness connector feels loose | Connector design tolerance. | Secure the connector with a zip-tie to prevent accidental disconnection. |
8. Specifications
- Brand: AmeriLite
- Model: Frontier
- Vehicle Service Type: Truck
- Compatible Years: 2009-2020 Nissan Frontier
- Light Source Type: LED (DRL/Signal), Halogen (High/Low Beam)
- Lens Material: Polycarbonate
- Lens Color: Clear
- Housing Color: Gun Metal
- Safety Rating: DOT Compliant, SAE Compliant
- OEM Part Numbers: 26010-ZL40B, 26010ZL40A, 26060-ZL40B, 26060ZL40A, 26060ZL40B
- ABPA Partslink Numbers: NI2502188, NI2503188
- Manufacturer Part Number: 02-AZ-NF09-PGM-P-SS-A
- Item Weight: Approximately 19.4 pounds (per set)
9. Warranty and Support
For warranty information or technical support, please contact AmeriLite directly through their official website or the retailer where the product was purchased. Keep your proof of purchase for any warranty claims.