Introduction
This manual provides comprehensive instructions for the assembly, operation, and maintenance of your Curtainboro 8-Drawer Rolling Tool Chest. Designed for industrial and workshop environments, this versatile tool storage solution offers intelligent capacity, modular space optimization, and robust mobility. Please read this manual thoroughly before assembly and use to ensure safe and efficient operation.
Safety Information
Always observe the following safety precautions to prevent injury or damage to the tool chest:
- Ensure all drawers are closed and locked before moving the tool chest to prevent accidental opening and contents spilling.
- Do not overload drawers. Distribute weight evenly to maintain stability.
- Always engage the wheel brakes when the tool chest is stationary to prevent unintended movement.
- Keep hands and fingers clear of drawer slides when opening or closing drawers.
- Do not climb on or stand on the tool chest.
- Assemble the unit on a flat, stable surface.
- Use appropriate personal protective equipment (PPE) during assembly if necessary.
Package Contents
Verify that all components are present before beginning assembly:
- Top Tool Cabinet (with 3 small and 2 large drawers)
- Bottom Rolling Tool Box (with 3 medium and 1 large drawer)
- Swivel Wheels (4 total, 2 with brakes)
- Drawer Liners (8 total, one for each drawer)
- Side-mounted Tool Hooks
- Storage Bins (7 total)
- Keys for Locking System
- Assembly Hardware (bolts, nuts, washers for wheels and handles)
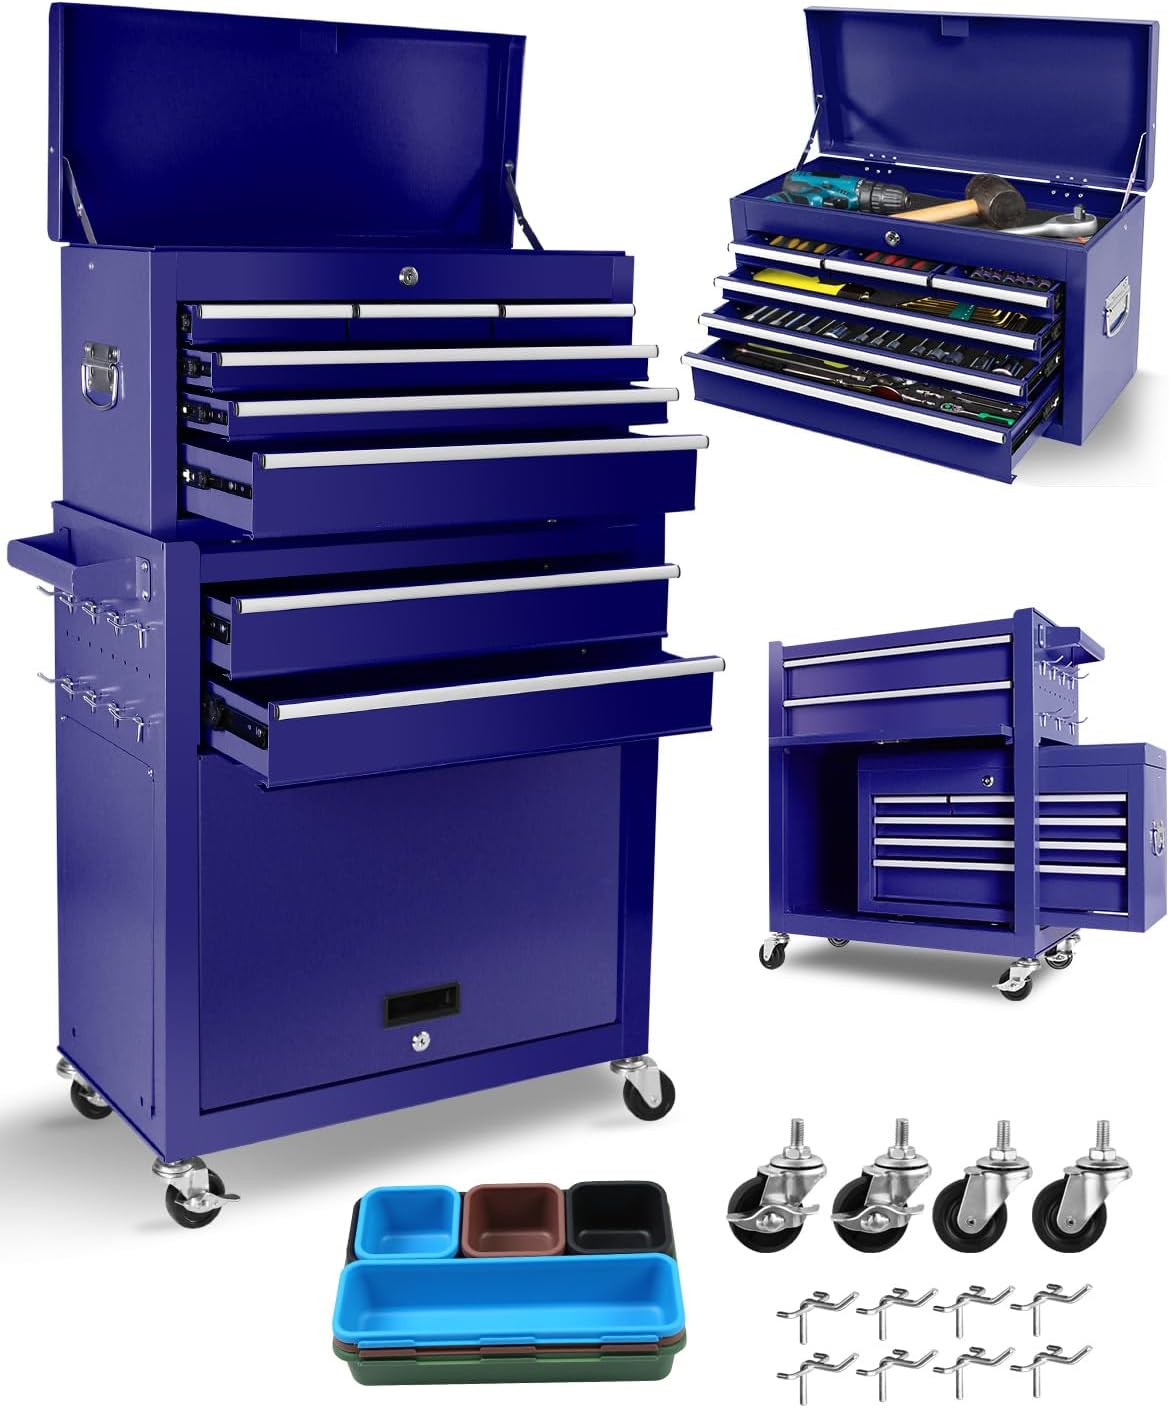
Image: Overview of the 8-drawer tool chest, showing the top and bottom units, wheels, and storage bins.
Setup and Assembly
Follow these steps to assemble your tool chest:
- Attach the Wheels:
Carefully lay the bottom rolling tool box on its side. Attach the four swivel wheels to the designated mounting points on the bottom corners of the unit using the provided bolts and nuts. Ensure the two wheels with brakes are installed on the same side for easier access. Tighten all fasteners securely.
Image: Detail showing the four swivel wheels, two with brakes, and the side-mounted tool hooks.
- Position the Top Cabinet:
Once the wheels are attached and the bottom unit is upright, carefully lift the top tool cabinet and align it with the top surface of the bottom rolling tool box. Ensure it sits securely and is centered.
- Insert Drawer Liners:
Open each drawer and place the black protective drawer liners inside. These liners help protect your tools and the drawer surfaces from scratches and impacts.

Image: Illustration of inserting a drawer liner into a tool chest drawer.
- Attach Side Tool Hooks and Storage Bins:
The side-mounted tool hooks can be attached to the pre-drilled holes on the side of the bottom unit. The 7 storage bins can be placed in the top compartment or within drawers as desired for organizing smaller items.
Operating Instructions
Drawer Operation
The tool chest features smooth-gliding drawers. To open, gently pull the drawer handle. To close, push the drawer firmly until it is fully seated. Reinforced slide rails prevent accidental slippage.
Locking System
Your tool chest is equipped with a dual-layer locking system. Use the provided keys to lock both the top cabinet and the bottom rolling toolbox independently. Ensure all drawers are fully closed before engaging the lock.
Image: Detail showing the double locking system and sturdy handle on the tool chest.
Mobility and Braking
The four swivel wheels allow for easy movement of the tool chest. To move the unit, release the brakes on the two braked wheels. To secure the unit in place, press down on the brake levers until they click into position. The ergonomic hand bars on the detachable top cabinet facilitate single-hand maneuvering when separated.

Image: Illustration highlighting the universal wheels with 360-degree rotation and integrated brakes.
Modular Configuration
The tool chest is designed as a 2-in-1 modular system. The top cabinet can be detached from the bottom rolling toolbox. This allows for the top unit to be used as a wall-mounted chest or a portable toolbox, while the bottom unit functions as a mobile rolling workbench. To detach, ensure the top cabinet is unlocked, then carefully lift it off the bottom unit. To reattach, align the top cabinet with the bottom unit and lower it into place.
Maintenance
Regular maintenance will prolong the life and functionality of your tool chest:
- Cleaning: Wipe down the powder-coated steel surfaces with a soft, damp cloth. Avoid abrasive cleaners or solvents that could damage the finish.
- Drawer Slides: Periodically inspect drawer slides for debris. If drawers become stiff, apply a small amount of silicone lubricant to the slides.
- Wheels: Check wheels regularly for accumulated debris (e.g., string, hair) that could impede rotation. Clean as necessary. Ensure wheel bolts remain tight.
- Drawer Liners: The thermal-insulated drawer padding can be removed and cleaned if necessary.
Troubleshooting
| Problem | Possible Cause | Solution |
|---|---|---|
| Drawers are difficult to open or close. | Overloaded drawer, debris in slides, or lack of lubrication. | Reduce drawer load. Inspect and clean slides. Apply silicone lubricant to slides. |
| Tool chest does not roll smoothly. | Wheel brakes engaged, debris in wheels, or loose wheel bolts. | Disengage wheel brakes. Clean wheels. Tighten wheel bolts. |
| Locking mechanism is stiff or not engaging. | Drawers not fully closed, or mechanism requires lubrication. | Ensure all drawers are completely closed. Apply a small amount of graphite lubricant to the lock cylinder. |
| Top cabinet is unstable when detached. | Not placed on a flat, stable surface. | Always place the detached top cabinet on a level and secure surface to prevent tipping. |
Specifications
| Feature | Detail |
|---|---|
| Brand | Curtainboro |
| Model Name | ajzLlZrcTT8ElrUur2yLkQP65 |
| Color | Blue-purple |
| Product Dimensions (Overall) | 27.56"D x 16.34"W x 29.33"H |
| Number of Drawers | 8 (2 large + 3 medium + 3 small) |
| Special Feature | Wheeled, Detachable 2-in-1 Design |
| Mounting Type | Floor Mount |
| Room Type | Utility Room, Garage, Workshop |
| Included Components | Drawers, Wheels, Drawer Liners, Tool Hooks, Storage Bins |
| Assembly Required | Yes |
| Item Weight | 58 pounds |
| Material | Powder-coated Steel |
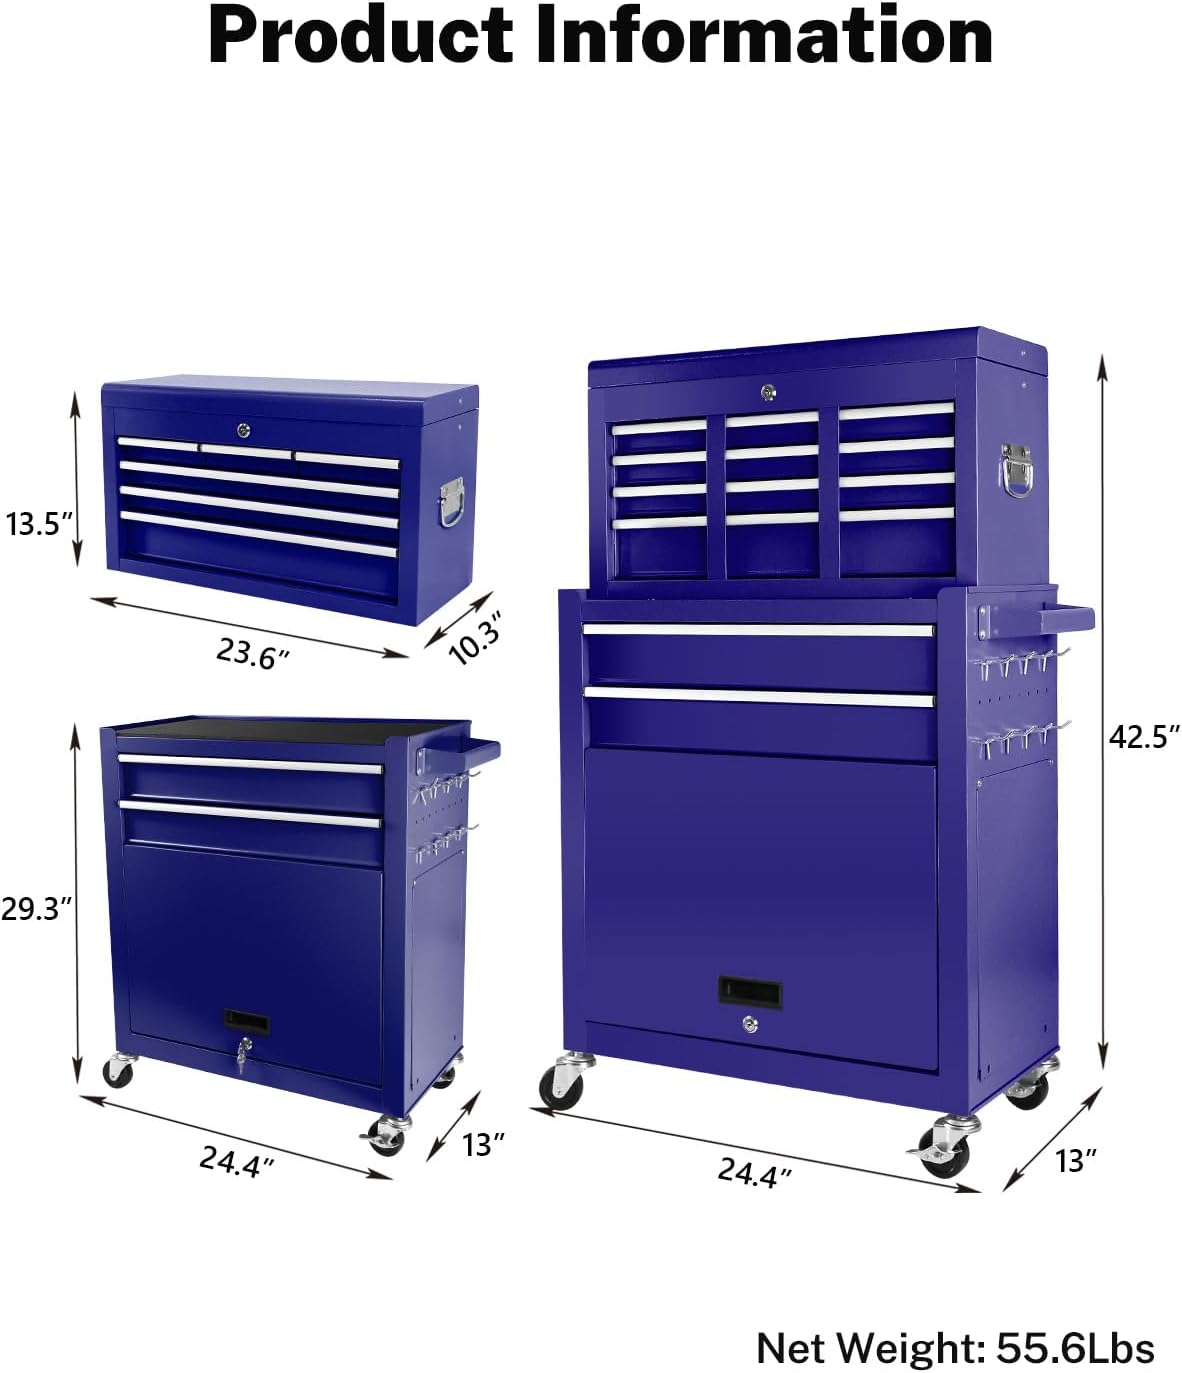
Image: Product dimensions diagram for the top cabinet, bottom rolling unit, and combined assembly.
Warranty and Support
For information regarding product warranty, please refer to the warranty card included with your purchase or contact Curtainboro customer support directly. For any questions, technical assistance, or to report issues, please reach out to the manufacturer's customer service department. Contact details can typically be found on the product packaging or the manufacturer's official website.
This product is eligible for 30-day easy returns through Amazon.com. Customer support is also available via Amazon's platform.