1. Introduction
Thank you for choosing the AIVOLT Cordless 3-in-1 Leaf Blower, Vacuum, and Mulcher. This versatile tool is designed to simplify your yard maintenance tasks by offering powerful blowing, efficient vacuuming, and effective mulching capabilities. This manual provides essential information for the safe and proper assembly, operation, maintenance, and troubleshooting of your device. Please read this manual thoroughly before first use and retain it for future reference.
2. Package Contents
Carefully unpack all items and ensure you have received all components listed below. If any parts are missing or damaged, please contact customer support.
- 1 x 40V Leaf Blower and Vacuum Combo Unit
- 2 x 20V/4.0Ah Lithium-Ion Batteries
- 1 x Dual Port Charger
- 1 x 40L Collection Bag
- 1 x Carrying Belt
- 1 x Instruction Manual
- Blower/Vacuum Tubes
- Adjustable Wheels

Figure 2.1: All components included in the AIVOLT package: the main unit, blower/vacuum tubes, 40L collection bag, two 4.0Ah batteries, dual-port charger, adjustable wheels, and a carrying belt.
3. Safety Instructions
Always follow basic safety precautions when using electrical appliances to reduce the risk of fire, electric shock, and personal injury.
General Safety
- Read all instructions: Familiarize yourself with the controls and proper use of the appliance.
- Wear appropriate personal protective equipment (PPE): Always wear safety glasses or goggles, hearing protection, long pants, and sturdy footwear. Avoid loose clothing that could get caught in moving parts.
- Keep bystanders away: Do not allow children or pets near the operating area.
- Inspect the work area: Before starting, clear the area of any objects that could be thrown by the air stream or caught in the vacuum impeller, such as rocks, glass, or metal debris.
- Do not operate in wet conditions: Avoid using the device in rain or damp environments to prevent electric shock.
- Maintain a firm grip: Always hold the device with both hands when operating.
- Disconnect battery: Always remove the battery pack before cleaning, servicing, or when the tool is not in use.
Battery Safety
- Use only specified batteries and charger: Use only AIVOLT 20V/4.0Ah batteries and the provided dual port charger. Using other batteries or chargers may create a risk of injury and fire.
- Do not short-circuit battery terminals: Avoid contact between battery terminals and metal objects.
- Do not expose to extreme conditions: Do not store or use batteries in temperatures above 104°F (40°C) or below 32°F (0°C). Do not incinerate batteries.
- Charge in a well-ventilated area: Ensure adequate ventilation during charging.
- Dispose of batteries properly: Follow local regulations for battery disposal.
4. Assembly and Setup
Follow these steps to assemble your AIVOLT 3-in-1 Leaf Blower, Vacuum, and Mulcher.
- Attach Blower/Vacuum Tubes: Align the tubes with the main unit's openings and push them firmly until they click into place. Ensure they are securely fastened for both blowing and vacuuming configurations.
- Attach Collection Bag (for Vacuum/Mulcher Mode): Slide the collection bag's collar onto the vacuum port until it locks. Ensure the zipper is closed before operation.
- Install Wheels: The adjustable wheels can be attached to the nozzle. For vacuuming, it is suggested to assemble the wheels to the innermost slot (towards the body of the device). For blowing, assemble to the outermost slot (towards the nozzle) for better maneuverability.
- Attach Shoulder Strap: Connect the carrying belt to the designated attachment points on the main unit for comfortable operation, especially during vacuuming. Adjust the strap length for optimal balance and comfort.
- Install Batteries: Insert the charged 20V/4.0Ah batteries into the battery slots on the main unit until they click into place. Ensure both batteries are fully seated.
- Charge Batteries: Before first use, fully charge both 20V/4.0Ah batteries using the provided dual port charger. The charging time is approximately 2 hours for a full charge. The charger will indicate when charging is complete.

Figure 4.1: A step-by-step visual guide demonstrating the simple installation process, including attaching the tubes, securing the collection bag, inserting the batteries, and operating the control panel.

Figure 4.2: The two included 4.0Ah lithium-ion batteries and the dual-port charger, essential for powering the device and ensuring continuous operation.
5. Operation
Your AIVOLT device offers three functions: blowing, vacuuming, and mulching. Ensure the batteries are fully charged before operation.
5.1 Switching Modes
The device features a function knob to switch between blower and vacuum modes. Rotate the knob to select the desired function. Ensure the device is off before switching modes.

Figure 5.1: The function knob allows for easy and quick switching between the blower and vacuum modes of the device.
5.2 Blower Mode
In blower mode, the device generates a powerful air stream to clear leaves and debris.
- Ensure the device is configured for blowing (collection bag removed, blower tube attached).
- Press the On/Off switch to start the device.
- Direct the nozzle towards the debris you wish to clear. Use a sweeping motion to gather leaves into piles.
- The device offers up to 600 CFM air volume and 160 MPH air speed for effective clearing.
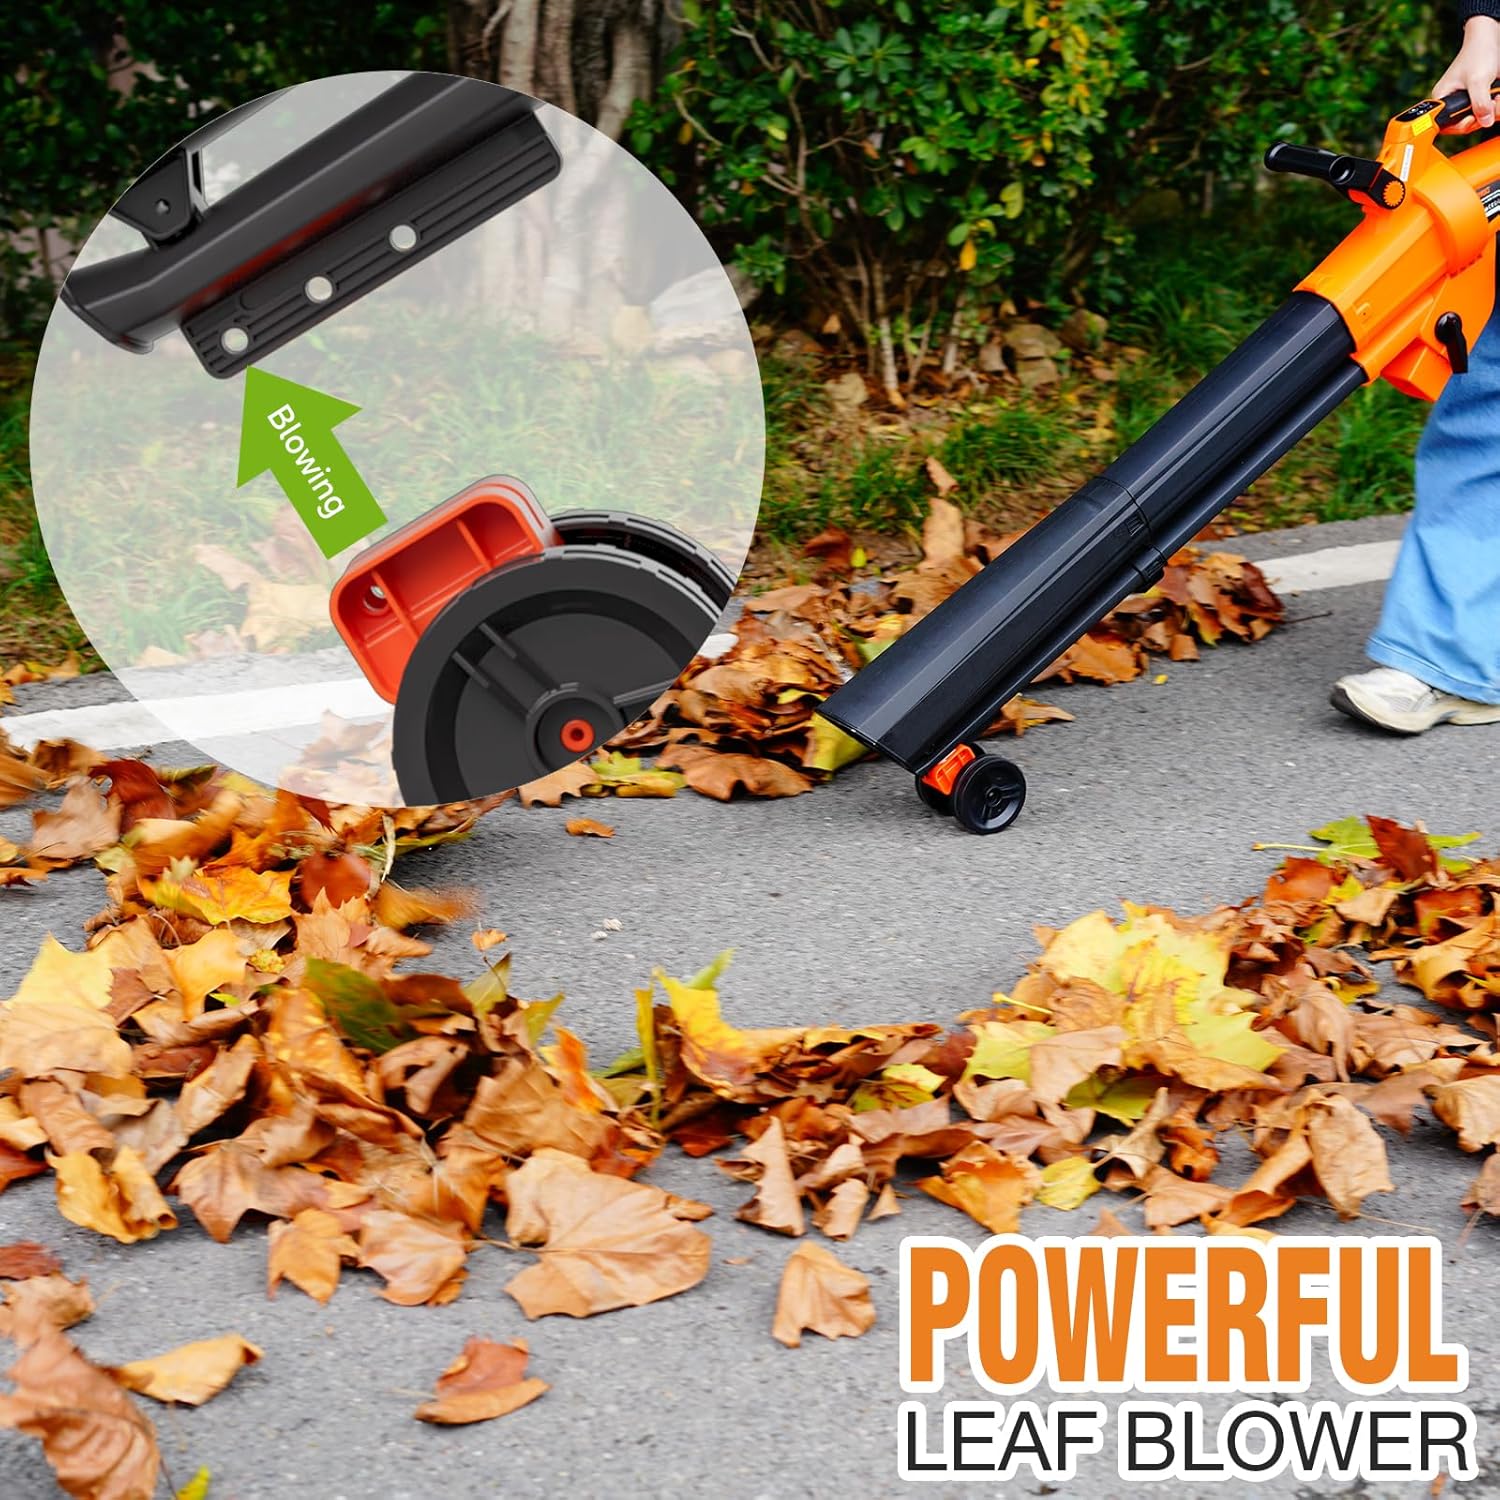
Figure 5.2: The AIVOLT device operating in blower mode, effectively moving a large quantity of leaves from a hard surface.
5.3 Vacuum and Mulcher Mode
In vacuum mode, the device sucks up leaves and mulches them into the collection bag.
- Ensure the device is configured for vacuuming (collection bag attached, vacuum tube attached).
- Press the On/Off switch to start the device.
- Slowly move the vacuum nozzle over the leaves. The device will draw in leaves and shred them before depositing them into the 40L collection bag.
- The mulching ratio is approximately 15:1, significantly reducing the volume of debris.
- To empty the collection bag, turn off the device, remove the battery, and unzip the bottom of the bag.
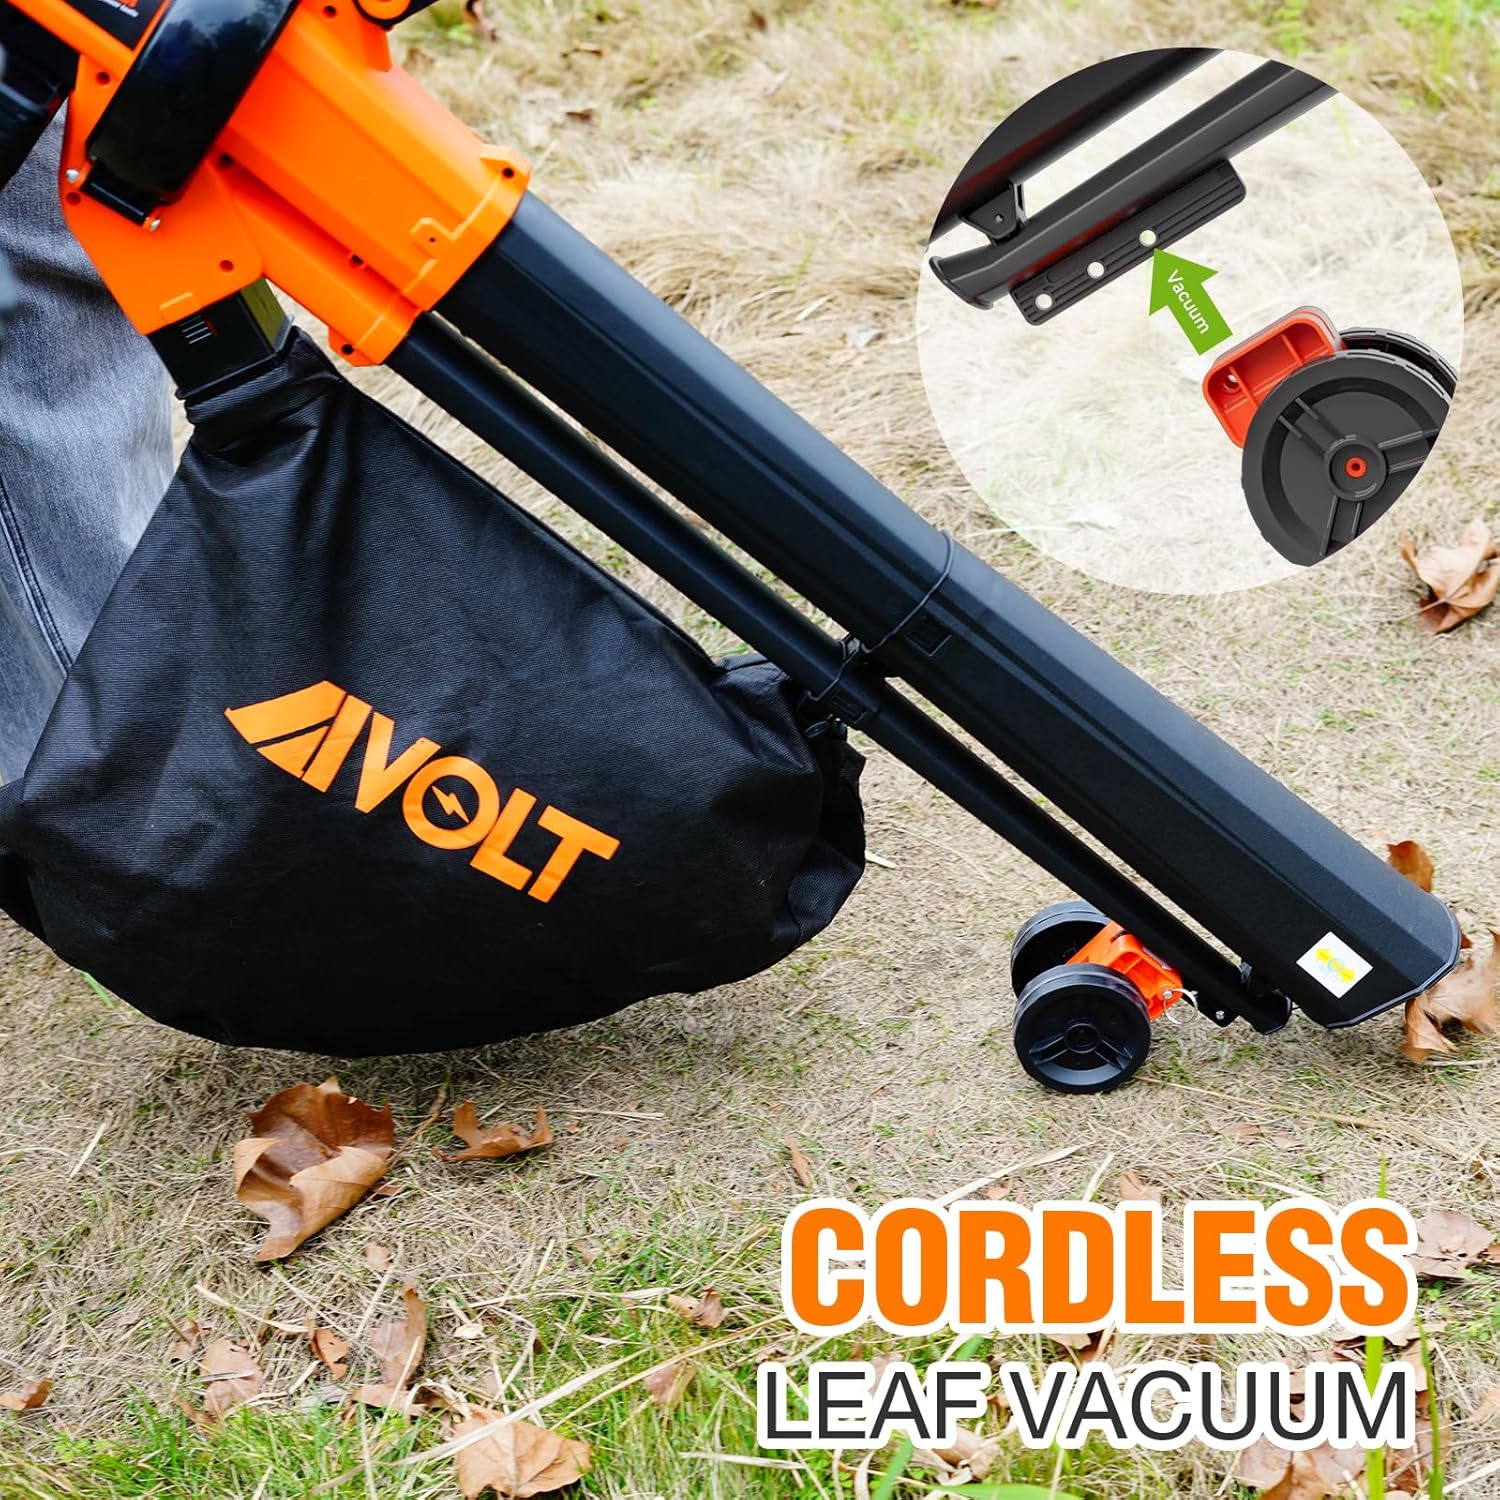
Figure 5.3: The AIVOLT unit in vacuum mode, efficiently gathering leaves from the ground and directing them into the spacious 40-liter collection bag.

Figure 5.4: The spacious 40-liter collection bag is designed to hold a significant volume of mulched leaves, reducing the frequency of emptying during use.

Figure 5.5: This image illustrates the impressive 15:1 mulching ratio, showing how the device significantly reduces the volume of leaves, making disposal more efficient.
5.4 Speed Control and Turbo Mode
The device features 4 speed modes and a Turbo button for varying power needs.
- Speed Adjustment: Use the 'Speed Up' and 'Speed Down' buttons on the control panel to cycle through the 4 speed modes. Modes 1-2 are suitable for light work, while Modes 3-4 are for heavier debris.
- Turbo Button: Press the 'TURBO' button for a burst of maximum power (Mode 4) for approximately 10 seconds, ideal for stubborn debris. The device will return to the previous speed mode after 10 seconds or if the button is released.
- Battery Indicator: The control panel includes a battery indicator to show the remaining charge level.

Figure 5.6: The control panel features a clear battery indicator, buttons for adjusting between 4 speed modes, a dedicated turbo button for maximum power, and an on/off switch for easy operation.
6. Maintenance
Regular maintenance ensures optimal performance and extends the lifespan of your device.
- Cleaning: After each use, ensure the battery is removed. Clean the exterior of the device with a damp cloth. Remove any debris from the air intake vents, blower tube, and vacuum port. Ensure the impeller area is clear of any lodged material.
- Collection Bag: Empty and clean the collection bag regularly. Wash with mild soap and water if necessary, and allow it to dry completely before reattaching.
- Battery Care: Store batteries in a cool, dry place away from direct sunlight and moisture. Do not store fully discharged batteries for extended periods. Charge them periodically if not in use.
- Storage: Store the device in a dry, secure location out of reach of children. Disassemble tubes and remove the collection bag for compact storage if desired.
7. Troubleshooting
Refer to this section for common issues and their solutions.
| Problem | Possible Cause | Solution |
|---|---|---|
| Device does not start | Batteries not charged or improperly installed. | Ensure batteries are fully charged and correctly inserted until they click. |
| Reduced blowing/vacuuming power | Air intake or output blocked; Impeller clogged. | Turn off and remove battery. Clear any obstructions from tubes, vents, and impeller area. |
| Device clogs frequently in vacuum mode | Attempting to vacuum wet leaves or large/dense debris; Operating too fast. | Avoid vacuuming wet leaves. Operate at a slower pace. Clear clogs immediately after turning off and removing battery. |
| Short battery run time | Batteries not fully charged; Operating continuously on high speed/Turbo mode. | Ensure batteries are fully charged. Use lower speed modes for lighter tasks to conserve battery life. |
8. Specifications
Technical details for the AIVOLT Cordless 3-in-1 Leaf Blower, Vacuum, and Mulcher.
- Model Name: Leaf Blower Vacuum
- Item Model Number: YA6601-8
- Brand: AIVOLT
- Power Source: Battery Powered
- Voltage: 40 Volts (2 x 20V batteries)
- Batteries: 2 x 4.0Ah Lithium Ion (included)
- Air Volume: Up to 600 CFM
- Air Speed: Up to 160 MPH
- Collection Bag Capacity: 40 Liters
- Mulching Ratio: 15:1
- Item Weight: 9.5 lbs (without batteries) / 12.23 lbs (with batteries)
- Product Dimensions: 45.7 x 11.0 x 6.3 inches (11 x 6.3 x 46 inches as per product data)
- Charging Time: Approximately 2 hours
- Run Time: 30 minutes (Mode 4) to 90 minutes (Mode 1)

Figure 8.1: This image illustrates the powerful internal components of the AIVOLT leaf blower, demonstrating its high air volume (600 CFM) and air speed (160 MPH) capabilities for efficient debris clearing.
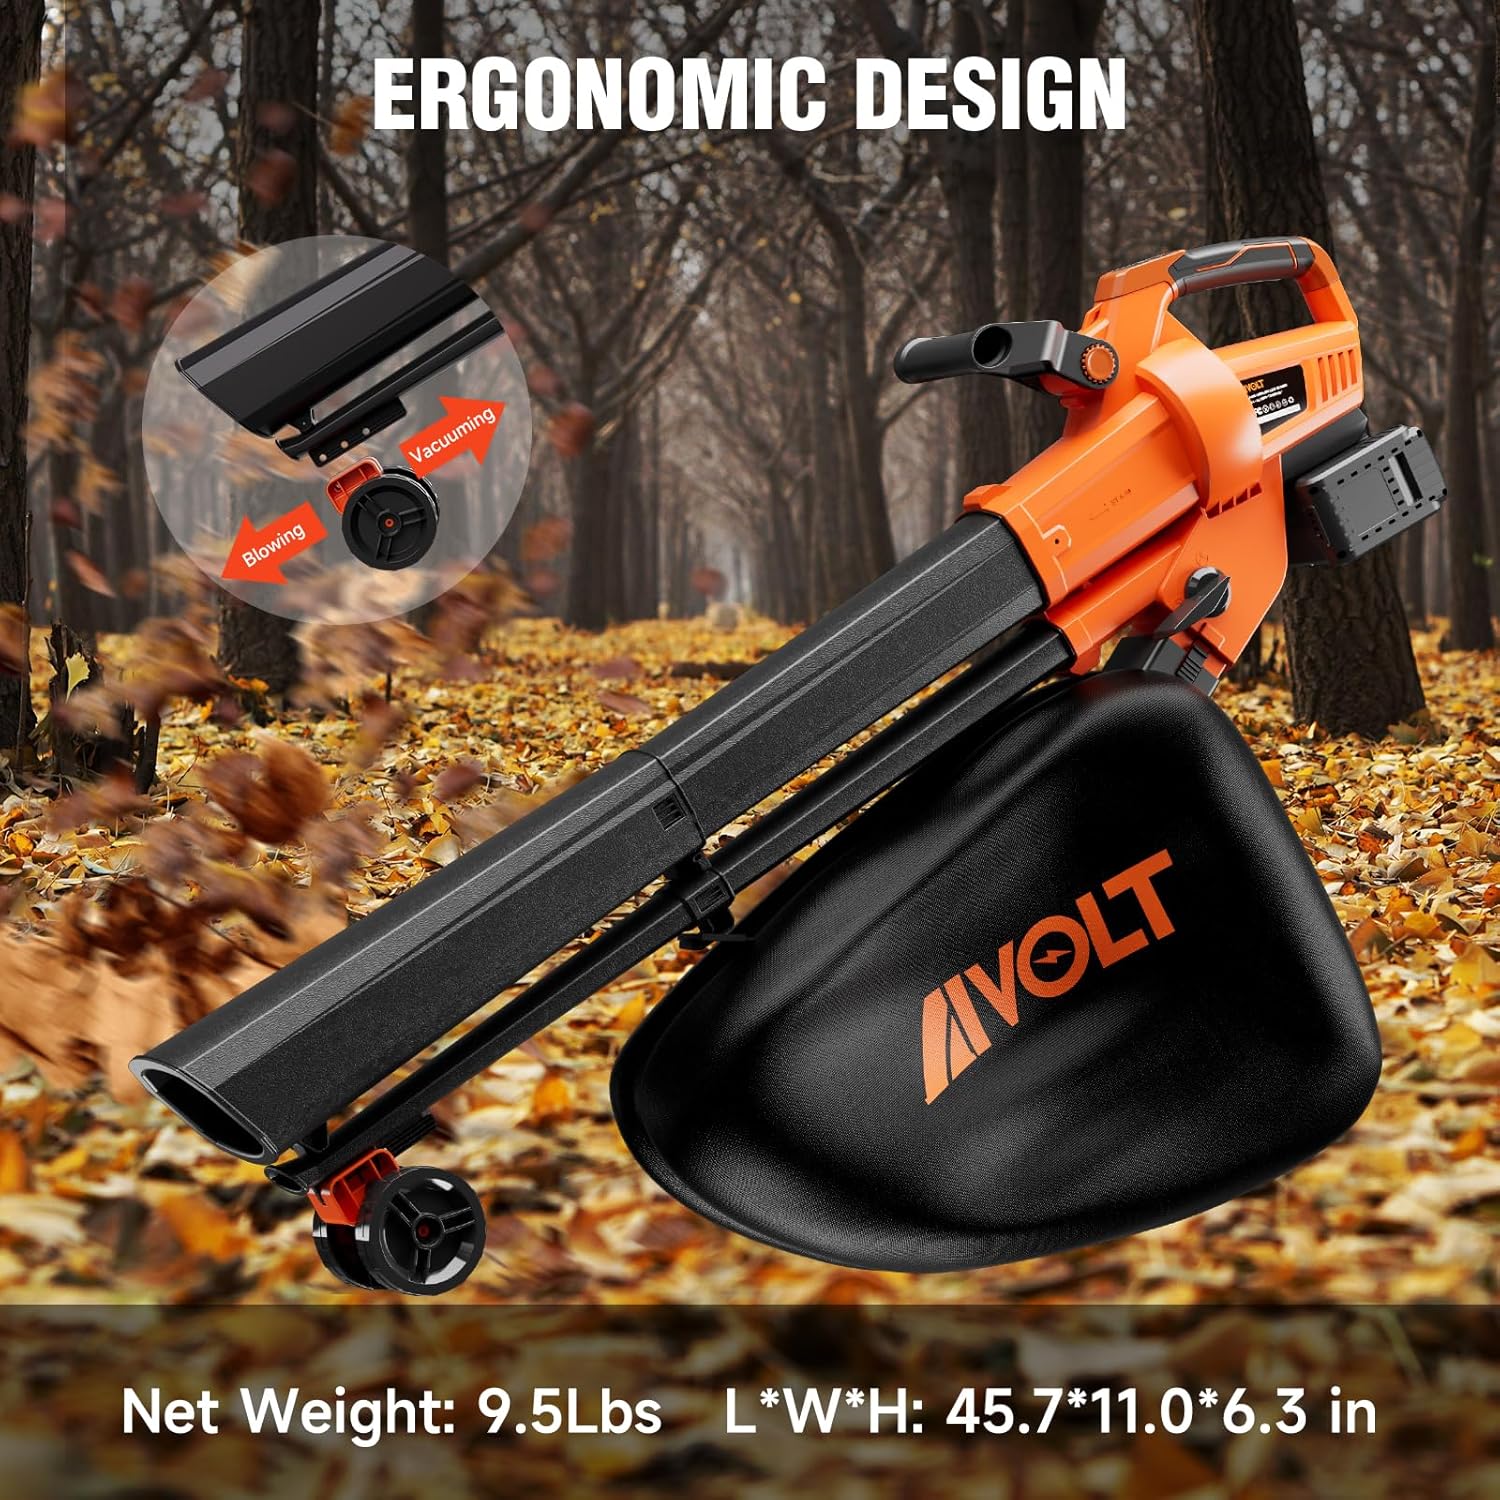
Figure 8.2: The ergonomic design of the AIVOLT leaf blower vacuum mulcher is showcased, emphasizing the comfortable antiskid handle and the compact, lightweight structure (9.5 lbs) for user comfort and maneuverability.
9. Warranty and Support
AIVOLT products are manufactured to high-quality standards. For warranty information or technical support, please refer to the warranty card included with your purchase or contact AIVOLT customer service directly. Please have your model number (YA6601-8) and purchase date available when contacting support.


