
Introduction
This manual provides detailed instructions for the safe installation, operation, and maintenance of your Generic 18-Arm Crystal Chandelier Pendant Light, Model DM04. Please read this manual thoroughly before installation and retain it for future reference.
This chandelier features 18 amber crystal arms and premium acrylic crystal pendants, designed to provide elegant illumination. It is compatible with E14 type bulbs (not included) and operates on 110/220 Volts.
Important Safety Instructions
- WARNING: To avoid electric shock, ensure power is turned off at the circuit breaker before installation or servicing.
- All electrical connections must be in accordance with local and national electrical codes. If you are not familiar with electrical wiring, consult a qualified electrician.
- Do not exceed the maximum wattage specified for the bulbs.
- Handle crystal components with care to prevent breakage.
- Ensure the mounting surface can support the weight of the fixture (approximately 14 kg).
- Keep packaging materials away from children.
Package Contents
Verify that all components are present and undamaged before beginning installation.
- Chandelier Frame (18 arms)
- Crystal Pendants and Chains
- Adjustable Hanging Chain (up to 80 cm)
- Canopy (metallic, gold finish)
- Mounting Hardware (screws, wire nuts)
- Instruction Manual
Setup and Installation
Professional installation is recommended. Ensure power is disconnected at the main circuit breaker before proceeding.
Step 1: Prepare for Installation
- Turn off power at the main circuit breaker.
- Unpack all components and lay them out on a clean, soft surface to prevent scratches.
- Identify all parts using the package contents list.
Step 2: Mount the Canopy
Attach the mounting bracket to the junction box in the ceiling. Secure the canopy to the mounting bracket using the provided screws.

Image: Chandelier canopy and hanging chain visible in a living room setting.
Step 3: Adjust Hanging Chain Length
Determine the desired hanging height. The chain is adjustable up to 80 cm. Use pliers to open and remove excess links from the chain if necessary. Attach one end of the chain to the chandelier frame and the other to the canopy's hanging loop.
Step 4: Electrical Connections
- Connect the chandelier's live wire (usually black or red) to the house's live wire.
- Connect the chandelier's neutral wire (usually white) to the house's neutral wire.
- Connect the chandelier's ground wire (usually green or bare copper) to the house's ground wire and the mounting bracket.
- Secure all connections with wire nuts and ensure they are properly insulated.
Step 5: Assemble Chandelier Arms and Crystals
Carefully attach the 18 crystal arms to the main chandelier body. Then, hang the individual crystal pendants onto the designated hooks on the arms and frame. Refer to the diagram below for crystal placement.
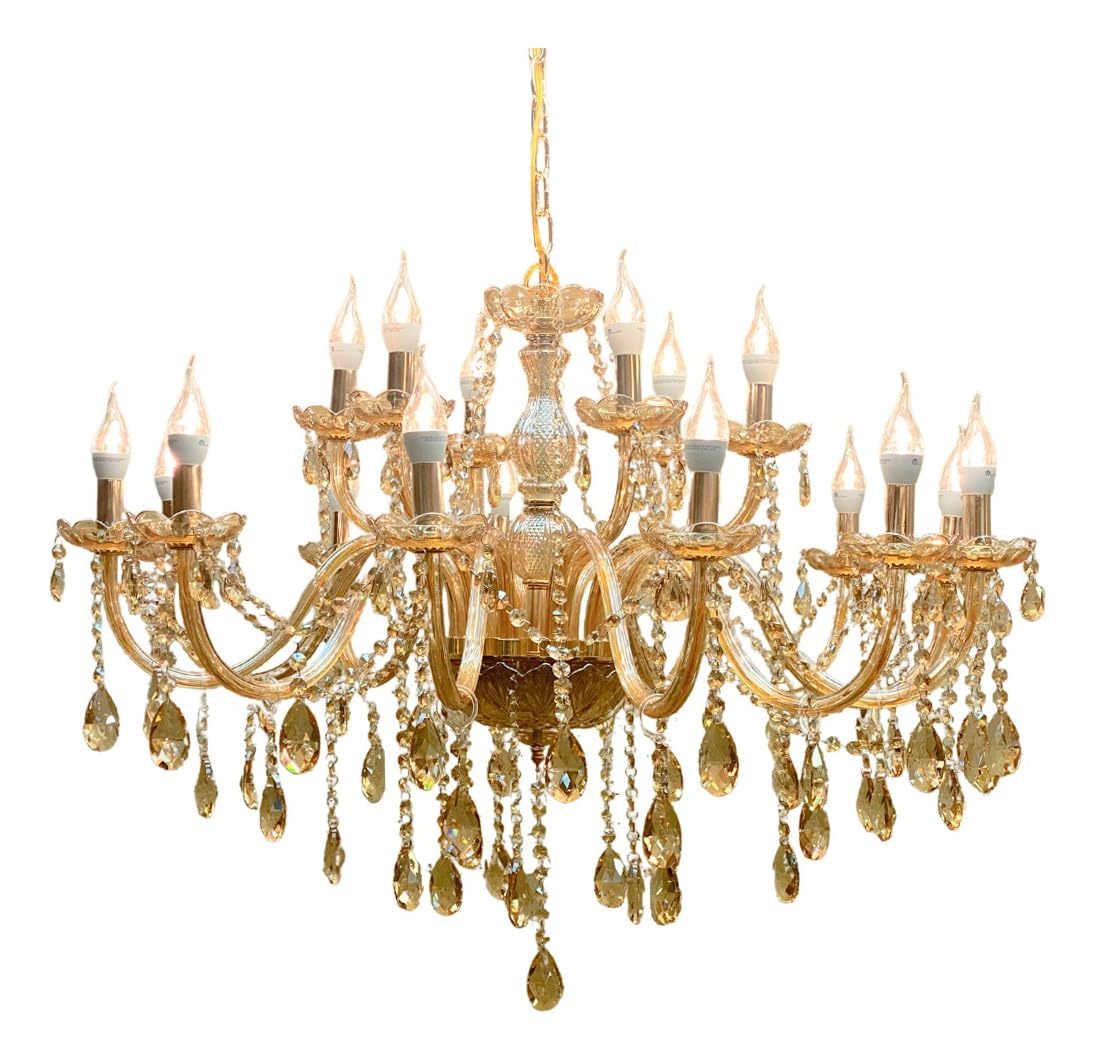
Image: Detailed view of amber crystal pendants and chandelier arm connections.
Step 6: Install Bulbs
Screw E14 type bulbs (not included) into each of the 18 sockets. Do not overtighten. Ensure bulbs are of the correct wattage (max 40 watts per bulb).
Operation
Once installation is complete and all connections are secure, restore power at the circuit breaker. Operate the chandelier using your standard wall switch. The chandelier is designed for ambient and decorative lighting.

Image: The 18-arm crystal chandelier providing illumination in a living space.
Maintenance
Cleaning
- Always turn off power before cleaning.
- Dust the chandelier regularly with a soft, dry cloth.
- For crystal components, use a soft, lint-free cloth dampened with a mild glass cleaner or distilled water. Avoid abrasive cleaners or harsh chemicals, as they can damage the finish and crystals.
- Do not spray cleaner directly onto the fixture. Spray onto the cloth first.
Bulb Replacement
- Ensure the fixture is cool and power is off before replacing bulbs.
- Use only E14 type bulbs, not exceeding 40 watts per bulb.
- Carefully unscrew the old bulb and screw in the new one.
Troubleshooting
| Problem | Possible Cause | Solution |
|---|---|---|
| Light does not turn on. |
|
|
| Flickering light. |
|
|
| Chandelier is unstable or wobbles. |
|
|
Specifications
| Model Number | DM04 |
| Brand | Generic |
| Material | Stainless Steel, Crystal |
| Color | Champagne (Amber Crystal) |
| Dimensions (L x W x H) | 95 cm x 95 cm x 200 cm (adjustable height) |
| Number of Arms | 18 |
| Bulb Type | E14 (not included) |
| Max Wattage per Bulb | 40 Watts |
| Voltage | 110/220 Volts |
| Power Source | Electric Power |
| Approximate Weight | 14 kg |
| Assembly Required | Yes |
Warranty and Support
This product comes with a Limited Warranty. For specific details regarding the warranty period and coverage, please refer to the documentation included with your purchase or contact the manufacturer directly.
For technical support, missing parts, or warranty claims, please contact your retailer or the manufacturer, Domeny Iluminação. Please have your model number (DM04) and proof of purchase ready when contacting support.