1. Important Safety Information
Read and understand all instructions before operating this machine. Failure to follow all instructions may result in serious injury or property damage. Keep this manual for future reference.
- Always wear appropriate personal protective equipment (PPE), including eye protection, hearing protection, and heavy-duty gloves, during operation.
- Ensure the work area is clear of bystanders, children, and pets.
- Never operate the chipper in wet conditions or on slippery surfaces.
- Do not feed fresh greens, pine cones, palm branches (fronds will jam), petrified wood, or vines into the chipper. These materials can cause jamming or damage to the machine.
- Ensure the machine is on a stable, level surface before starting.
- Never place hands or any body part into the feeding chute or discharge chute while the engine is running.
- This machine is UKCA/CE Certified. Operate only as directed in this manual.
2. Product Overview
The SuperHandy Mini Wood Chipper Shredder Mulcher is designed for efficient processing of branches, limbs, and garden debris up to 50mm in diameter. It features a powerful 196cc engine and CR12MoV cutting blades for effective chipping, shredding, and mulching.

Figure 2.1: Overall view of the SuperHandy Mini Wood Chipper Shredder Mulcher.

Figure 2.2: The chipper offers a 15:1 reduction ratio and handles limbs up to 50mm.

Figure 2.3: The robust 196cc 4-stroke gas engine provides reliable power.
3. Setup and Assembly
Your SuperHandy Wood Chipper comes partially assembled. Follow these steps to complete the setup:
3.1 Included Components:
- Engine Unit
- Feed-in Chute
- Discharge Guide Plate
- Wheels and Axle
- Emergency Stop Switch
- Assembly Hardware
3.2 Assembly Steps:
- Attach the wheels to the axle and secure them to the main frame.
- Mount the feed-in chute to the main housing using the provided hardware. Ensure it is securely fastened.
- Install the discharge guide plate onto the discharge chute.
- Connect the emergency stop switch wiring as per the diagram in the full manual (not provided here).

Figure 3.1: The compact design with wheels allows for easy transport.
3.3 Fuel and Oil:
Before first use, add engine oil (NOT INCLUDED) to the engine crankcase. Refer to the engine manual for the correct oil type and capacity. Fill the fuel tank with 87+ unleaded gasoline (NO ETHANOL recommended). The maximum fuel capacity is 0.7 gallons.
4. Operating Instructions
4.1 Starting the Engine:
- Ensure the chipper is on a level surface and the emergency stop switch is in the 'RUN' position.
- Open the fuel valve and set the choke to the 'START' position (if cold engine).
- Pull the recoil starter handle firmly until the engine starts.
- Once the engine is running, gradually move the choke to the 'RUN' position.
4.2 Feeding Material:
Carefully feed branches and garden debris into the large extended feeding chute. The chipper can handle materials up to 50mm in diameter. Do not force material into the chute. Allow the chipper to process the material at its own pace.

Figure 4.1: The large hopper facilitates easy loading of greenery, twigs, and branches.
4.3 Debris Discharge:
The chipper features a vertical extended discharge chute with an adjustable guide. This allows for precise debris discharge within an angled range of 90° to 145°. Adjust the guide to direct chipped material into a desired container or area.
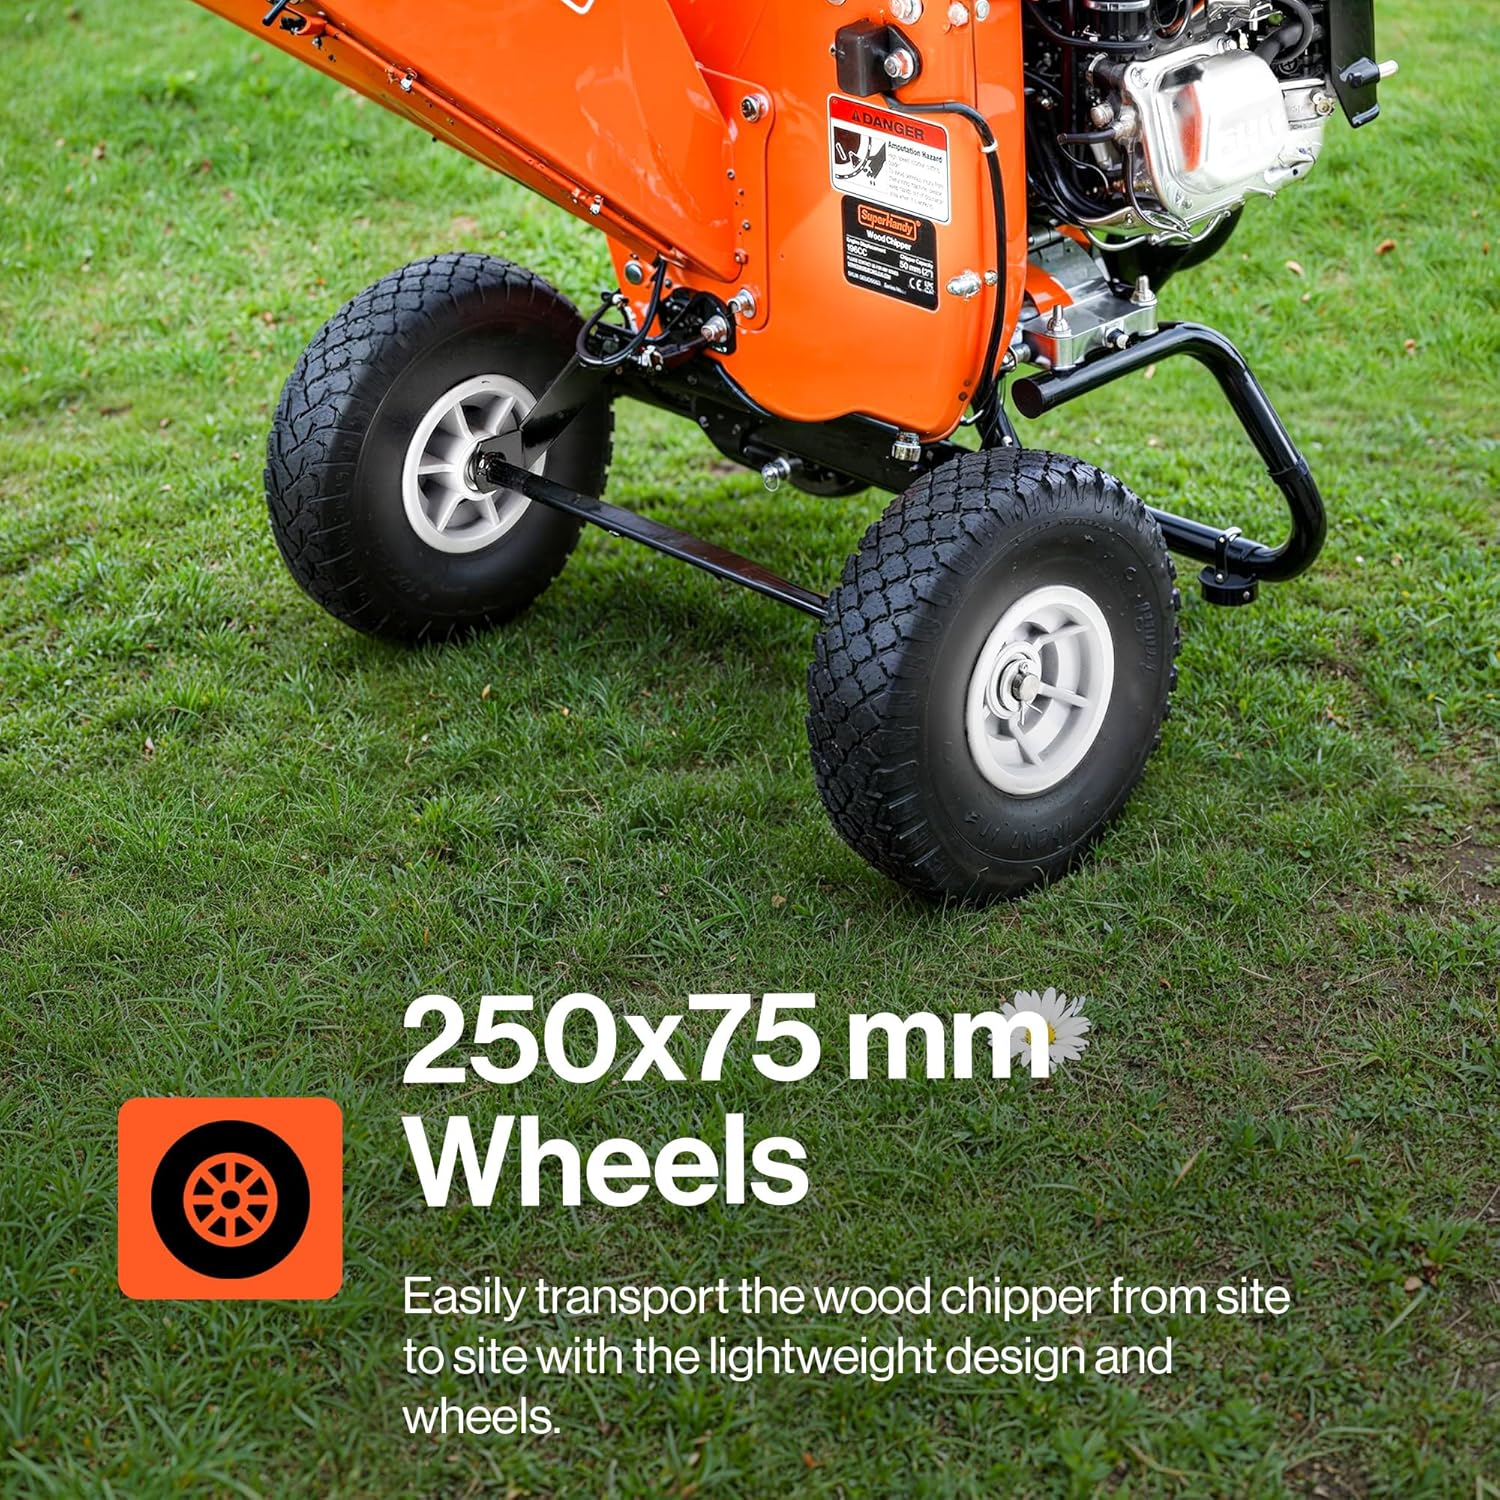
Figure 4.2: The multi-position chute allows for precise control of debris discharge.
5. Maintenance
Regular maintenance ensures optimal performance and extends the life of your chipper.
- Engine Oil: Check engine oil level before each use. Change oil according to the engine manufacturer's recommendations (typically after the first 5 hours, then every 25-50 hours).
- Air Filter: Clean or replace the air filter regularly, especially when operating in dusty conditions.
- Spark Plug: Inspect and clean the spark plug periodically. Replace if worn.
- Cutting Blades: Inspect the CR12MoV cutting blades for sharpness and damage after each use. Sharpen or replace blades as needed. Always disconnect the spark plug wire before performing any maintenance on the blades.
- General Cleaning: Keep the chipper clean and free of debris buildup, especially around the engine and cutting mechanism.
6. Troubleshooting
Refer to this section for common issues and their solutions.
| Problem | Possible Cause | Solution |
|---|---|---|
| Engine does not start | No fuel; Choke not set; Spark plug issue; Emergency stop engaged | Add fuel; Adjust choke; Check/clean/replace spark plug; Disengage emergency stop |
| Poor chipping performance | Dull blades; Overfeeding; Incorrect material | Sharpen/replace blades; Feed material slowly; Ensure material is suitable for chipping |
| Machine jams frequently | Overfeeding; Unsuitable material (e.g., palm fronds, vines) | Reduce feeding rate; Avoid feeding prohibited materials; Clear jam (engine off, spark plug disconnected) |
7. Specifications
| Specification | Detail |
|---|---|
| Model Number | GEUOS063-NEW |
| Engine Type | 196cc Horizontal 4-stroke Single Cylinder OHV Gas Engine |
| Max Engine Speed | 3600 RPM |
| Max Torque | 9.14 ft-lbs @ 2500 RPM |
| Fuel Type | 87+ Unleaded Gasoline (No Ethanol Recommended) |
| Max Fuel Capacity | 0.7 Gallons |
| Max Chipping Capacity | 50mm (2 inches) |
| Reduction Ratio | 15:1 |
| Cutting Blades | CR12MoV (x2) |
| Discharge Chute Angle | 90° - 145° Adjustable |
| Item Weight | 33 kg (72.75 lbs) |
| Manufacturer | GCM |
8. Warranty and Support
For warranty information and technical support, please refer to the documentation included with your purchase or visit the official SuperHandy website. Keep your purchase receipt as proof of purchase for any warranty claims.
If you require assistance, please contact SuperHandy customer service. Contact details can typically be found on the manufacturer's website or on your product packaging.