Introduction
This manual provides detailed instructions for the assembly, operation, and maintenance of your VEVOR 48-inch Universal ATV/UTV Snow Plow Kit. Please read this manual thoroughly before use to ensure safe and efficient operation. Keep this manual for future reference.

Safety Information
Always prioritize safety when operating the snow plow. Failure to follow safety guidelines can result in injury or damage to equipment.
- Ensure all bolts and fasteners are securely tightened before operation.
- Do not operate the plow at excessive speeds.
- Be aware of your surroundings and potential obstacles.
- Wear appropriate personal protective equipment (PPE) such as safety glasses and gloves.
- Keep bystanders, especially children and pets, away from the operating area.
- Regularly inspect the plow for any signs of wear or damage.
Setup and Assembly
The VEVOR Snow Plow Kit is designed for straightforward assembly. Follow these steps to prepare your plow for use.
1. Unpacking and Component Identification
Carefully unpack all components and verify against the parts list provided in your packaging. Ensure all parts are present and undamaged.

2. Assembling the Plow Blade and Frame
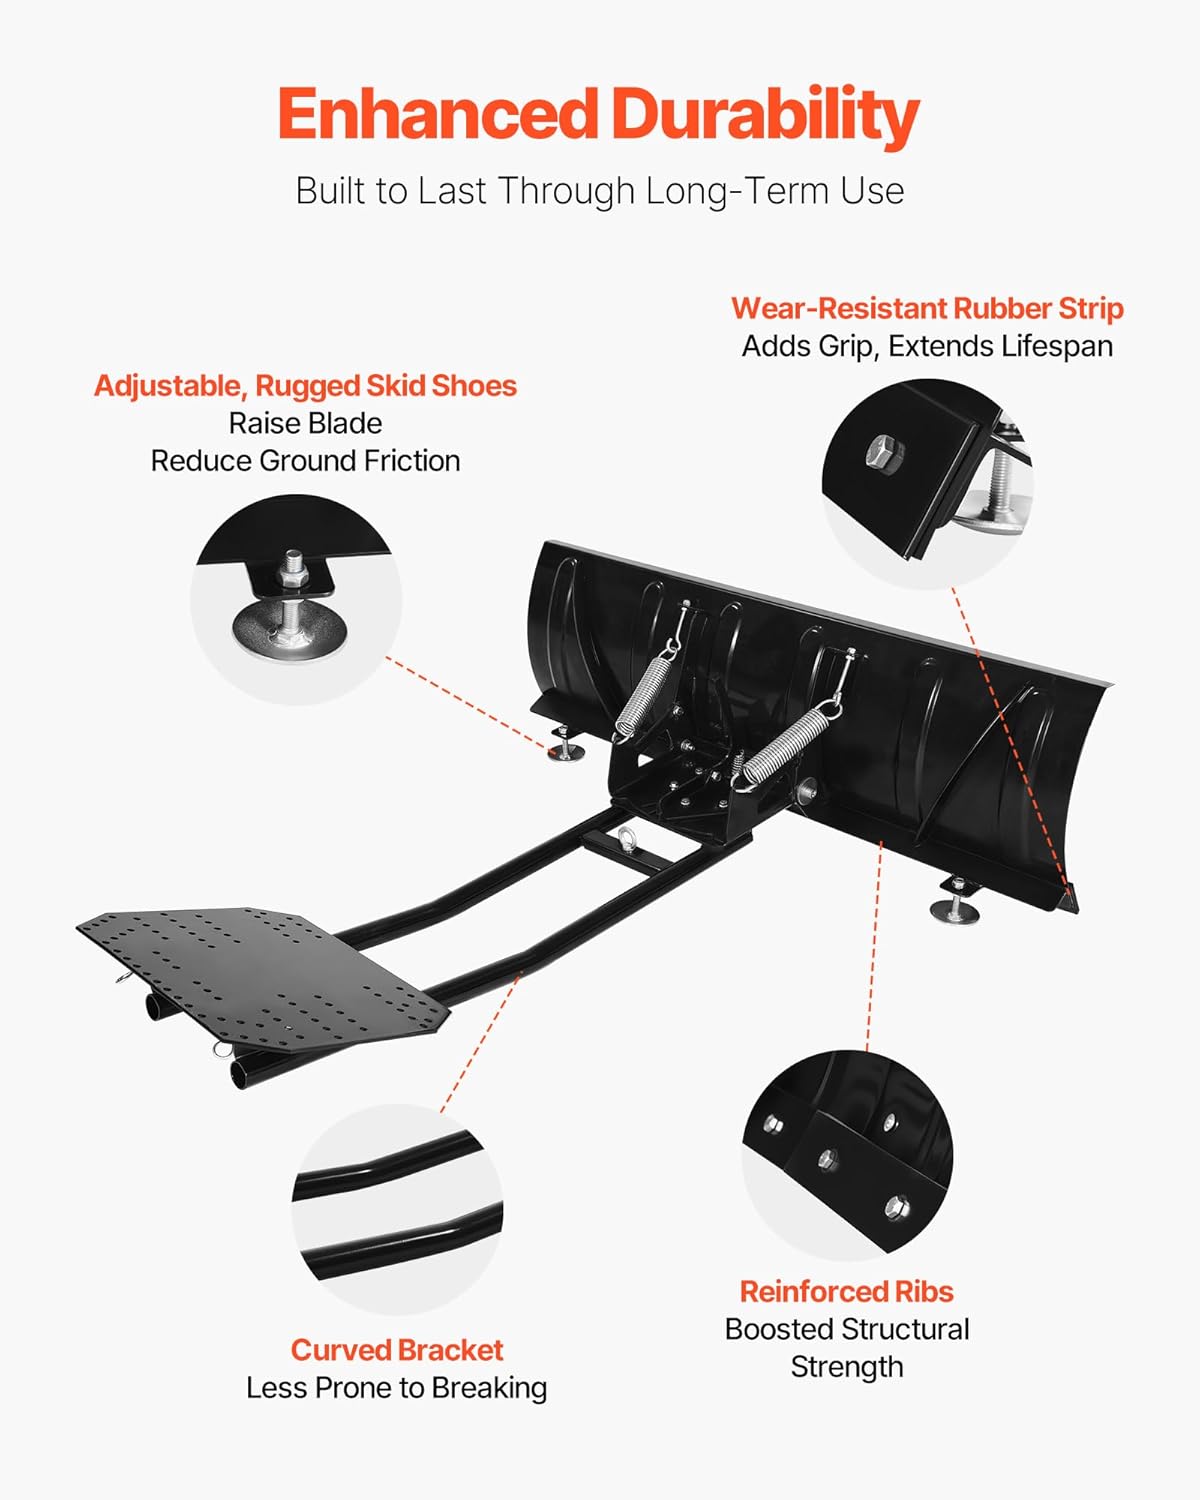
Attach the plow blade to the main frame using the provided hardware. Ensure all connections are secure. The blade features a wear-resistant rubber strip at the bottom for impact protection and adjustable skid shoes to control ground clearance.

3. Attaching the Universal Mounting Plate
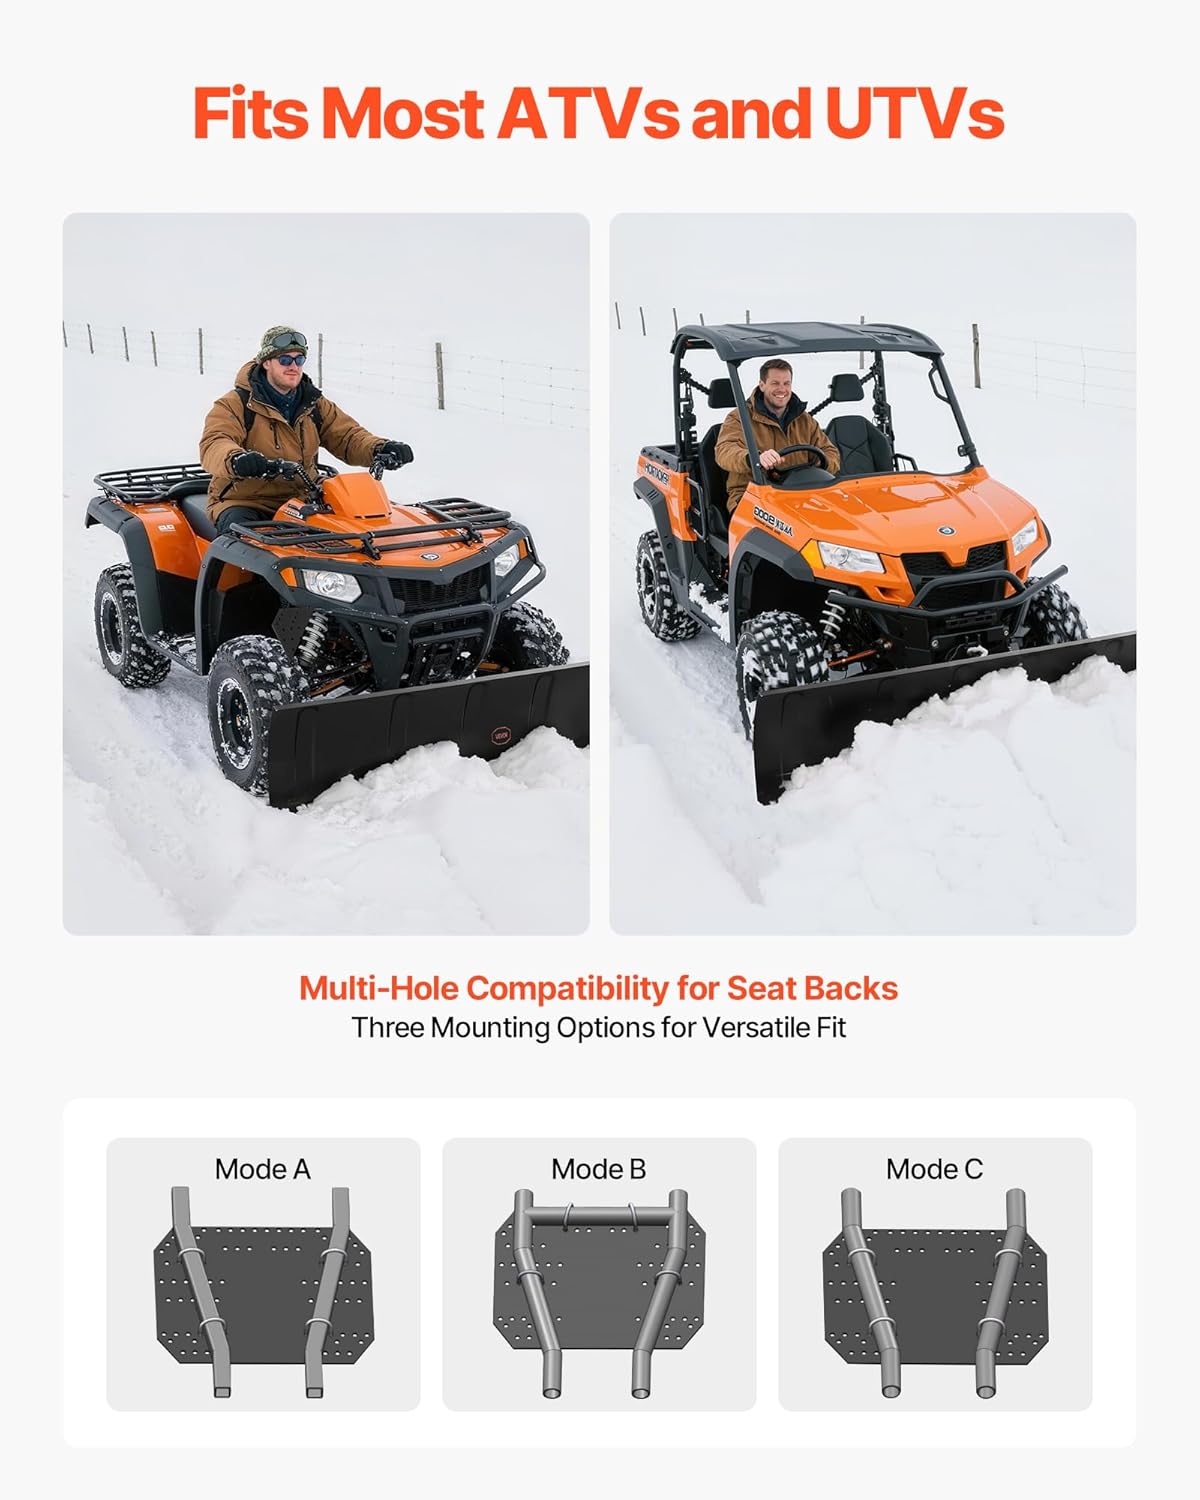
The universal multi-slot mounting backplate offers three installation methods for broad compatibility with most ATV and UTV models. Select the appropriate mounting holes and secure the plate to your vehicle's frame using the provided U-bolts or other suitable hardware. It is recommended to verify compatibility with your specific vehicle model prior to installation.
4. Video Guide: How to Set up VEVOR Snow Plow Kit
For a visual guide on the setup process, please refer to the official VEVOR setup video below:
Operating Instructions
Proper operation ensures effective snow clearing and extends the life of your equipment.
1. Adjusting Blade Angle and Height
The ATV snow plow offers 5-position angle adjustment (up to ±24.88°) and 4-level vertical height control. Use the adjustment handle to set the desired angle for directing snow and the height control to adapt to different snow depths or terrain. The blade is designed to adapt to steep slopes, deep snow, or uneven terrain.

2. Snow Clearing Techniques
Begin plowing at a moderate speed. Overlapping passes will ensure complete snow removal. For heavy snow, consider making multiple passes or adjusting the blade angle to a less aggressive position or make narrower passes. The plow is suitable for residential driveways, farm roads, parking lots, and rural paths.


Maintenance
Regular maintenance ensures optimal performance and longevity of your snow plow.
- After Each Use: Clean the plow blade and frame to remove snow, ice, and debris. This prevents rust and maintains smooth operation.
- Seasonal Inspection: Before and after the snow season, inspect all bolts, nuts, and pins for tightness. Tighten any loose fasteners.
- Blade Inspection: Check the wear-resistant rubber strip and the steel cutting edge for damage or excessive wear. Replace if necessary.
- Lubrication: Lubricate moving parts, such as pivot points and springs, with a suitable grease or lubricant to prevent corrosion and ensure smooth movement.
- Storage: When not in use, detach the snow plow attachment for off-season storage. Store in a dry place to prevent rust.
Troubleshooting
This section addresses common issues you might encounter during operation.
- Plow Folds Down Unexpectedly: The plow is designed with springs to allow it to fold down if it hits an obstacle, preventing damage to the plow and your vehicle. If this happens frequently on clear surfaces, check the spring tension and ensure the locking mechanism for the blade angle is fully engaged.
- Difficulty Adjusting Blade Angle: Ensure the adjustment handle is fully disengaged before attempting to change the angle. Check for any debris or ice obstructing the pivot points. Lubricate if necessary.
- Ineffective Snow Clearing: Verify the blade height is correctly set for the snow depth. For very deep or heavy snow, adjust the blade angle to a less aggressive position or make narrower passes.
- Mounting Issues: If the universal mounting plate does not fit your specific ATV/UTV, minor modifications (e.g., drilling additional holes) may be required. Consult your vehicle's manual or a professional if unsure.
Specifications
| Feature | Detail |
|---|---|
| Item Model Number | ATV-001-48 |
| Product Dimensions | 48.03 x 50.39 x 15.16 inches |
| Item Weight | 91.3 pounds |
| Blade Size (Length x Width) | 48 inch |
| Item Material | Steel |
| Color | Glossy Black |
| Angle Adjustment | 5-position (up to ±24.88°) |
| Height Control | 4-level vertical |
Warranty and Support
For warranty information, technical support, or to purchase replacement parts, please visit the official VEVOR website or contact their customer service. Keep your purchase receipt and product model number (ATV-001-48) handy for any inquiries.
You can visit the VEVOR Store for more information: VEVOR Official Store