1. Safety Information
Read and understand all safety warnings and instructions before operating this product. Failure to follow these instructions may result in serious injury or property damage.
- Always wear appropriate personal protective equipment (PPE), including safety glasses and gloves, during assembly and operation.
- Ensure the ATV/UTV is stable and turned off before attaching or detaching the snow plow.
- Do not exceed the weight capacity or towing limits of your ATV/UTV.
- Operate the snow plow at a safe speed, especially on uneven terrain or near obstacles.
- Be aware of your surroundings and avoid plowing near people, pets, or fragile objects.
- Regularly inspect all components for wear, damage, or loose fasteners. Replace damaged parts immediately.
- Keep hands and feet clear of moving parts during operation.
2. Product Overview
The VEVOR Snow Plow Blade is a robust attachment designed for efficient snow removal from various surfaces. It features adjustable width, angle, and height settings for versatile use across different terrains and snow conditions.
Key Features:
- Universal Compatibility: Upgraded multi-slot mounting backrest offers 3 installation options, compatible with most ATV and UTV models.
- Flexible & Adjustable: Two adjustable width settings (43 in/72 in), five-position left-right angle adjustment (±24.88° max), and four-level height adjustment.
- Rugged & Durable: Reinforced main panel and backrest bracket, wear-resistant rubber strip, and curved side panels for enhanced structural strength and impact protection.
- Quick Installation & Storage: Quick-release panel design for fast setup and removal, facilitating off-season storage.
- Versatile Use: Ideal for clearing snow from driveways, farm paths, parking lots, and rural roads.
3. Components List
Before assembly, ensure all components are present and undamaged. Refer to the diagram below for identification.
- Snow Blade (Main Panel)
- Mounting Backrest / Universal Mounting Plate
- Push Tube Assembly
- Swivel Plate
- Adjustment Handle
- Adjustment Disc
- Rubber Strips (Wear Bar)
- Scraper Blades
- Reflective Rods
- Springs (for blade articulation)
- Various Bolts, Nuts, Washers, Pins (U-bolts for mounting)

Figure 3.1: All components of the VEVOR Snow Plow Blade kit.
4. Setup and Assembly
Follow these steps carefully to assemble your VEVOR Snow Plow Blade. It is recommended to have a second person assist with assembly.
4.1 Attach Side Panels to Main Blade
Secure the side panels to the main snow blade using the provided bolts and nuts. Ensure they are aligned correctly for proper snow channeling.
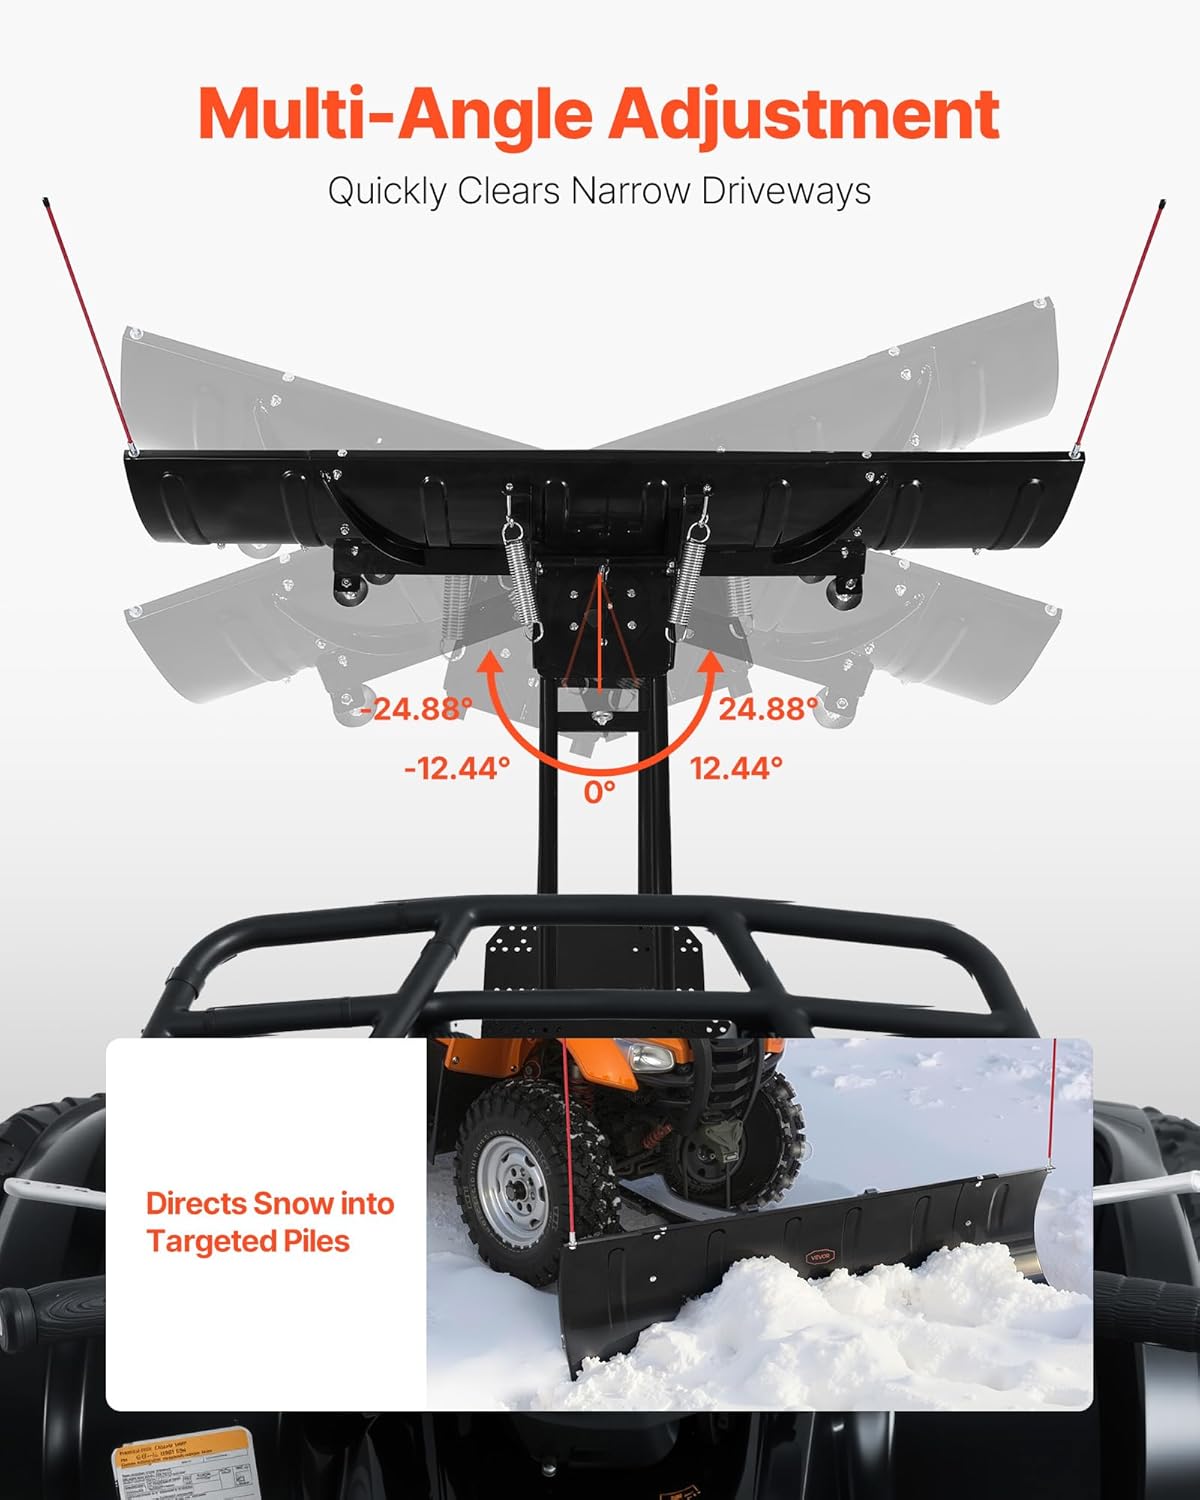
Figure 4.1: Side panels being attached to the main snow blade.
4.2 Install Rubber Strips (Wear Bar)
Attach the wear-resistant rubber strips to the bottom edge of the snow blade. These strips protect the blade and the ground surface.
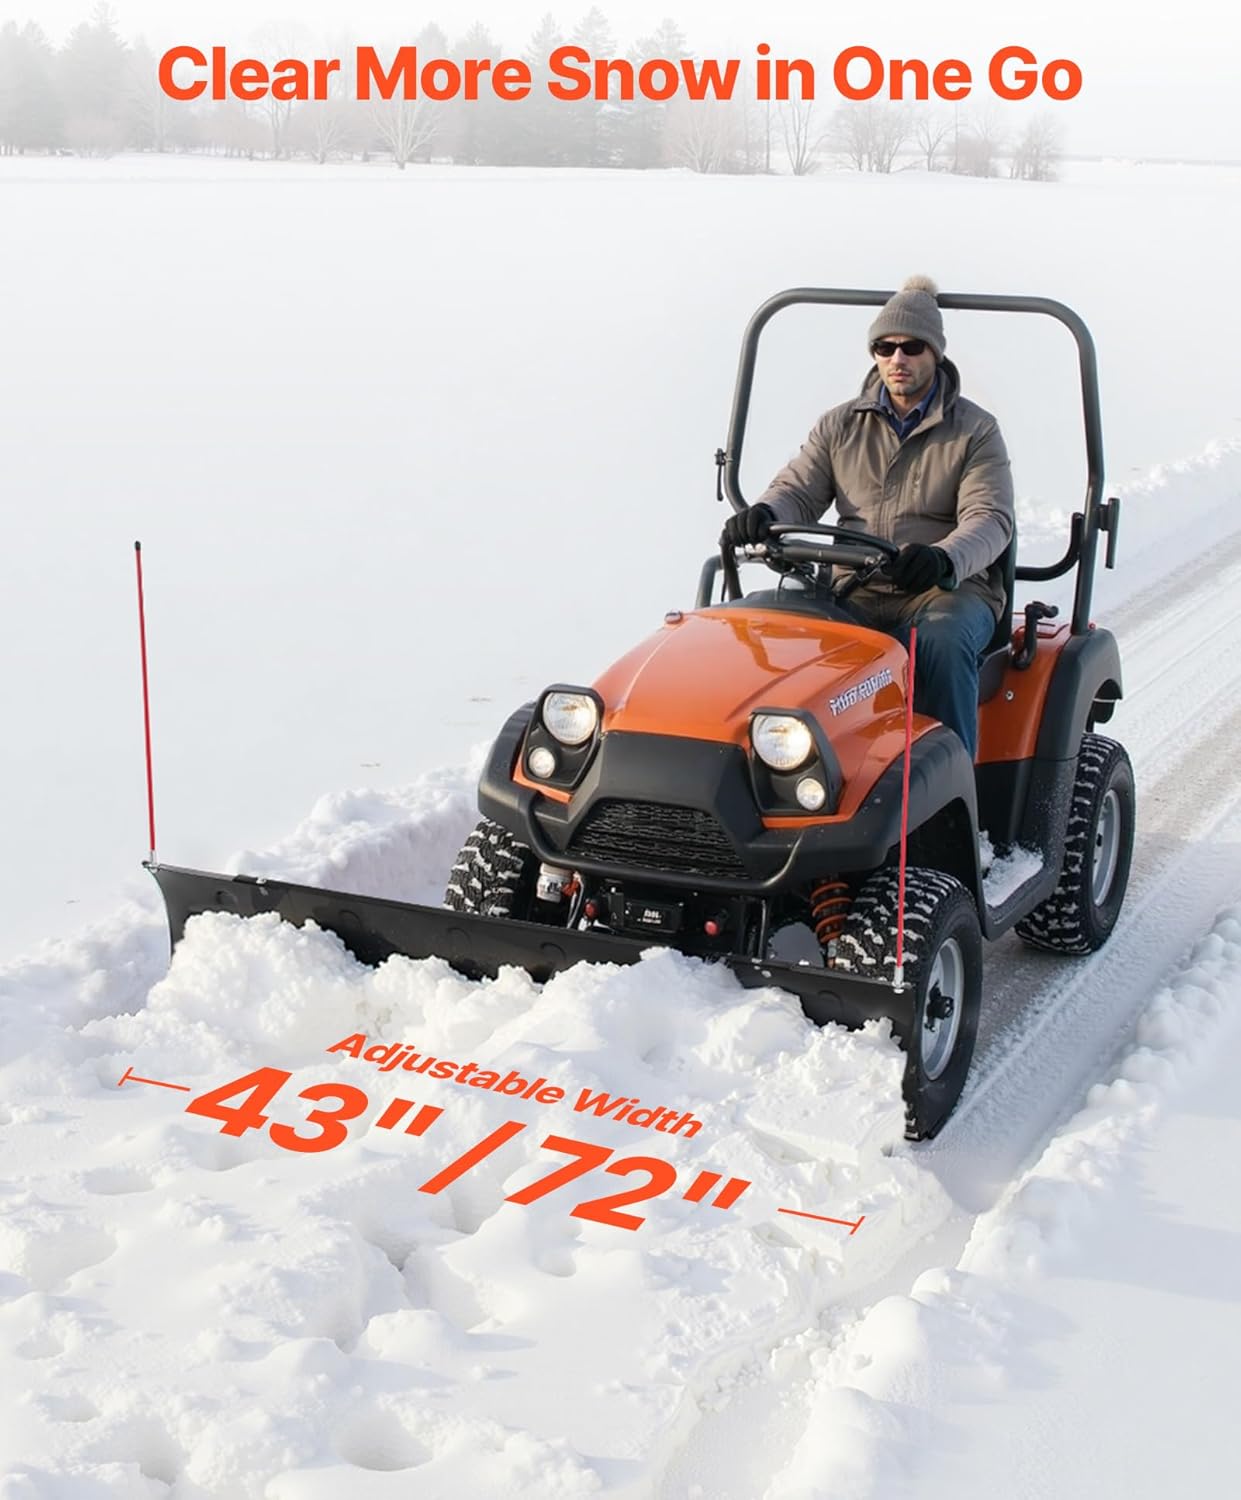
Figure 4.2: Securing the rubber wear strips to the bottom of the plow blade.
4.3 Assemble Swivel Plate and Adjustment Mechanism
Connect the swivel plate and adjustment handle to the push tube assembly. This mechanism allows for angle adjustments of the plow blade.
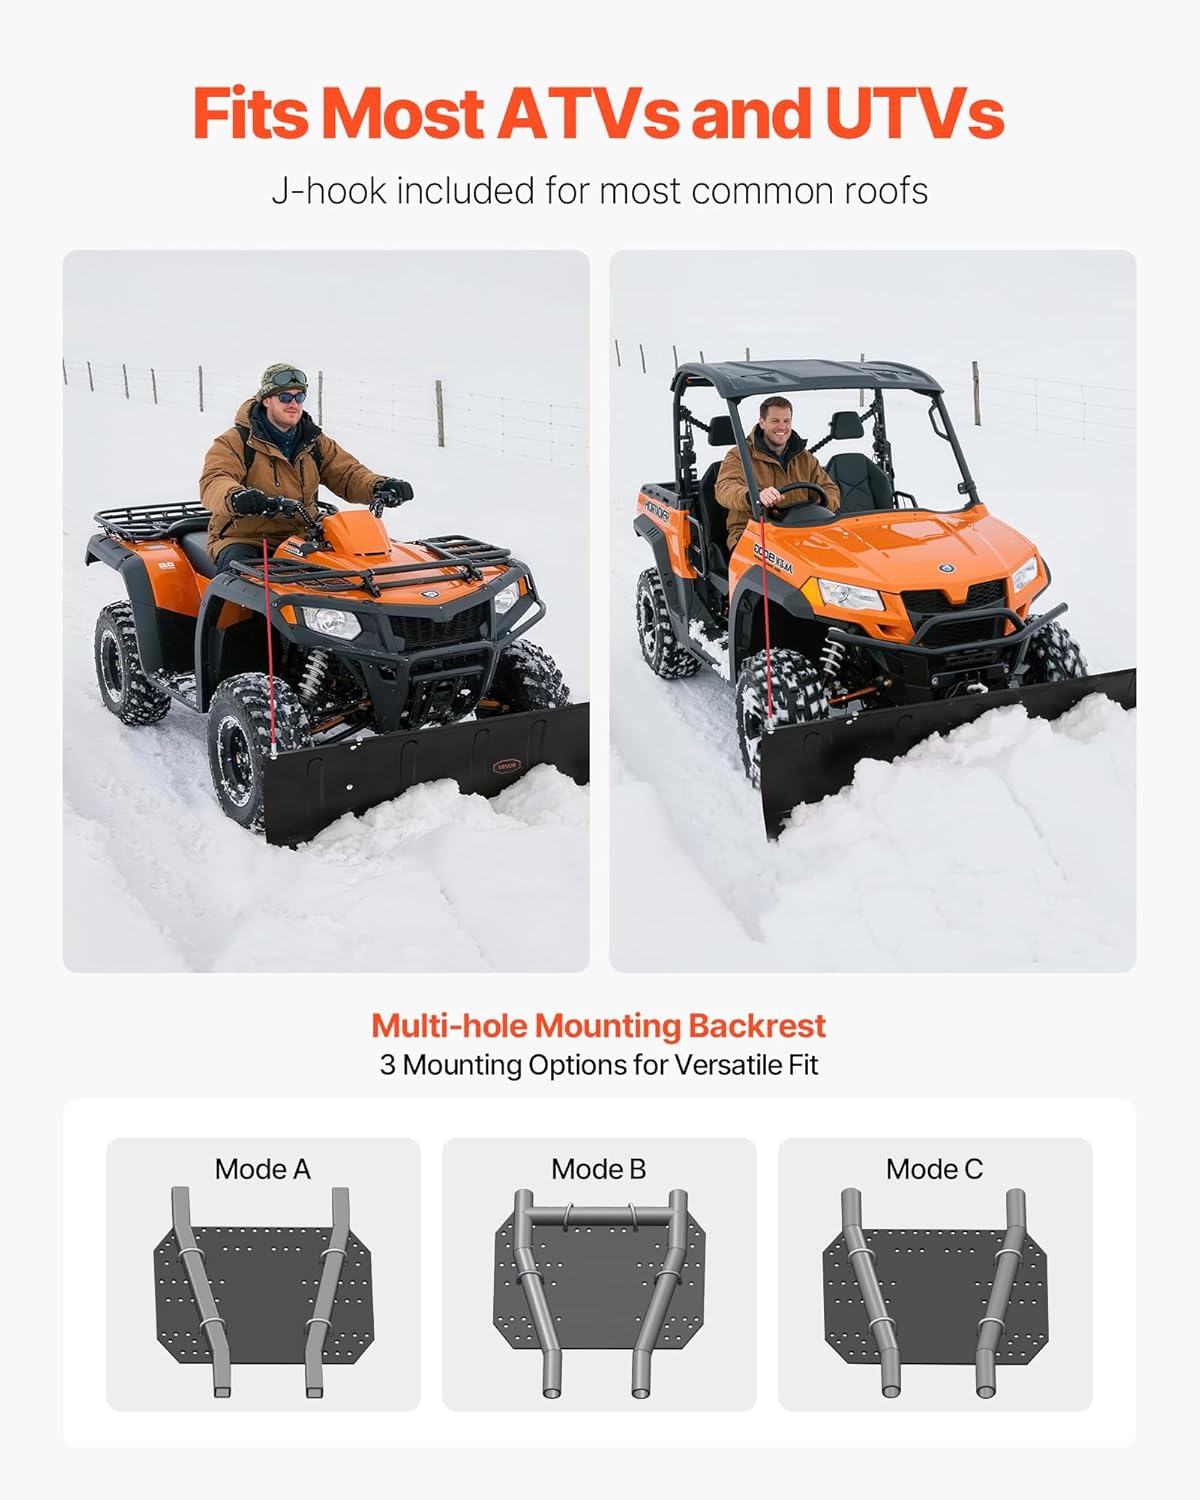
Figure 4.3: The swivel plate and adjustment handle being assembled onto the push tube.
4.4 Attach Push Tube Assembly to Snow Blade
Secure the assembled push tube to the main snow blade. Ensure all connections are tight and secure.
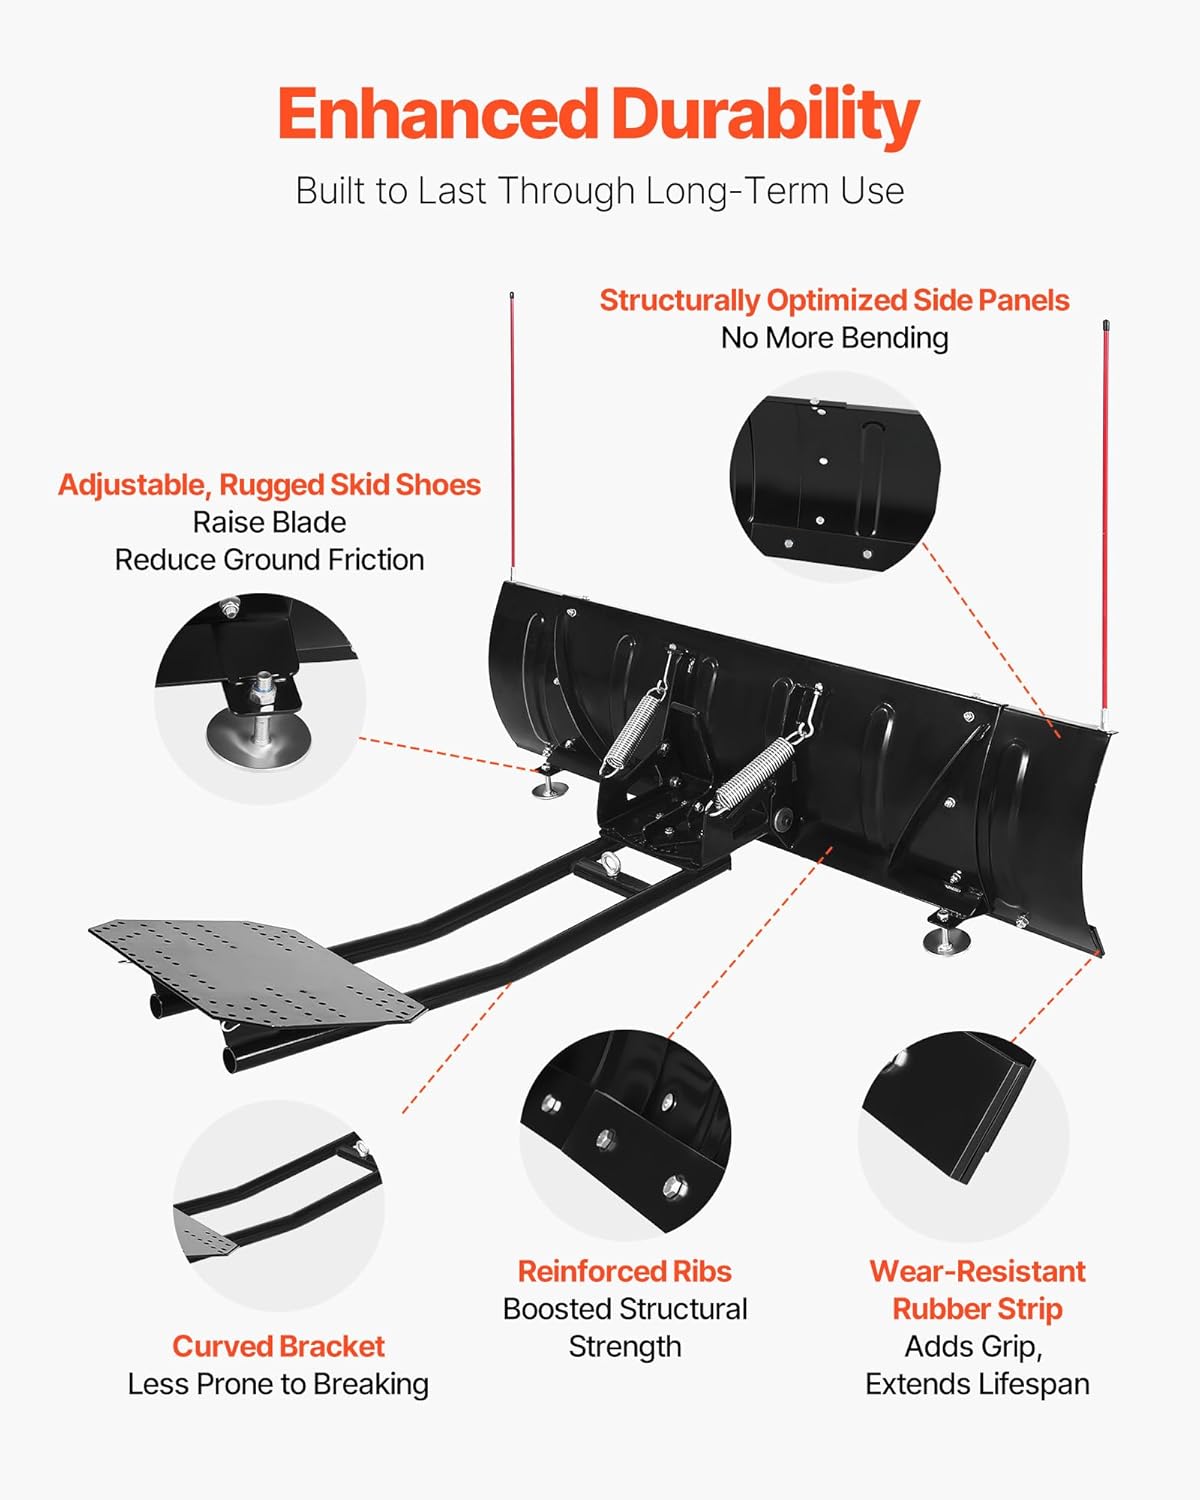
Figure 4.4: The push tube assembly being connected to the snow blade.
4.5 Install Springs and Reflective Rods
Attach the springs to the blade for articulation and install the reflective rods on the top corners of the blade for visibility.
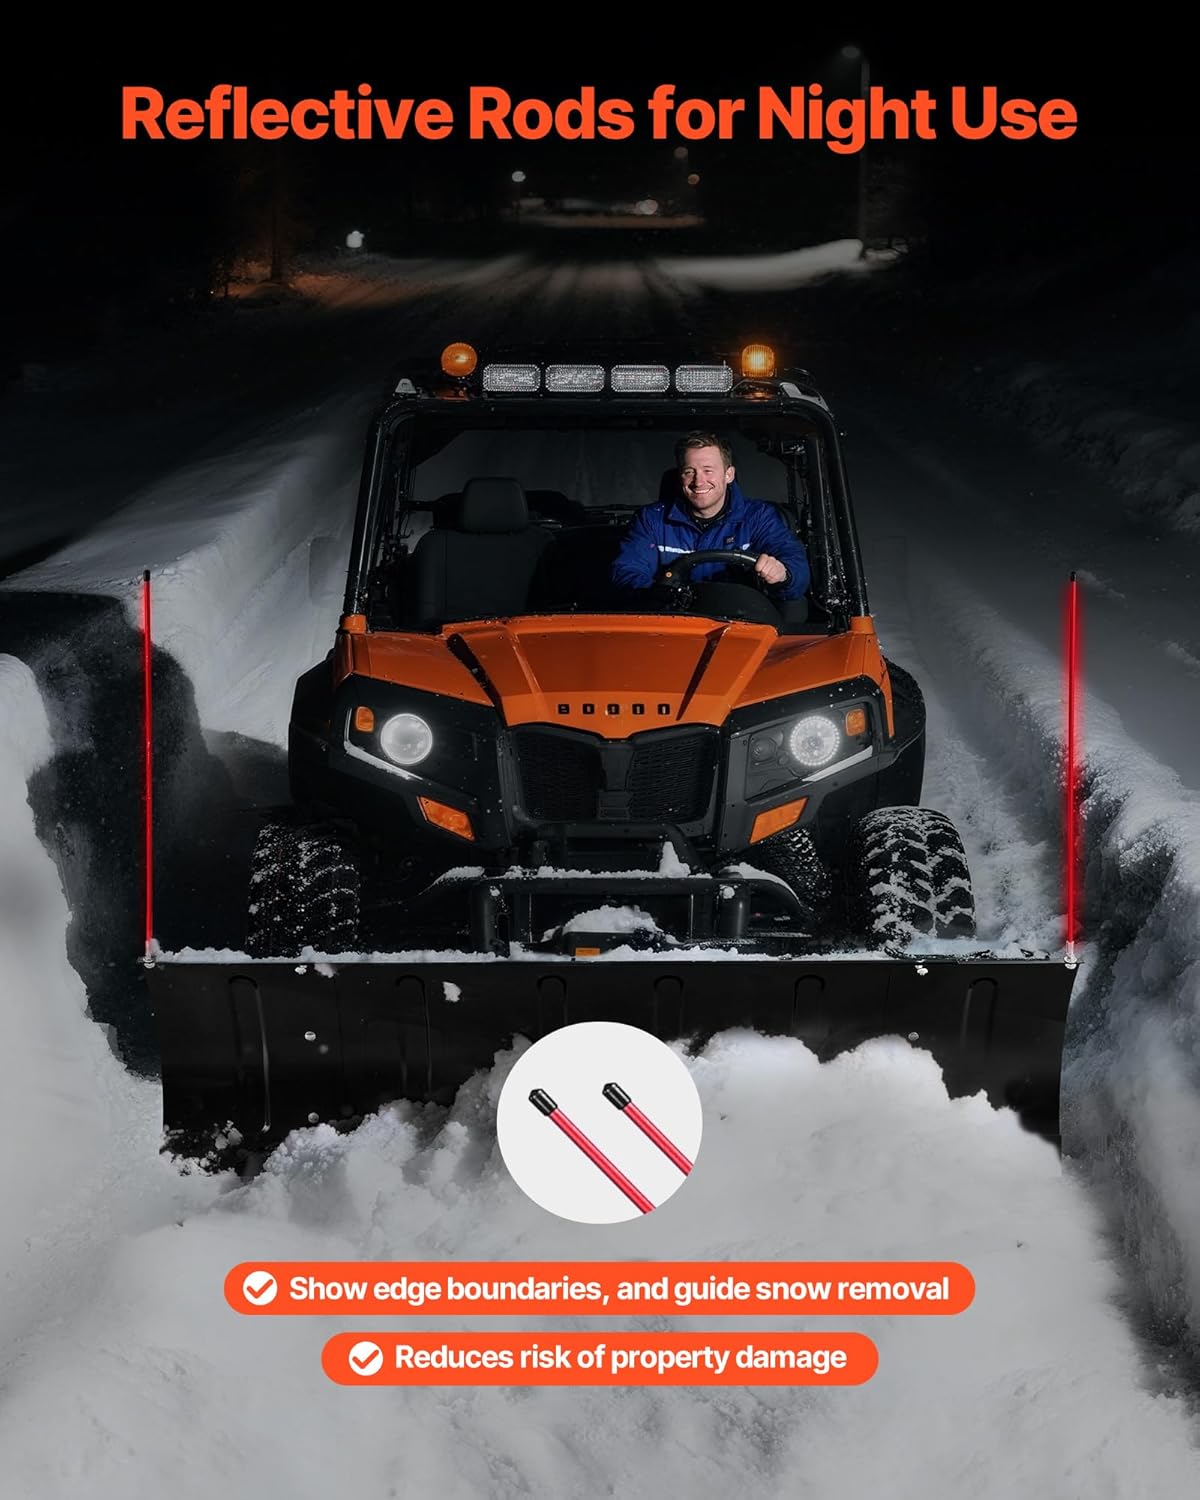
Figure 4.5: Springs and reflective rods being installed on the snow plow blade.
4.6 Mount Universal Plate to ATV/UTV
Attach the universal mounting plate to the front of your ATV/UTV using appropriate U-bolts or other hardware suitable for your vehicle's frame. Ensure a secure and stable connection.

Figure 4.6: The universal mounting plate, ready for attachment to an ATV/UTV.
4.7 Final Attachment to Vehicle
Connect the snow plow assembly to the universal mounting plate on your ATV/UTV. Use the quick-release pins for easy attachment and detachment.
Video 4.7: Official VEVOR video demonstrating the setup of the snow plow kit. This video shows the step-by-step assembly process, including attaching the blade sections, rubber strips, push tube, and the final connection to the vehicle's mounting plate. It also highlights the spring-loaded articulation and angle adjustment features.
5. Operating Instructions
Proper operation ensures effective snow removal and extends the life of your snow plow.
5.1 Adjusting Blade Width
The snow plow offers two adjustable width settings: 43 inches for narrow spaces and 72 inches for large-area clearing. Adjust the side panels as needed by loosening and re-tightening the bolts.

Figure 5.1: The snow plow demonstrating its adjustable width settings for different clearing needs.
5.2 Adjusting Blade Angle
Utilize the adjustment handle to set the blade to one of five positions, allowing for left-right angle adjustments up to ±24.88°. This helps direct snow into targeted piles and navigate complex terrains.

Figure 5.2: Illustration of the multi-angle adjustment feature of the snow plow blade.
5.3 Adjusting Blade Height
The plow features a four-level height adjustment. Adjust the skid shoes to raise or lower the blade, reducing ground friction and adapting to uneven terrain. This also helps avoid scratches from ice and gravel.

Figure 5.3: Close-up of the adjustable skid shoes for precise blade height control.
5.4 Using Reflective Rods
The included reflective rods provide clear visibility of the plow's edges, especially during night operation. This helps guide snow removal and reduces the risk of property damage.

Figure 5.4: Reflective rods indicating the plow's boundaries during night use.
6. Maintenance
Regular maintenance ensures optimal performance and longevity of your VEVOR Snow Plow Blade.
- Inspect Wear Bar: Periodically check the rubber wear strip for signs of excessive wear or damage. Replace if necessary to maintain effective scraping and protect the blade.
- Check Fasteners: Before each use, inspect all bolts, nuts, and pins to ensure they are securely tightened. Re-tighten any loose fasteners.
- Clean and Lubricate: After each use, especially after contact with salt or de-icing agents, clean the plow thoroughly. Lubricate moving parts and pivot points to prevent rust and ensure smooth operation.
- Storage: For off-season storage, detach the snow plow from your vehicle. Clean, inspect, and store it in a dry, protected area to prevent corrosion and damage.
7. Troubleshooting
This section addresses common issues you might encounter with your snow plow.
- Plow not clearing snow effectively:
- Check blade angle: Adjust to a more aggressive angle if needed.
- Inspect wear bar: A worn rubber strip may reduce scraping efficiency. Replace if necessary.
- Verify height adjustment: Ensure the skid shoes are set correctly for the surface.
- Excessive wear on blade or ground:
- Adjust blade height: Raise the blade slightly using the skid shoes to reduce direct contact with the ground.
- Check for obstacles: Ensure the plowing path is clear of large rocks or debris.
- Plow feels unstable or loose:
- Inspect all mounting points: Ensure the universal plate is securely attached to the ATV/UTV and the plow is tightly connected to the plate.
- Check all fasteners: Tighten any loose bolts or nuts on the plow assembly.
8. Specifications
| Attribute | Value |
|---|---|
| Item Model Number | ATV-001J-72 |
| Product Dimensions | 70.87 x 50.39 x 15.16 inches |
| Item Weight | 103.6 pounds |
| Blade Size (Length x Width) | 43 inch / 72 inch (Adjustable) |
| Material | Steel |
| Color | Glossy Black |
9. Warranty and Support
For warranty information, technical support, or to purchase replacement parts, please contact VEVOR customer service. Keep your purchase receipt and model number handy for faster service.
Visit the official VEVOR website for the most up-to-date information and support resources.