1. Important Safety Information
WARNING: Read and understand all instructions before using this heater. Failure to follow these instructions may result in electric shock, fire, property damage, or serious injury.
- Installation must be performed by a qualified electrician in accordance with national and local electrical codes.
- Ensure the heater is properly grounded.
- Do not operate the heater without supervision.
- This heater features overheat protection and an automatic shut-off function for safe use.
- Maintain minimum clearances from combustible materials as specified in the installation section.
2. Product Overview
The InoKraft 7,500W Electric Garage Heater is designed to provide efficient heating for large spaces such as garages and workshops. It features a robust construction and user-friendly controls.
Key Features:
- Powerful 7,500W Heating: Provides rapid heating for areas up to 750 square feet.
- Precise Digital Thermostat: Adjustable temperature range from 40°F to 99°F.
- ECO Mode: Automatically adjusts heating output to save energy.
- 24-Hour Timer: Allows for scheduled operation.
- Overheat Protection: Automatic shut-off for enhanced safety.
- Remote Control: Convenient operation from a distance.
- Adjustable Angle: Five angle adjustments for directing warmth.
- Mounting Options: Designed for wall or ceiling mounting to save space.
- Durable Construction: Heavy-duty metal casing for longevity.
Package Contents:
- InoKraft 7,500W Electric Garage Heater Unit
- Mounting Bracket
- 8.2 feet Power Cord with NEMA 14-50P Plug (8 AWG copper wire)
- Infrared Remote Control
- Cable Gland
- Mounting Screws and Washers
- User Manual

Image: Components of the InoKraft 7,500W Electric Garage Heater, showing the main unit, power cord with NEMA 14-50P plug, remote control, mounting bracket, and various screws and washers.
3. Setup and Installation
Proper installation is crucial for the safe and efficient operation of your InoKraft garage heater. It is recommended that installation be performed by a qualified electrician.
3.1 Tools Needed:
- Phillips & Flathead Screwdriver
- Power Drill
- Hammer
- Crowbar (optional, for knockout removal)
- #17 Wrench
- 2 x AAA batteries (for remote)
3.2 Connecting the Wire:
- Remove the screw from the bottom panel of the heater.
- Choose a side for wire entry and open the knockout cutout using a screwdriver and pliers.
- Install the cable gland into the opened cutout, ensuring it is securely fastened.
- Run the power cord through the cable gland and into the heater's wiring compartment.
- Connect the black wire to the L1 terminal, the red wire to the L2 terminal, and the green wire to the ground terminal. Ensure all wires are securely tightened.
- Tighten the cable gland to secure the power cord and prevent strain.
- Close the bottom panel and tighten the screw.

Image: Illustration of the NEMA 14-50 plug and compatible outlet, highlighting that it is not compatible with 120V, NEMA 14-30, or NEMA 6-50 outlets.
3.3 Mounting the Heater:
The heater can be mounted on a wall or ceiling. Ensure you locate a sturdy wood stud or appropriate structural support.
- Locate a wood stud or suitable mounting surface. Place washers on the provided screws and tighten them securely into the wall or ceiling to attach the mounting bracket.
- Lift the heater unit onto the installed bracket. Align the holes on the heater with the bracket and secure it using the larger bolts.
- Align and secure the bracket with the small bolts for either horizontal or tilted mounting. The heater offers five angle adjustments.
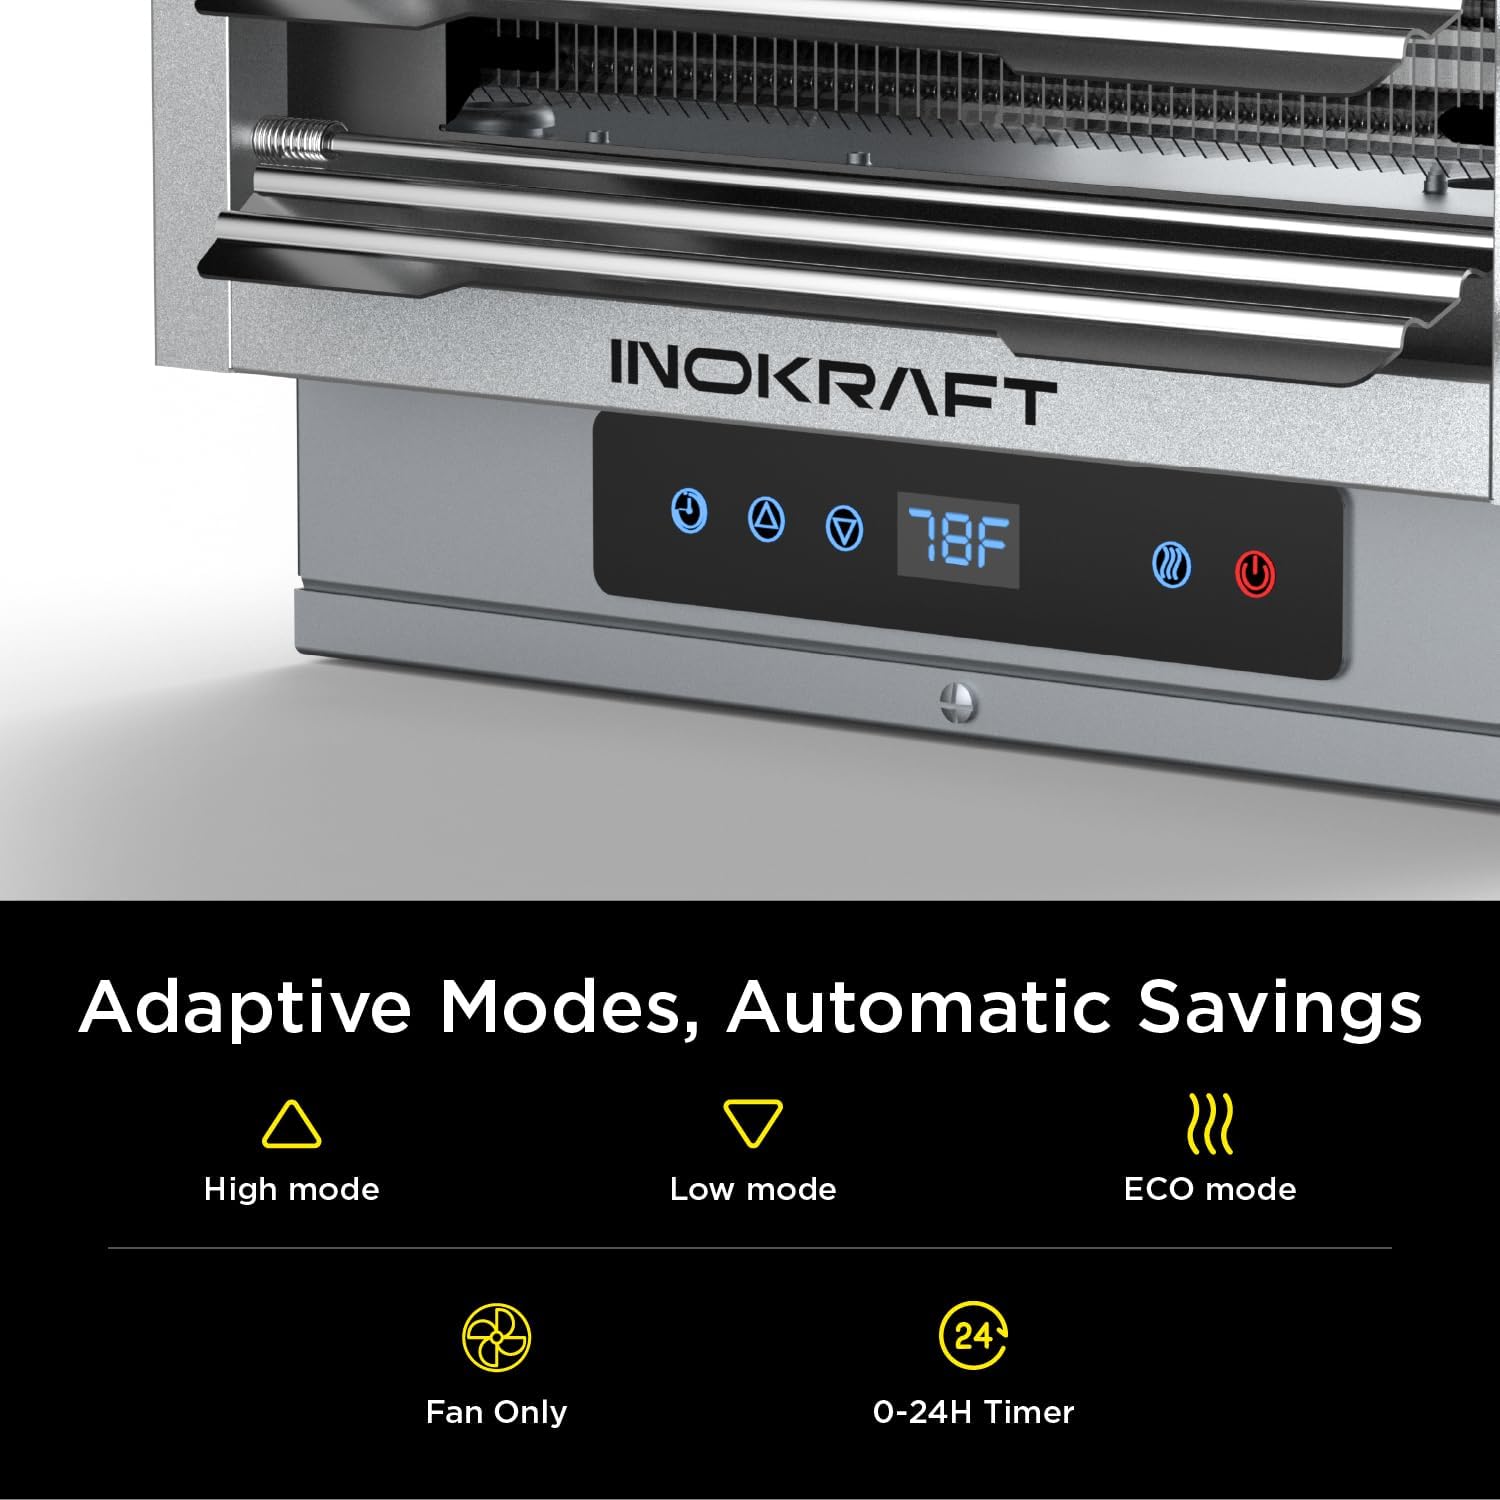
Image: The InoKraft 7500W Electric Garage Heater mounted on a wall, illustrating minimum distance requirements of 13 inches from side walls and 8 inches from the mounting surface.

Image: Diagram illustrating wall or ceiling mount options for the InoKraft garage heater, showing how the bracket allows for adjustable angles.
3.4 Power Connection:
Plug the NEMA 14-50P power cord into a compatible NEMA 14-50 outlet. Ensure the outlet is on a dedicated 40-amp circuit breaker.

Image: The InoKraft 7500W Electric Garage Heater with its 8.2ft power cord securely plugged into a NEMA 14-50 outlet on a wall.
Installation Video:
Video: Official InoKraft Electric Garage Heater Installation & Operation Video. This video provides a visual guide for connecting the wire, locating and hanging the heater, and connecting power. It also covers basic operation.
4. Operating Instructions
The InoKraft garage heater can be operated using the control panel on the unit or the included remote control.
4.1 Control Panel & Remote Functions:
| Icon | Name | Function |
|---|---|---|
| ⏻ | Power Button | Turns the heater On/Off. |
| ≡ | Mode Selection Button | Cycles through High (H), Low (L), ECO (E), and Fan Only (FAN) modes. |
| ⏱ | Timer Button | Sets the auto-off timer (0-24 hours). |
| ▲ / ▼ | Up / Down Buttons | Adjusts temperature (40-99°F) or timer settings. |
| C/F | °C/°F Conversion Button | Switches temperature display between Celsius and Fahrenheit (press and hold Mode Selection button for 5 seconds on control panel). |
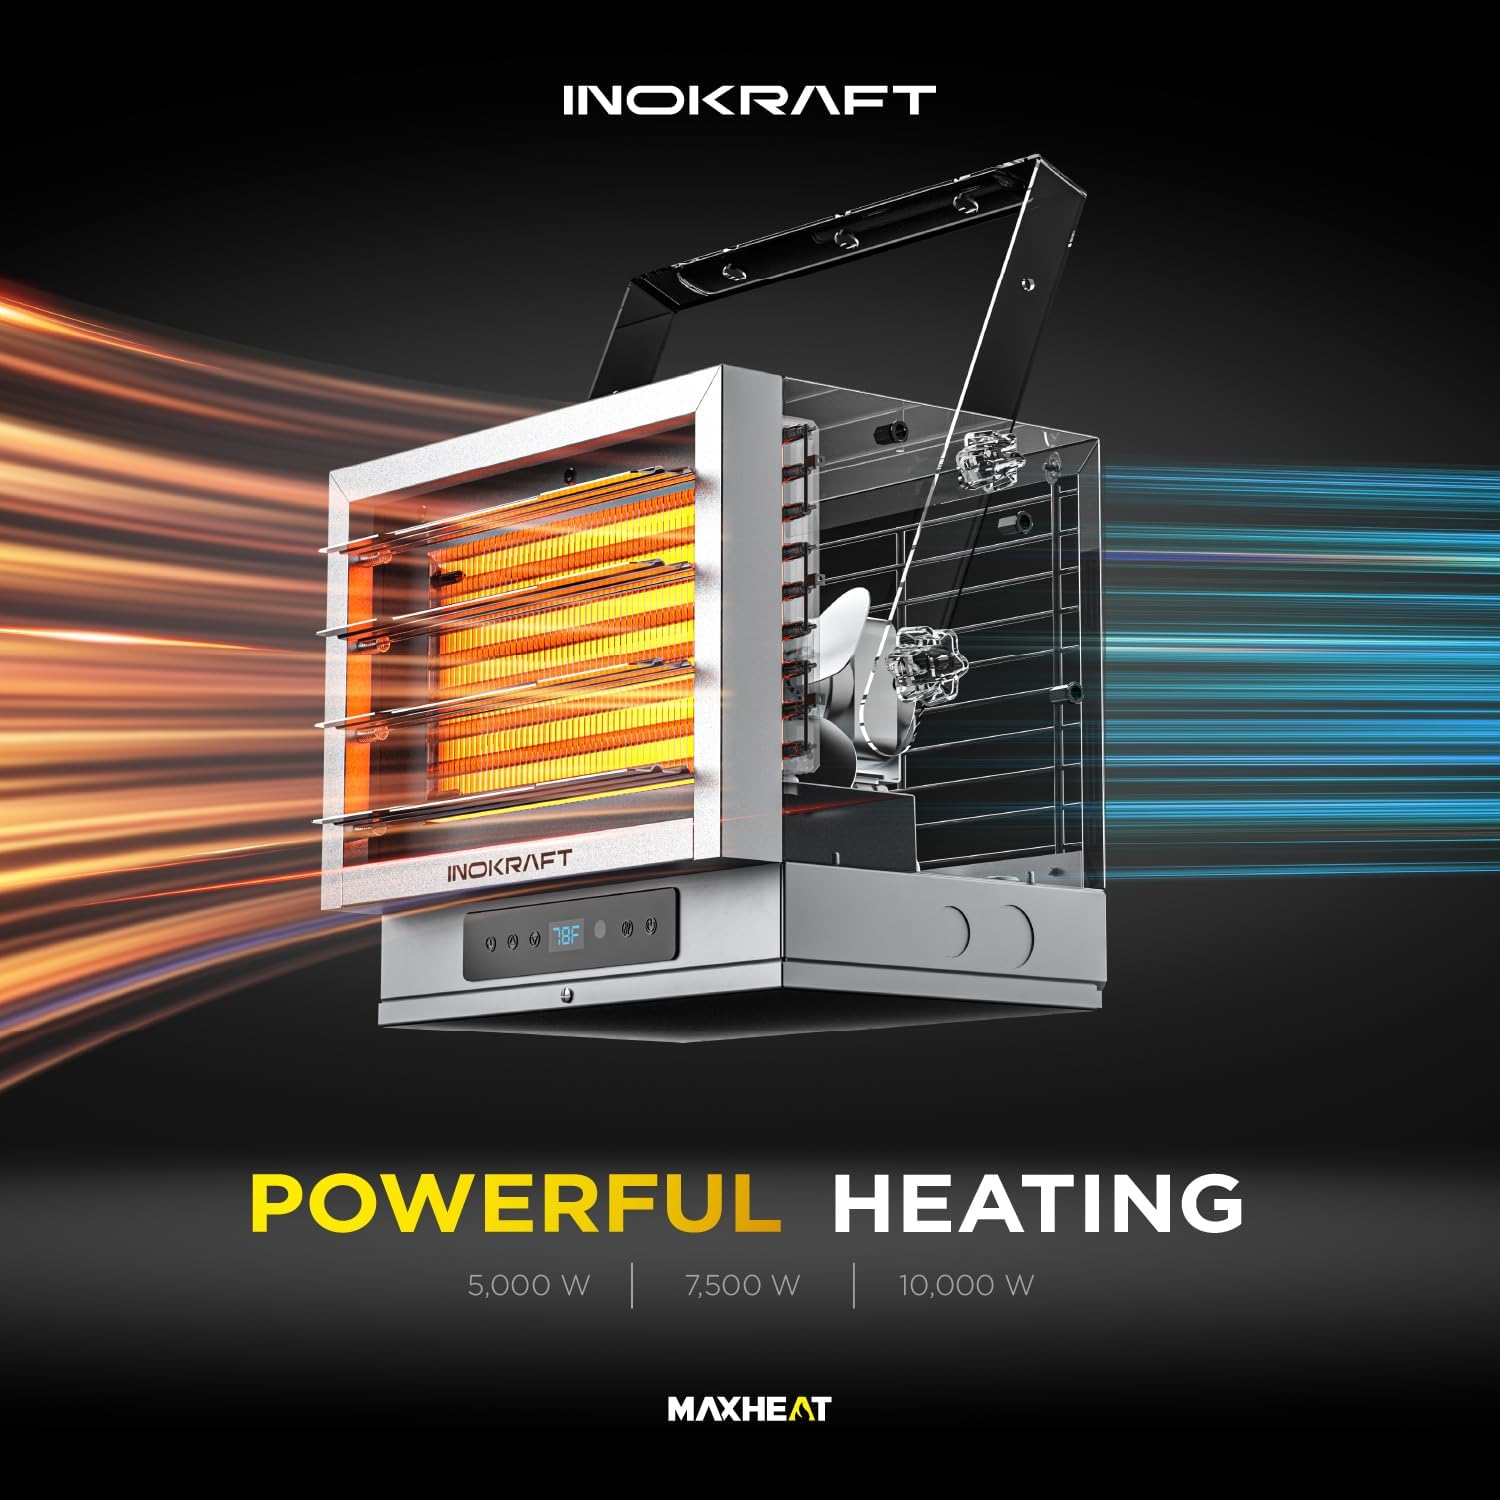
Image: A detailed view of the InoKraft heater's digital control panel, displaying the current temperature (78°F) and various control icons for timer, mode selection, temperature adjustment, and power.
4.2 Using the Built-in Thermostat:
Ensure the rear switch on the heater is set to position "I" for built-in thermostat control. When powered on, the heater will beep once and the display will light up.
- Press the Power button (⏻) to turn the unit on.
- Use the Up (▲) and Down (▼) buttons to set your desired temperature between 40°F and 99°F.
- Press the Mode Selection button (≡) to cycle through High, Low, ECO, and Fan Only modes.
- To set the timer, press the Timer button (⏱) and use the Up/Down buttons to select the desired duration (0-24 hours).
4.3 Using an External Thermostat:
If using an external thermostat, set the rear switch to position "II". The heater will then operate based on the external thermostat's settings. Heating modes (Low/High) can still be selected via the unit's control panel or remote.

Image: A diagram illustrating the selection switch for choosing between the built-in thermostat (position I) and an external thermostat (position II).
Operation Video:
Video: "Powerful Heating - InoKraft Electric Garage Heater with Plug". This video demonstrates the heater's powerful heating capabilities, quick heat-up time, and quiet operation, showcasing its effectiveness in a garage environment.
5. Maintenance
Regular maintenance ensures optimal performance and longevity of your heater. Always disconnect power before performing any maintenance.
- Cleaning: Periodically clean the exterior of the heater with a soft, damp cloth. Do not use abrasive cleaners or solvents.
- Fan Blades: Ensure the fan blades are free from dust and debris. The fan runs for 90 seconds after heating stops to cool itself down and prevent dust accumulation.
- Air Intake/Output: Keep the air intake and output grilles clear of obstructions to maintain proper airflow.
- Electrical Connections: Annually inspect all electrical connections for tightness and signs of wear. This should be done by a qualified electrician.
6. Troubleshooting
If you encounter issues with your InoKraft heater, refer to the following common problems and solutions:
| Problem | Possible Cause | Solution |
|---|---|---|
| Heater does not turn on. | No power, tripped circuit breaker, incorrect thermostat setting. | Check power supply and circuit breaker. Ensure the rear switch is set to "I" for built-in thermostat or "II" for external. |
| Heater has power but won't adjust temperature. | Incorrect thermostat mode selected. | Verify the rear switch is set to position "I" for built-in thermostat control. |
| Heater runs continuously or does not reach desired temperature. | Thermostat set too high/low, ECO mode active, poor insulation in space. | Adjust thermostat to desired temperature. Understand ECO mode behavior. Improve room insulation if necessary. |
| Overheat protection activates frequently. | Obstructed airflow, dirty fan/grilles, unit too close to combustibles. | Ensure clear airflow. Clean fan and grilles. Check and maintain proper clearances. |
7. Specifications
| Feature | Detail |
|---|---|
| Brand | InoKraft |
| Model | MH-E7500 |
| Heat Output | 7500 Watts |
| Voltage | 240 Volt |
| Amperage | 31.25 Amps |
| Heating Coverage | Up to 750 sq ft |
| Temperature Range | 40°F to 99°F |
| Timer | 1-24 Hours |
| Noise Level | Max 65 dB |
| Power Source | Corded Electric (NEMA 14-50P Plug, 8 AWG wire) |
| Mounting Type | Wall-Mounted, Ceiling-Mounted |
| Special Features | ECO Mode, Overheat Protection, Remote Control |
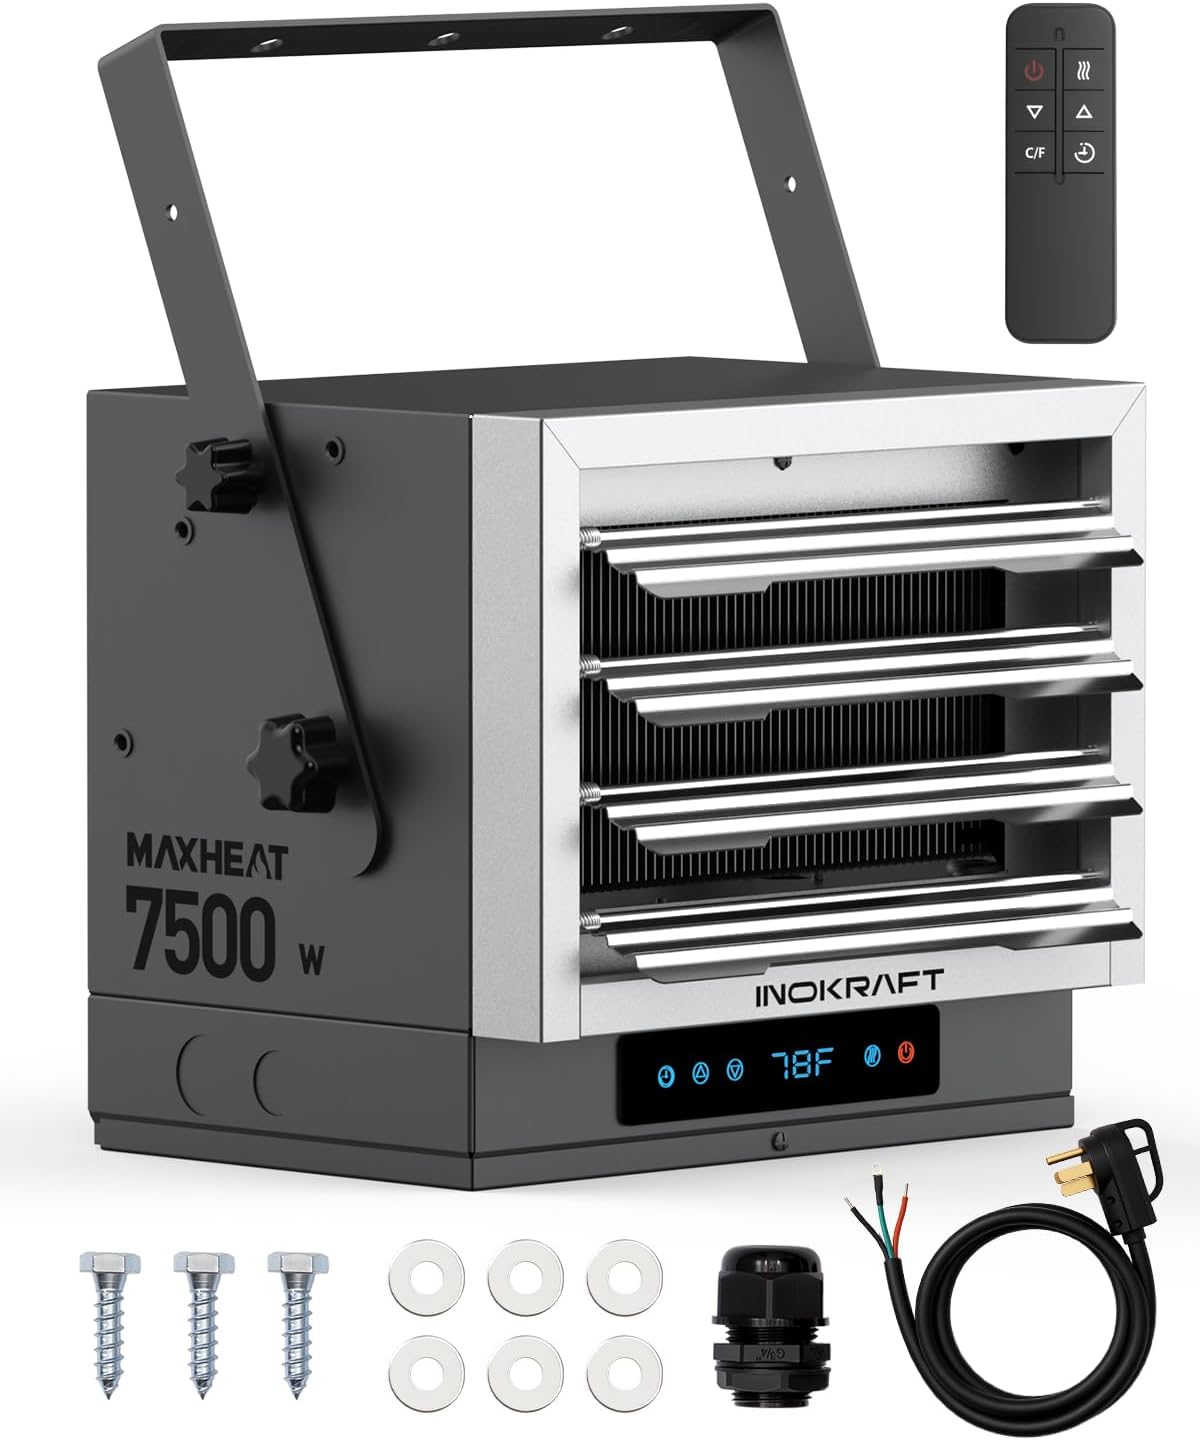
Image: The InoKraft 7500W Electric Garage Heater with dimensions (14 inches wide, 11 inches deep, 12.6 inches high) and power specifications (Voltage: 240V, Power: 7500W High Mode / 5000W Low Mode, Amps: 31.25A).
8. Warranty & Support
InoKraft is committed to providing high-quality products and excellent customer service.
- Warranty: This product comes with a 1-year hassle-free warranty.
- Customer Support: For any questions or assistance, please contact our Premium InoKraft Customer Support Team at support@inokraft.com.
- Online Resources: Find abundant printed guides, videos on Amazon and YouTube, and other resources to help you with your product.
- Register Your Product: Register your InoKraft HVAC product for priority customer support and exclusive product trial opportunities. Visit toolant.com/pages/inokraft-kraftsman-club for more details.

Image: Information on InoKraft customer support, including email address and a QR code for fast access to video guides and online resources.


