1. Introduction
This manual provides detailed instructions for the installation, operation, and maintenance of your kuayvan 11.5-inch Wireless CarPlay Screen with integrated 4K Dash Cam. Please read this manual thoroughly before using the product to ensure proper functionality and safety.
2. Package Contents
Verify that all items listed below are included in your package:
- 11.5-inch CarPlay Screen with Dash Cam x 1
- Car Charger Adapter x 1
- User Manual x 1
- Suction Cup Bracket x 1
- Vertical Bracket with Strong Adhesive x 1
- Rear 1080P Camera x 1
- 64GB SD Card x 1 (Pre-installed or included separately)

Image: The kuayvan 11.5-inch Wireless CarPlay Screen with its various components, including the main unit, dash cam, rear camera, mounting brackets, car charger, and 64GB SD card.
3. Product Overview
The kuayvan 11.5-inch Wireless CarPlay Screen is designed to enhance your driving experience with advanced features and connectivity.
Key Features:
- Large 11.5-inch HD Touchscreen: Provides a clear and expansive display for navigation and media.
- Wireless Apple CarPlay & Android Auto: Seamless smartphone integration for apps, music, and messages.
- 4K Dash Cam & 1080P Rear Camera: Records high-resolution video for front and rear views, with 178° full-viewing angle.
- 64GB Storage & DVR Loop Recording: Ensures continuous recording and overwrites old data when full.
- Mirror Link Functionality: Cast videos from your phone to the screen for an enhanced viewing experience.
- Multiple Audio Output Options: Built-in speakers, AUX, FM transmission, and Bluetooth 5.0 stereo.
- Voice Control: Compatible with Siri and Google Assistant for hands-free operation.
- Built-in 5GHz WiFi: For faster data transfer and mobile app control.
4. Setup & Installation
4.1 Mounting the Display Unit
The device offers multiple mounting options to suit your vehicle's dashboard or windshield.
- Dashboard Mount (Adhesive): Attach the vertical bracket with strong adhesive to a clean, flat surface on your dashboard. Ensure the surface is free of dust and oils for optimal adhesion.
- Windshield Mount (Suction Cup): Use the suction cup bracket for easy attachment and removal from your windshield. Clean the windshield surface before applying the suction cup.

Image: Illustration of different ways to mount the display unit, showing dashboard and windshield options.
4.2 Connecting Power
Connect the provided car charger adapter to your vehicle's 12V-24V power outlet (cigarette lighter socket) and then to the display unit. Ensure a secure connection.
4.3 Installing the Rear Camera
The 1080P rear camera provides a clear view for reversing. Follow these steps for installation:
- Mount the rear camera at the back of your vehicle, typically near the license plate.
- Route the camera cable discreetly through your vehicle's interior to the main display unit.
- Connect the red wire of the rear camera to the positive lead of your vehicle's reversing light. This enables automatic display switching when reversing.
- Connect the remaining cable to the AV-IN port on the main display unit.
4.4 Initial Setup
Upon first power-on, the device will prompt you to select a language and set the date/time. Follow the on-screen instructions.
5. Operating Instructions
5.1 Wireless Apple CarPlay & Android Auto
To connect your smartphone wirelessly:
- On the display unit, select either 'CarPlay' (for iOS) or 'Android Auto' (for Android).
- Enable Bluetooth on your smartphone.
- Search for and pair with the device's Bluetooth name (e.g., 'T85B-4CF7').
- Confirm the pairing on both your phone and the display unit. The device will automatically switch to the CarPlay or Android Auto interface.
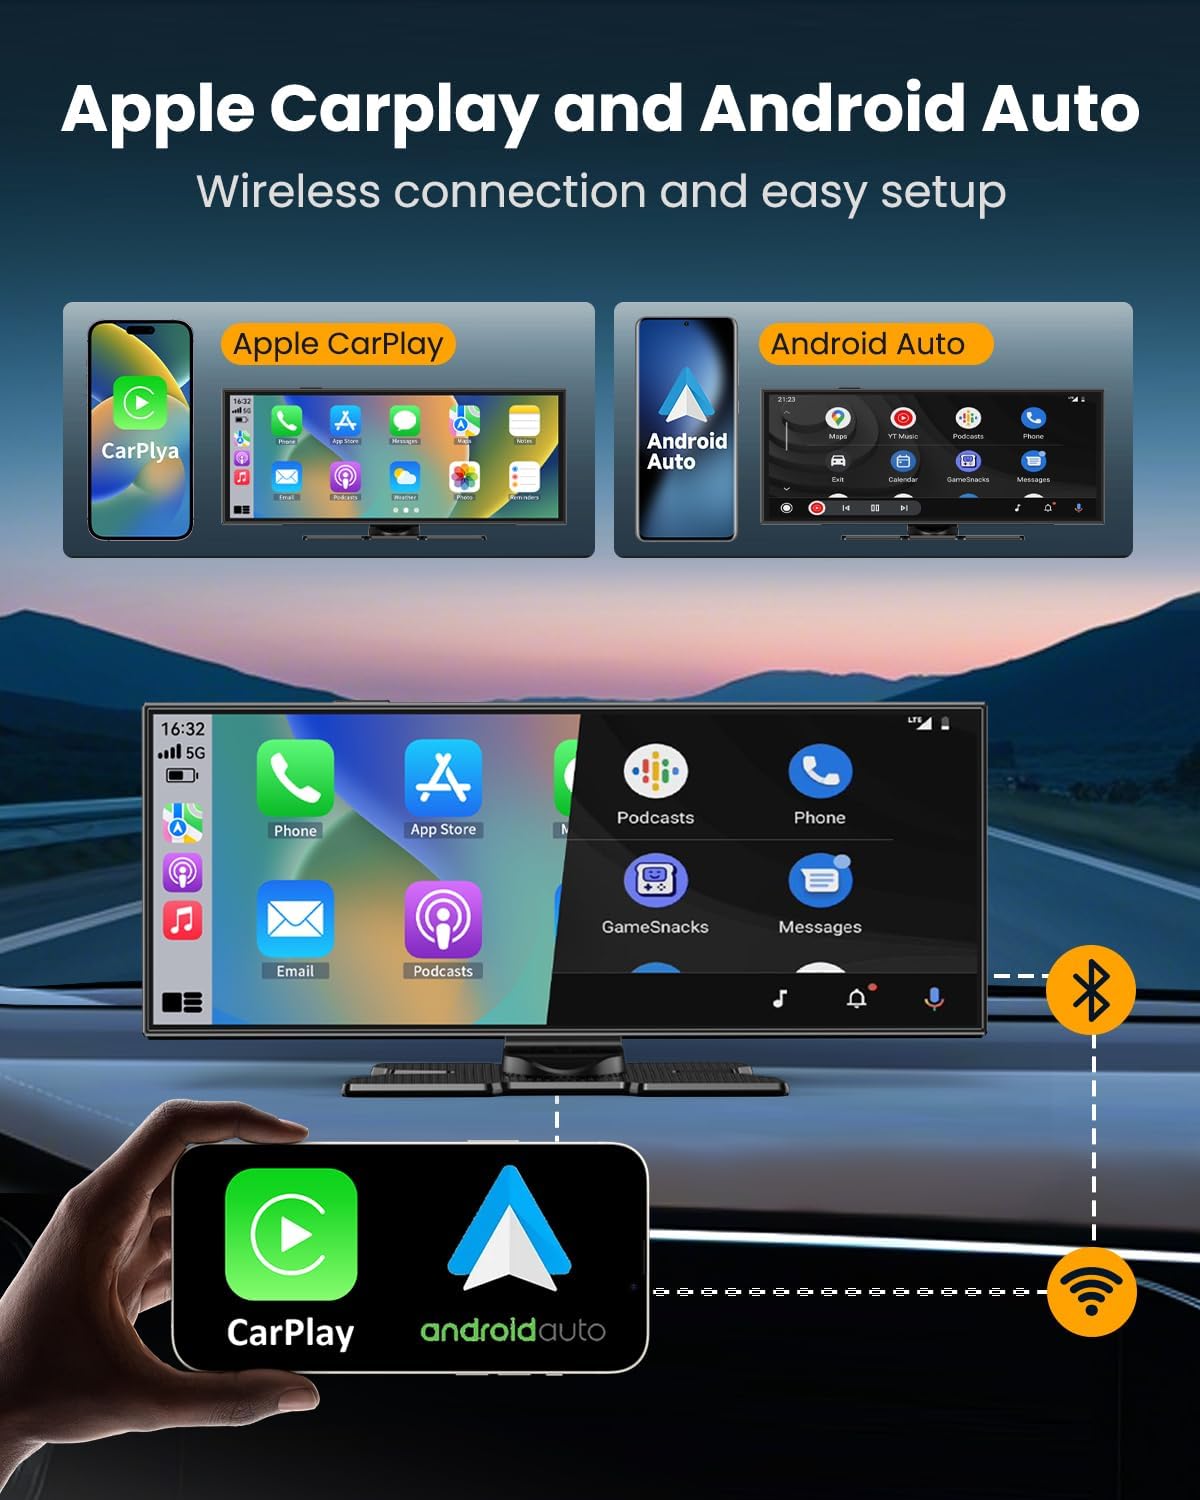
Image: Visual representation of wireless CarPlay and Android Auto connectivity.
5.2 Dash Cam Functionality
The integrated dash cam records continuously when the device is powered on.
- 4K Front Camera: Captures detailed footage of the road ahead.
- 1080P Rear Camera: Provides a clear view of the rear, especially useful for parking and reversing.
- Loop Recording: Automatically overwrites the oldest files when the 64GB SD card is full, ensuring continuous recording.
- Mobile App Control: Download the free mobile app (for Android or iOS) to preview, download, and share dash cam videos via the built-in 5GHz WiFi.

Image: Overview of the dual camera system and its recording capabilities.
5.3 Mirror Link
The Mirror Link function allows you to cast your smartphone's screen directly to the CarPlay display. This is ideal for viewing videos or other content.
- Select 'Airplay' (for iOS) or 'Super Link' (for Android) on the display unit.
- Follow the on-screen instructions to connect your phone via Wi-Fi or the dedicated app (for Android).

Image: Demonstration of the wireless mirror link feature.
5.4 Audio Output Options
The device offers flexible audio output to suit your preference:
- Built-in Speakers: For direct audio output from the device.
- AUX Cable: Connect the provided AUX cable from the display unit to your car's AUX input for original car audio quality.
- FM Transmission: Transmit audio wirelessly to your car's FM radio by tuning both devices to the same FM frequency.
- Bluetooth 5.0 Stereo: Connect to your car's Bluetooth system for high-quality wireless audio.

Image: Overview of the available audio output methods.
5.5 Voice Control
Utilize Siri or Google Assistant for hands-free control of navigation, calls, messages, and music. Simply activate the voice assistant through the CarPlay/Android Auto interface.
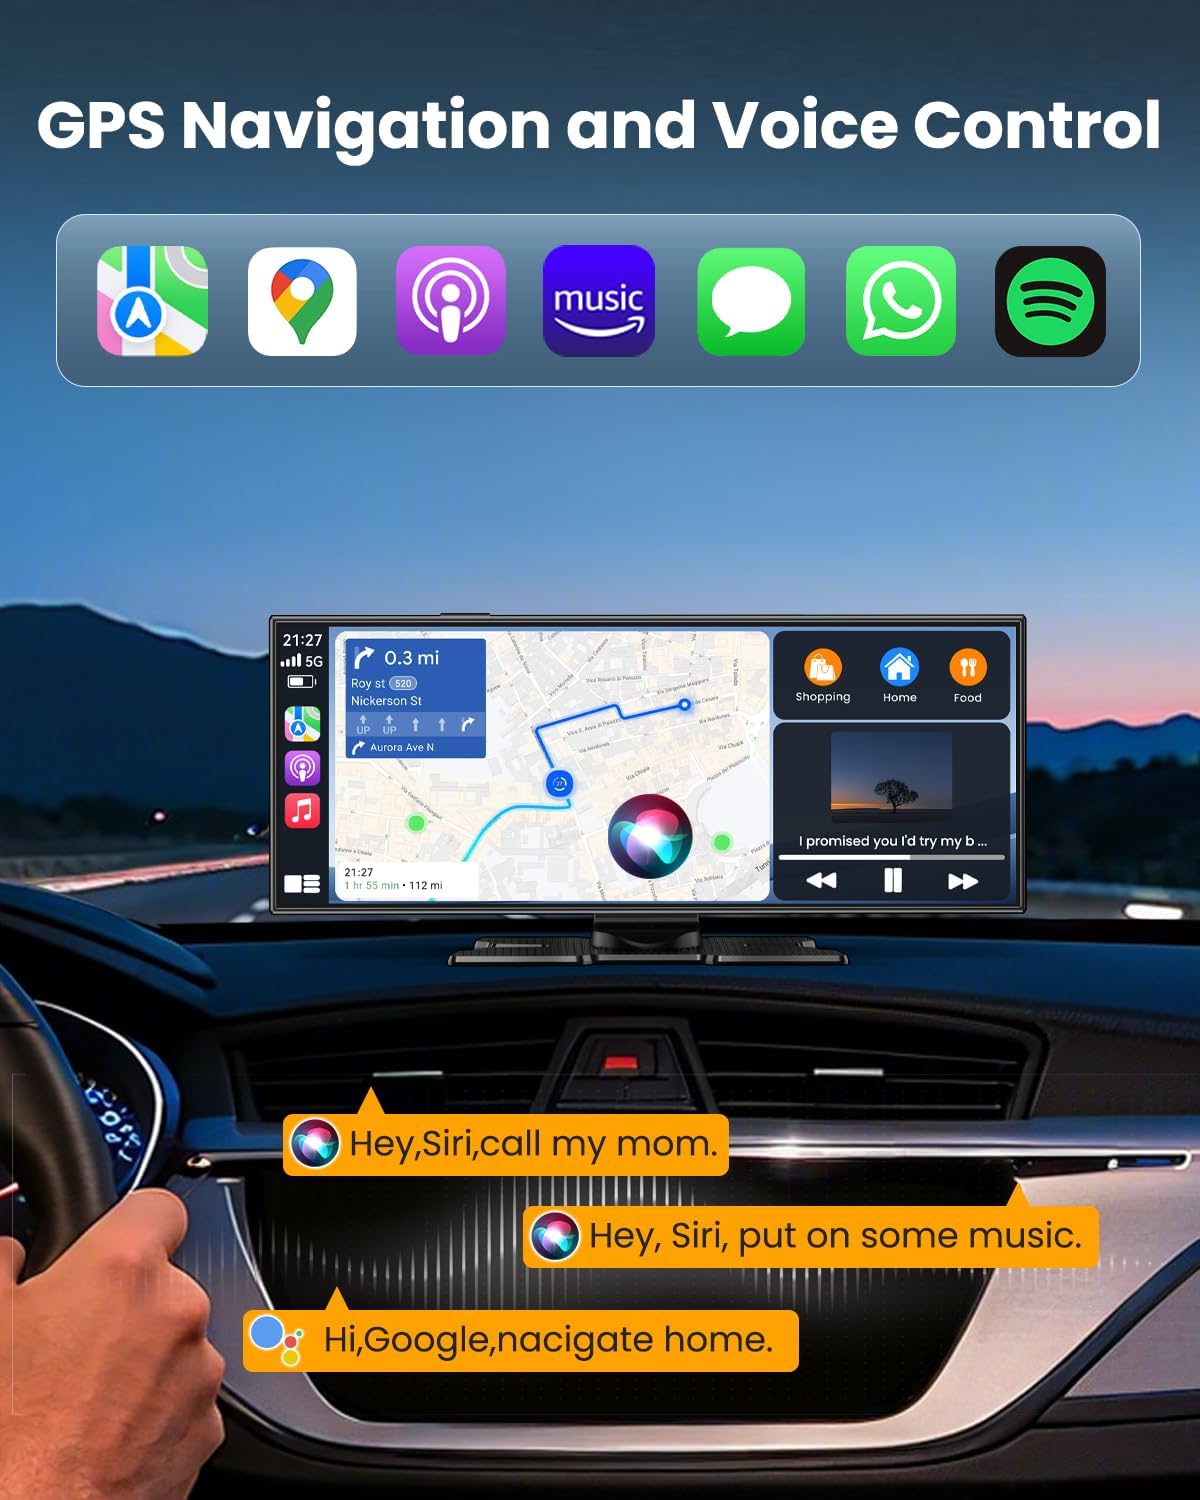
Image: Example of voice control functionality with navigation and music commands.
6. Maintenance
To ensure the longevity and optimal performance of your kuayvan CarPlay screen, follow these maintenance guidelines:
- Cleaning: Use a soft, dry, lint-free cloth to clean the screen. For stubborn smudges, lightly dampen the cloth with water or a screen-safe cleaner. Avoid harsh chemicals or abrasive materials.
- Temperature: Avoid exposing the device to extreme temperatures (very hot or very cold) for extended periods, as this can affect performance and lifespan.
- Cable Management: Ensure all cables are neatly routed and secured to prevent damage or interference with driving.
- Software Updates: Check the manufacturer's website or mobile app periodically for any available software updates to improve functionality and fix bugs.
7. Troubleshooting
If you encounter issues with your device, refer to the following common problems and solutions:
| Problem | Possible Cause | Solution |
|---|---|---|
| Device does not power on | Loose power connection, faulty car charger, vehicle power outlet issue. | Check power cable connection. Ensure car charger is functional. Test vehicle power outlet with another device. |
| CarPlay/Android Auto not connecting | Bluetooth not enabled, incorrect pairing, phone software issue. | Ensure Bluetooth is on and visible on your phone. Delete previous pairings and re-pair. Restart phone and device. |
| No audio output | Incorrect audio output setting, volume too low, faulty cable. | Check selected audio output mode (Built-in, AUX, FM, Bluetooth). Increase volume on both device and car stereo. Check AUX cable connection. |
| Dash Cam not recording | SD card full or faulty, recording function disabled. | Ensure 64GB SD card is inserted correctly. Format the SD card (this will erase all data). Check recording settings. |
| Rear camera not displaying | Loose cable connection, incorrect wiring to reverse light. | Check AV-IN cable connection. Verify the red wire is correctly connected to the reverse light. |
8. Specifications
| Feature | Detail |
|---|---|
| Screen Size | 11.5 Inches |
| Product Dimensions | 1.97 x 9.45 x 3.94 inches |
| Item Weight | 2.7 pounds (1.23 Kilograms) |
| Video Capture Resolution | 4K (Front), 1080P (Rear) |
| Connectivity Technology | Auxiliary, Bluetooth, USB, Wi-Fi (5GHz) |
| Special Features | Bluetooth, Touch Screen, Voice Control, Dash Cam, Backup Camera, Mirror Link |
| Control Method | App, Touch, Voice |
| Mounting Type | Dashboard Mount |
| Vehicle Service Type | Car, Minivan, RV |
| Model Number | P9 |
9. Warranty & Support
For warranty information and customer support, please refer to the documentation included with your product or contact kuayvan customer service directly. Specific warranty terms may vary.


