LOTAPGPVK AC DC 7-32V
LOTAPGPVK 2-Channel Tuya Smart Dry Contact Relay Module User Manual
Model: AC DC 7-32V | Brand: LOTAPGPVK
1. Introduction
This manual provides detailed instructions for the installation, operation, and maintenance of your LOTAPGPVK 2-Channel Tuya Smart Dry Contact Relay Module. This device is designed to enable smart control of various electrical appliances, such as lights, motors, and garage doors, through the Tuya/Smart Life application, a 433MHz remote control, and voice commands via compatible smart assistants like Amazon Alexa and Google Home.
2. Product Overview
2.1 Components
The LOTAPGPVK 2-Channel Tuya Smart Dry Contact Relay Module consists of a main circuit board housed within a protective casing. Key components include:
- Input Terminals: For connecting the power supply (AC/DC 7-32V or USB 5V).
- Output Terminals: Two sets of Normally Open (NO), Common (COM), and Normally Closed (NC) dry contact terminals for connecting controlled devices.
- Pairing Button: Used for initiating Zigbee pairing mode and manual control.
- LED Indicators: To display power status, network connection, and relay status.
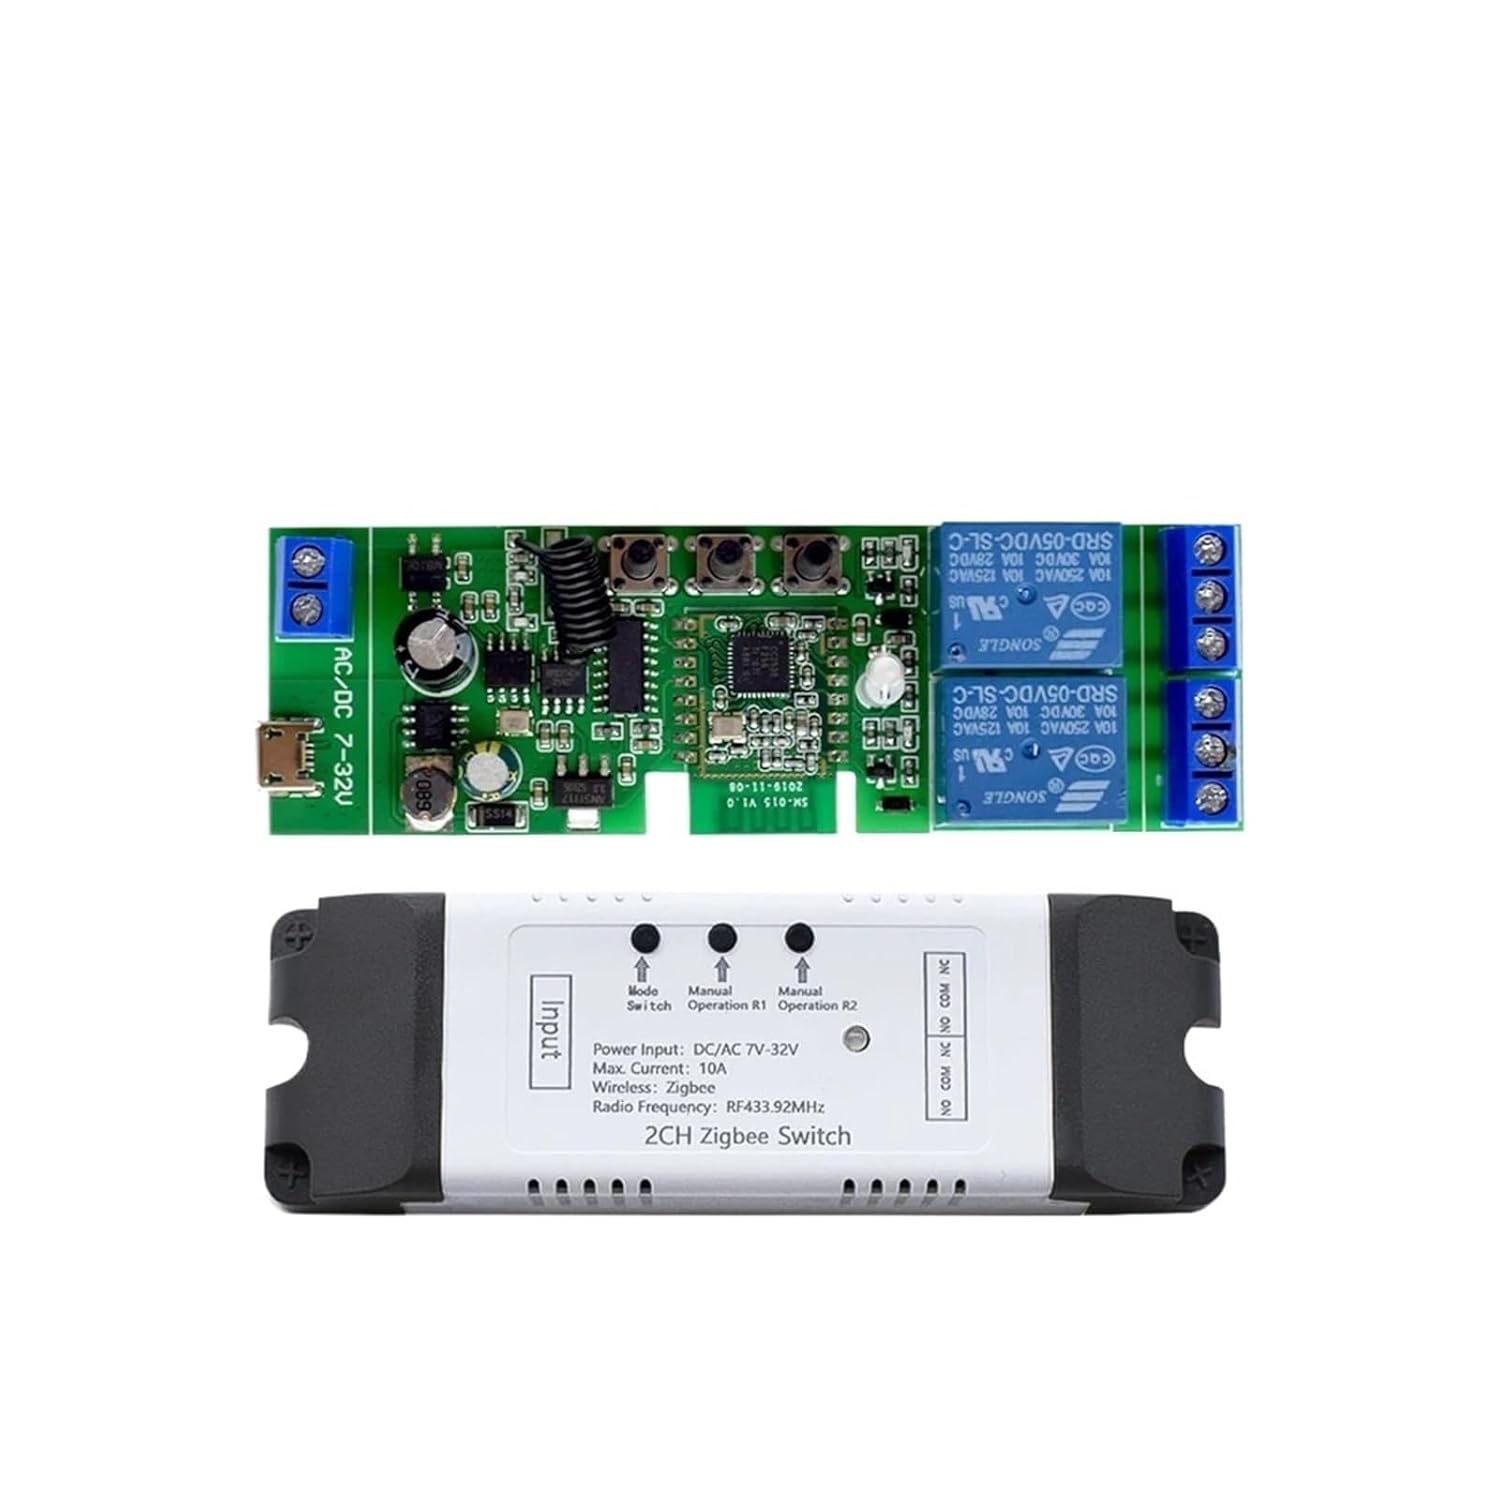
Figure 1: The LOTAPGPVK 2-Channel Tuya Smart Dry Contact Relay Module, showing both the internal circuit board and the external protective casing. The board features input terminals, output relays, and control buttons. The casing provides insulation and mounting points.
2.2 Features
- 2-Channel Control: Independently control two separate devices or circuits.
- Wide Voltage Input: Supports AC/DC 7-32V power input, with an additional USB 5V option.
- Zigbee Communication: Integrates with Zigbee gateways for smart home connectivity.
- Multiple Control Methods: Control via Tuya/Smart Life app, 433MHz RF remote, and voice commands (Alexa, Google Home).
- Dry Contact Output: Provides potential-free contacts suitable for various applications, including garage door openers, gate motors, and traditional switches.

Figure 2: The relay module enclosed in its casing, positioned next to a smartphone. This illustrates the module's compact design and its integration with a mobile application for smart control.
3. Setup
3.1 Safety Precautions
- Ensure power is disconnected before performing any wiring.
- Installation should be performed by a qualified electrician if you are unsure about electrical wiring.
- Do not exceed the maximum current rating of 10A per channel.
- Operate within the specified temperature and humidity ranges.
3.2 Wiring Instructions
The module supports two input voltage options and provides dry contact outputs.
- Power Input:
- Connect your AC/DC 7-32V power supply to the designated input terminals (labeled 'Input' or similar).
- Alternatively, for 5V operation, connect a USB power source to the micro-USB port.
- Load Connection (Dry Contact):
- Each channel (R1 and R2) has three terminals: Normally Open (NO), Common (COM), and Normally Closed (NC).
- For most applications (e.g., garage door buttons, light switches), connect the device's control wires to the NO and COM terminals. When the relay is activated, it will momentarily close the circuit between NO and COM.
- Ensure the load's voltage and current do not exceed the module's specifications (Max. 10A).

Figure 3: Top view of the relay module within its casing, highlighting the input power terminals and the two sets of dry contact output terminals (NO, COM, NC) for connecting external devices.
3.3 App Pairing (Tuya / Smart Life)
- Download App: Download and install the Tuya Smart or Smart Life app from your smartphone's app store. Register or log in to your account.
- Add Zigbee Gateway: Ensure you have a Tuya-compatible Zigbee gateway already set up and connected to your app. This module requires a Zigbee gateway to function.
- Enter Pairing Mode: Power on the relay module. Press and hold the pairing button on the module for approximately 5 seconds until the LED indicator starts blinking rapidly, indicating it is in pairing mode.
- Add Device in App: Open the Tuya Smart or Smart Life app, tap '+' to add a device, and select 'Auto Scan' or manually add a 'Switch (Zigbee)' or 'Relay (Zigbee)'. Follow the on-screen instructions to complete the pairing process.
- Rename Device: Once paired, you can rename the device and its channels for easier identification.
3.4 433MHz Remote Pairing (Optional)
If your module supports 433MHz RF control and you have a compatible remote:
- Enter Learning Mode: Briefly press the pairing button on the module once. The LED indicator will light up steadily.
- Press Remote Button: Within 5 seconds, press the desired button on your 433MHz remote control that you wish to associate with the relay channel. The module's LED will flash to confirm successful pairing.
- Repeat for other channels or remote buttons as needed.

Figure 4: An example of a 4-button 433MHz remote control that can be paired with the relay module for local control.
4. Operating Instructions
4.1 App Control
Once the module is paired with the Tuya Smart or Smart Life app:
- Open the app and select your relay module.
- You will see controls for each channel (R1, R2). Tap to toggle the relay state (ON/OFF).
- The app allows for scheduling, countdown timers, and integration into smart scenes with other Tuya-compatible devices.
4.2 Voice Control (Alexa / Google Home)
To enable voice control:
- Ensure your Tuya Smart or Smart Life account is linked to your Amazon Alexa or Google Home app.
- Discover new devices in your Alexa or Google Home app. Your relay module should appear.
- You can now use voice commands such as:
- "Alexa, turn on [Device Name] Channel 1."
- "Hey Google, turn off [Device Name] Channel 2."
4.3 Manual Control
The module may feature physical buttons for manual operation:
- A short press of the button associated with a channel will toggle its relay state.
- Refer to the markings on the module for specific button functions (e.g., 'Operation R1', 'Operation R2').
5. Maintenance
- Cleaning: Use a dry, soft cloth to clean the module. Do not use liquid cleaners or solvents.
- Firmware Updates: Periodically check the Tuya Smart or Smart Life app for available firmware updates to ensure optimal performance and security.
- Environmental Conditions: Ensure the module is kept within its specified operating temperature (-20°C to +70°C) and humidity (40% ~ 80% RH) ranges to prevent damage.
6. Troubleshooting
| Issue | Possible Cause | Solution |
|---|---|---|
| Module not powering on | Incorrect power connection; no power supply. | Verify power input (AC/DC 7-32V or USB 5V) is correctly connected and active. |
| Cannot pair with app | Not in pairing mode; no Zigbee gateway; weak Zigbee signal. | Ensure module LED is blinking rapidly. Confirm Zigbee gateway is online and nearby. Reset module and try again. |
| Relay not responding | Incorrect wiring; device not receiving commands. | Check load wiring to NO/COM terminals. Verify app/remote control is sending commands. Check module's LED status. |
| Voice control not working | Tuya/Smart Life account not linked to Alexa/Google Home; incorrect device name. | Ensure accounts are linked. Use the exact device name configured in the app. Try rediscovering devices. |
7. Specifications
| Parameter | Value |
|---|---|
| Brand | LOTAPGPVK |
| Model | AC DC 7-32V |
| Channels | 2 |
| Input Voltage | AC/DC 7-32V, USB 5V |
| Communication Method | Zigbee |
| Max. Current per Channel | 10A |
| Operating Humidity | 40% ~ 80% RH |
| Working Temperature | -20°C to +70°C |
| Control Methods | APP (Tuya/Smart Life), 433MHz Remote, Voice Control (Alexa, Google Home) |
| Package Dimensions | 0.39 x 0.39 x 0.39 inches |
| Mounting Type | Bolt-On Mount |

Figure 5: The product packaging, a printed manual (in Chinese), and the LOTAPGPVK 2-Channel Tuya Smart Dry Contact Relay Module, illustrating the complete product set.
8. Warranty and Support
This product comes with a standard manufacturer's warranty. For specific warranty details, technical support, or service inquiries, please refer to the contact information provided with your purchase or visit the LOTAPGPVK official support channels. Please retain your proof of purchase for warranty claims.
Related Documents - AC DC 7-32V
 |
Tuya Smart Switch WiFi Relay Module - 2CH, 7-32V/85-250V, App Control Detailed information on the Tuya Smart Home 2-channel WiFi relay switch module. Features app control via Smart Life/Tuya Smart, voice assistant compatibility, 433MHz RF remote control, and dual input voltage options (7-32V and 85-250V). |
 |
4-Channel Smart Relay Module User Manual User manual and installation guide for the 4-channel smart relay module, featuring WiFi 2.4GHz and 433MHz RF control, compatible with Tuya Smart App. |
 |
Yiweilian Smart WiFi & Bluetooth Relay Module (2/4-Way, 7-32V) Detailed information on the Yiweilian smart WiFi and Bluetooth relay module, featuring 2-way and 4-way configurations, 7-32V input, and multiple control modes for smart home applications. |
 |
Tuya Smart 7-32V Click Self-Locking Module User Guide Comprehensive guide to setting up and using the Tuya Smart 7-32V Click Self-Locking Module, including installation, app connection, features, and troubleshooting. |
 |
Smart WiFi Relay Switch Modules - 1/2/4 Channel, 5V-32V Input, App & RF Control Comprehensive guide to smart WiFi relay switch modules. Features include 1, 2, and 4 channel options, 5V to 32V input, remote control via Ewelink/Tuya Smart apps, and optional RF control. Learn about installation, setup, working modes, and troubleshooting. |
 |
1CH Zigbee Switch Module-DC Dry Contact Instruction Manual Comprehensive instruction manual for the 1CH Zigbee Switch Module-DC Dry Contact, covering technical specifications, installation, wiring diagrams, FAQ, and app usage for smart home automation. |
Ask a question about this manual
Ask about setup, troubleshooting, compatibility, parts, safety, or missing instructions. Manuals+ will review the question and use this page’s manual context to help answer it.