Introduction
This manual provides comprehensive instructions for the installation, operation, and maintenance of your STINGER Audio Party Pack 10-inch Subwoofer System. This system is designed to enhance your vehicle's audio experience with powerful bass. Please read this manual thoroughly before installation and use to ensure proper function and longevity of the product.
What's Included
- 10-inch Loaded Subwoofer Box Enclosure
- MT-700.1 Monoblock Amplifier with Remote Control Bass Knob
- Amp Wiring Kit
Product Features
- Subwoofer Enclosure: 700W RMS/1200W Max Single 10" Subwoofer Enclosure with CFL³ Technology Voice Coils, MLB Collar Technology, Fiber Matrix Paper Cones, and Durable Sound Material for longevity and distortion-free sound.
- Optimized Bass: Features Linear Surround Technology, a High-Density Ferrite Magnet, and Linear Long Throw Spider Suspension for maximum bass impact and increased output.
- Thermal and Magnetic Efficiency: Magnetic F.E.A. High-Efficiency Motor and Thermal Efficient Design via a Vented Motor ensure optimal performance and extended low-frequency response.
- Clarity and Precision: Dual VC (vent-cap) Design and Dual Cap Topology (D.C.T.) minimize distortion, providing tight, articulate bass and high-quality musical reproduction.
- Reliable Connections: Double Looped and Sleeved Lead Wires, Push Type Terminals, and a Bent Edge Enhanced Frame ensure secure connections and minimize resonance.
- Monoblock Amplifier: MT-700.1V2 Digital Class-D 700W RMS Monoblock Amplifier delivers high-quality power in a compact size, utilizing Robust Unregulated Power Supplies with advanced pulse width modulator integrated circuits and HEXFET Power MOSFETs for superior efficiency and reliability.
- Compact and Durable Amplifier: Small footprint and sturdy design with durable metal potentiometers for precise sound adjustments. Includes a Remote Bass Controller for convenient bass level control.
- Amp Wiring Kit: 4 Gauge OFC Amp Wiring Kit with full copper construction for efficient power transmission, quality twisted pair interconnects for noise-free signal transfer, and reliable overcurrent protection.
- Easy Setup: Designed for straightforward installation with all necessary components included.
Product Overview
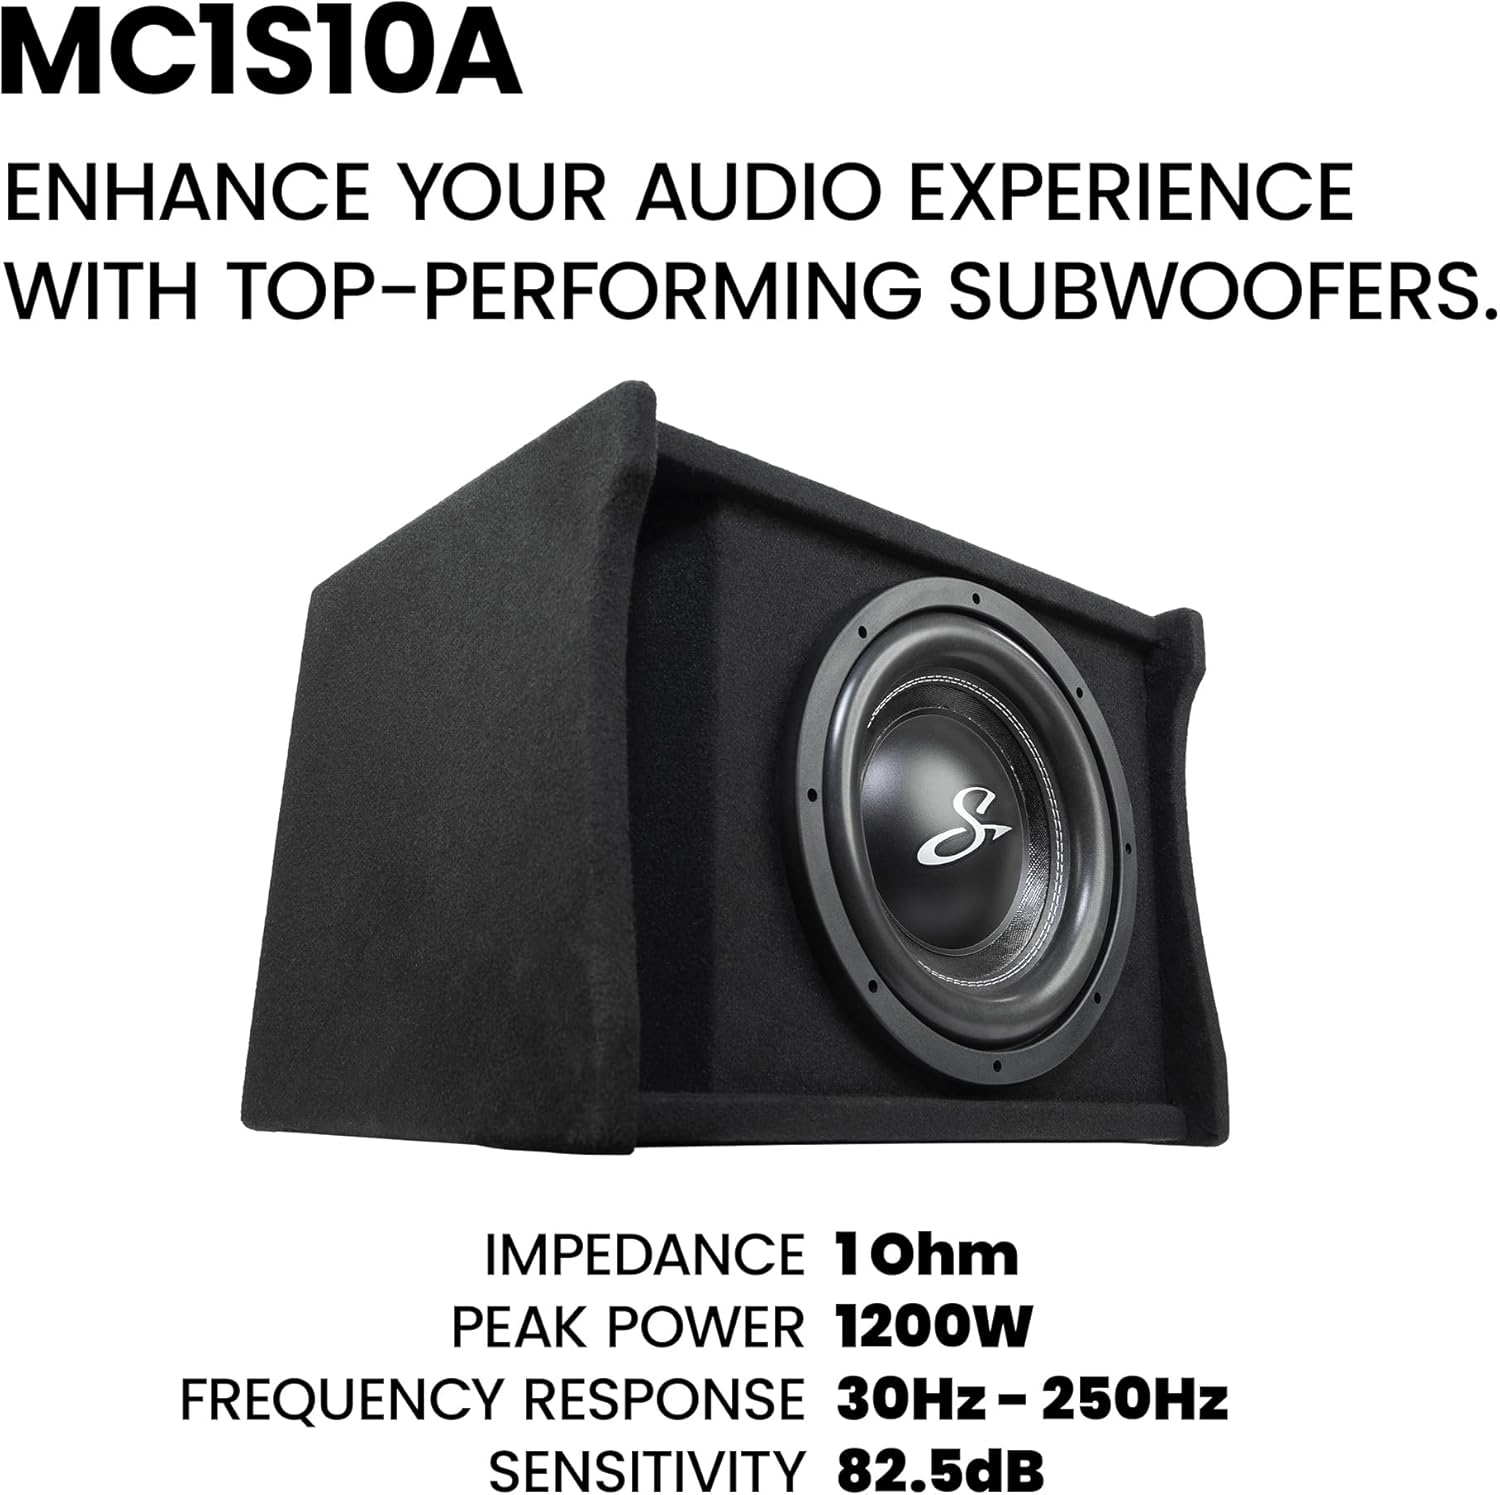
Image: STINGER 10-inch Subwoofer Enclosure. This image shows the front view of the loaded subwoofer enclosure.

Image: STINGER 10-inch Subwoofer Enclosure with key dimensions labeled. The enclosure measures 15.2 inches deep, 16.5 inches wide, and 13 inches high, weighing 38 lbs.

Image: STINGER MT-700.1 Monoblock Amplifier shown with the remote bass knob. The amplifier features a small footprint and direct insert terminals.

Image: Top view of the STINGER MT-700.1 Monoblock Amplifier showing input, gain, LPF, subsonic, frequency, and boost controls. Dimensions are 8.19 inches by 6.1 inches by 2.09 inches.

Image: STINGER 4 Gauge OFC Amp Wiring Kit components, including copper wire, fuses, fuse holders, and interconnects.
Setup and Installation
Professional installation is recommended for optimal performance and safety. Ensure the vehicle's battery is disconnected before beginning any wiring. Refer to your vehicle's service manual for specific wiring diagrams and safety precautions.
1. Power Wiring
- Connect the 4-gauge power wire from the amplifier wiring kit to the positive (+) terminal of the vehicle's battery. Install the inline fuse holder within 18 inches of the battery.
- Route the power wire safely through the firewall to the amplifier's mounting location, avoiding sharp edges and moving parts.
- Connect the power wire to the +12V terminal on the MT-700.1 amplifier.
- Connect the ground wire from the amplifier wiring kit to a clean, unpainted metal surface on the vehicle chassis. Ensure a solid connection for optimal performance and safety. Connect the other end to the GND terminal on the amplifier.
- Connect the remote turn-on wire from your head unit (or other switched 12V source) to the REM terminal on the amplifier.
2. Signal Input
- Connect the RCA interconnect cables from your head unit's subwoofer output (or full-range output if no dedicated subwoofer output is available) to the INPUT RCA jacks on the MT-700.1 amplifier.
3. Speaker Output
- Connect the speaker wires from the MT-700.1 amplifier's MONO OUTPUT terminals to the terminals on the 10-inch subwoofer enclosure. Ensure correct polarity (+ to + and - to -).
4. Remote Bass Knob
- Connect the remote bass knob to the REMOTE port on the amplifier using the provided cable. Mount the bass knob in a convenient location for the driver.
Operating Instructions
Initial Power-Up and Settings
- After all connections are made and verified, reconnect the vehicle's battery.
- Turn on your vehicle's ignition and head unit. The amplifier's power indicator should illuminate.
- Gain Setting: Start with the amplifier's GAIN control set to minimum. Play a familiar music track with strong bass. Slowly increase the GAIN until you hear distortion, then back off slightly. This matches the amplifier's input sensitivity to your head unit's output.
- Low Pass Filter (LPF): Set the LPF to filter out high frequencies from the subwoofer. A common starting point is 80Hz. Adjust to blend smoothly with your main speakers.
- Subsonic Filter: The MT-700.1 amplifier includes a SUBSONIC filter. For ported enclosures like the included subwoofer box, setting the subsonic filter slightly below the enclosure's tuning frequency (typically around 30-40Hz) can protect the subwoofer from over-excursion.
- Bass Boost: Use the BASS BOOST control sparingly. Excessive bass boost can cause distortion and damage to the subwoofer. Start at 0dB and increase only if needed for a desired bass response.
- Remote Bass Knob: The remote bass knob allows for convenient adjustment of the subwoofer's output level from the driver's seat.
Break-in Period
Allow a break-in period of approximately 10-20 hours of normal listening before operating the subwoofer at high volumes. This allows the subwoofer's suspension to loosen and perform optimally.
Maintenance
- Regular Cleaning: Keep the amplifier and subwoofer enclosure clean and free of dust and debris. Use a soft, dry cloth.
- Check Connections: Periodically check all power, ground, signal, and speaker connections to ensure they are secure and free from corrosion.
- Ventilation: Ensure the amplifier has adequate ventilation to prevent overheating. Do not block cooling fins.
- Fuse Replacement: If a fuse blows, replace it only with a fuse of the same type and rating as specified in the amplifier's documentation.
Troubleshooting
| Problem | Possible Cause | Solution |
|---|---|---|
| No Sound from Subwoofer | No power to amplifier; RCA cables disconnected; Speaker wires disconnected or incorrect polarity; Amplifier in protection mode. | Check power and ground connections, fuses. Verify RCA and speaker connections. Check amplifier status indicator. |
| Distorted Sound | Gain set too high; Bass boost too high; Incorrect LPF setting; Damaged speaker or amplifier. | Reduce gain and bass boost. Adjust LPF. Inspect speaker and amplifier for damage. |
| Amplifier Overheating | Insufficient ventilation; Impedance too low; Prolonged high-volume operation. | Ensure proper airflow around amplifier. Verify speaker impedance. Reduce volume or allow cooling time. |
| Humming or Noise | Poor ground connection; RCA cables too close to power wires; Ground loop. | Check ground connection. Reroute RCA cables away from power wires. Install a ground loop isolator if necessary. |
Specifications
| Feature | Specification |
|---|---|
| Brand | STINGER |
| Model Name | SA10PP |
| Subwoofer Diameter | 10 Inches |
| Speaker Maximum Output Power | 1200 Watts (Peak) |
| Amplifier RMS Power | 700 Watts |
| Impedance | 1 Ohm |
| Connectivity Technology | RCA (Amplifier) / Wired (Subwoofer) |
| Mounting Type | Floor Mount (Enclosure) |
| Additional Features | Bass Boost, Remote Bass Knob |
| Item Dimensions (D x W x H) | 18.1"D x 20.5"W x 15.2"H |
| Item Weight | 17.24 Kilograms |
| Compatible Vehicle Type | Universal |
| UPC | 609098908863 |
Official Product Videos
Introducing Stinger Audio MT Series Amplifiers
Video: An introductory overview of the Stinger Audio MT Series Amplifiers, highlighting their design and features.
Stinger Audio MT Series Monoblock Amplifiers Feature Video
Video: A detailed feature presentation of the Stinger Audio MT Series Monoblock Amplifiers, showcasing their capabilities and technology.
Warranty Information
This product is covered by a 1 Year Manufacturer Warranty. For specific details regarding warranty claims and service, please refer to the warranty card included with your product or contact STINGER customer support.
Support
For technical assistance, troubleshooting, or further inquiries, please visit the official STINGER website or contact their customer support department. Keep your purchase receipt and product model number (SA10PP) handy when seeking support.


