1. Introduction
This manual provides essential instructions for the safe and efficient operation, installation, and maintenance of your VEVOR Level 2 EV Charger. Please read this manual thoroughly before using the product and retain it for future reference.
1.1 Product Overview
The VEVOR Level 2 EV Charger is a portable electric vehicle charging station designed for home use. It offers 32 Amp adjustable current at 240V, featuring a 25 ft charging cable with a NEMA 14-50P plug and an SAE J1772 connector. The unit includes an LCD display for real-time charging data and is built with robust safety features and an IP66 waterproof rating for outdoor use.

Image: VEVOR Level 2 EV Charger, showing the main unit, J1772 connector, NEMA 14-50P plug, control box holder, screws, and carrying bag.
1.2 What's in the Box
- 1 x EV Charger (Control Box with Cable and Connector)
- 1 x Carrying Bag
- 1 x Control Box Holder
- 4 x Screws
- 1 x User Manual (this document)
2. Safety Instructions
Always adhere to the following safety guidelines to prevent injury, damage to the product, or damage to your vehicle.
- Ensure the NEMA 14-50 outlet is properly installed by a qualified electrician and meets all local electrical codes.
- Do not use the charger if the cable, plug, or EV connector is damaged.
- Do not attempt to open, disassemble, or modify the charger.
- Keep the charger away from flammable, explosive, or corrosive materials.
- Do not immerse the charger in water. While it has an IP66 rating, direct submersion is not recommended.
- Ensure the charging cable is not pinched, stepped on, or subjected to excessive tension.
- Supervise children and pets around the charging area.
- Disconnect the charger from the power source before cleaning or performing any maintenance.
2.1 Integrated Safety Features
The VEVOR EV Charger is equipped with an intelligent chip providing comprehensive protection:
- Surge Protection
- Leakage Protection
- Grounding Protection
- Overvoltage Protection
- Undervoltage Protection
- Overcurrent Protection
- Overheating Protection
- Overcharging Protection

Image: Diagram showing the various intelligent security protection features of the VEVOR EV charger, including surge, leakage, grounding, overvoltage, undervoltage, overcharge, overcurrent, and overheat protection.
3. Setup and Installation
The VEVOR Level 2 EV Charger is designed for portable use but can also be mounted for convenience.
3.1 Power Requirements
- Requires a dedicated 240V NEMA 14-50 outlet.
- Ensure the circuit breaker for the outlet is rated appropriately (e.g., 50 Amp breaker for a 32 Amp charger). Consult a qualified electrician if unsure.

Image: Illustration of a NEMA 14-50P outlet, indicating it provides Level 2 - 240V power for the EV charger.
3.2 Mounting the Control Box Holder (Optional)
For a more permanent setup, you can mount the control box holder to a wall.
- Choose a suitable location near your NEMA 14-50 outlet, ensuring the 25 ft cable can comfortably reach your vehicle's charging port.
- Use the provided screws to secure the control box holder to a sturdy wall surface.
- Place the control box into the mounted holder.

Image: The VEVOR EV charger control box mounted on a wall, with the charging cable neatly coiled around it, demonstrating a typical installation.
4. Operating Instructions
Follow these steps to charge your electric vehicle.
4.1 Initial Connection
- Ensure your vehicle is parked and turned off.
- Plug the NEMA 14-50P plug into the dedicated 240V outlet. The charger's LCD screen will illuminate.
- The charger will perform a self-check. Once "Ready" is displayed on the LCD, it is ready for use.
4.2 Charging Your Vehicle
- Open your vehicle's charging port cover.
- Firmly insert the SAE J1772 connector into your vehicle's charging port. You should hear a click indicating it's securely latched.
- The charger will automatically begin charging. The LCD screen will display real-time charging information.
4.3 Understanding the LCD Display
The bright LCD display provides critical charging information at a glance:
- 1. Temperature: Displays the internal temperature of the control box.
- 2. Work Status: Indicates the current operational state (e.g., "Ready", "Charging", "Error").
- 3. Charging Current: Shows the current (in Amps) being delivered to the vehicle.
- 4. Charging Time: Displays the elapsed charging duration.
- 5. Electricity Consumption: Shows the total energy (in kWh) delivered during the current session.
- 6. Real-Time Voltage: Displays the current voltage.
- 7. Real-Time Current: Displays the instantaneous current.
- 8. Real-Time Power: Displays the instantaneous power (in kW).

Image: Close-up of the VEVOR EV charger's LCD display, with numbered labels pointing to temperature, work status, charging current, charging time, electricity consumption, real-time voltage, real-time current, and real-time power.
4.4 Adjusting Charging Current and Scheduling
The charger allows for adjustment of the charging current and scheduling of charging times. Refer to the specific buttons on the control box for these functions. Typically, a button labeled 'A' or similar is used to adjust current, and a clock icon button for scheduling.
- Current Adjustment: Press the current adjustment button to cycle through available amperage settings (e.g., 16A, 24A, 32A). Select an amperage suitable for your vehicle and electrical circuit.
- Charging Schedule: Use the schedule button to set a delayed start time for charging, typically from 1 to 12 hours in advance.
4.5 Ending a Charging Session
- Once charging is complete, or if you need to stop charging, unlock your vehicle's charging port (if applicable).
- Press the release button on the SAE J1772 connector and carefully pull it out from the vehicle's charging port.
- Disconnect the NEMA 14-50P plug from the wall outlet if you are finished charging or storing the unit.
- Store the cable and connector properly to prevent damage.
5. Compatibility
The VEVOR Level 2 EV Charger uses the SAE J1772 connector, making it compatible with most electric vehicles (EVs) and plug-in hybrid electric vehicles (PHEVs) in North America.
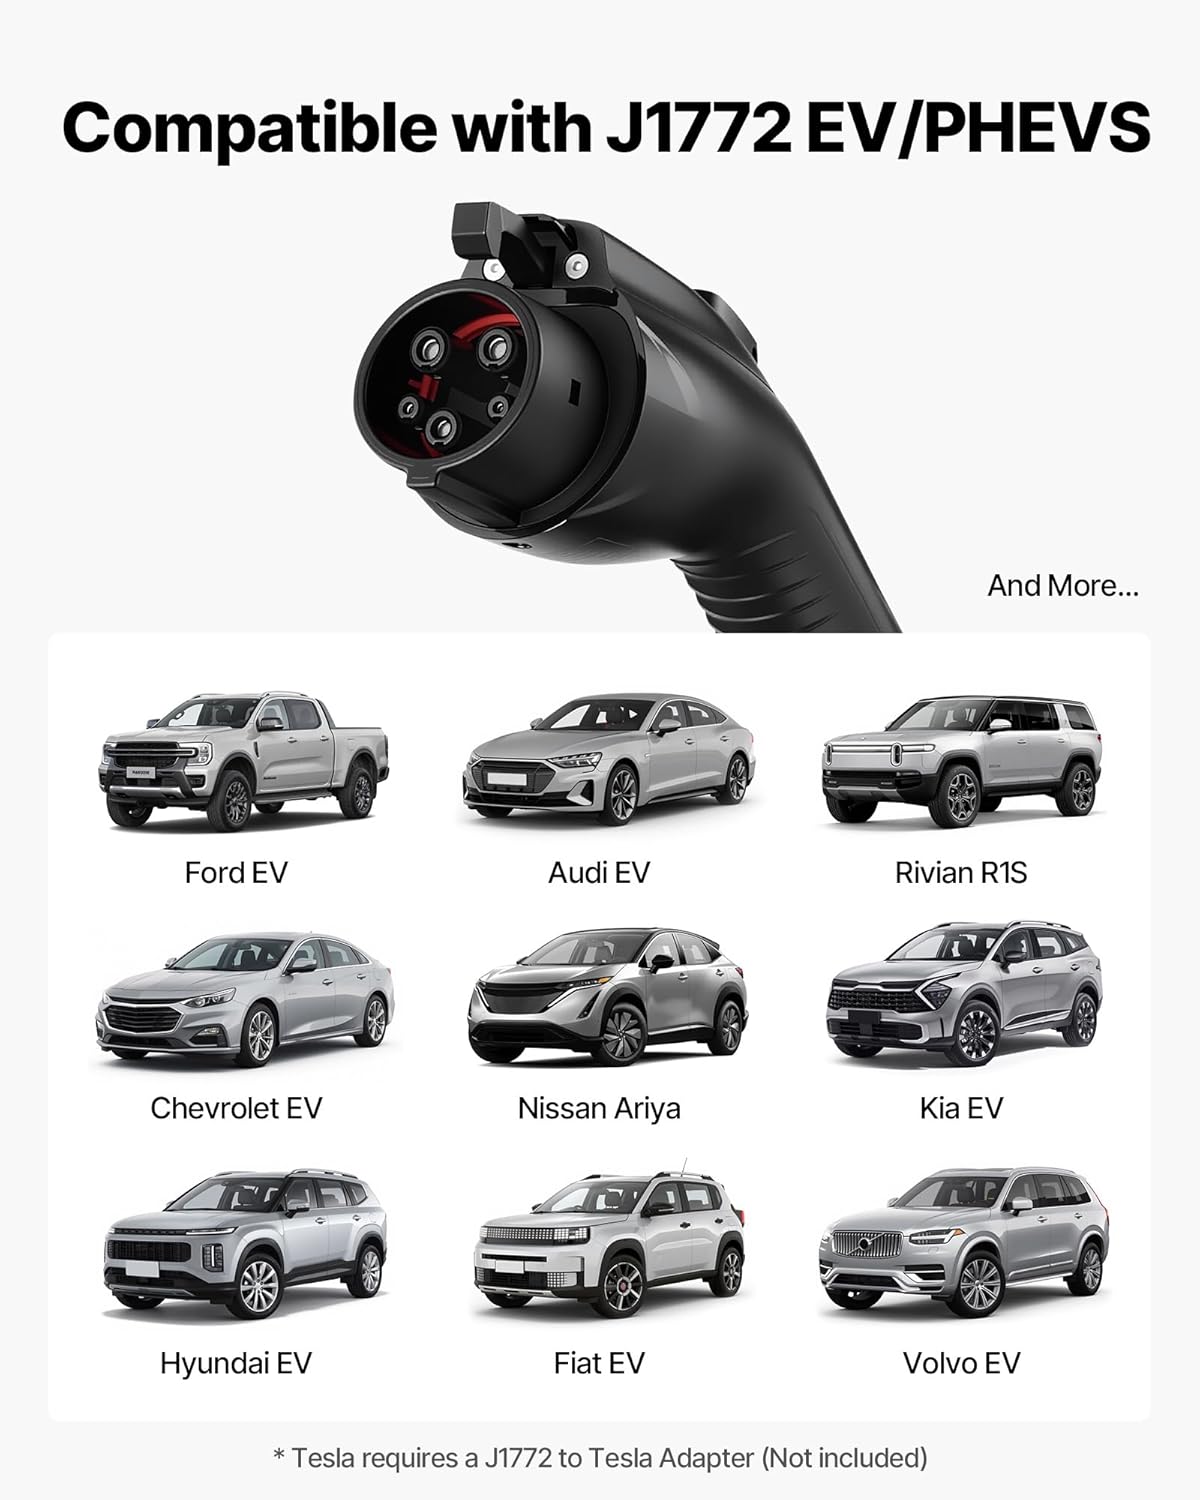
Image: The J1772 EV connector shown alongside various compatible electric vehicle models such as Ford EV, Audi EV, Rivian R1S, Chevrolet EV, Nissan Ariya, Kia EV, Hyundai EV, Fiat EV, and Volvo EV.
Note: For Tesla vehicles, a J1772 to Tesla adapter (not included) is required.

Image: An illustration demonstrating a Tesla vehicle being charged using the J1772 connector with an additional Tesla adapter, highlighting the need for this accessory.
6. Maintenance
Regular maintenance ensures the longevity and safe operation of your EV charger.
- Cleaning: Wipe the control box and cables with a soft, damp cloth. Do not use harsh chemicals or abrasive cleaners. Ensure the charger is unplugged before cleaning.
- Inspection: Periodically inspect the charging cable, NEMA 14-50P plug, and J1772 connector for any signs of wear, damage, or corrosion. If any damage is found, discontinue use immediately and contact customer support.
- Storage: When not in use, store the charger in a dry, clean place. Use the provided carrying bag for portable storage. Avoid coiling the cable too tightly.
7. Troubleshooting
If you encounter issues with your VEVOR EV Charger, refer to the following common troubleshooting steps:
| Problem | Possible Cause | Solution |
|---|---|---|
| Charger does not power on. | No power from outlet; faulty outlet; charger malfunction. |
|
| Charging does not start. | EV connector not fully inserted; vehicle not ready to charge; charger error. |
|
| LCD displays an error code. | Internal fault; external issue (e.g., over-temperature). |
|
| Slow charging speed. | Current setting too low; vehicle limitation. |
|
If these steps do not resolve the issue, please contact VEVOR customer support.
8. Specifications
Detailed technical specifications for the VEVOR Level 2 EV Charger (Model EV-ACS3201U/K3).
| Feature | Specification |
|---|---|
| Model | EV-ACS3201U/K3 |
| Rated Voltage | AC 240V 60Hz (Level 2) |
| Rated Current | 32A (Adjustable) |
| Power Range | 1.44 kW – 7.68 kW |
| Cable Length | 25 ft / 7.6 m |
| Waterproof Rating | IP66 |
| Operating Temperature | -22°F to 122°F / -30°C to 50°C |
| Net Weight | 9.3 lbs / 4.2 kg |
| Product Dimensions (Control Box) | 9.7 x 3.8 x 2.3 in / 247 x 97 x 59 mm |
| Connector Type | SAE J1772 |
| Input Plug | NEMA 14-50P |

Image: A visual summary of the VEVOR EV charger's specifications, including cable length, rated voltage, current, power range, waterproof rating, operating temperature, weight, and dimensions.
9. Warranty and Support
9.1 Limited Warranty
VEVOR products are designed and built to high-quality standards. This product comes with a limited warranty against defects in materials and workmanship under normal use. Please refer to the warranty card included with your product or visit the official VEVOR website for detailed warranty terms and conditions.
9.2 Customer Support
For technical assistance, troubleshooting, or warranty claims, please contact VEVOR customer support. Have your product model number (EV-ACS3201U/K3) and purchase information ready when contacting support.
You can typically find contact information on the VEVOR official website or through your purchase platform.


