1. Introduction
The Gmatrix A-TV18+ is a universal remote control designed for ease of use, particularly for seniors. It features large, clearly labeled buttons and simplified functionality to control your television. This manual provides detailed instructions for setting up, operating, and maintaining your remote control.
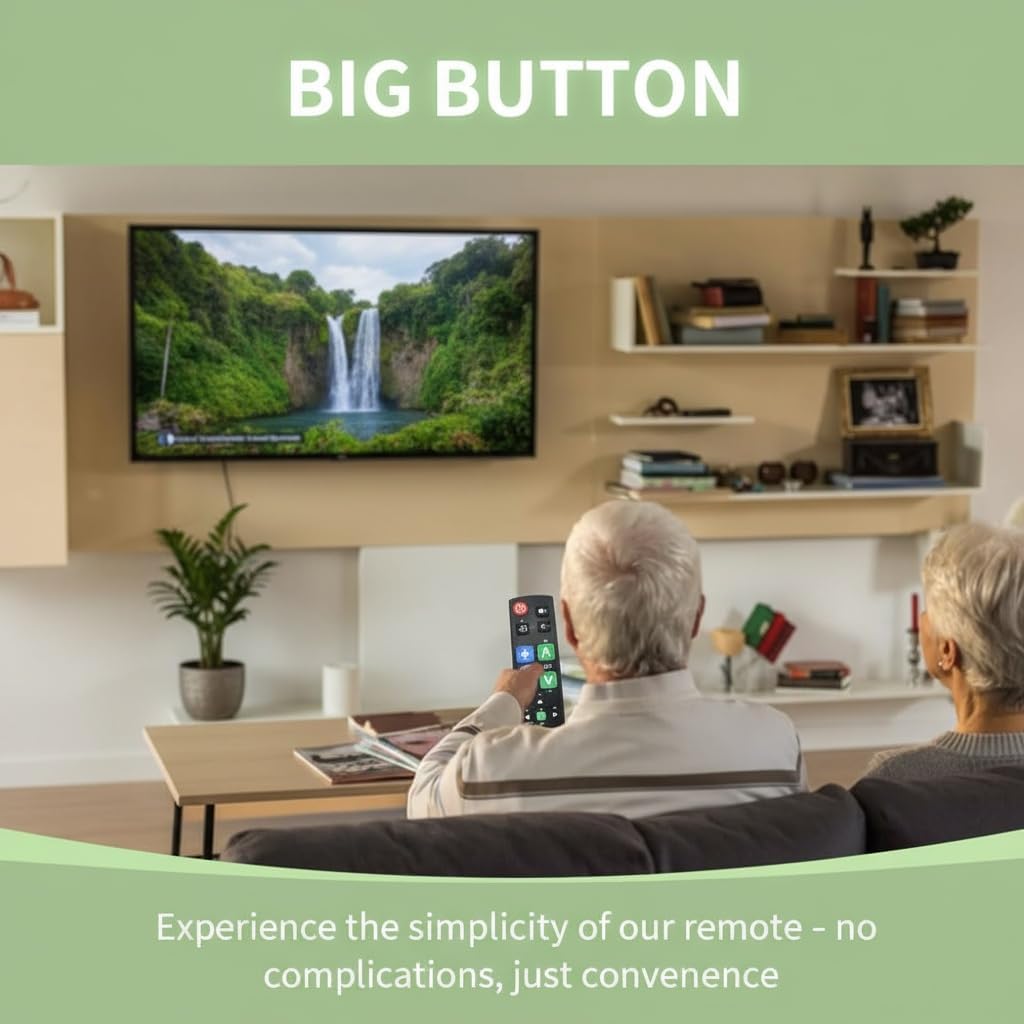
Image: An older couple comfortably using the Gmatrix A-TV18+ remote control to watch television, highlighting its user-friendly design.

Image: The Gmatrix A-TV18+ remote control displayed alongside a modern television, illustrating its simple and direct usability.
2. Compatibility
The A-TV18+ universal remote is compatible with a wide range of major TV brands. It is designed to work with one TV, cable box, or STB at a time. Please refer to the compatibility list below to ensure your device is supported.

Image: A visual compatibility list indicating various TV brands supported by the Gmatrix A-TV18+ remote, including Samsung, LG, Sony, TCL, Hisense, Vizio, Roku-TV, Panasonic, Philips, Sharp, Toshiba, Sanyo, Magnavox, and Element. It also clearly states that it is not compatible with Cable Box, Fire Stick, Roku Stick, DVD/Blu-ray, or TV brands not explicitly listed.
Supported TV Brands include: SAMSUNG, LG, SONY, TCL, HISENSE, VIZIO, ROKU-TV, PANASONIC, PHILIPS, SHARP, TOSHIBA, SANYO, MAGNAVOX, ELEMENT, and more.
Important Note: This remote is NOT compatible with Cable Boxes, Fire Sticks, Roku Sticks, DVD/Blu-ray players, or TV brands not listed above.
3. Setup Instructions
3.1. Battery Installation
The remote requires 2 AAA batteries (not included). To install:
- Open the battery compartment cover on the back of the remote.
- Insert two AAA batteries, ensuring correct polarity (+ and -).
- Close the battery compartment cover securely.
3.2. Brand Switching (Quick Setup)
This feature allows you to quickly configure the remote for your specific TV brand.
- Ensure your TV is turned on.
- Press and hold the Power button and the corresponding brand key (e.g., SN for Sony, LG for LG, FR for Philips, RK for Roku-TV, HS for Hisense, PN for Panasonic, TC for TCL) simultaneously for approximately 2 seconds.
- The LED indicator on the remote will flash and then turn off, indicating successful brand switching.
- Test the remote's functions (Power, Volume, Channel). If some functions do not work, try cycling through models for HISENSE and TOSHIBA TVs by repeating the process, or proceed to Manual Code Search.

Image: The Gmatrix A-TV18+ remote control with an arrow pointing to the Power button and a brand button, demonstrating how to perform brand switching.

Image: A three-step diagram illustrating the "Smart Brand Switching" feature, showing the user holding two buttons, an LED confirmation, and the TV responding.
3.3. Manual Code Search
If the Brand Switching feature does not fully configure your remote, use the manual code search.
- Enter Setup: Press and hold the SET button and the CH+ button simultaneously for 1 second until the LED indicator stays on.
- Search for Code: Aim the remote at your TV and repeatedly press the CH+ button. Stop when your TV displays volume indicators or changes channels.
- Save Code: Test other essential buttons like Volume. If they work correctly, press the SET button to save the code and exit setup. The LED will turn off.
- If the remote does not function correctly, repeat the process, pressing CH+ until a different code is found.
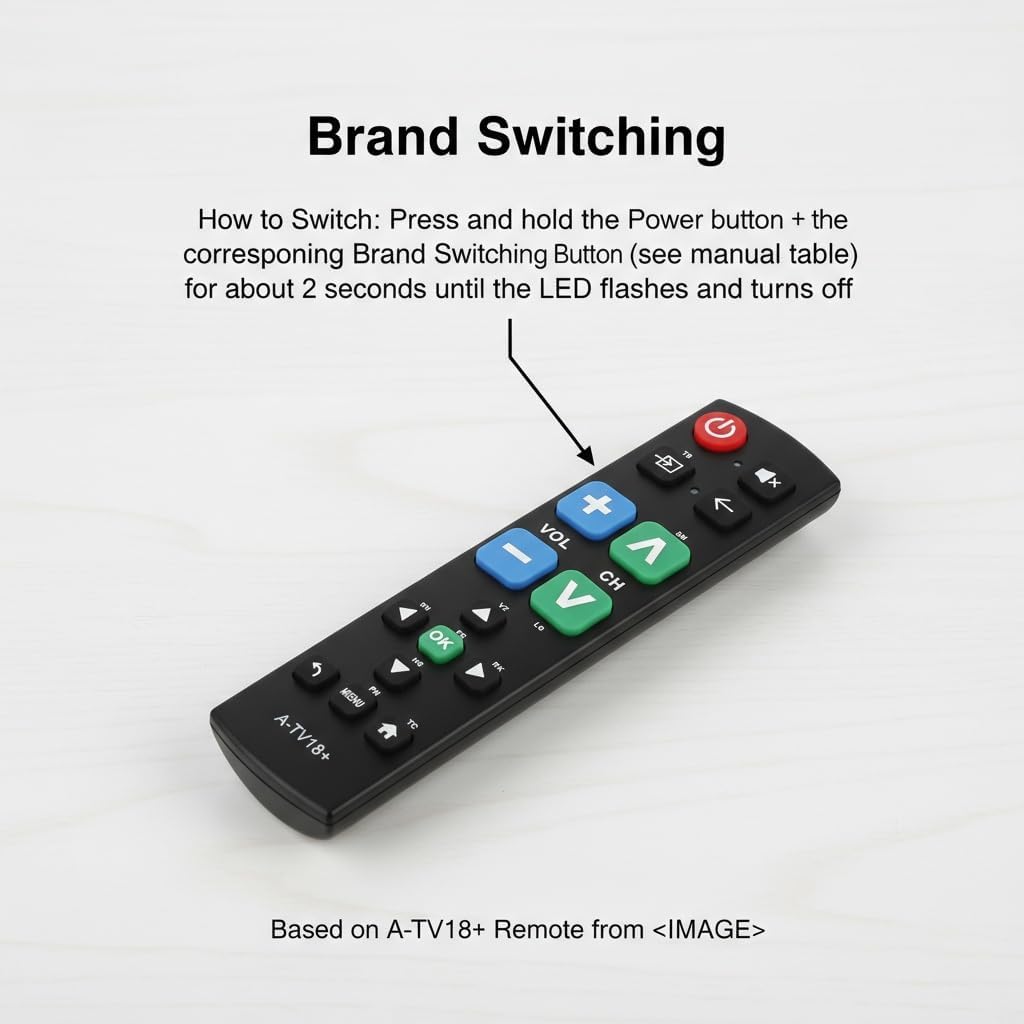
Image: The Gmatrix A-TV18+ remote control with a text overlay detailing the three steps for Manual Code Search: Enter Setup, Search for Code, and Save Code.
3.4. Learning Function
The learning function allows you to copy commands from your original remote control to up to 14 buttons on the A-TV18+ remote.
- Enter Learning Mode: Press and hold the SET button and the Right Arrow button simultaneously for 3 seconds until the LED indicator stays on.
- Align Remotes: Place your original remote control 3-5 cm away from the A-TV18+ remote, ensuring their IR emitters are facing each other.
- Teach a Button: Press the desired button on your original remote. The LED on the A-TV18+ will blink. Immediately press the corresponding button on the A-TV18+ remote where you want to store the command. The LED will stay on, indicating successful learning.
- Repeat step 3 for other buttons you wish to program (up to 14 buttons).
- Save & Exit: After programming all desired buttons, press the SET button and the Right Arrow button simultaneously to save and exit learning mode. The LED will turn off.

Image: The Gmatrix A-TV18+ remote control with a text overlay detailing the four steps for using the Learning Function: Enter Learning Mode, Align Remotes, Teach a Button, and Save & Exit.
4. Basic Operation
Once configured, the Gmatrix A-TV18+ remote provides straightforward control over your television. The large, color-coded buttons are designed for easy identification and use.
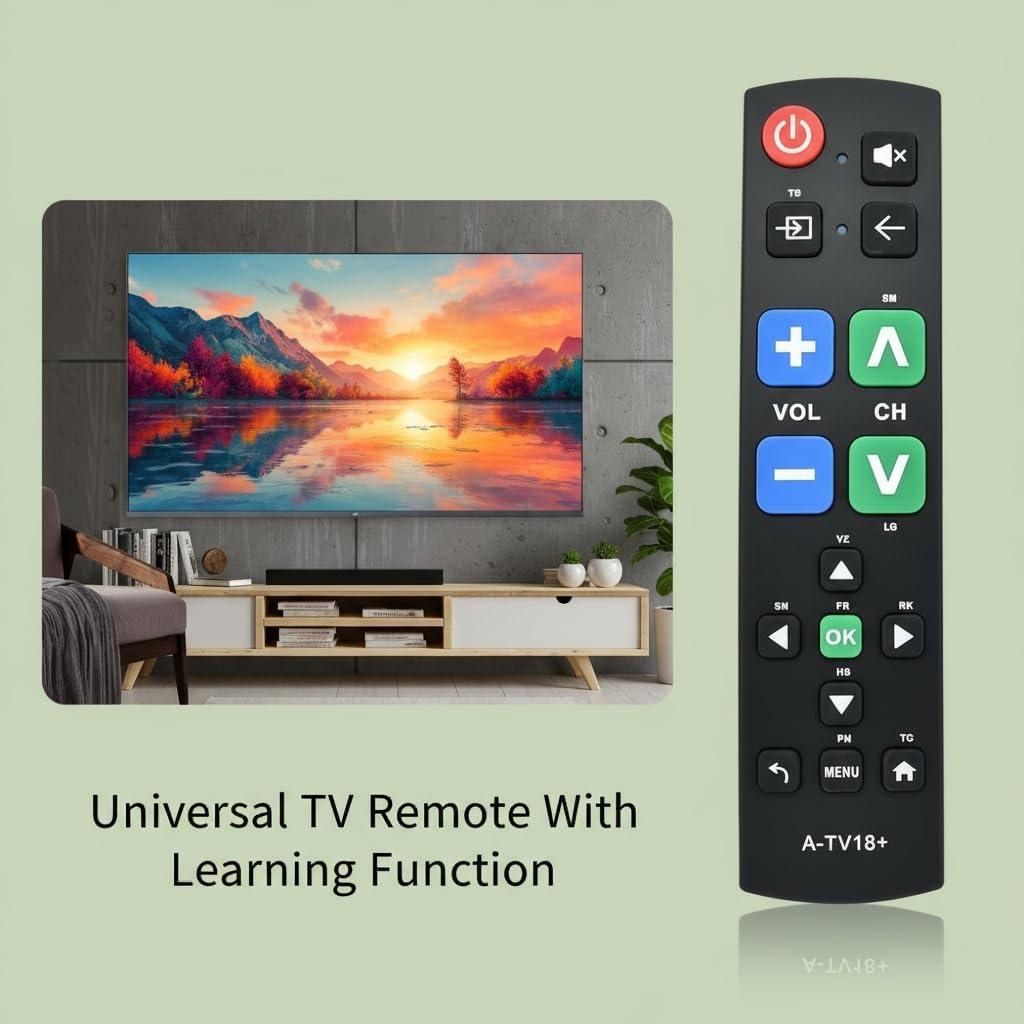
Image: A close-up view of the Gmatrix A-TV18+ remote control, emphasizing its large, tactile buttons for simple operation.
- Power Button (Red): Turns your TV on or off.
- Volume Up/Down (Blue): Adjusts the volume level.
- Channel Up/Down (Green): Changes TV channels.
- Mute Button: Mutes or unmutes the TV sound.
- Input/Source Button: Switches between different input sources (e.g., HDMI 1, HDMI 2).
- Back Button: Navigates back in menus or previous channel.
- OK Button: Confirms selections in menus.
- Menu Button: Accesses the TV's main menu.
- Home Button: Returns to the TV's home screen (if applicable).

Image: The Gmatrix A-TV18+ Universal Big Button Remote Control, highlighting its key features such as durable ABS plastic shell, sensitive buttons, ease of programming, and long battery life.
5. Maintenance
5.1. Cleaning
To clean your remote control, use a soft, dry cloth. Do not use liquid cleaners, aerosols, or solvents, as these may damage the remote's surface or internal components.
5.2. Battery Replacement
Replace batteries when the remote's response becomes sluggish or the LED indicator does not light up during button presses. Always replace both batteries at the same time with new AAA alkaline batteries. Do not mix old and new batteries or different types of batteries.
8. Warranty Information
This Gmatrix A-TV18+ Universal TV Remote Control comes with a 1 Year Warranty from the date of purchase. This warranty covers manufacturing defects and malfunctions under normal use. It does not cover damage caused by misuse, accidents, unauthorized modifications, or improper battery installation.
For warranty claims or technical support, please contact Gmatrix customer service through your retailer or the official Gmatrix website.