1. Introduction
Thank you for choosing the KING BIRD 10X15FT Heavy Duty RV Carport. This manual provides essential information for the safe and efficient assembly, operation, and maintenance of your carport. Please read all instructions carefully before beginning assembly and retain this manual for future reference.

Image 1.1: The KING BIRD 10X15FT Heavy Duty RV Carport, designed for vehicle and outdoor storage.
2. Safety Information
WARNING: Failure to follow these safety instructions may result in serious injury or property damage.
- Always ensure the carport is properly anchored to the ground to prevent it from being blown away by strong winds. Follow the manufacturer's instructions for proper anchoring.
- Do not assemble the carport during strong winds, heavy rain, or snow.
- Ensure the assembly area is clear of overhead power lines and other obstructions.
- Wear appropriate safety gear, including gloves and eye protection, during assembly.
- Regularly inspect the frame and cover for damage or wear. Replace damaged parts immediately.
- Clear snow accumulation from the roof promptly to prevent structural collapse.
3. Package Contents
Verify that all components are present before beginning assembly. If any parts are missing or damaged, contact KING BIRD customer support.
- Heavy-duty galvanized steel frame components (poles, connectors)
- 240G PE cover (main tarp)
- Front and rear end panels with ventilation windows and dual doors
- Reinforced ground bars
- Top beams
- Lengthened screws and other fasteners
- Ratchet straps and ground anchors
- Adjustable PE divider (optional use)
4. Setup Instructions
Assembly typically requires two or more people. Follow the steps below for proper installation.
4.1 Frame Assembly
- Unpack Components: Lay out all frame components on a flat, clear surface. Refer to the parts list to identify each piece.
- Assemble Base Frame: Connect the horizontal base poles using the appropriate connectors. Ensure all connections are secure with screws.
- Install Vertical Poles: Attach the vertical poles to the base frame.
- Construct Roof Truss: Assemble the roof peak and connecting beams. The frame features an ultra-high peak design (10.8FT) for ample clearance.
- Connect Roof to Vertical Poles: Carefully lift and secure the assembled roof truss to the vertical poles.
- Reinforce Frame: Install the 6 reinforced ground bars and 2 top beams using the provided high-quality lengthened screws to enhance stability.

Image 4.1: Detail of the heavy-duty frame construction with all-screw connections for enhanced stability.

Image 4.2: Key structural details including all-screw connections and reinforced ground bars.
4.2 Cover Installation
- Drape Main Cover: Carefully drape the 240G PE cover over the assembled frame, ensuring it is centered and evenly distributed.
- Attach End Panels: Secure the front and rear end panels to the frame. These panels feature dual doors and mesh ventilation windows.
- Secure Cover: Use the provided bungee cords and ratchet straps to secure the cover tightly to the frame. Ensure the cover is taut to prevent water pooling and wind damage.
4.3 Anchoring
Proper anchoring is critical for the stability and longevity of your carport. Use the provided ground anchors and ratchet straps to firmly secure the carport to the ground.
Video 4.3: This video demonstrates the process of securing the carport cover using ratchet straps and ground anchors, ensuring the cover is taut and the structure is firmly anchored.
4.4 Optional Adjustable Divider
If desired, install the adjustable PE divider inside the carport. This allows for flexible partitioning of the space based on your storage needs.

Image 4.4: The adjustable PE divider can be positioned to create separate storage areas within the carport.
5. Operating Instructions
5.1 Vehicle Storage
The carport's 10.8FT ultra-high peak design accommodates lifted trucks, RVs, and vehicles with roof racks, preventing scratches and allowing easy drive-in for SUVs and boats.

Image 5.1: The KING BIRD carport offers a higher peak for increased clearance compared to standard carports.

Image 5.2: The carport provides versatile storage for various vehicles and equipment, such as tractors and hay.
5.2 Ventilation System
The carport features side mesh vents and expansive overhead space to enhance airflow, regulate temperature, and prevent overheating, aging, or freezing of stored items.
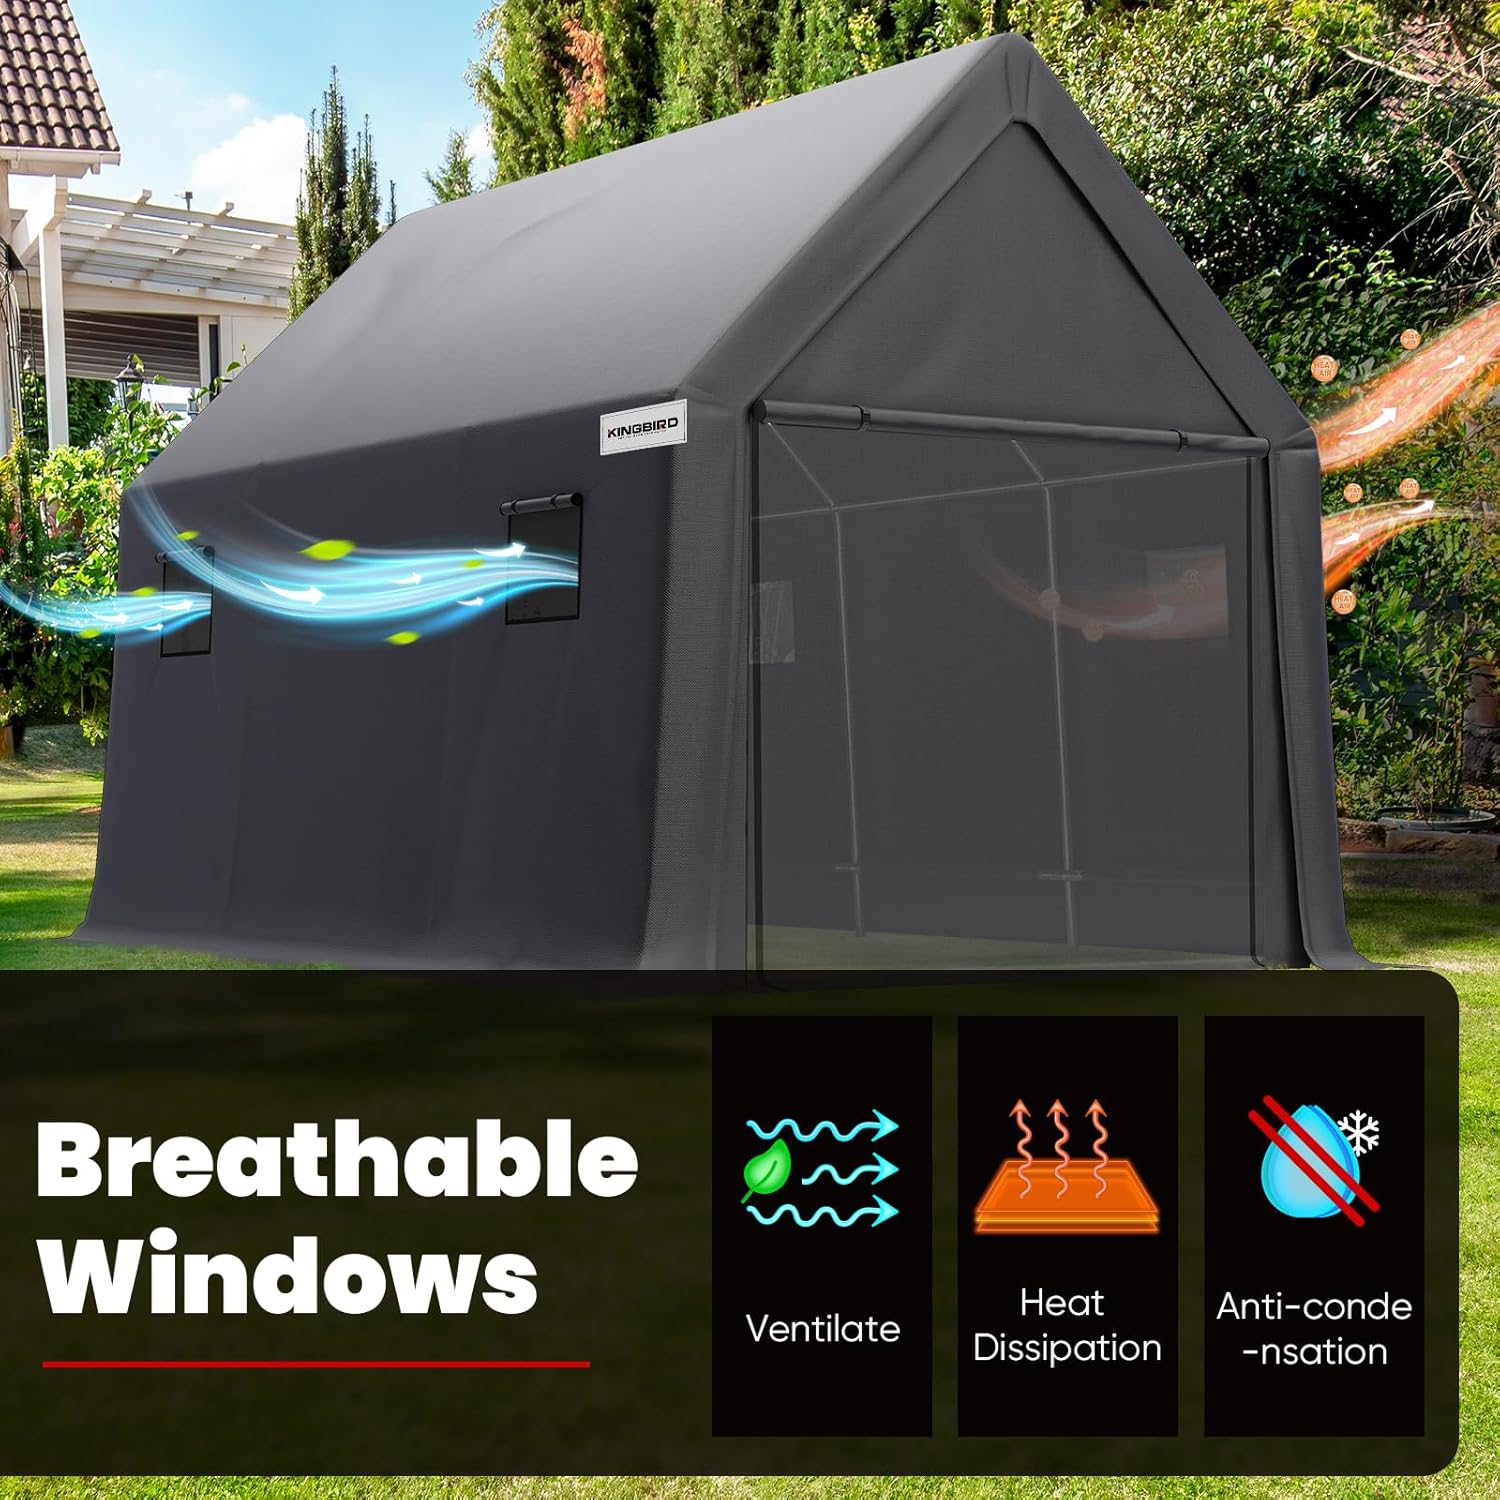
Image 5.3: Breathable mesh windows facilitate air circulation within the carport.
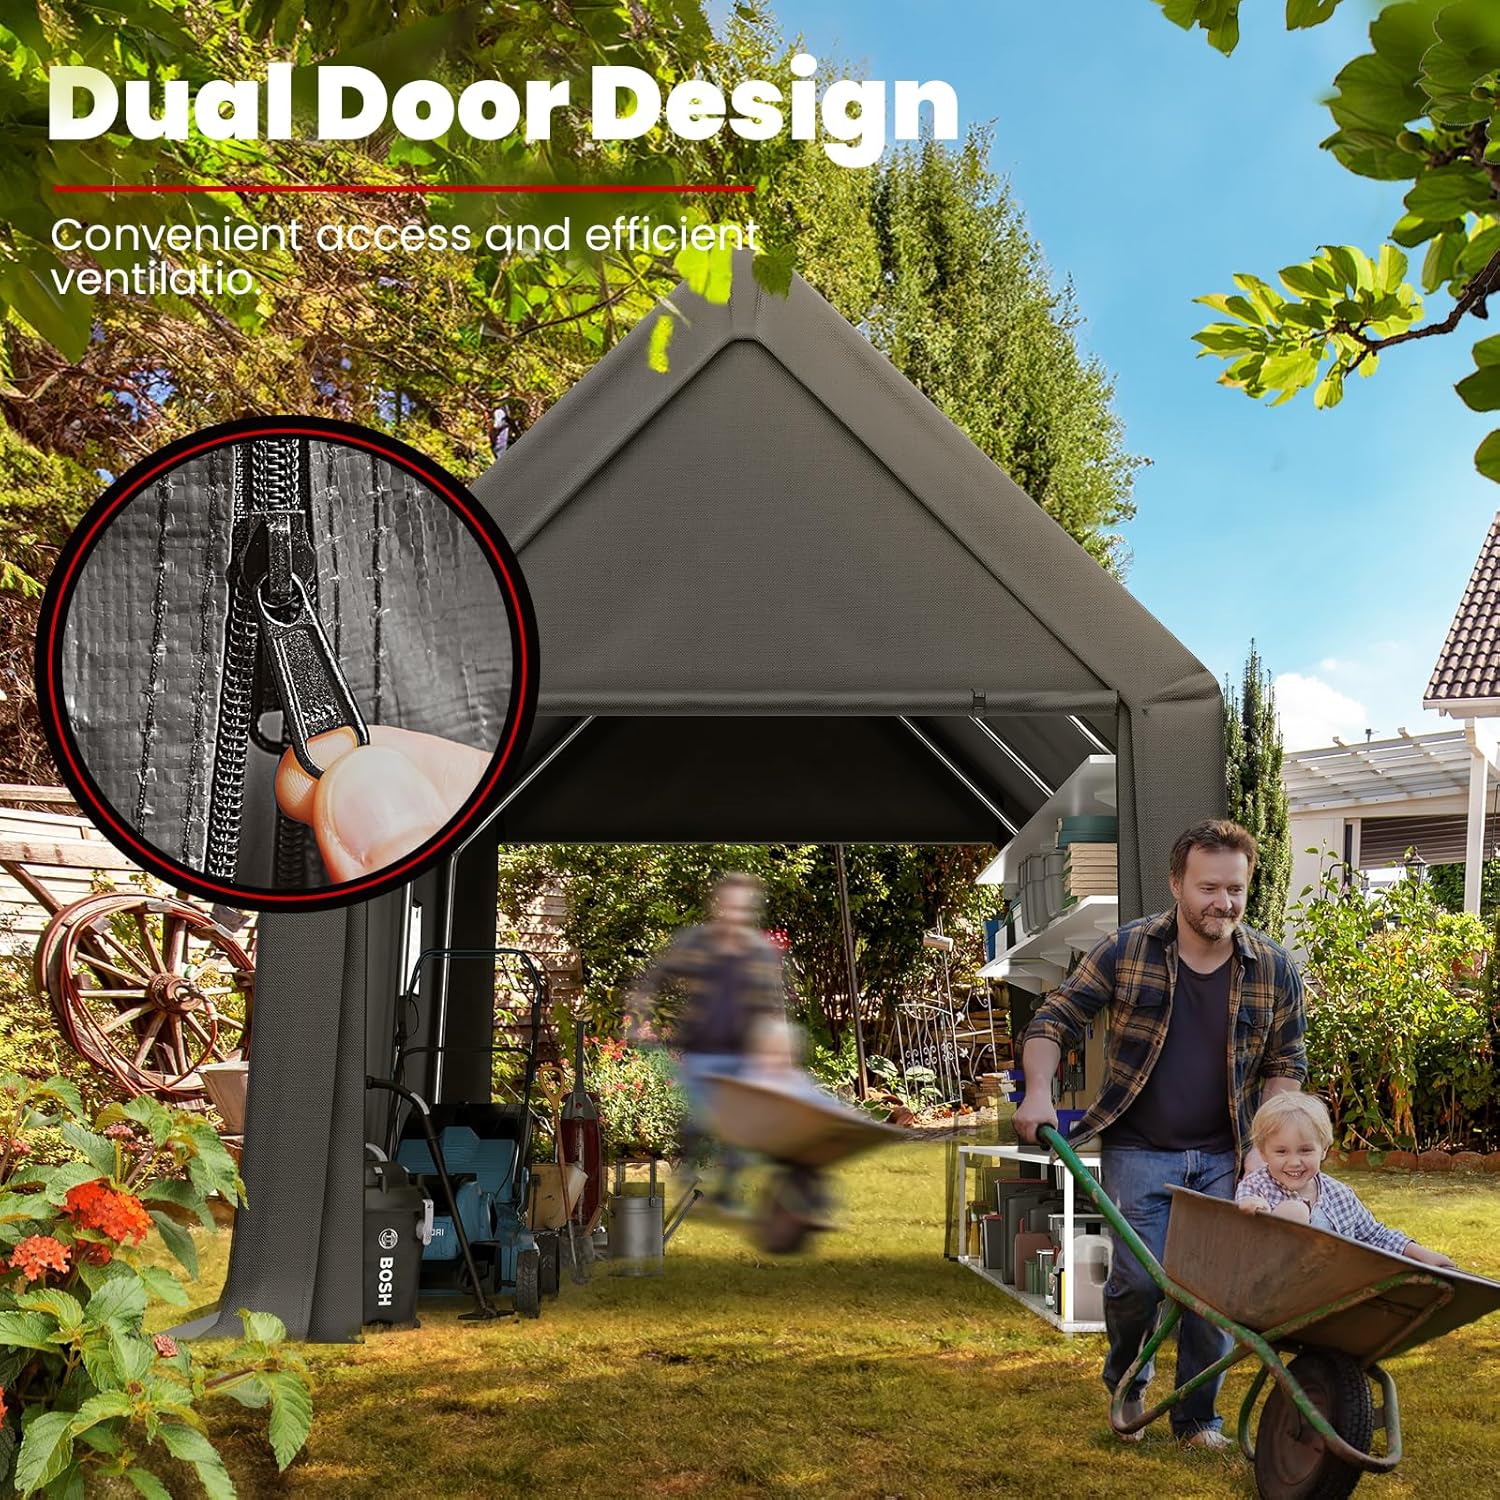
Image 5.4: The dual door design allows for convenient access and efficient ventilation.
6. Maintenance
6.1 General Care
- Clean the PE cover periodically with mild soap and water. Avoid harsh chemicals that could damage the material.
- Inspect all frame connections and anchoring points regularly to ensure they remain tight and secure.
- Check the cover for any tears or damage. Repair small tears promptly to prevent them from enlarging.

Image 6.1: The extra-thick 240G PE cover is designed for long-lasting durability and protection against various weather conditions.
6.2 Snow and Weather Management
- The steep roof design helps snow and rain slide off easily, reducing pressure buildup. However, in areas with heavy snowfall, it is recommended to clear excessive snow accumulation from the roof to prevent structural stress.
- During extreme weather conditions (e.g., hurricanes, blizzards), consider disassembling the carport or taking additional precautions to secure it.

Image 6.2: The carport's high spire design is resistant to snow, water, and leaves, aiding in natural shedding.

Image 6.3: The carport provides shelter in snowy conditions, protecting vehicles from the elements.
7. Troubleshooting
7.1 Carport Instability
- Issue: Carport shakes or feels unstable in wind.
- Solution: Ensure all frame connections are fully tightened. Verify that ground anchors are securely installed and ratchet straps are taut. Consider adding additional anchoring points in high-wind areas.
7.2 Water Pooling on Cover
- Issue: Water collects on the carport roof.
- Solution: Ensure the cover is stretched tightly across the frame. Adjust ratchet straps to increase tension. Check for any sagging areas in the frame structure.
7.3 Difficulty with Zippers
- Issue: Zippers on doors or windows are stiff or difficult to operate.
- Solution: Apply a silicone-based lubricant to the zipper teeth. Ensure the fabric around the zipper is not under excessive tension.
8. Specifications
| Feature | Detail |
|---|---|
| Brand | KING BIRD |
| Model Number | 1124-3 |
| Product Dimensions | 180"L x 120"W x 129.6"H (15'L x 10'W x 10.8'H) |
| Peak Height | 10.8 FT |
| Material | Alloy Steel (Frame), Polyethylene (PE) 240G (Cover) |
| Color | Dark Gray |
| Ultraviolet Light Protection | Yes |
| Water Resistance Level | Moisture Resistant |
| Item Weight | 140 pounds |

Image 8.1: Detailed dimensions of the KING BIRD 10X15FT Carport.
9. Warranty and Support
KING BIRD offers comprehensive support for your carport:
- 1-Year Support: Applies to poles and tarps.
- Lifetime Support: Applies to joints, ground nails, and bouncy cords.
For accessory replacement or any support inquiries, please contact KING BIRD customer service through the retailer where you purchased the product or visit the official KING BIRD website.


