1. Product Overview
This flat igniter is designed as a replacement component for various Sears Kenmore oven and range models. Its primary function is to provide a consistent spark to ignite the gas, ensuring proper oven heating and functionality. It is suitable for ovens experiencing ignition failures or inconsistent heating.
The igniter features a 2-prong Molex plug with 8-inch wire leads for straightforward electrical connection. The 1.5-inch ceramic igniter bar is protected by a durable metal shield, enhancing its heat resistance and overall longevity. The package includes two porcelain wire nuts to facilitate a secure and safe electrical connection during installation.
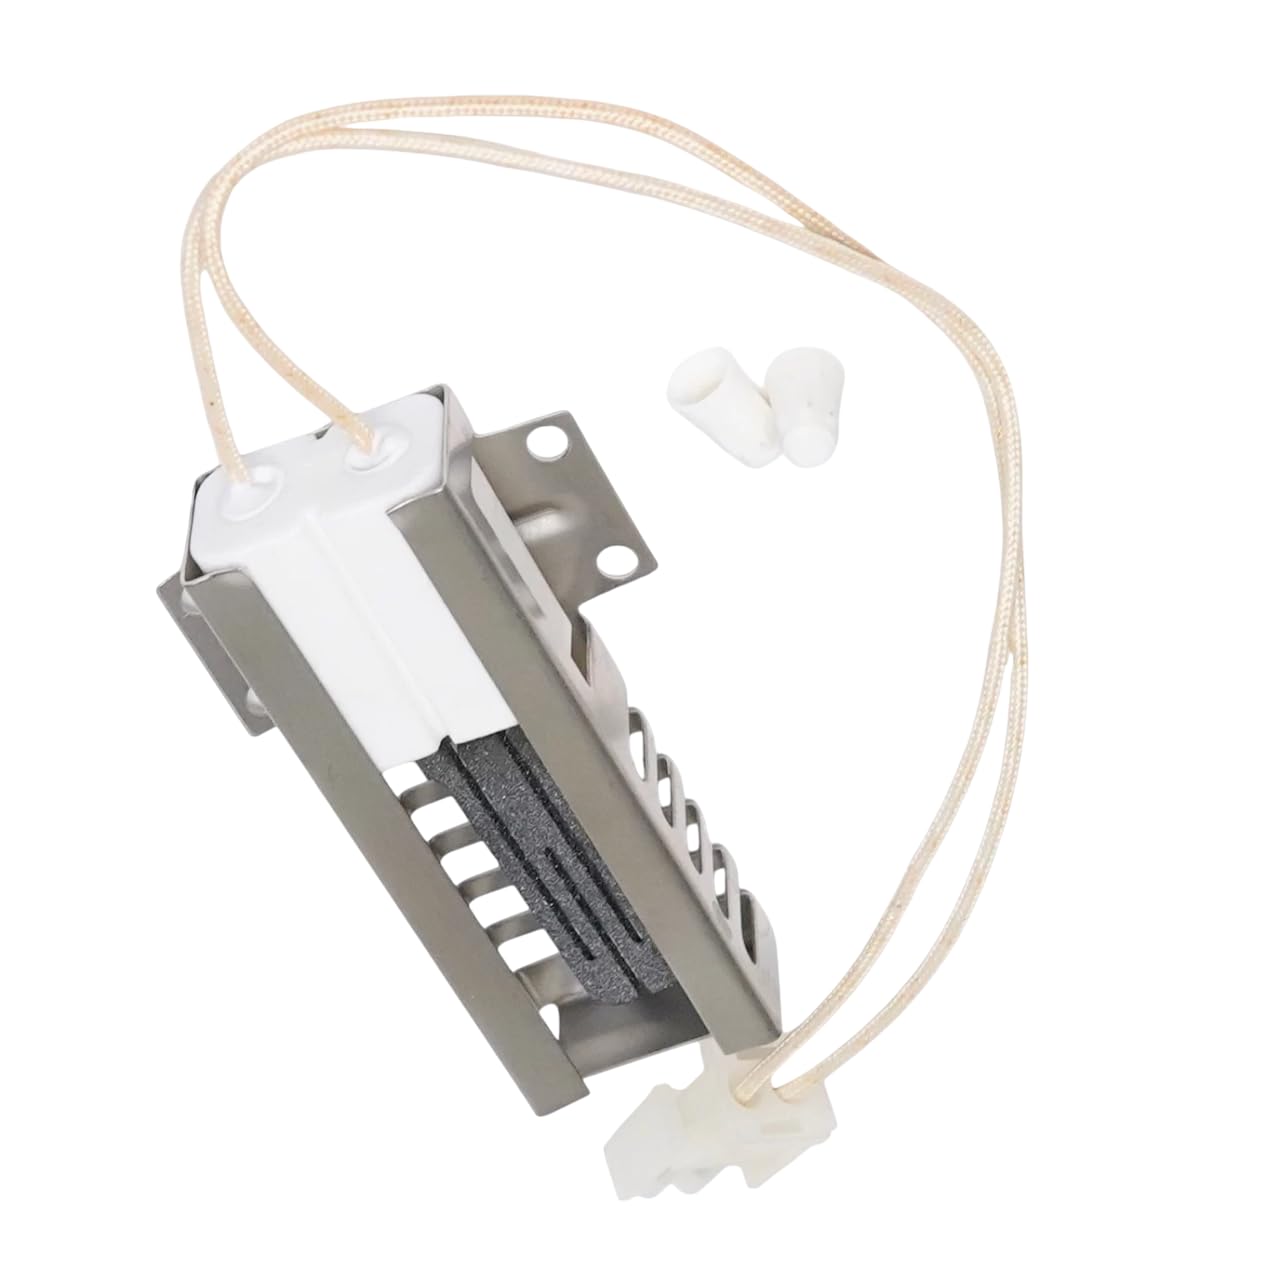
Image 1: Front view of the flat igniter replacement, showing the ceramic bar, metal shield, and wiring with Molex plug.
2. Safety Information
WARNING: Before attempting any installation or repair, always disconnect power to the appliance at the circuit breaker or fuse box. Turn off the gas supply to the oven. Failure to do so can result in electric shock, gas leak, fire, or serious personal injury.
- Ensure the work area is well-ventilated.
- Wear appropriate personal protective equipment, such as gloves and safety glasses.
- If you are unsure about any step of the installation process, consult a qualified appliance technician.
- Do not bypass any safety features of the appliance.
- Check for gas leaks after reconnecting the gas supply using a soap and water solution.
3. Package Contents
Verify that all components are present and undamaged before beginning installation:
- 1 x Flat Igniter Replacement
- 2 x Porcelain Wire Nuts
4. Compatible Models
This igniter is compatible with various Sears Kenmore Oven Range models, including but not limited to:
- 362.75322001
- 362.75322002
- 362.75322003
- 362.75322004
- 362.75324100
- 362.75324101
- 362.75324102
- 362.75327000
- 362.75327001
- 362.75328000
Always confirm compatibility with your specific appliance model before installation.
5. Installation Instructions
5.1. Preparation
- Disconnect Power: Locate your home's circuit breaker panel and turn off the circuit breaker that supplies power to your oven. Alternatively, unplug the oven from the wall outlet.
- Turn Off Gas Supply: Locate the gas shut-off valve for your oven and turn it to the OFF position.
- Cool Down: Ensure the oven is completely cool before proceeding.
5.2. Accessing the Igniter
- Open the oven door and remove any oven racks.
- Depending on your oven model, you may need to remove the oven bottom panel. This usually involves lifting the front edge and sliding it out, or removing a few screws.
- Locate the igniter, which is typically positioned near the gas burner tube at the bottom of the oven.

Image 2: Side view of the igniter, highlighting the ceramic igniter bar within its protective metal shield.
5.3. Removing the Old Igniter
- Carefully disconnect the wiring harness from the old igniter. The 2-prong Molex plug should detach by gently pulling.
- Unscrew the mounting screws that secure the igniter to the burner assembly or oven floor. Keep these screws for the new igniter.
- Gently remove the old igniter. Avoid touching the ceramic part, as it can be fragile.
5.4. Installing the New Igniter
- Position the new flat igniter in the same location as the old one.
- Secure the new igniter using the original mounting screws. Do not overtighten.
- Connect the 2-prong Molex plug of the new igniter to the oven's wiring harness. Ensure a firm connection.
- If your oven's wiring harness does not have a compatible plug, cut the wires from the old igniter's plug and use the provided porcelain wire nuts to connect the new igniter's wires to the oven's wiring. Ensure connections are secure and insulated.

Image 3: Bottom view of the igniter, showing the mounting holes for secure installation.
5.5. Reassembly and Testing
- Replace the oven bottom panel and any other components removed during access.
- Reconnect the gas supply to the oven and check for any leaks using a soap and water solution on the gas connections. Bubbles indicate a leak. If a leak is detected, turn off the gas immediately and tighten connections or seek professional help.
- Restore electrical power to the oven at the circuit breaker or by plugging it back in.
- Turn on the oven to a bake setting and observe the igniter. It should glow red and then ignite the gas burner within 30-90 seconds.
- If the oven does not ignite, refer to the Troubleshooting section.
6. Maintenance
The flat igniter is a sealed component and requires no routine maintenance. Periodically inspect the igniter and its wiring for any signs of wear, damage, or loose connections. If any issues are observed, consider replacement or professional inspection.
7. Troubleshooting
| Problem | Possible Cause | Solution |
|---|---|---|
| Oven does not ignite | No power to oven Gas supply off Faulty igniter Loose wiring connection | Check circuit breaker/plug Turn on gas supply Replace igniter Check and secure wiring |
| Igniter glows but no flame | Weak igniter Gas supply issue Clogged burner ports | Replace igniter Check gas line/valve Clean burner ports (professional service recommended) |
| Oven heats slowly or unevenly | Weak igniter Other oven component failure | Replace igniter Consult a professional technician |
If troubleshooting steps do not resolve the issue, contact a qualified appliance technician.
8. Specifications
| Feature | Specification |
|---|---|
| Part Number | 362.75322003, 362.75322004 |
| Item Model Number | 362.75322001, 362.75322002 |
| Item Weight | 1 pound |
| Package Dimensions | 1 x 1 x 1 inches |
| Number of Pieces | 1 (Igniter) |
| Included Components | As pictured (Igniter, Wire Nuts) |
9. Warranty and Support
For warranty information, please refer to the documentation provided by your retailer or the product manufacturer. If you require technical assistance or have questions regarding this product, please contact the seller or manufacturer directly through their official support channels.


